You are using an out of date browser. It may not display this or other websites correctly.
You should upgrade or use an alternative browser.
You should upgrade or use an alternative browser.
RRR - Racing Rig Revival
- Thread starter tinytomlogan
- Start date


B NEGATIVE
New member
I do what now?
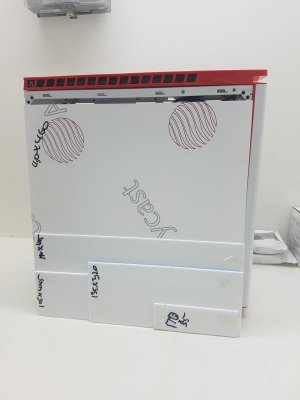
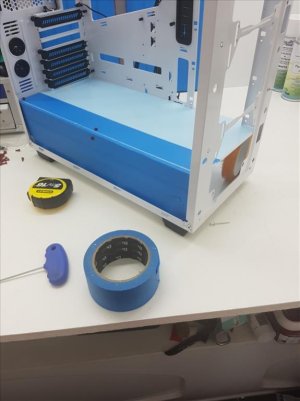
After being massively patient and hoping that the missing acrylic I needed would arrive Ive given up and got some from ebay. Ordered it Thursday lunchtime in the sizes I needed and it arrived today....
Ive also ordered a full window for the side, Im not sure if Ill get away with drilling the acrylic or not but Ill give this way a go first.

Ive also ordered a full window for the side, Im not sure if Ill get away with drilling the acrylic or not but Ill give this way a go first.
Attachments
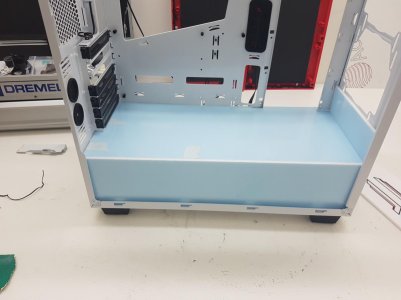
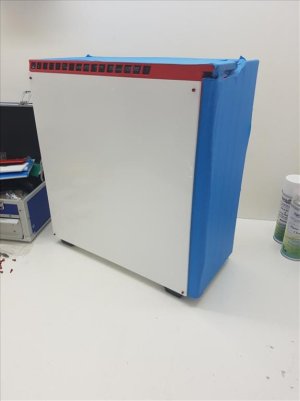
With the acrylic here I got the dremel out and tweaked the case to allow the new PSU shroud to be fitted. Few bits around the mobo tray and at the front of the cases needed cutting

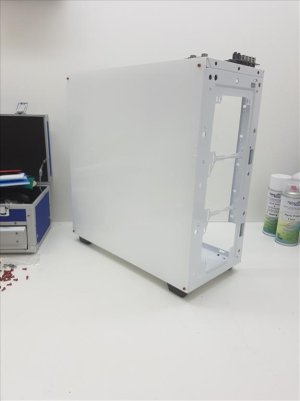
Its a fairly basic design, I mean hey its just a box but I wanted to open up the H440 because I think the front cages make it feel a lot smaller and closed off than it needs to be.


Ive got a bit of acrylic to use a whole side panel window, Ive got an idea to use rivnuts to help me mount it easier and still be secure, look good etc. Ive ordered a rivnut kit from Amzon because I cant find mine or one locally so I guess Ill be back once its here!
Its a fairly basic design, I mean hey its just a box but I wanted to open up the H440 because I think the front cages make it feel a lot smaller and closed off than it needs to be.
Ive got a bit of acrylic to use a whole side panel window, Ive got an idea to use rivnuts to help me mount it easier and still be secure, look good etc. Ive ordered a rivnut kit from Amzon because I cant find mine or one locally so I guess Ill be back once its here!
Attachments

This gets my vote. Like this a lot.
Time for an update, apologies for the delay. It turns out Ive been having one too many weetabix in the morning and the super strength its been giving me has had me breaking tools left right and centre.... Rivnut mandrels to be exact and youll understand more in a bit.

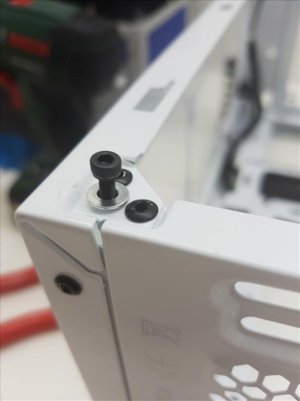
Ive had a dilemma about how to mount the full acrylic window to the side of the case, nuts and bolts need access to the back or a way of fixing it in place with a weld or some kind of glue and that just makes it all a bit messy. I had a lightbulb moment when remembering 'back in the day' when we had to use self tapping screws on watercooling rads and I used to mod mine to accept M3 bolts and I used to do it properly by adding rivnuts to give a proper thread. Back on topic it dawned on me that would be a perfect way to mount my window and give me a good solid thread for the bolts. Rivnuts are just like rivets and fix like rivets but with a thread in the middle of them.


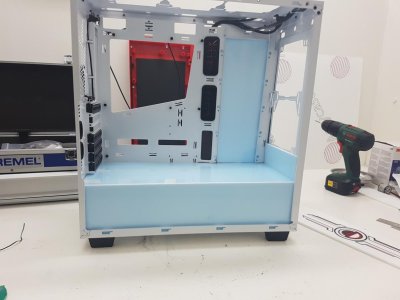
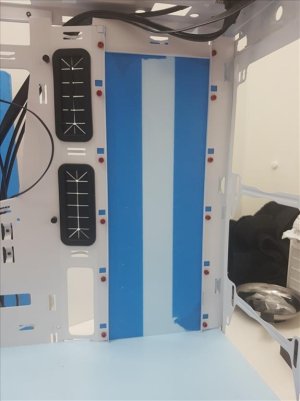
So with the window done a did a second trial fit for the inside panels and also got the upright blank fitted. This is to cover up where the HDD's would have been. The bolts are where the hdd's trays would have had thumb screws to fix them in place (from the back side of the case) There were threads there for that and they looked horrible from the mobo side of the case so I drilled them away and then added holes on the acrylic to match and put some red M3 bolts through to make it look prettier. The two bolts at the very top were rivets but I wizzed those out too so it all matched!

With that in it was a great chance to bolts everything up properly and the gap for the lower fan at the front (under PSU cover) is now bothering me so I will get that sorted, this will also help support the top a bit better.

So thats about it, Im currently brainstorming ideas about how I can repupose the red "NZXT" panel that would have been on the side of the original PSU cover, Ive got some ideas but its going to be a fiddly job and might well need some parts making up!
Ive had a dilemma about how to mount the full acrylic window to the side of the case, nuts and bolts need access to the back or a way of fixing it in place with a weld or some kind of glue and that just makes it all a bit messy. I had a lightbulb moment when remembering 'back in the day' when we had to use self tapping screws on watercooling rads and I used to mod mine to accept M3 bolts and I used to do it properly by adding rivnuts to give a proper thread. Back on topic it dawned on me that would be a perfect way to mount my window and give me a good solid thread for the bolts. Rivnuts are just like rivets and fix like rivets but with a thread in the middle of them.
So with the window done a did a second trial fit for the inside panels and also got the upright blank fitted. This is to cover up where the HDD's would have been. The bolts are where the hdd's trays would have had thumb screws to fix them in place (from the back side of the case) There were threads there for that and they looked horrible from the mobo side of the case so I drilled them away and then added holes on the acrylic to match and put some red M3 bolts through to make it look prettier. The two bolts at the very top were rivets but I wizzed those out too so it all matched!
With that in it was a great chance to bolts everything up properly and the gap for the lower fan at the front (under PSU cover) is now bothering me so I will get that sorted, this will also help support the top a bit better.
So thats about it, Im currently brainstorming ideas about how I can repupose the red "NZXT" panel that would have been on the side of the original PSU cover, Ive got some ideas but its going to be a fiddly job and might well need some parts making up!
Attachments


AlienALX
Well-known member
Off to a good start man. I have to hide my wallet from those coloured bolts now. Every time it sees them it cries... I think it was a matter of mercy that I couldn't find them in green haha.
Will be watching this")
Oh yeah, I was just going to post and say "Hey, what stereo is that?" then realised it was a shower lmao.
Will be watching this
Oh yeah, I was just going to post and say "Hey, what stereo is that?" then realised it was a shower lmao.
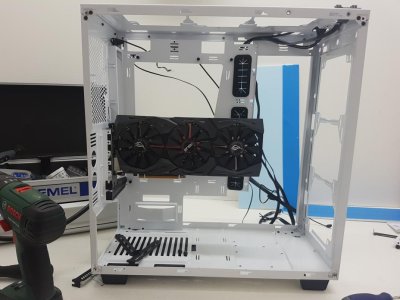
Ive been trying to think of ways that I can put the GPU(s) on display a bit more and Ive wanted to put them in vertically like this for ages.
This is just a very raw (staight from cut) look but considering the simplicity Im quite happy with it (bit of a bodge atm but it will get tidied up)
Initial thoughts?


This is just a very raw (staight from cut) look but considering the simplicity Im quite happy with it (bit of a bodge atm but it will get tidied up)
Initial thoughts?
Attachments

RickPlaysWarr
New member
Hi
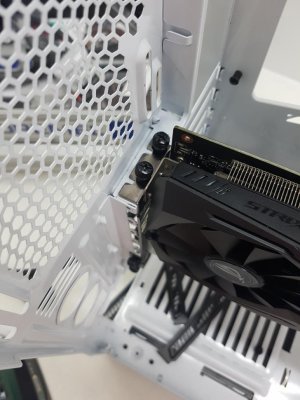
I love it. I like all the mods you have done to the H440 to make it your own. One thing that might make it a bit better is to cut off all the material from the leftover slots and just put a blanking plate or piece of acrylic in the space where the partial slots are behind the GPU
Keep on Bodging!
I love it. I like all the mods you have done to the H440 to make it your own. One thing that might make it a bit better is to cut off all the material from the leftover slots and just put a blanking plate or piece of acrylic in the space where the partial slots are behind the GPU
Keep on Bodging!
Wraith
Bettyswollocks
Beat me to the punch, totally agree! And Moar!Hi
I love it. I like all the mods you have done to the H440 to make it your own. One thing that might make it a bit better is to cut off all the material from the leftover slots and just put a blanking plate or piece of acrylic in the space where the partial slots are behind the GPU
Keep on Bodging!
Excalabur50
Well-known member
Looking good Tom, will be nice to see a gpu from that angle for a change
Similar threads
- Replies
- 1
- Views
- 161
- Replies
- 3
- Views
- 1K