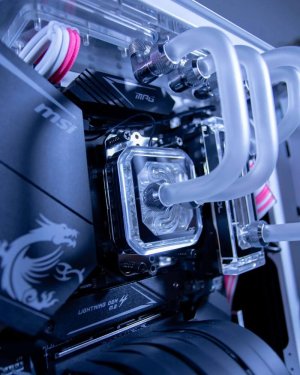
[Worklog] Rebuilding an old companion Project ‘Battlefield’

modLab

New member
HWLUXX.thumb.png.305ab8f2f70f41aba8c10457497f3d9f.png


Foreword

Hello, finally something to show again.
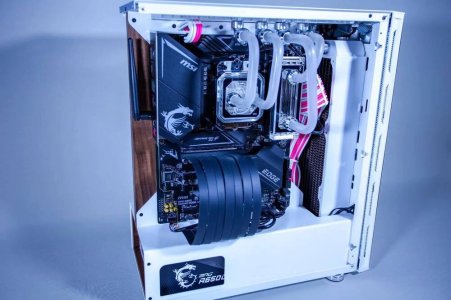
The project started out very differently from how it ended in the end. The original idea was to build a “S.T.A.L.K.E.R. 2: Heart of Chornobyl” project, but for many reasons it eventually turned into a Battlefield 6 case mod with lots of extras.
Uhm yeah, that’s the short version. In reality, it was mainly the time I was missing towards the end to finish the project before the release of S.T.A.L.K.E.R. 2. Unfortunately, it also wasn’t ready for the release of Battlefield 6, but it was finally completed by Season 2
So much for the story of the project, now let’s move on to the concept.


The Project


Some of you might know about my participation in the HWLuxx Modding Contest. Here’s the link to the worklog for those who missed it -> HardwareLuxx Modding Contest 2021]: Project “富士山” - ivory2k14
Here are a few pictures since the Imgur file apparently no longer exists (it is a Germn Forum):
8.jpg7.jpg5.jpg4.jpg3.jpg2.jpg1.jpg

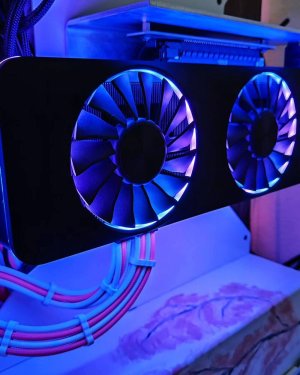
The PC was sitting on my desk and after a while it all felt a bit too boring. Something new had to happen. But scrapping the case and the hardware felt like a waste, because it was still running well and was perfectly fine for my needs: a bit of Fusion 360, image and video editing, and occasionally some gaming when I have the time. Over the years the GPU was replaced with an Intel Arc A770 — that was the only upgrade.
A quick note on how I actually came up with the idea to start a project like this.
I’ve been following the modding scene for several years and over time you get in contact with a lot of people and get inspired by many well-known creators, such as:

Blue Horse Studio: https://www.instagram.com/bluehorse.studios/
AK Mod: https://www.instagram.com/akmodtw/
JMDF: https://www.instagram.com/jmdf_th/
Moddingcafe: https://www.instagram.com/moddingcafe/
CzugA: https://www.instagram.com/czuga/

It was time to try something new. A simple case mod felt a bit too boring to me, so the idea came up: why not build a diorama with everything that comes with it… :stupid:
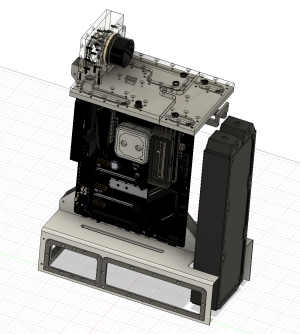
After a few thoughts and some sketches, the concept slowly became clearer.
You probably know the situation: everything is modeled in Fusion 360 and you’re ready to start building — and then a new idea pops into your head…
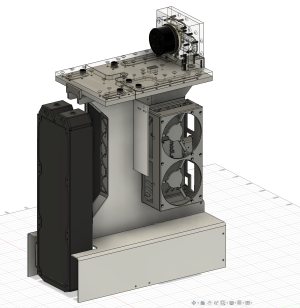
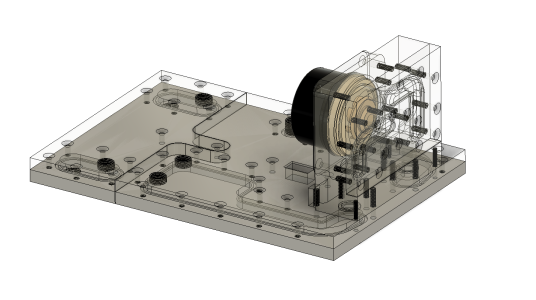
Why not redesign the distro plate?
So that’s exactly what I did. Here’s a small preview:
2.png3.png5.png

Everyone does it their own way, but I prefer having something drawn in 3D because it helps me visualize things much better.
Now it was finally time to start the project. Some details were not really possible to model in Fusion at that time, so those only existed on paper — or well, in my head.


Hardware:


By the end of the project the hardware changed a bit, so here is the current configuration. There will be a separate post about the GPU, since it was also modified slightly.


CPU: AMD Ryzen 9 5900X

Mainboard: MSI MPG B550 GAMING EDGE WIFI

RAM: G.Skill Trident Z Neo F4-3600C18D-16GTZN

GPU: Lenovo RTX 4080

SSD: MSI SPATIUM M480 PCIe 4.0 NVMe M.2 + 1TB no Name SSD

Case: MSI MPG GUNGNIR 110R

PSU:
Seasonic Prime TX 1300


Cooling:


CPU Cooker: Alphacool Eisblock XPX Aurora
GPU Cooler/Backplate: Custom build. The chip cooler itself is the
XG3 RGB HYBRID GPU-Waterblock for the 4080/4090
Pump:
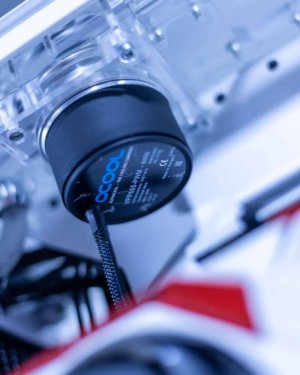
Alphacool VPP655PWM - Single Edition
Radiator: 1x Alphacool NexXxoS UT60 Full Copper 360mm Radiator - White Special Edition + 2x Alphacool NexXxoS XT45 Full Copper 180mm Triple Radiator
Fittings: A mix of hard and soft tube fittings from the Eiszapfen series in 16/10mm soft tube and 13/10mm hard tube
Fans: 3x
Valkyrie X12 ARGB 120mm Fan + 6x Phobya 180mm Fan
Tubes: 16/10mm Soft Tube and 13/10mm Hard Tube


Accessories:


Various cables, connectors, a 3D printer, glue, etc. — as always.


Final words:


I have to say that the PC is already finished and currently in use, and the worklog is being written afterwards.
Unfortunately I have to admit that I should have documented this at the same time, because after switching smartphones some steps are missing since the photos are gone. :shot:
However, I’ll describe those parts to fill the gap. A few additional ideas also came up spontaneously along the way, but more about that in the log.
A huge thanks also goes out to the sponsors. Without them it would not have been possible to realize this project.


Alphacool
Thermal Grizzly
MSI Deutschland
Seasonic
G.Skill
AMD Deutschland
My Valkyrie

Admin: if I should remove the links please let me know.

Thanks for reading, more updates will follow shortly.


PS: Yes, the banner was AI-generated. Next time I’ll make something like that myself again…
 
Last edited:
  • Like
Reactions: WYP
The project is finished, so you’d think there would be time for the worklog, but since I’m writing this during my lunch break, there isn't much room for both the new project and the log here. But I want to improve and post a bit more frequently, as there is still quite a lot that needs to be documented.

Let’s move on to the distro.

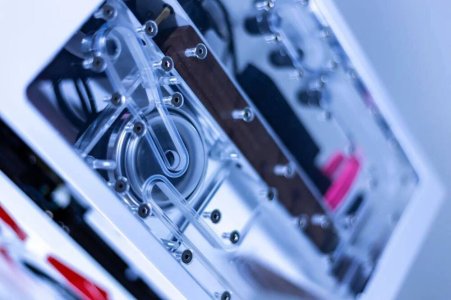
In the first post, you can see the distro as it is now in its final state, but getting there was a bit of a bumpy road. The design was chosen for a good reason: I wanted to test certain shapes for future projects in everyday use, such as the pump being rotated 90 degrees to the main plate. Well, as it turned out, that idea – let’s just say it wasn't one of my best, but more on that later... xD

Once the distro design was finished, I sent the data to various service providers to have it manufactured. Due to the size, I didn't expect it to be cheap, but not a single quote was under 1,200 Euro. That was very frustrating at the time because that's simply way too much for some acrylic, so it was back to Fusion.

Druck Distro 1.jpgDruck Distro 2.jpg

A small distro plate with side inlets to test flow, throughput, shape, stability, and behavior.

As mentioned, having it manufactured was just too expensive, and I love designing things in Fusion and finding solutions, so the idea came to mind: why not 3D print it? I have a printer in the basement; it’s worth a try.

IMG_20250821_131312.jpgIMG_20250821_160908.jpgIMG_20250822_172522.jpgIMG_20250822_172639.jpg


Printed on a Creality Halot Mage 8K with a build volume of 228x128x230 mm, which is the only thing that might limit me a bit in the future. How can I put it – the tests went better than expected, and so the project was set: the plate would come out of the printer.

In the pictures, you can see the print. The only thing that is still made of acrylic here is the top plate, but that changed in the final project, as did the screws – unfortunately, I couldn't find better ones on short notice. The only thing that posed a small problem was the gasket because it leaked a bit of fluid, but that was fixed by remaking it and gluing it cleanly.

The distro was not treated, only briefly dry-sanded with 400-grit sandpaper.

The flow rate was decent, the pressure in the plate was also okay and held up even though two screws were missing. Partly because the threads were unfortunately not through-holes and were therefore full of resin and had to be recut.

Perhaps someone in the group has some tips for me on how to get that problem under control?

Let’s leave it at that for now, otherwise the post will be far too long. Thank you for reading and for any feedback.

Stay tuned.
 
Before printing the distro, I wanted to test how accurate my single-digit readings are; the best way to do this is with the so-called ‘Cones of Calibration V3’.

Please excuse my handwriting... 😅

IMG_20251006_130755.jpg

I have to admit it still needs a bit more fine-tuning, but unfortunately that had to wait a while... xD

The base layers are a bit too thick; there are some slightly overexposed areas where the surrounding material has hardened further, leaving slightly raised edges. Sanding sorts it all out – no problem at all. The advantage is that the part sits very securely on the bed and is unlikely to come loose.

I noticed that the less exposure, the more elastic the part becomes, so that should work for me too. The ‘cones’ were all fine, but with the transparent resin, the details that were printed in weren’t very visible because it’s transparent. But for my project, it was perfect.

The post-curing in the air was also successful; after UV curing, the patterns all looked very yellow, but:

IMG_20251006_130808.jpgIMG_20251009_203558.jpg

Depending on the size of the part, after a while there was no yellow left.

After these tests, it was the distro’s turn:


IMG_20251006_212537.jpgIMG_20251006_212737.jpgIMG_20251006_212741.jpgIMG_20251007_214827.jpgIMG_20251008_211347.jpgIMG_20251009_211003.jpg
 
All in all, everything turned out surprisingly well, except that the threaded and through holes weren’t great, unfortunately.
I’m hoping you lot might have some tips for me on how to improve the overhangs, as they’re still a bit of a fail at the moment...

Once everything was printed, it was time for post-processing and sanding:

IMG_20251011_201503.jpgIMG_20251011_201513.jpgIMG_20251027_092749.jpgIMG_20251029_200219.jpgIMG_20251029_203011.jpg
 
Everything was sanded with 1x 400-grit, 1x 800-grit and then 1500-grit sandpaper, giving it a matt finish.
Not bad, really – next time I’ll polish it, though; let’s see if that works with the resin as well.

After a long search, I found the right screws and sealing tape; that definitely took longer than actually putting the distro together. xD

IMG_20251204_123516874_HDR.jpgIMG_20251204_124205620_HDR.jpgIMG_20251217_132109302_HDR.jpgIMG_20251217_132116235_HDR.jpgIMG_20251217_132124031_HDR.jpgIMG_20251217_132143951_HDR.jpgIMG_20251217_132155846_HDR.jpgIMG_20251217_132224186_HDR.jpgIMG_20251217_132249048_HDR.jpg

I have to say that right up until the end, everything went smoothly without any insurmountable problems. Apart from the pump’s position – though that’s my own fault. As planned, the pump is the highest point, and when I filled the loop, it was full of air. Well, it’s working now, and as a pilot project, it’s okay if things don’t go exactly to plan, isn’t it? xD

Do let me know what you think – I’d really appreciate some feedback, and perhaps you’ll have a few suggestions to offer.
 
Back
Top