You are using an out of date browser. It may not display this or other websites correctly.
You should upgrade or use an alternative browser.
You should upgrade or use an alternative browser.
Project Dianoga (Previously: Project Elvis)
- Thread starter AlienALX
- Start date

AlienALX
Well-known member

Say hello to my little friend.

OK so this is what I am going to be using. I have had it forever.

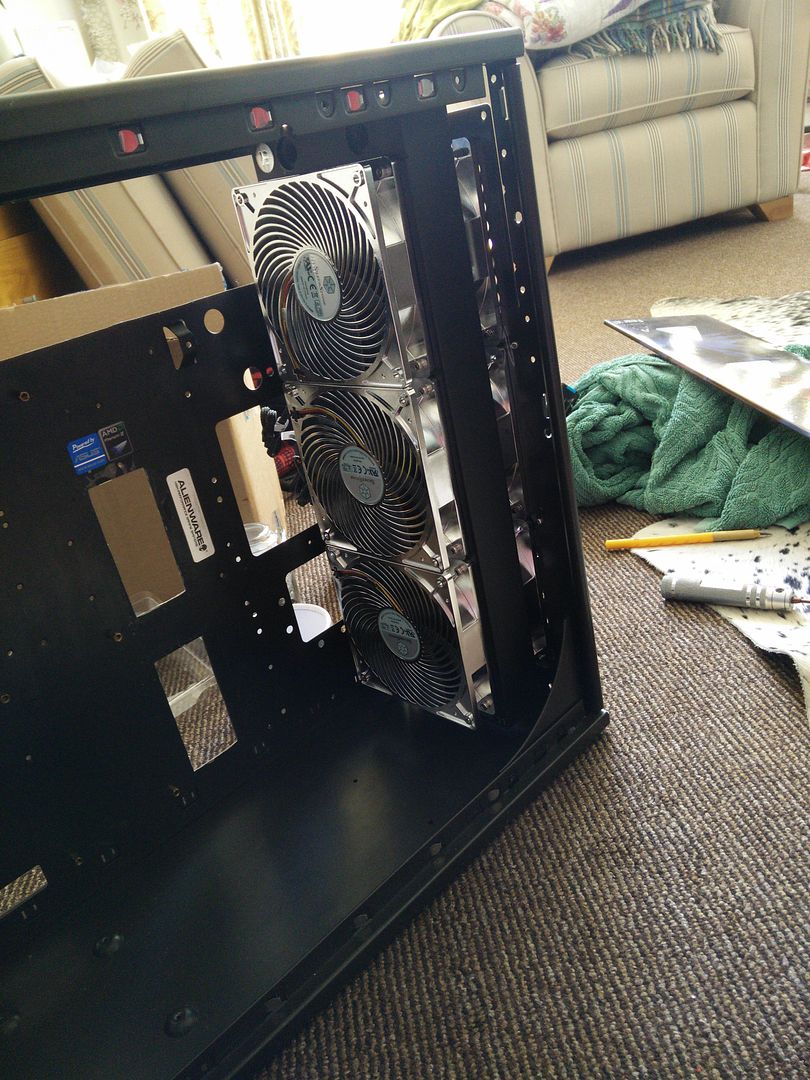
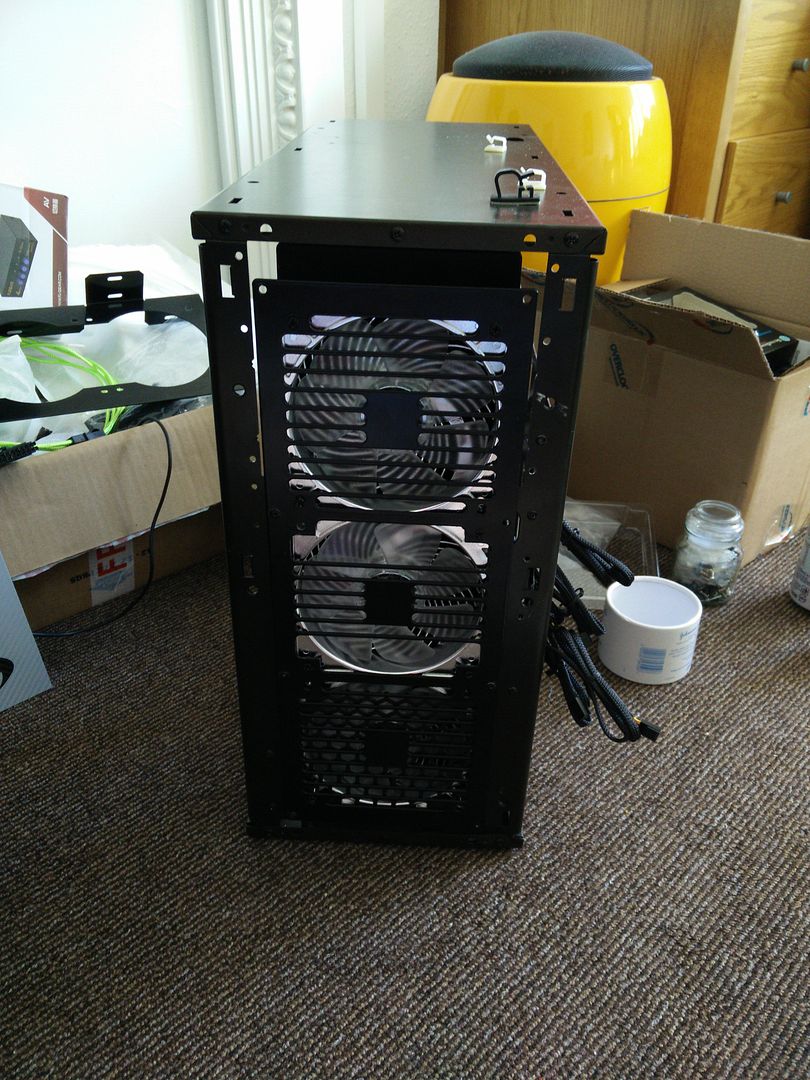
OK so I needed the front so that I could map out where it attaches to the chassis.

Map everything out.

Then tape down.

Then take it to the kitchen, drill the rivet holes, cut out the face panel, clean, paint edges that were cut, rivet on, paint rivets (need another coat). And.

And the other side.

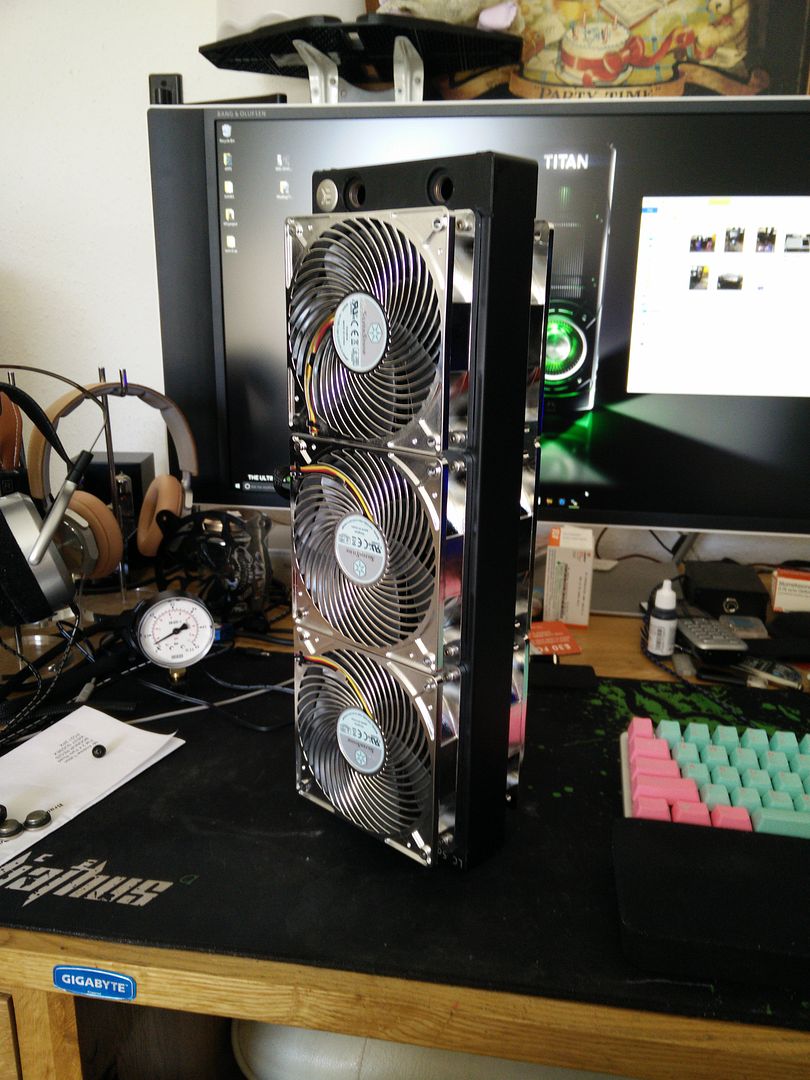
OK so as you can see all I need to do now is basically fit the fans on the rad (short screws) and then use those self tapping fan screws to attach it to the new front panel. Much easier than buggering around with that rad stand.
I also cut off the 90' lip that was running all the way through the case. I will paint this edge later though there's little point tbh.

AlienALX
Well-known member
I just had to ! The E-peen was strong on this one, I'd only ever had push pull on a 240mm AIO before. It's darned heavy though !
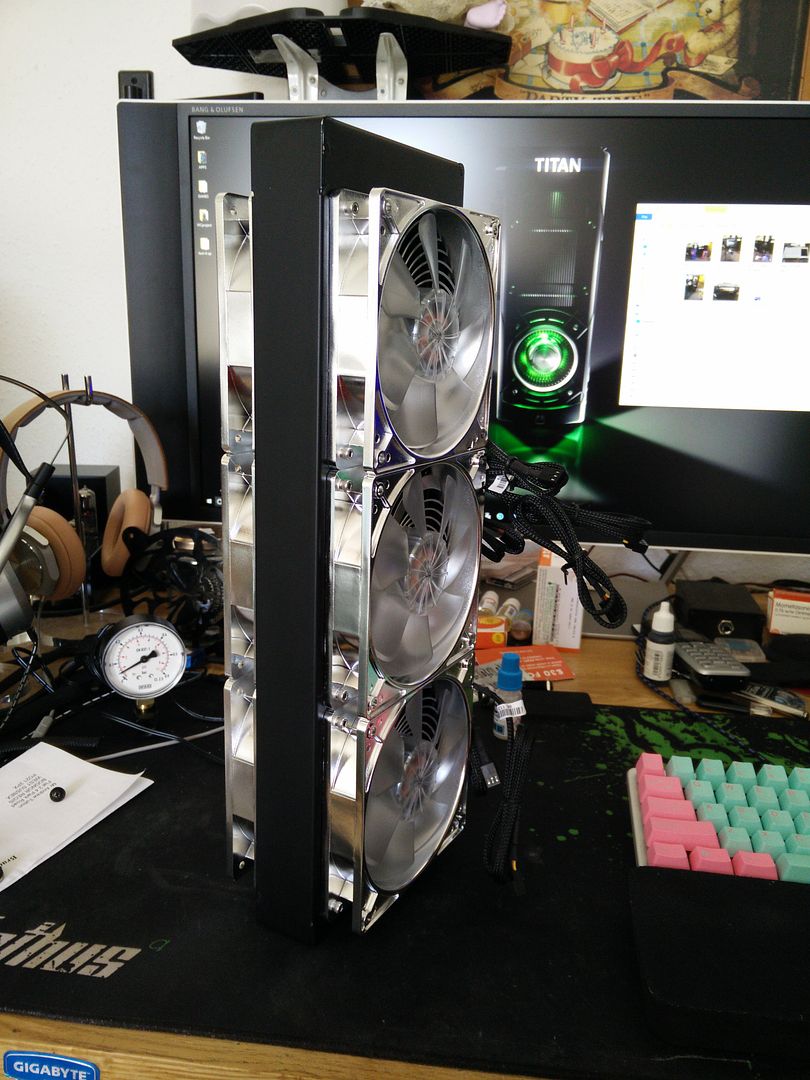
This side will need some work, but nothing the plotter can't handle. Wondering whether to cut them out of chrome so they merge into the fans...
/Kevin Bloody Wilson - From the Featherbrain Championship..."now there's a doorway where there weren't one there before"
Quite pumped up for the Acrylic phase now")

This side will need some work, but nothing the plotter can't handle. Wondering whether to cut them out of chrome so they merge into the fans...

/Kevin Bloody Wilson - From the Featherbrain Championship..."now there's a doorway where there weren't one there before"


Quite pumped up for the Acrylic phase now
AlienALX
Well-known member
I like the way this is going.
Thanks fella ! I do too tbh. I was kind of at an impasse when the case was given back to me. I didn't really want to cut it up because I hate it when people mangle Alienwares but in reality it was very dated and the cooling was years out of date.
It's funny because this was the first case I ever cut up with a Dremel. I cut in some cable management and the feeling was awesome haha. So in a way it's gone full circle now lol.
Completely redesigning the interior will bring it bang up to date cooling wise, whilst leaving the outside panels alone.
I'm also hoping this uses up all of my spare crap lol. I was annoyed to have to pay £12 for the grommets as I only needed two (Corsair 350D grommets IIRC) and almost threw them out. Effing glad I didn't now !
The main nasty smelly work is done now. The vinegar has been disposed of and the metal has been cut. I absolutely hate cutting metal as the fine dust gets up your nose and all you can taste is like rusty metal (and smell too). I developed a system though where I just put on my respirator, then pull a tshirt over my head down to the bottom of my eyes and it keeps out that nasty crap.
/rambling. Tired man haha. But yeah, was dreading cutting up the metal but it's done now. Good feeling
Last edited:
Excalabur50
Well-known member
Looking good dude looking good!
AlienALX
Well-known member
Looking good dude looking good!
Thanks man
Hopefully the enormous sheet of acrylic I've ordered will come soon because that's pretty much where I am at now. I need to mod the CPU block but that won't take too long (will do that tomorrow I'm having me a day off) but yeah, the rest is pretty much all acrylic work and with every piece cut it will start to look better and better and not the hacked about frame that I have now lol.


")

Thanks man
Hopefully the enormous sheet of acrylic I've ordered will come soon because that's pretty much where I am at now. I need to mod the CPU block but that won't take too long (will do that tomorrow I'm having me a day off) but yeah, the rest is pretty much all acrylic work and with every piece cut it will start to look better and better and not the hacked about frame that I have now lol.
The hacked about frame is my fav part, its the time when the canvass blank and ideas swirl lol. Looking great man cant wait to see more.
AlienALX
Well-known member
The hacked about frame is my fav part, its the time when the canvass blank and ideas swirl lol. Looking great man cant wait to see more.
Thanks
I've managed to avoid any blood so far but I just caught my thumb on something sharp as I was putting it away, now it has my blood on.
Gotta be good then

Thanks
I've managed to avoid any blood so far but I just caught my thumb on something sharp as I was putting it away, now it has my blood on.
Gotta be good then
Lol you know where the case has been? might need to go to the clinic lol j/k
These slutty cases nowadaysAlienALX
Well-known member
Lol you know where the case has been? might need to go to the clinic lol j/k
lmao thankfully I had a tetanus a few years back. The case was mine from '08-10 then I sold it to my nextdoor neighbour who had it for five years and then gave it back free. Can't beat free
I remember the days though where it was like a customary tradition to bleed on your PC.
Oh yeah there was something I forgot as it goes. RAM. It looks like doodoo. I thought it was single sided and had a plan in place for that (four sinks from two broken DDR3 sticks and then dinoc on the back) but obs being double sided that would look stupid. I also remembered that usually when people water cool PCs the ram gets starved of air so I started looking at ram coolers (at least it would cover the gash stock ram and horrid yellow ram sockets). They're expensive though.. Hmm.. Any way I found this in the complete wrong colour obs.

Then I realised I had one of these still packed in bubble wrap.

I forget completely why I bought it originally but it's brand new and unused. I remember buying it and the nozzle was busted so I got a refund, then it just got thrown in a storage container. Any way, I found out you can buy all sorts of different nozzles for Montana cans so I've bought five.
There's just a few bits that are going to need paint, and hey, if I hadn't thrown every technique at this thing I would probably regret it.
The ram cooler was £13 btw. Not too expensive and should look quite nice in green. Only one issue, it fouls the res bay I made so I need to trim that down a bit (it's far too bulky and over built) and then fingers crossed it should fit but bugger me it's going to be a wedgie.
AlienALX
Well-known member
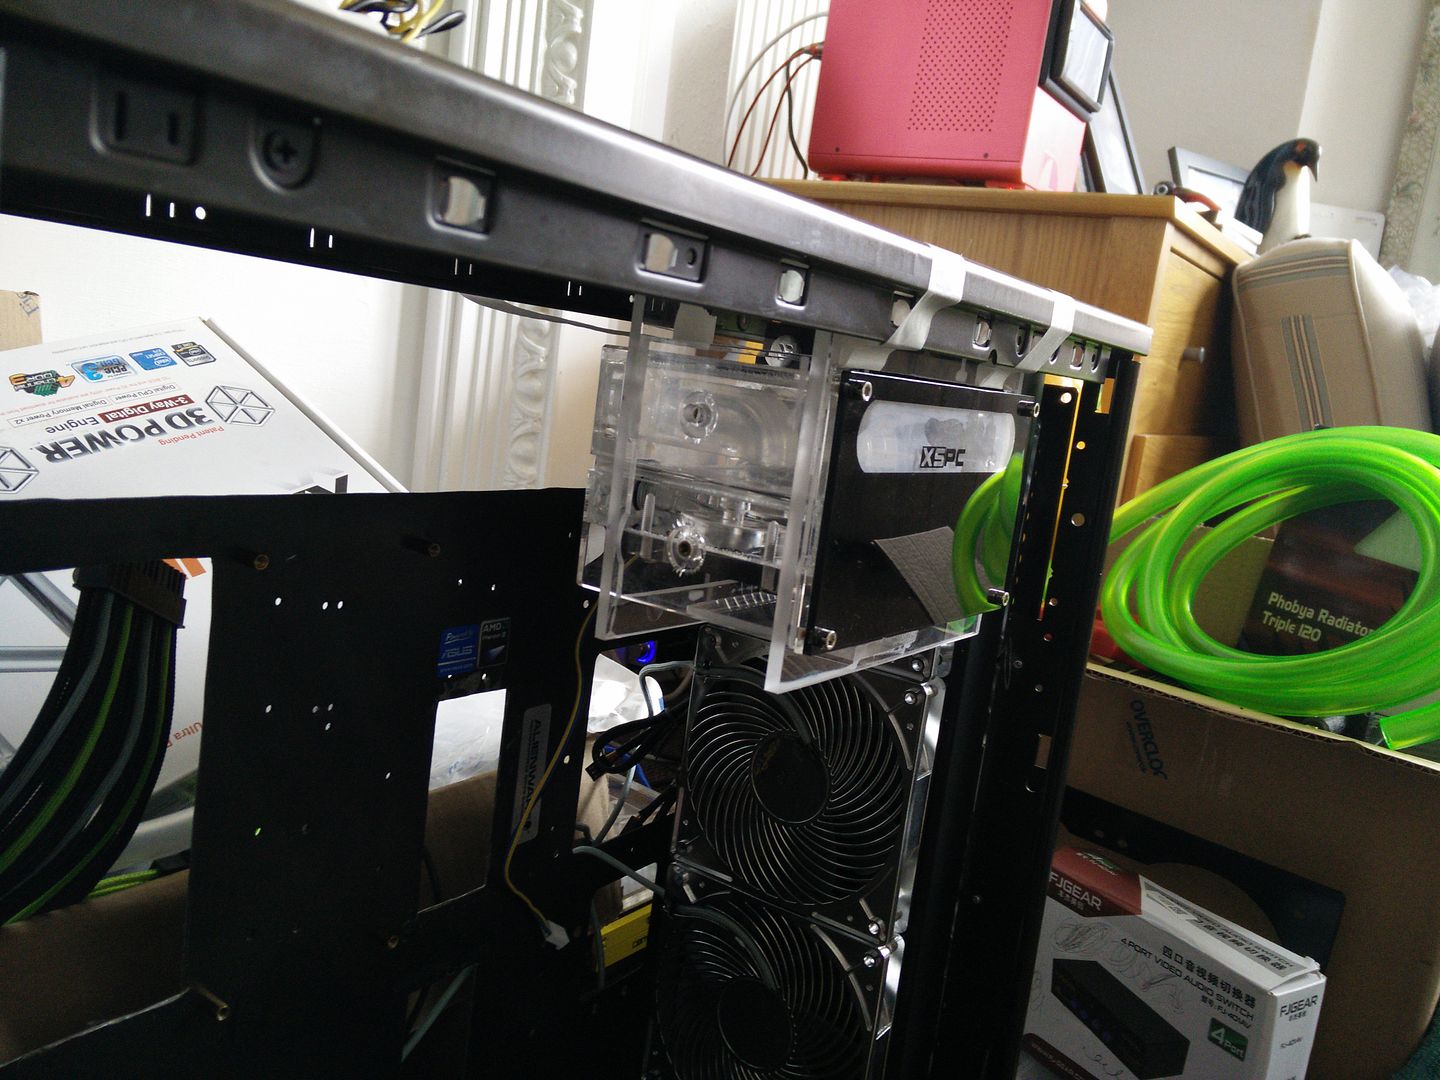
I decided that for now I was going to touch up the block and keep it black. This may change yet, but for right now I just touched it in
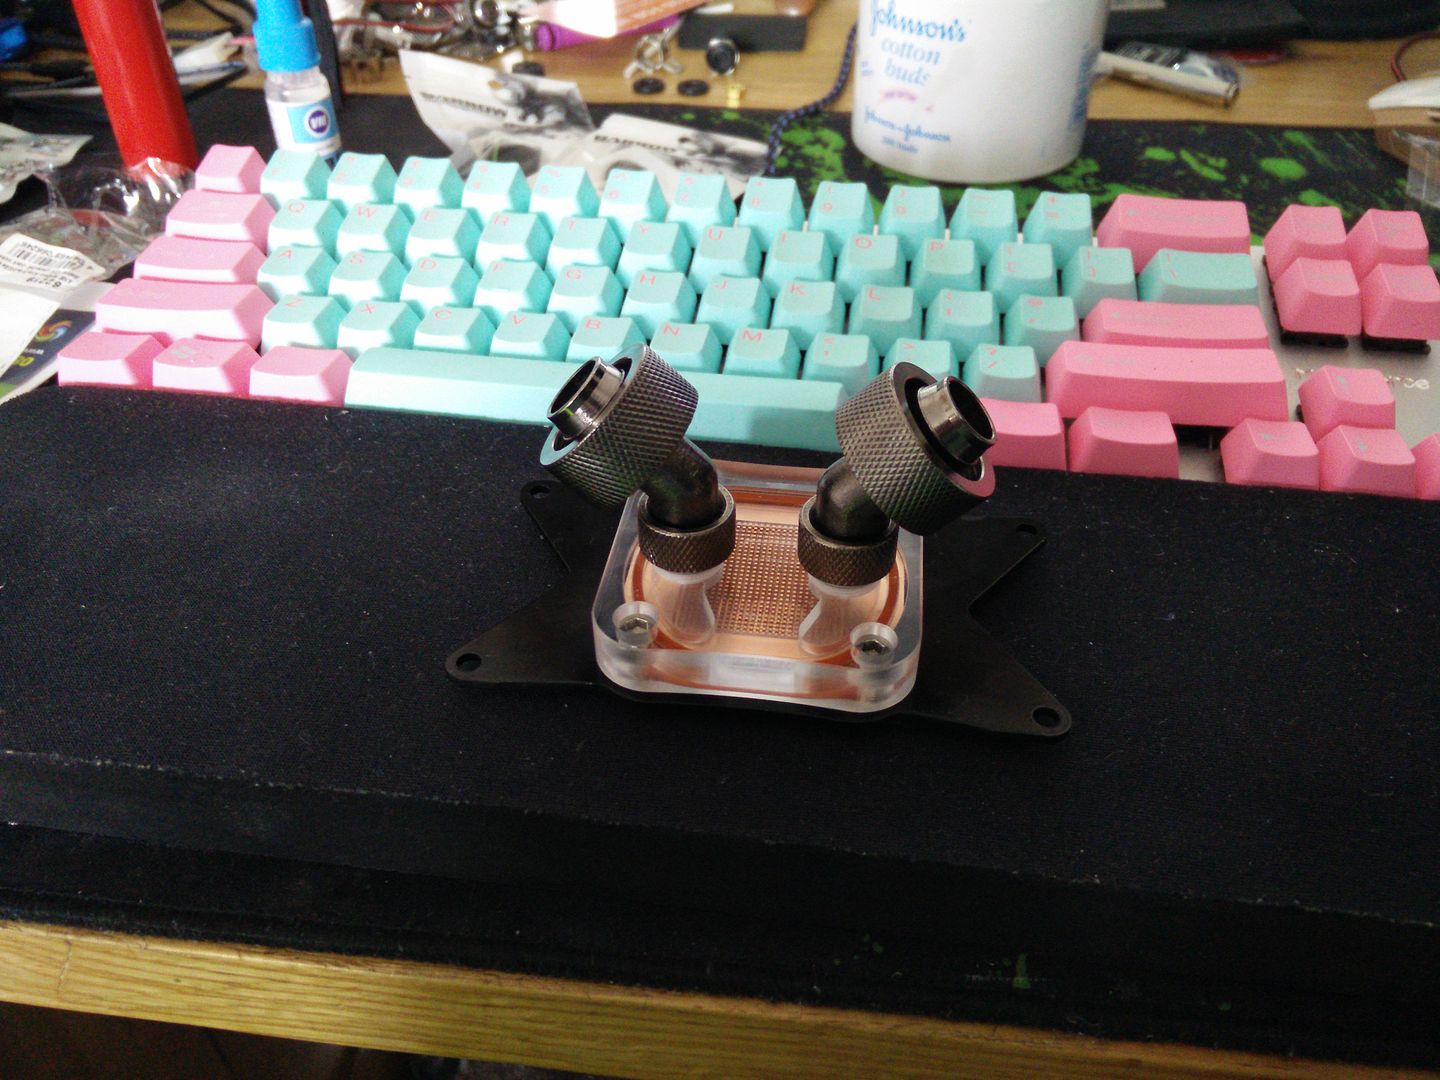
As you can see the fittings have arrived, along with the hose.
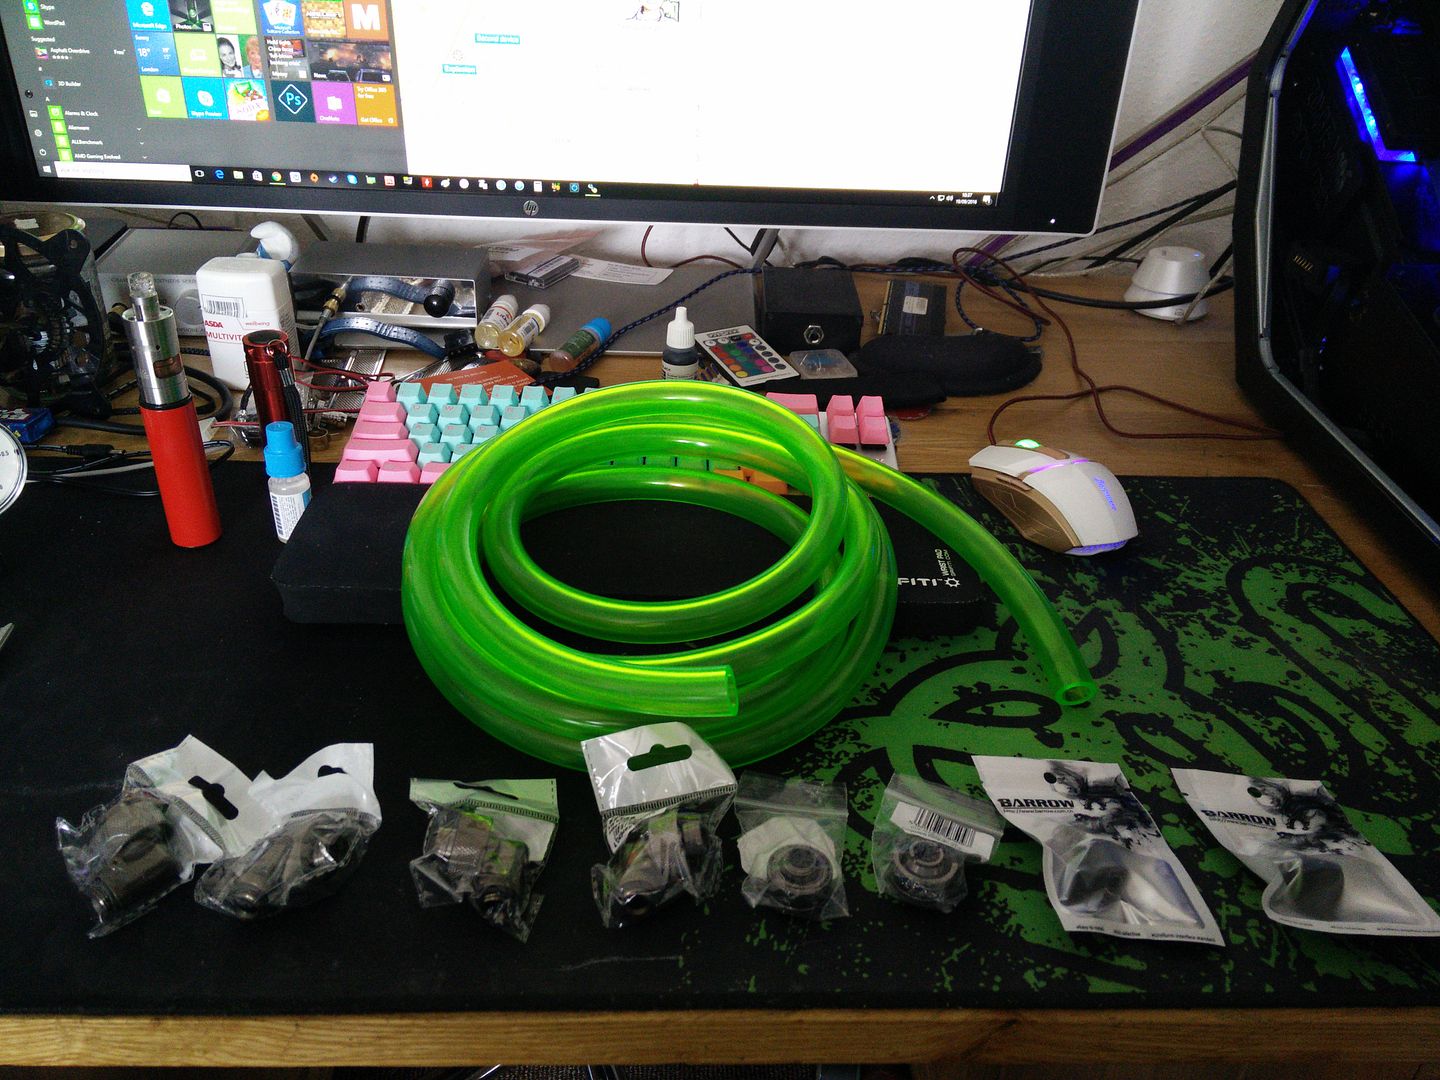
Must admit I did LOL at the size of the fittings and sheer massiveness of the hose

As you can see the fittings have arrived, along with the hose.

Must admit I did LOL at the size of the fittings and sheer massiveness of the hose
AlienALX
Well-known member
OK so it was time for a bit I had been dreading. Fitting the res bay and cutting a hole in the top of the case that will act as a filling hole. I kinda knew that the hole saw I had was useless for metal but in true "try it and see" style I completely ruined my 40mm bit lol. I was then only really left with one option - the jigsaw. I had forgotten that I own a rather lovely Bosch one and it was right where I left it with a genuine Bosch blade in it.
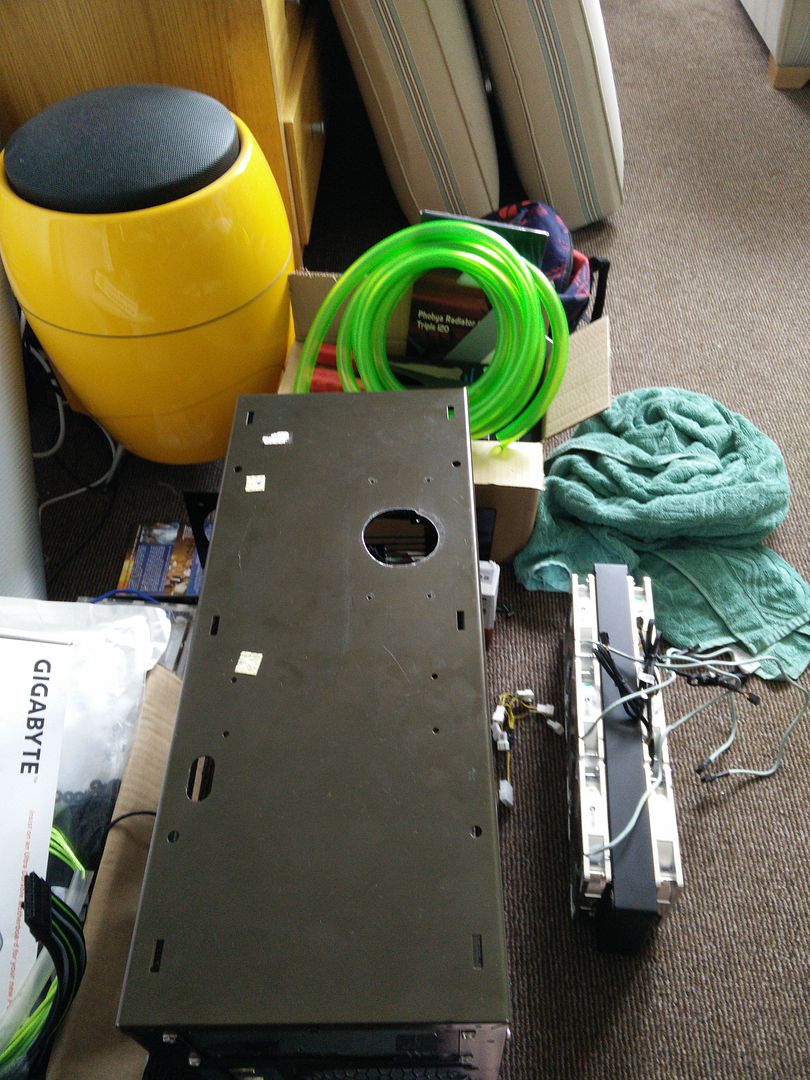
I'll admit, I've done better work. The screw holes are perfect, mind.
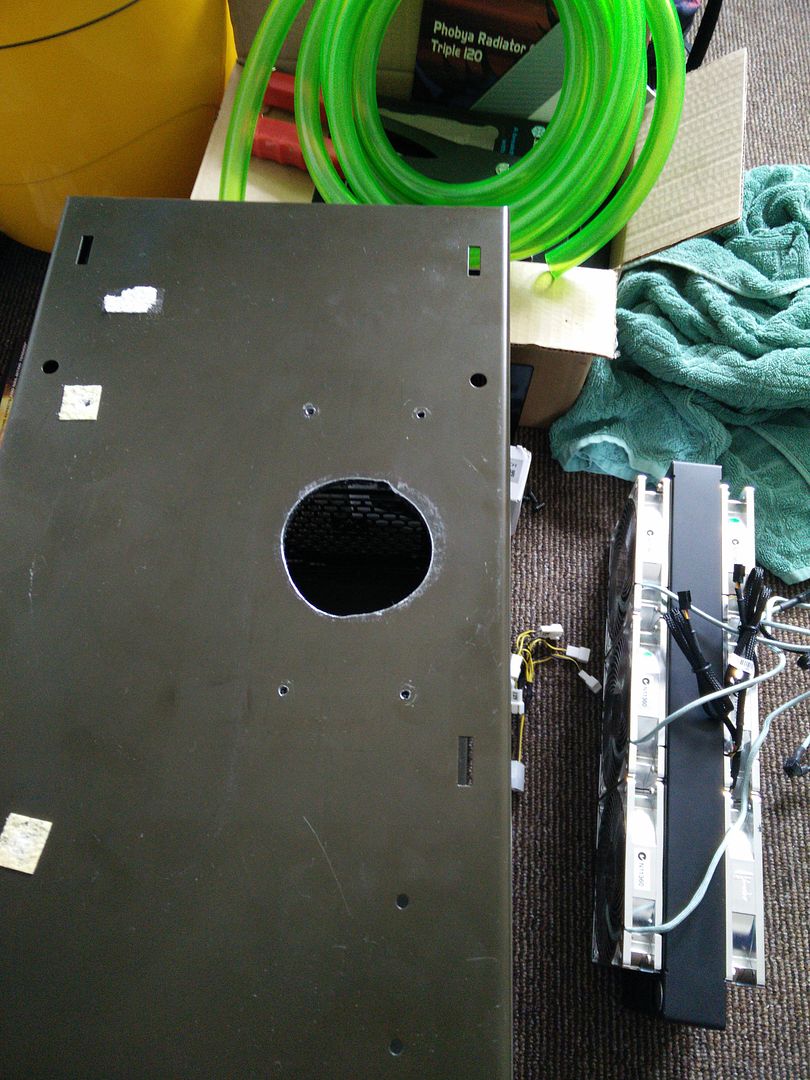
About half an hour later and finally I can solemnly declare that this case is water cooling ready
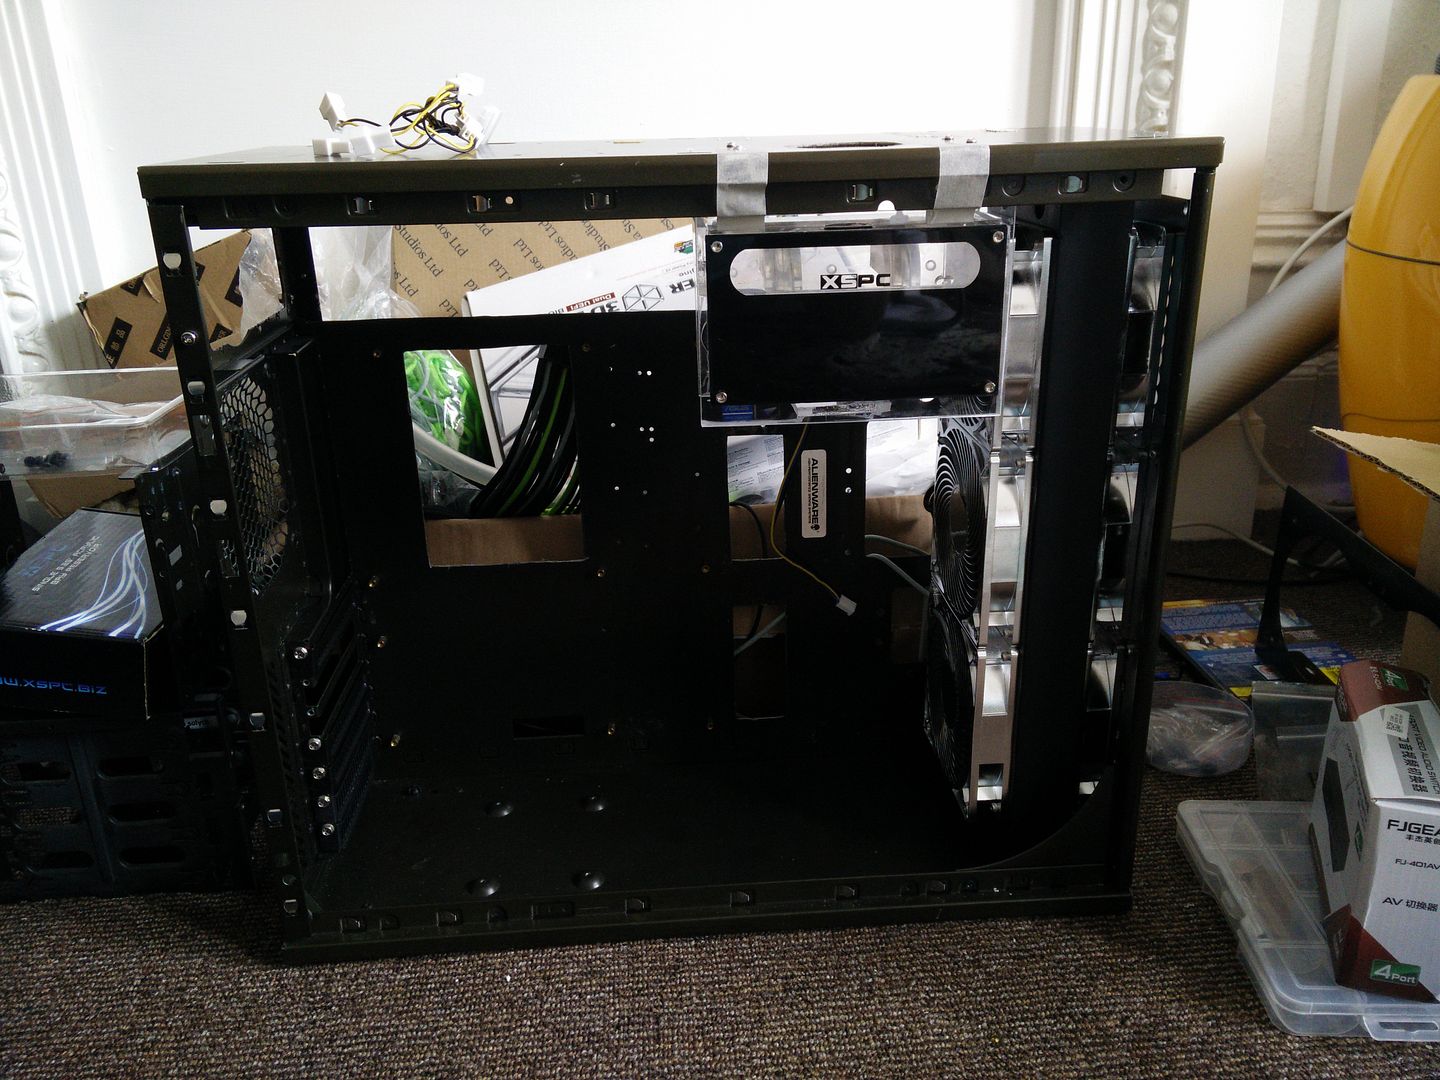
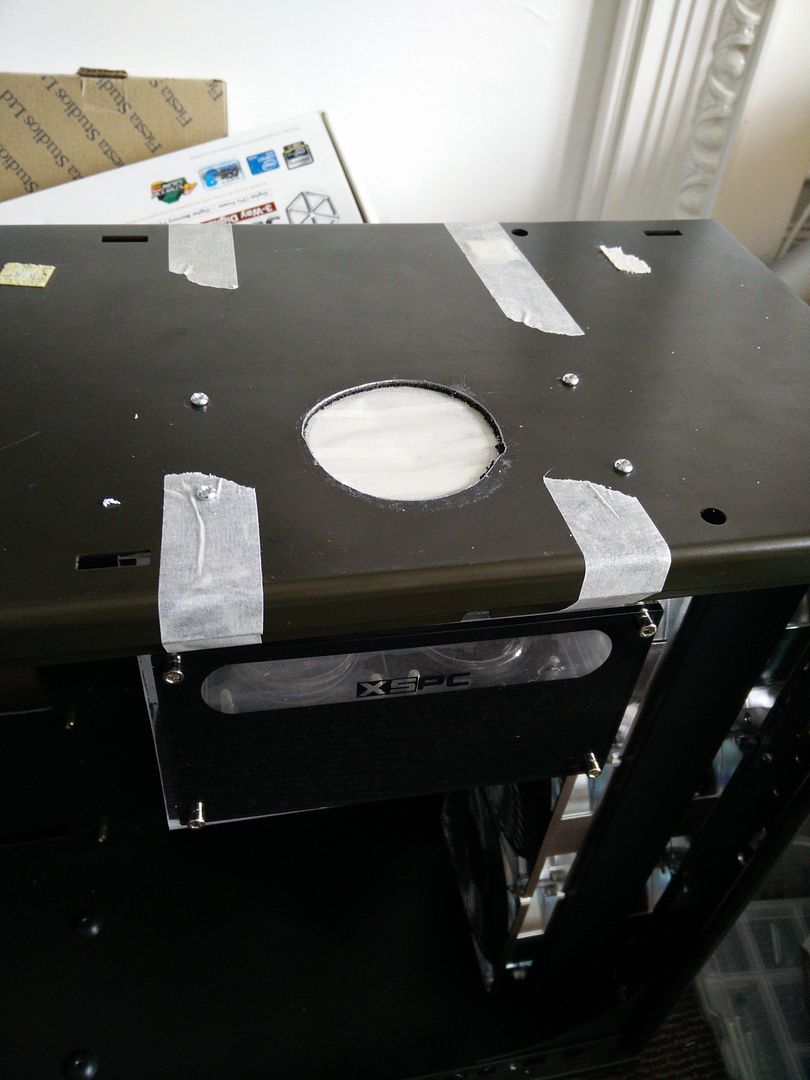
It's 'snug' lol


I'll admit, I've done better work. The screw holes are perfect, mind.

About half an hour later and finally I can solemnly declare that this case is water cooling ready


It's 'snug' lol


Similar threads
- Replies
- 2
- Views
- 197