You are using an out of date browser. It may not display this or other websites correctly.
You should upgrade or use an alternative browser.
You should upgrade or use an alternative browser.
Project: Angel
- Thread starter w3bbo
- Start date
UPDATE:
Decided on using barbs and 7/16 tubing. I know the fashion is to use comp fittings but I personally think they look a little bulky. I also don't trust them. That said they do look mint if there isn't too much being cooled. For me however I don't think they are right for this build.
The barbs are standard hi-flow affairs which give the best grip imo. This is imperative as I intend to use 7/16 tubing WITHOUT any form of fixing (tie wraps/jubilees etc). This should give a nice clean appearance.
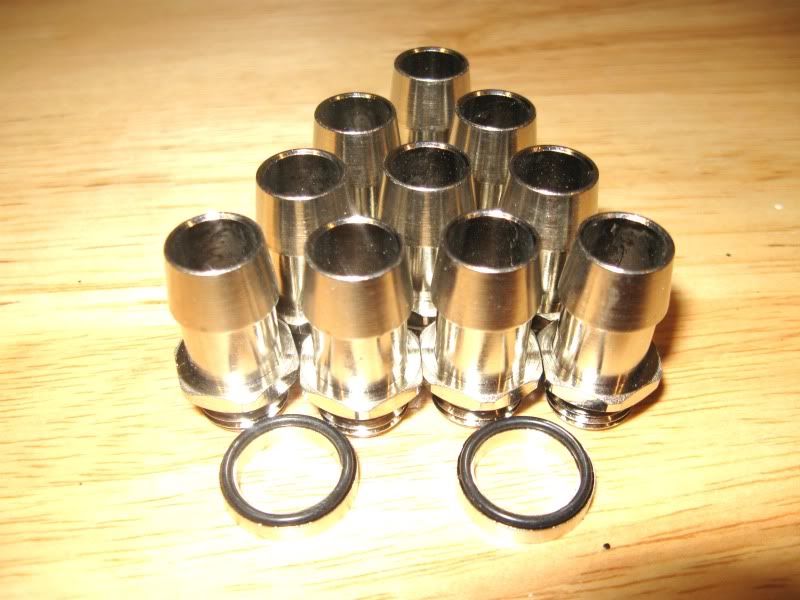
To minimised the amount of flex on the tubing, I also intend to use these babies:
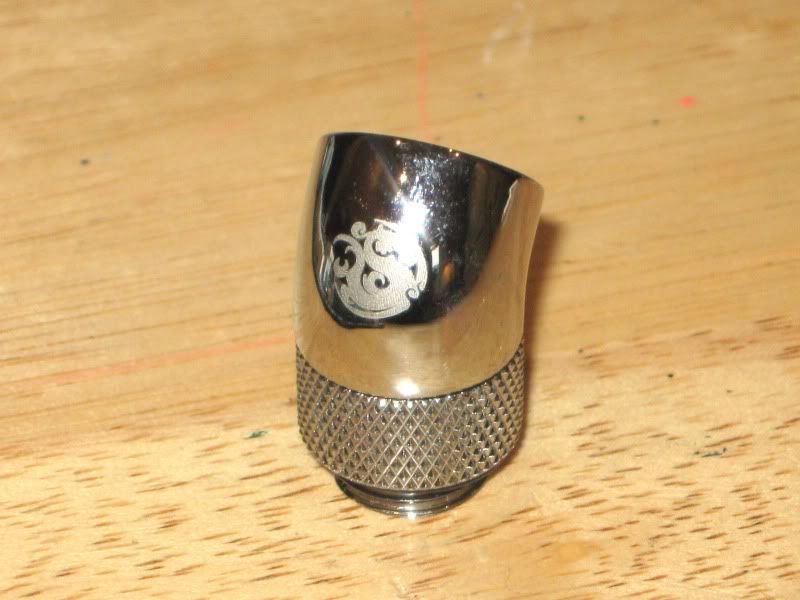
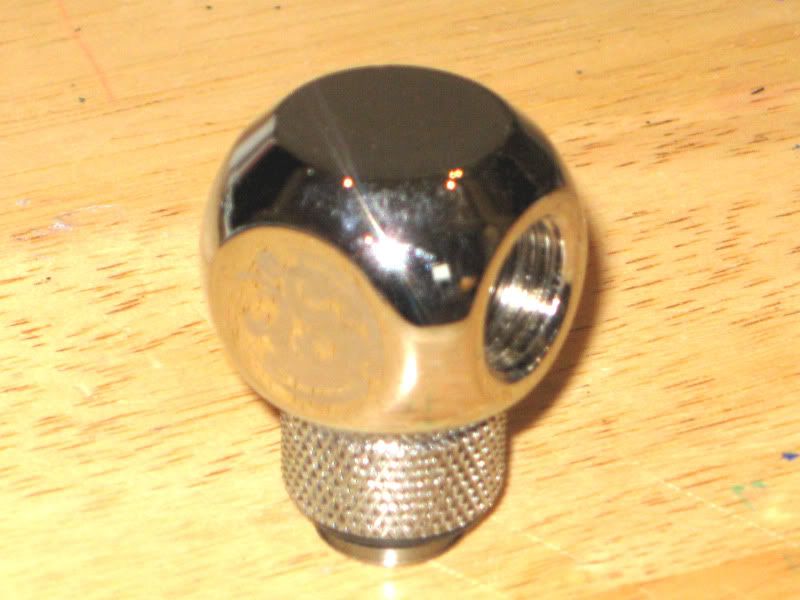
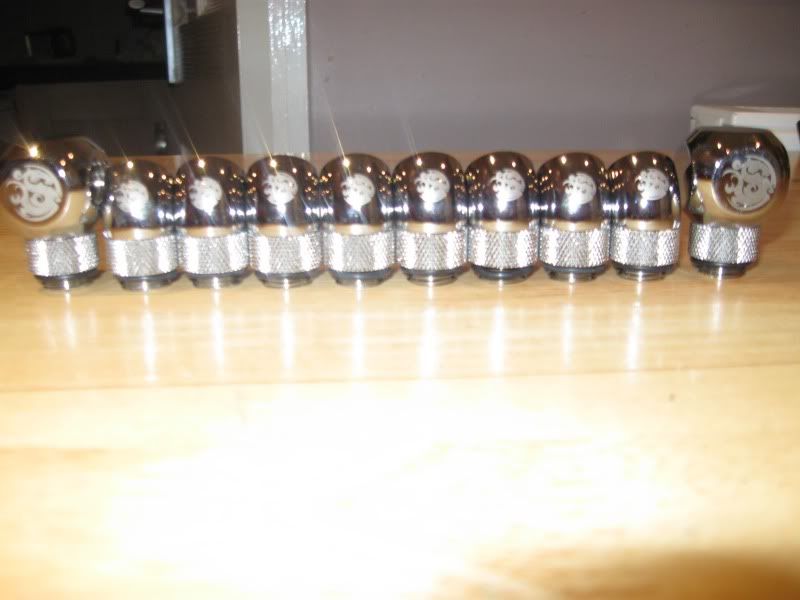
Gotta love shiny bitspower goodies. Thanks to TTL (Time To Live - Tom) I got these fittings while the rest of the UK was sold out - cheers mate!!! Overpriced for sure but they certainly look the dogs danglies!
Decided on using barbs and 7/16 tubing. I know the fashion is to use comp fittings but I personally think they look a little bulky. I also don't trust them. That said they do look mint if there isn't too much being cooled. For me however I don't think they are right for this build.
The barbs are standard hi-flow affairs which give the best grip imo. This is imperative as I intend to use 7/16 tubing WITHOUT any form of fixing (tie wraps/jubilees etc). This should give a nice clean appearance.
To minimised the amount of flex on the tubing, I also intend to use these babies:
Gotta love shiny bitspower goodies. Thanks to TTL (Time To Live - Tom) I got these fittings while the rest of the UK was sold out - cheers mate!!! Overpriced for sure but they certainly look the dogs danglies!
Motherboard prep:
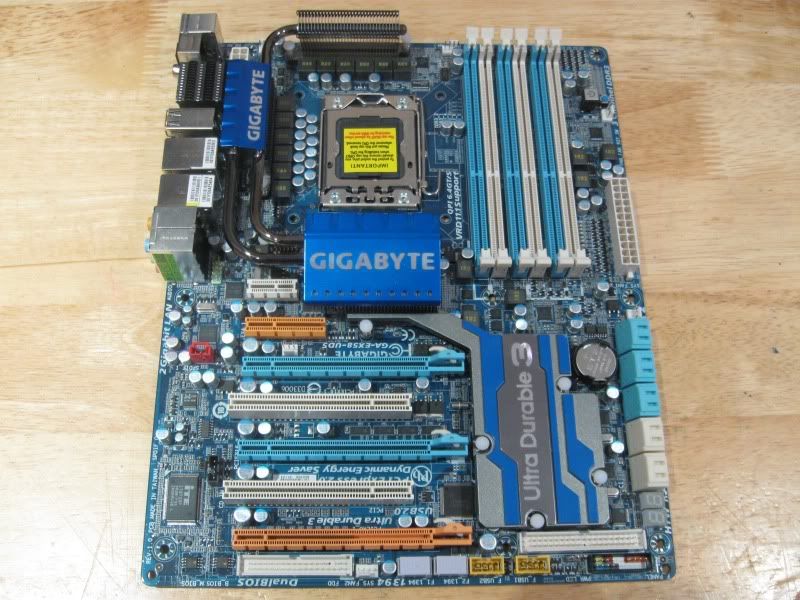
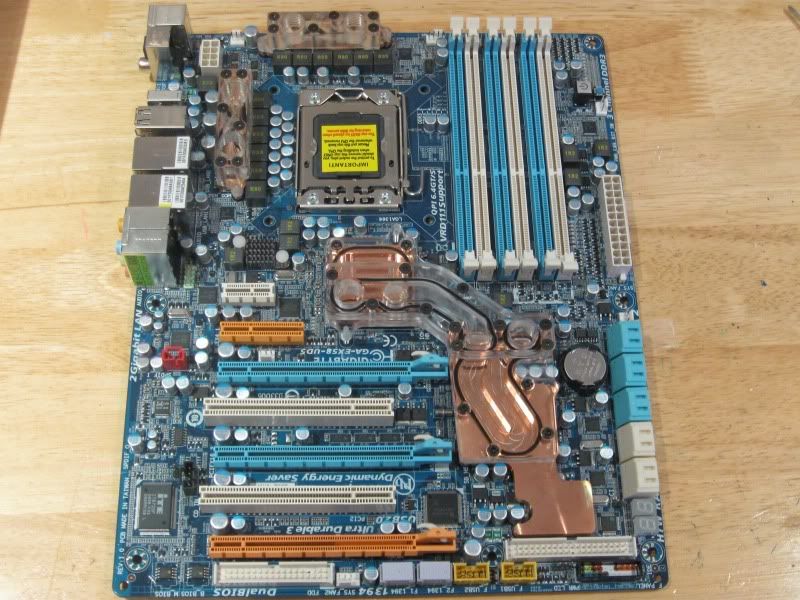
The Gigabyte EX58-UD5 is the older revision but that doesn't mena it's any less capable than the newer one. Infact I've heard on the grapevine that it actually overclocks BETTER than the newer revision. Anyway for those that don't know what this board looks like here ya go:
While the stock cooling looks nice, like most things OEM, they are made with budget in mind. I decided to go for the full monty EK setup but first I removed the stock heatpiped affair, which is a doddle to do as it's only attached via push pins:
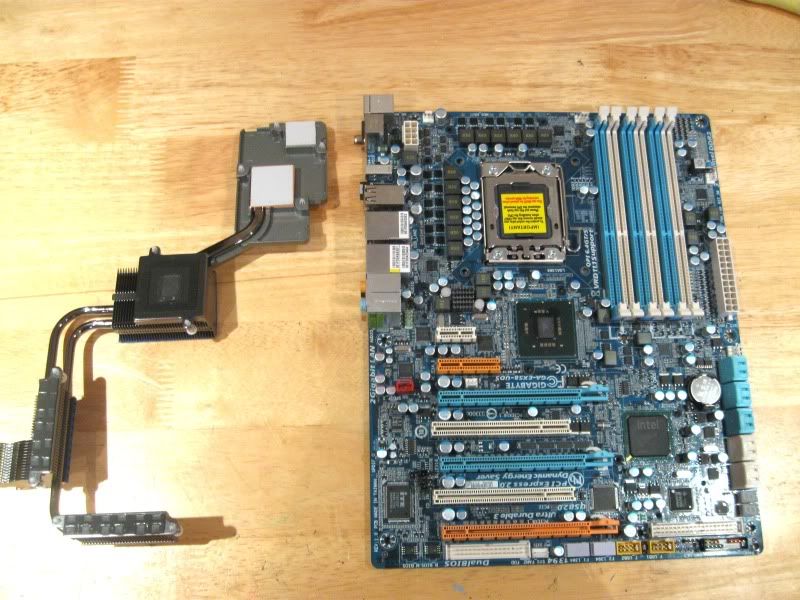
Stock vs the EK kit:

more to come...
The Gigabyte EX58-UD5 is the older revision but that doesn't mena it's any less capable than the newer one. Infact I've heard on the grapevine that it actually overclocks BETTER than the newer revision. Anyway for those that don't know what this board looks like here ya go:
While the stock cooling looks nice, like most things OEM, they are made with budget in mind. I decided to go for the full monty EK setup but first I removed the stock heatpiped affair, which is a doddle to do as it's only attached via push pins:
Stock vs the EK kit:
more to come...
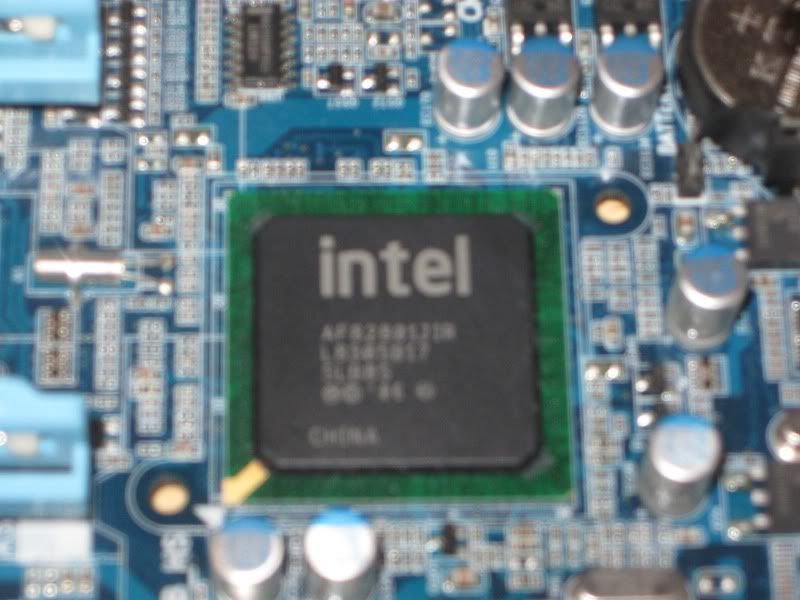
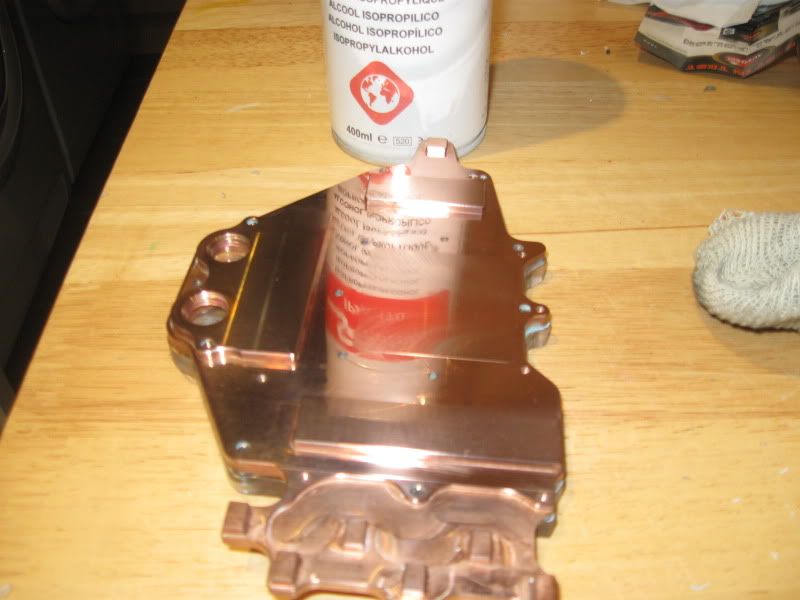
Strip washing the mobo was made all the more easy thanks to IPA. Both sets of MOSFETs, NB (QPI) and SB (ICH10R) were given a good clean to remove all traces of the original compound, to ensure the best possible surface contact to the blocks:
I was gonna use paste on the fets but as the levels were so misaligned, thermal tape was the best option.
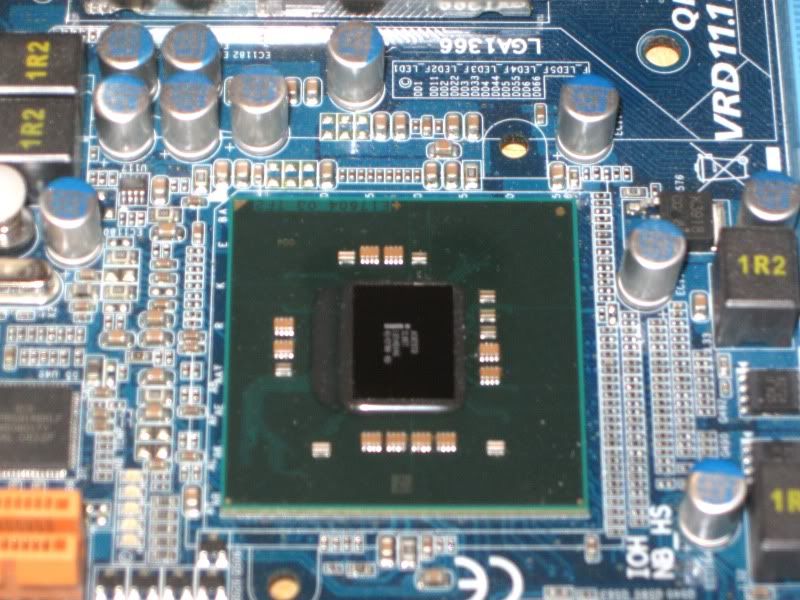
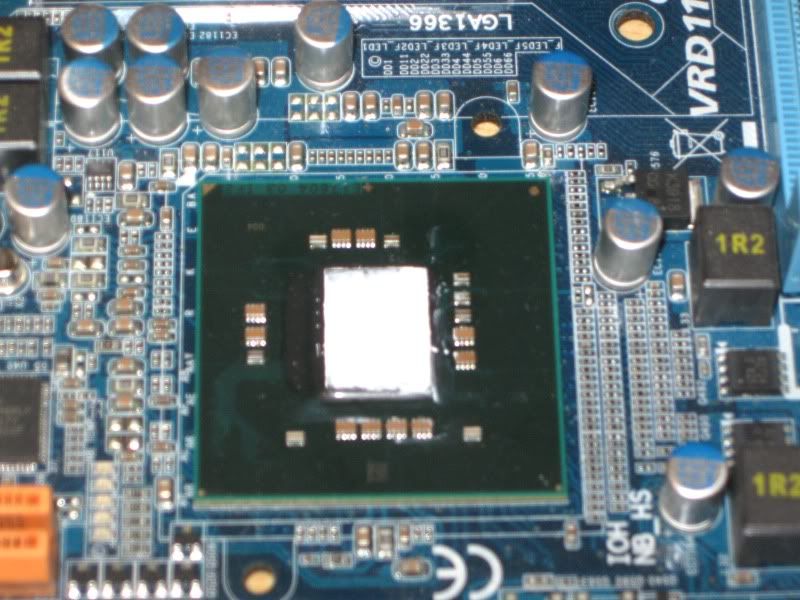
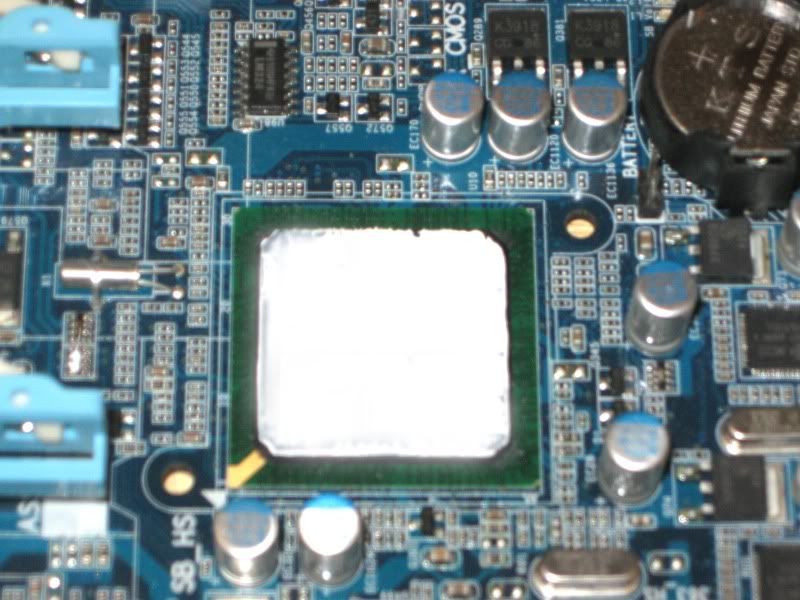
For the chipset I used Arctic Ceramique which is getting on a bit but still pretty good stuff (and more importantly non conductive!).
Appologies for some of the poor quality pics - crap lighting and crap camera.
I was gonna use paste on the fets but as the levels were so misaligned, thermal tape was the best option.
For the chipset I used Arctic Ceramique which is getting on a bit but still pretty good stuff (and more importantly non conductive!).
Appologies for some of the poor quality pics - crap lighting and crap camera.
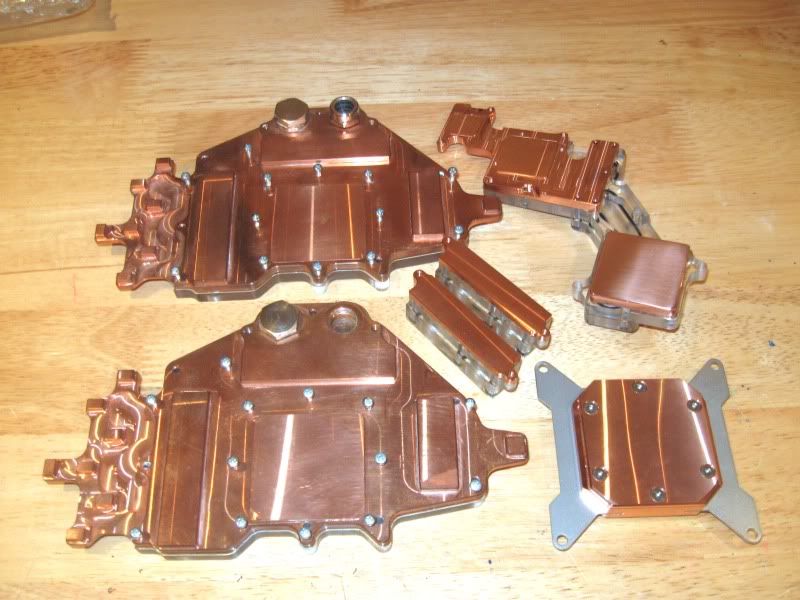
Back to the shiny bits. Heres a few shots of the chipset blocks:
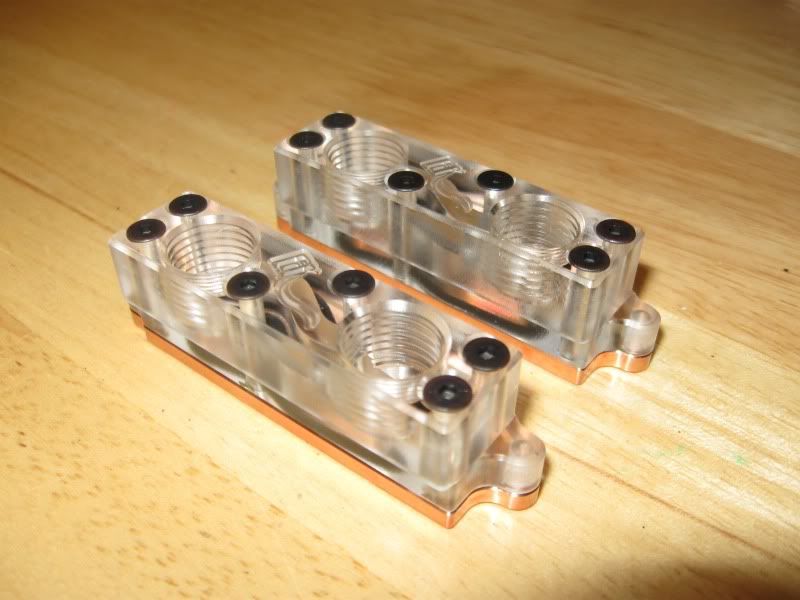
Fitting the blocks was a doddle thanks to EK's perfectly machined blocks and aligned screw holes. An idea for the future might be to get some white delrin/acetel style tops instead of the acrylic but for now the acrylic look better than black for my build.
Here they are fitted to the board:
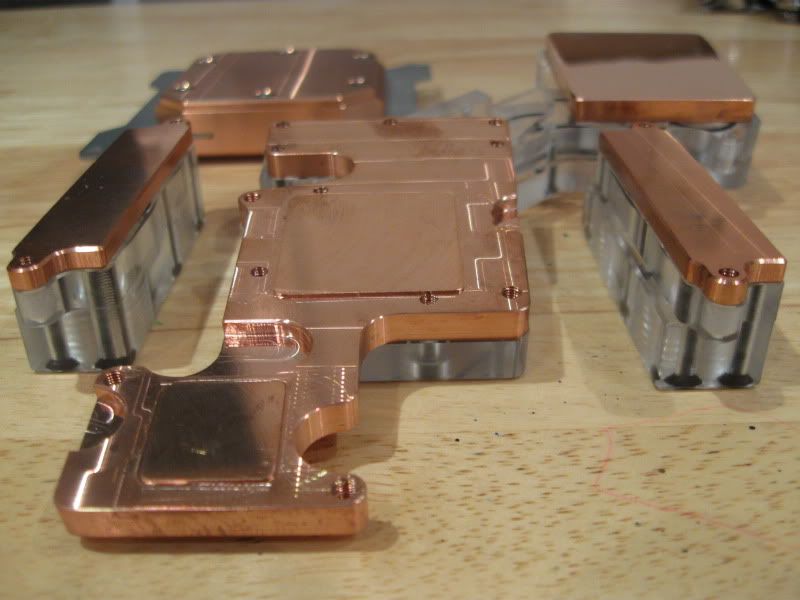
...Oh an it would have been a shame not to take a piccy of all the onboard copper blocks together :
:
Fitting the blocks was a doddle thanks to EK's perfectly machined blocks and aligned screw holes. An idea for the future might be to get some white delrin/acetel style tops instead of the acrylic but for now the acrylic look better than black for my build.
Here they are fitted to the board:
...Oh an it would have been a shame not to take a piccy of all the onboard copper blocks together
:
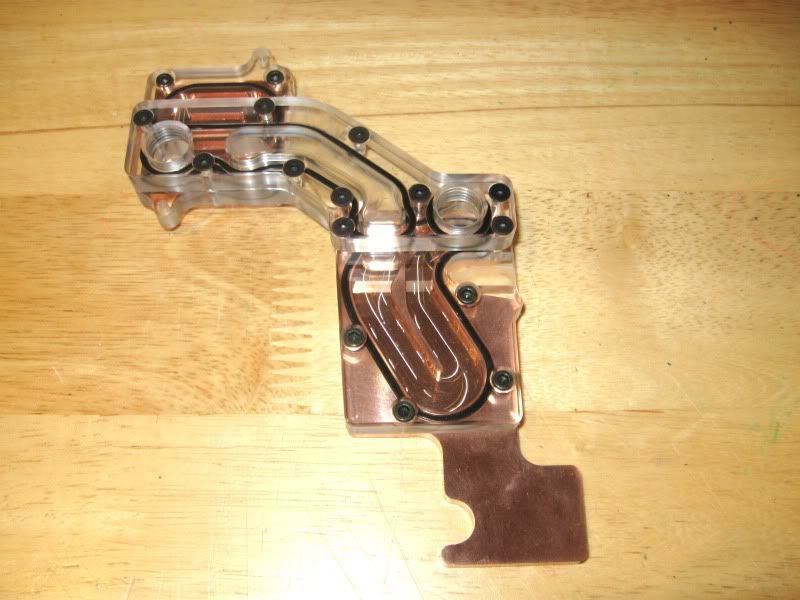
As mentioned earlier in the build log, I will be using the full copper Watercool Heatkiller block for the CPU so here's a few snaps of that block too:
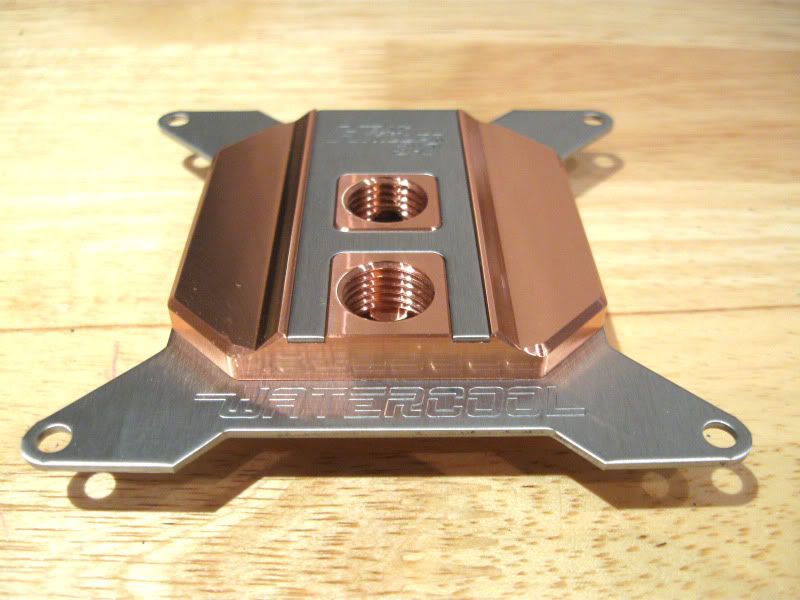

Must say this block is perhaps the best looking block I've seen for some time. Not only that but it's also (and more importnantly) the best performing block on the market at present. The LT version with the Delrin top is cheaper and almost performs on a par with the full CU block but I couldn't resist the lush full CU version") .
.
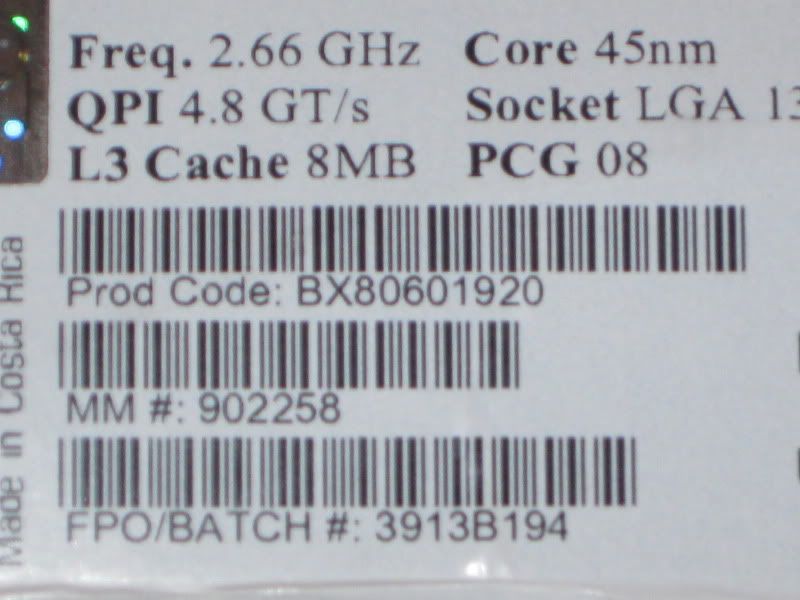
For those who are interested here's the FPO/Batch of the CPU. No idea if it's a good one or not but as long as I get 4/4.2 without issue I'm happy:
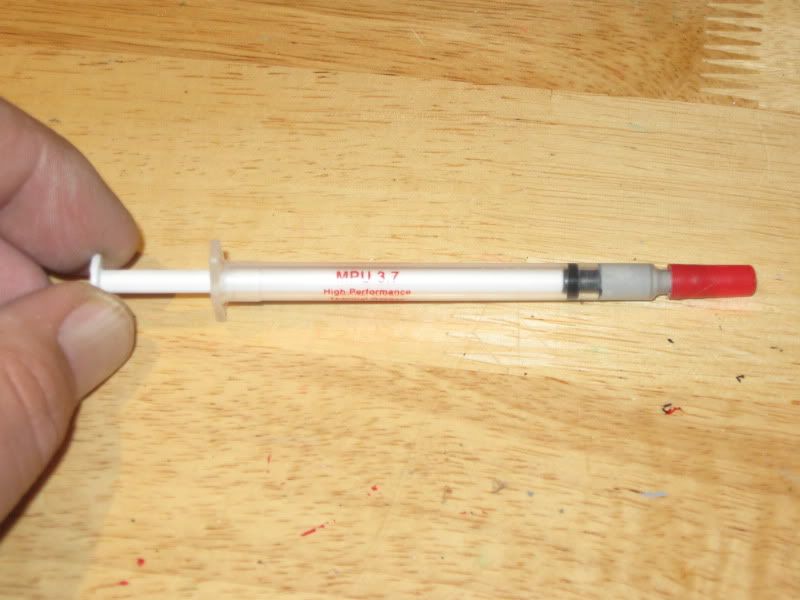
The paste choice is not so critical as it once was as most popular 'high performance' pastes perform within a degree of each other so I went with what I know is good, Shinetsu Microsi:
Next up - CPU mount
Must say this block is perhaps the best looking block I've seen for some time. Not only that but it's also (and more importnantly) the best performing block on the market at present. The LT version with the Delrin top is cheaper and almost performs on a par with the full CU block but I couldn't resist the lush full CU version
.For those who are interested here's the FPO/Batch of the CPU. No idea if it's a good one or not but as long as I get 4/4.2 without issue I'm happy:
The paste choice is not so critical as it once was as most popular 'high performance' pastes perform within a degree of each other so I went with what I know is good, Shinetsu Microsi:
Next up - CPU mount
Spreading the microSI was a total PITA as the batch I got was very dry but with a little persuasion I got a then sliver onto the CPU. I prefer to use the spread method rather than the blob, it's what works best for me but I have little doubt that the blob method works best for others so I won't get into an arguement about that here!
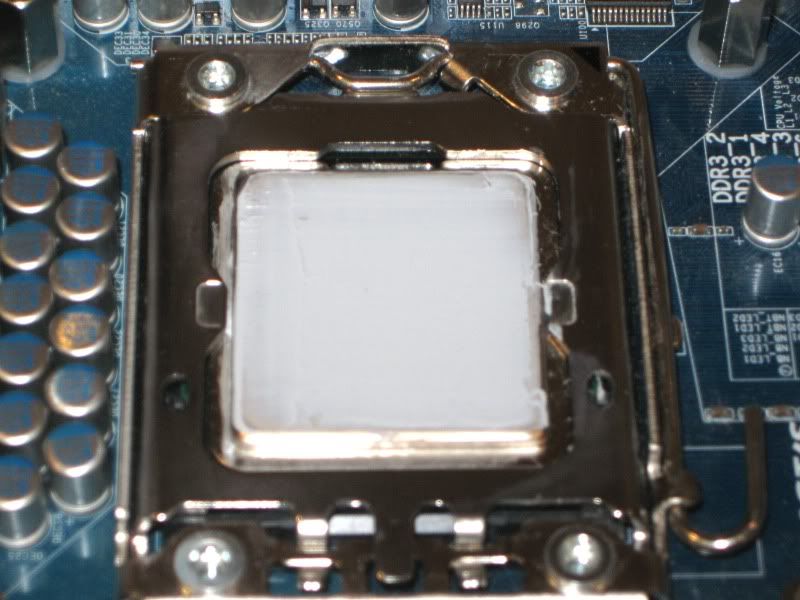
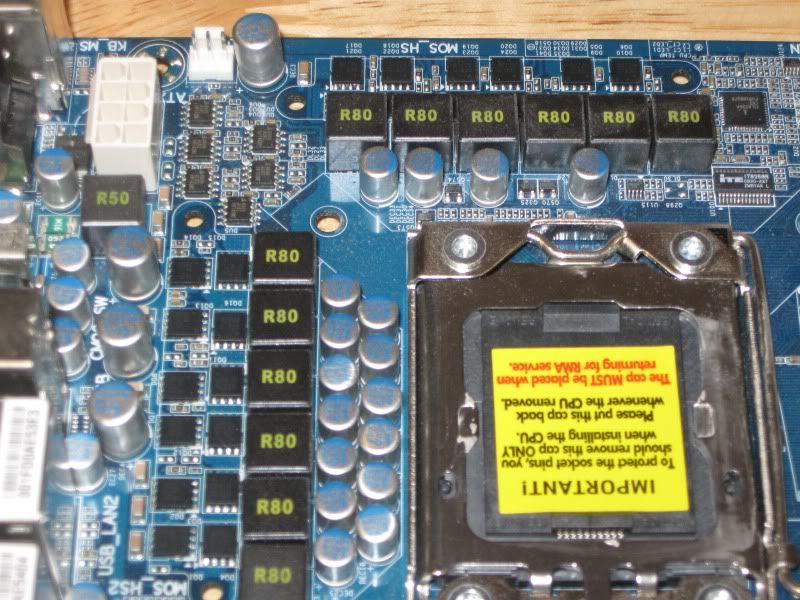
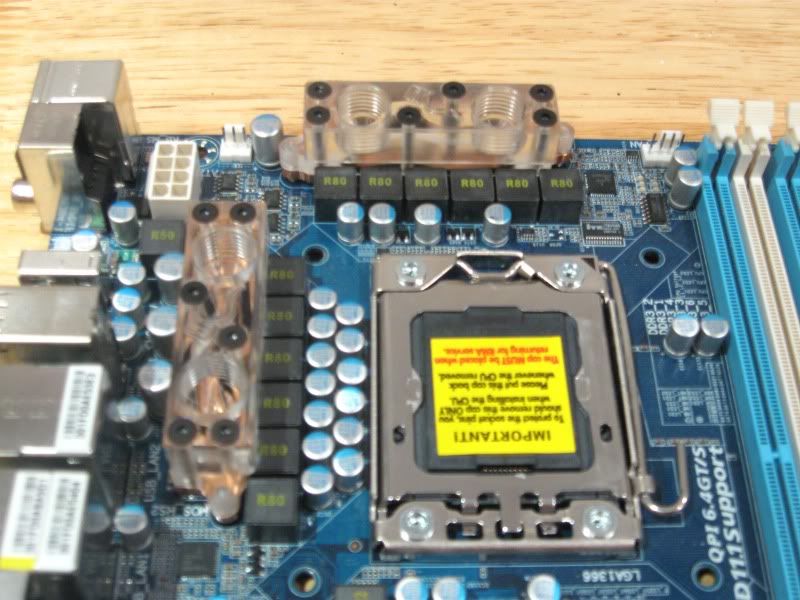
Fitting the CPU block at first presented no problems, however after doing a little research I quickly realised that the Heatkiller block should be fitted horizontally on the UD5 thanks to the row of caps (highlighted below) that prevent a good mount.
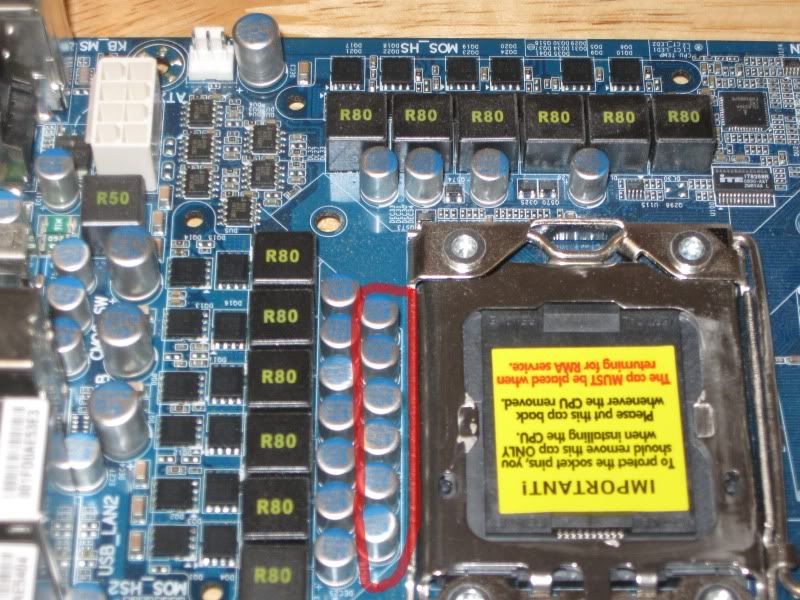
The caps are just a smidge to close to the CPU socket so with a little more (very) gentle persuasion, I bent them out of the way to allow vertical fitment of the Heatkiller:
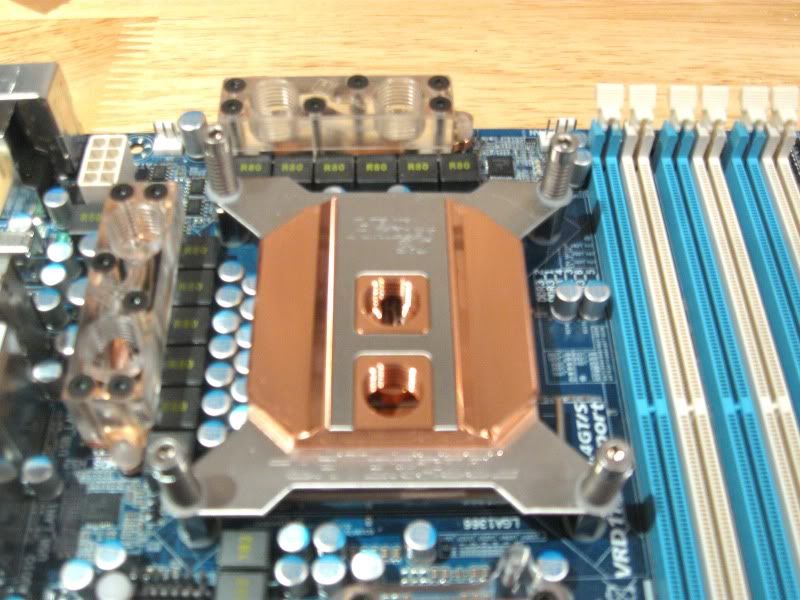
Sorted
Fitting the CPU block at first presented no problems, however after doing a little research I quickly realised that the Heatkiller block should be fitted horizontally on the UD5 thanks to the row of caps (highlighted below) that prevent a good mount.
The caps are just a smidge to close to the CPU socket so with a little more (very) gentle persuasion, I bent them out of the way to allow vertical fitment of the Heatkiller:
Sorted
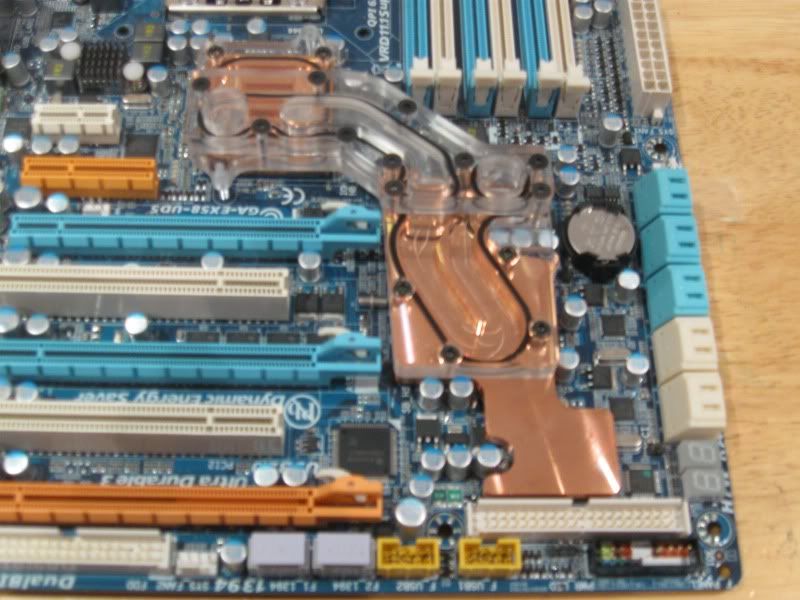
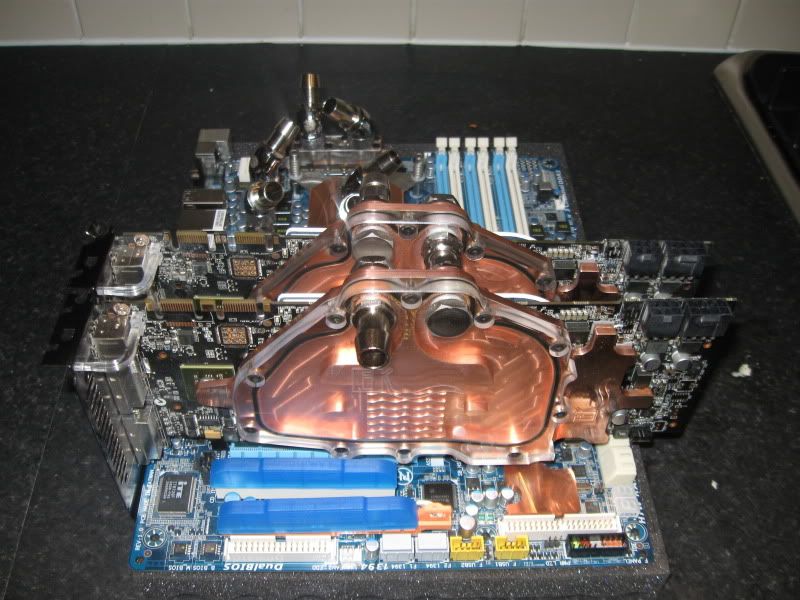
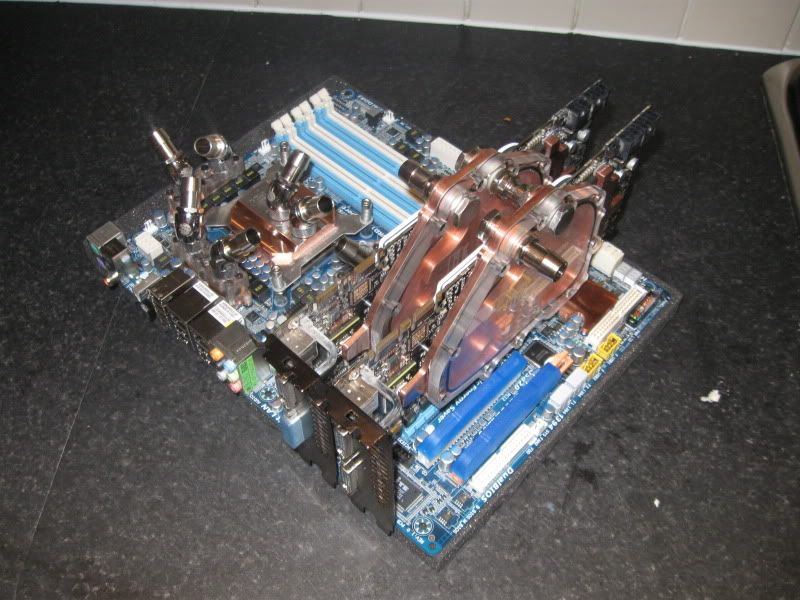
Here's how the board looks now with the blocks fitted:
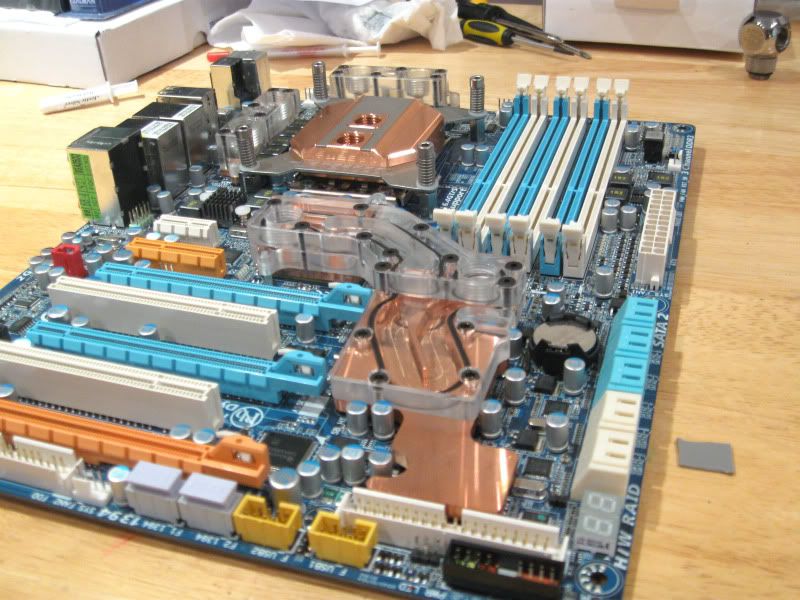
I had a quick play with the 45 angled bitspower fittings and attached the barbs to judge how I'm going to plumb in all up:

So with the motherboard blocks fitted thats pretty much all the prep work done save for the GPU's which I'll come to later in the build. For now its time to crack on with the build....
I had a quick play with the 45 angled bitspower fittings and attached the barbs to judge how I'm going to plumb in all up:
So with the motherboard blocks fitted thats pretty much all the prep work done save for the GPU's which I'll come to later in the build. For now its time to crack on with the build....
The GPU's I will be using for this build are the GTX280. While they are no longer top dog of the graphics card world, they are still powerfull, especially as the ones I will be using are XXX versions - 2 of .
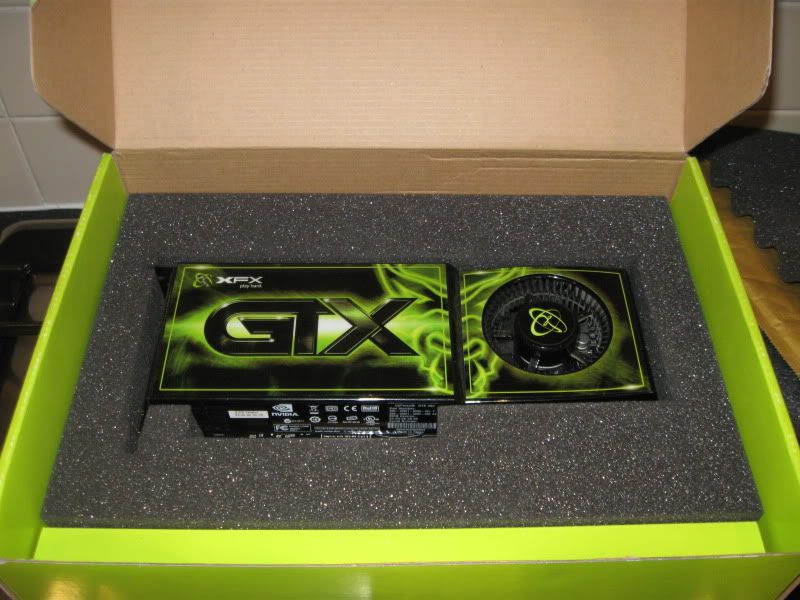
Of course it would be rude not to watercool them and overclock the nuts off them too, we'll see how that goes later. The blocks for the GTX280 I'll be using are EK-FC280GTX. Mine were bought second hand, and while thye were in good nick they needed a bit of spit and polish to bring them back to their former shiny glory:
With the backplate I sprayed earlier:
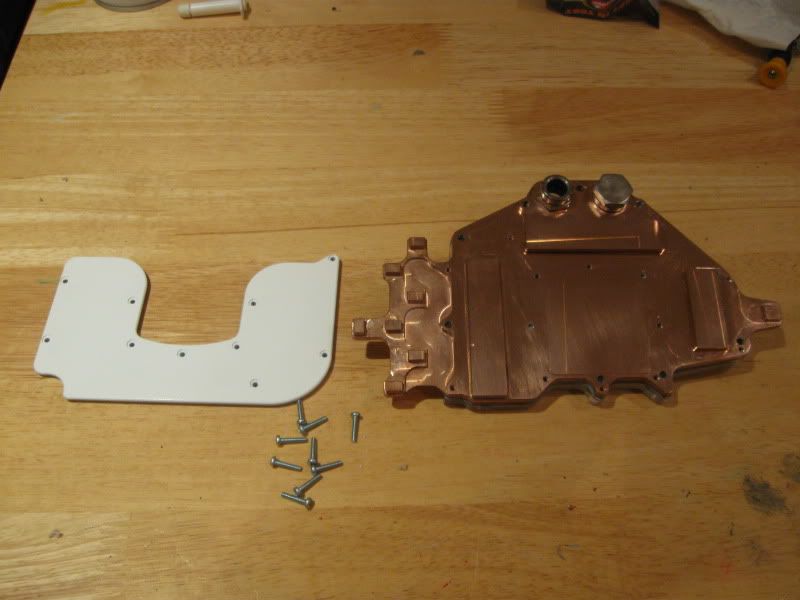
Stripped the cards back:
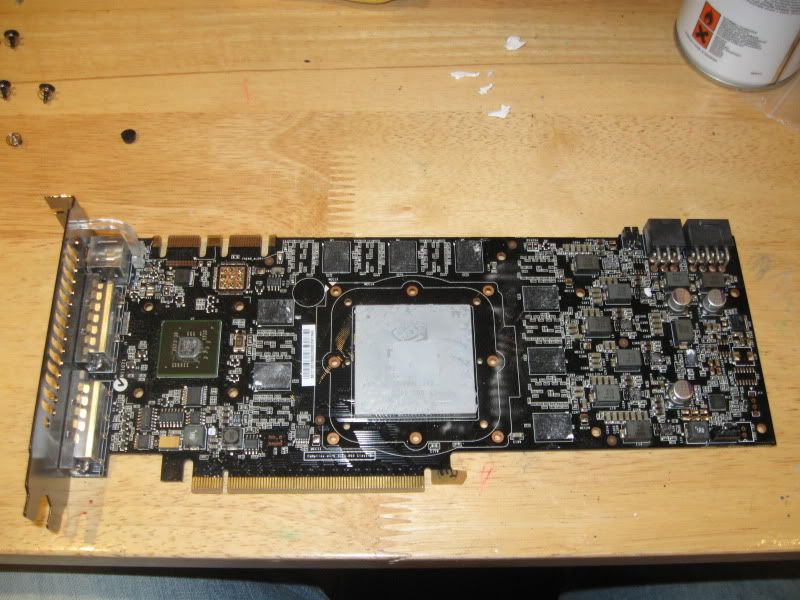
and fitted the blocks.
.
Of course it would be rude not to watercool them and overclock the nuts off them too, we'll see how that goes later. The blocks for the GTX280 I'll be using are EK-FC280GTX. Mine were bought second hand, and while thye were in good nick they needed a bit of spit and polish to bring them back to their former shiny glory:
With the backplate I sprayed earlier:
Stripped the cards back:
and fitted the blocks.

")
retrogamer1990
New member
very sexy indeed! although I have to say, if it were me I'd use nickel plated blocks. But that motherboard matches your colour scheme impeccably, well done
thestepster
New member
thats lookin great mate gonna be some pc!
killablade
New member
Holy **** that looks teh sex!!! 0.o Veeerryyyy nice!
looks really nice dudio, is everywhere sold out again then! whoa should have charged you retail 
Be great to see this one done dude, keep the updates coming
Be great to see this one done dude, keep the updates coming
Update:
I went for a horizontal fitting with the MM Ascension case but for all intents and purposes, the motherboard tray looks exactly the same as one which would be fitted vertical:
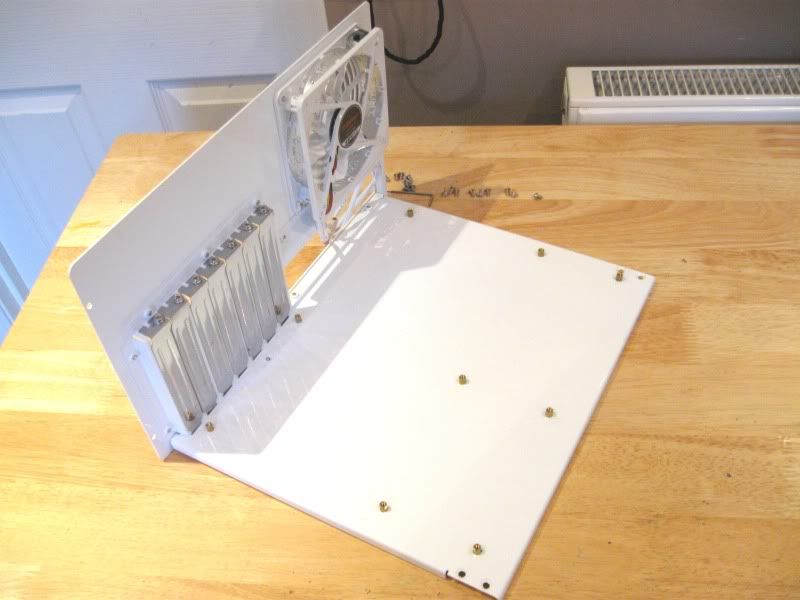
I dunno which way to have the fan yet as there are two more 120mm fans on the case roof so for now ignore the fan orientation:
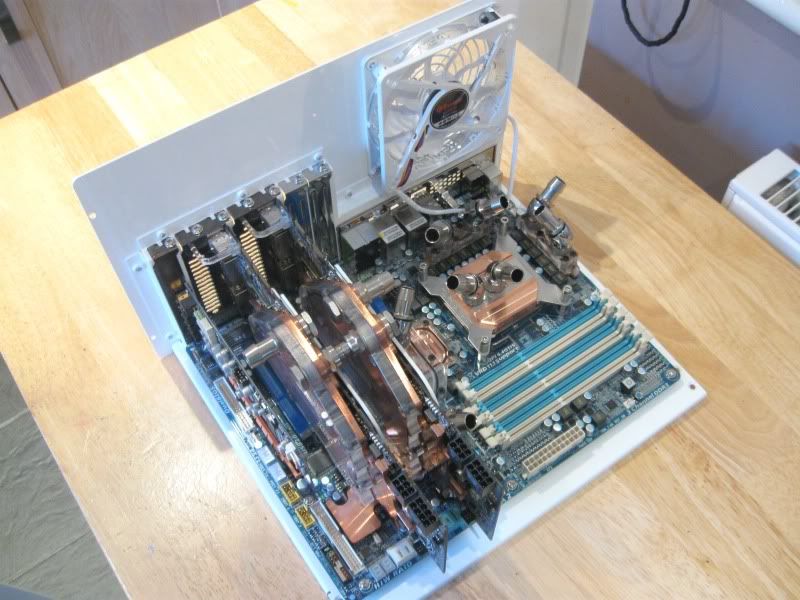
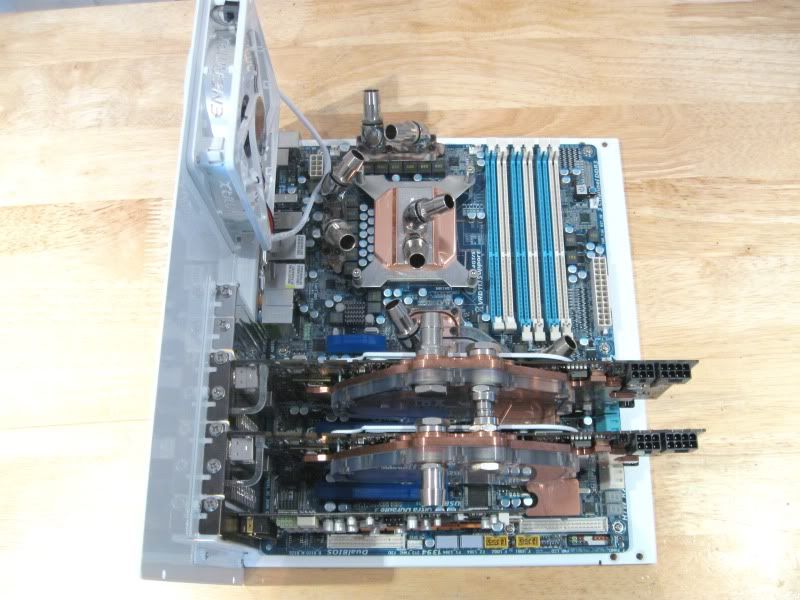
Fitting both GTX's in situ was a bit of a pain as MM have a nasty habit of placing a pop rivet directly in line with the PCI backplates making it tricky to fit the cards into the 16x PCIe slots at the same time. A little bit of 'jiggling' (technical term) and they slotted right in.
I went for a horizontal fitting with the MM Ascension case but for all intents and purposes, the motherboard tray looks exactly the same as one which would be fitted vertical:
I dunno which way to have the fan yet as there are two more 120mm fans on the case roof so for now ignore the fan orientation:
Fitting both GTX's in situ was a bit of a pain as MM have a nasty habit of placing a pop rivet directly in line with the PCI backplates making it tricky to fit the cards into the 16x PCIe slots at the same time. A little bit of 'jiggling' (technical term) and they slotted right in.