dieseldog49
New member
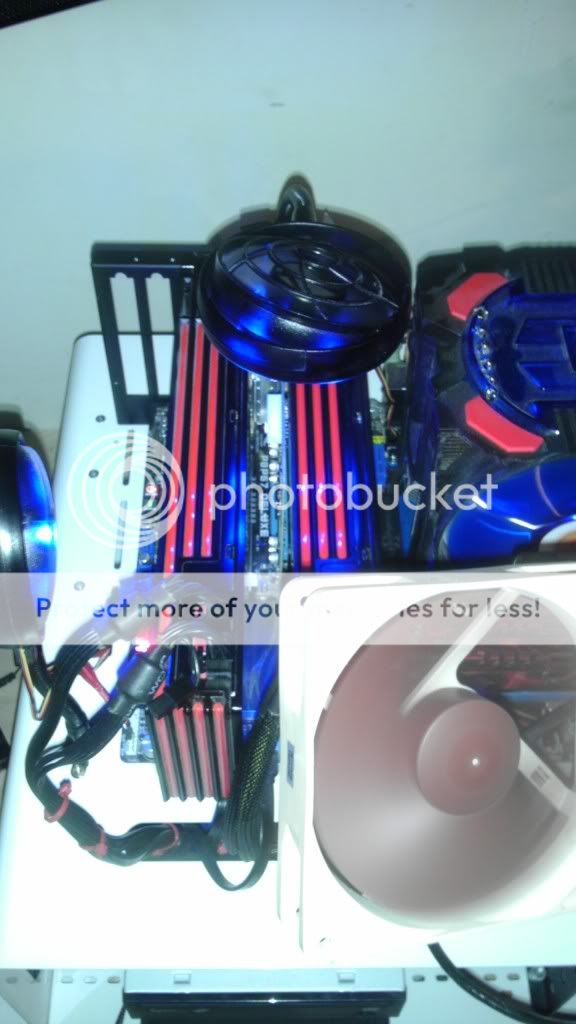
(This is my build which I started about 2 months ago. I am currently planning out the PC layout in Sketchup and I am open to any and all suggestions on design and device placement. Please let me know what you think! I am currently planning out the Watercooling loops and I am considering my radiator options, right now the Phobya 1260 Supernova looks like a pretty good option but to be honest there are so many rads out there these days and I have so much space to work with i would love input on what are going to serve me best in the long run.)
Ok so I have been planning on building a new desk ever since me and my brother in law built me a new PC work bench (Pictured below)
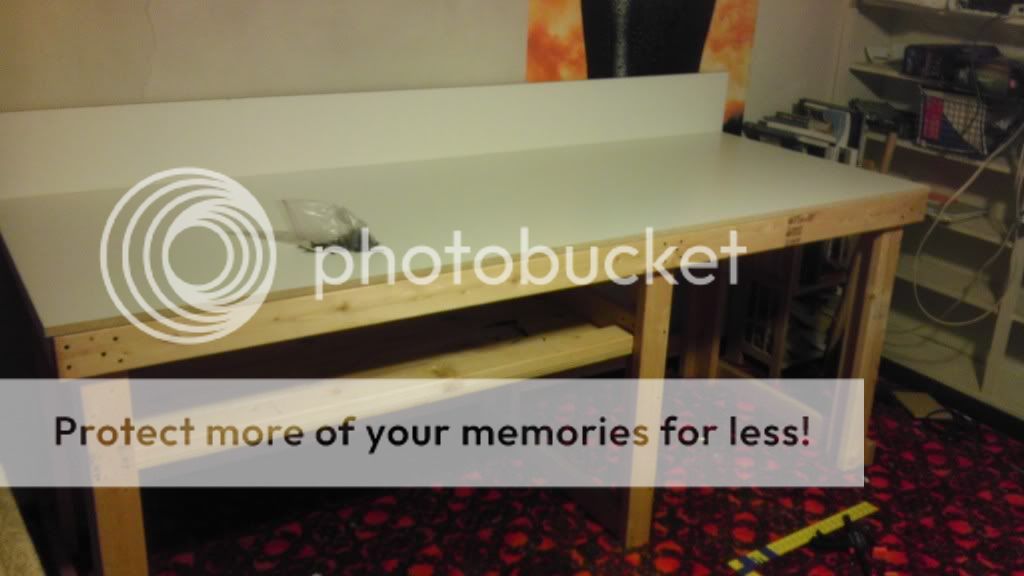
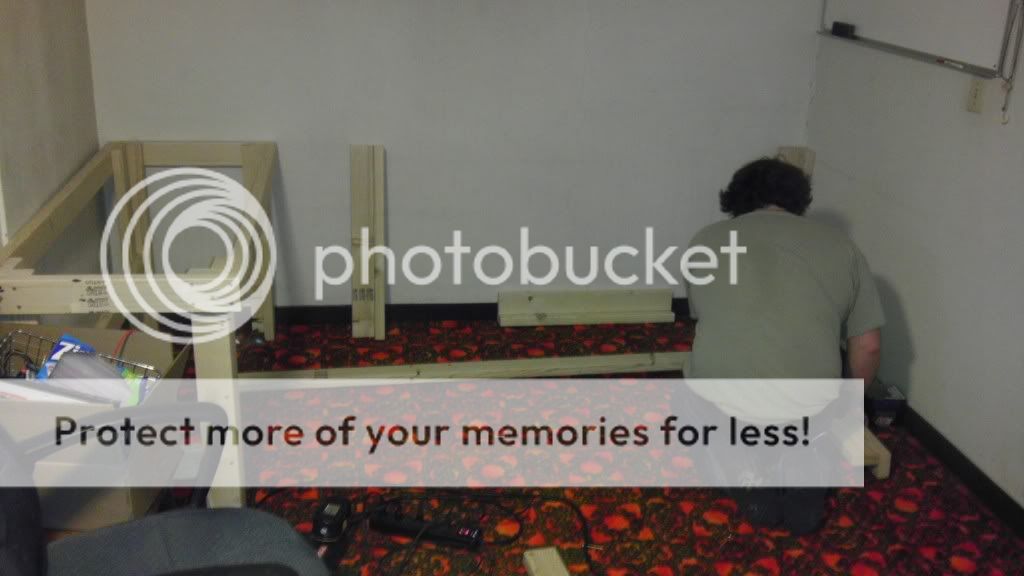
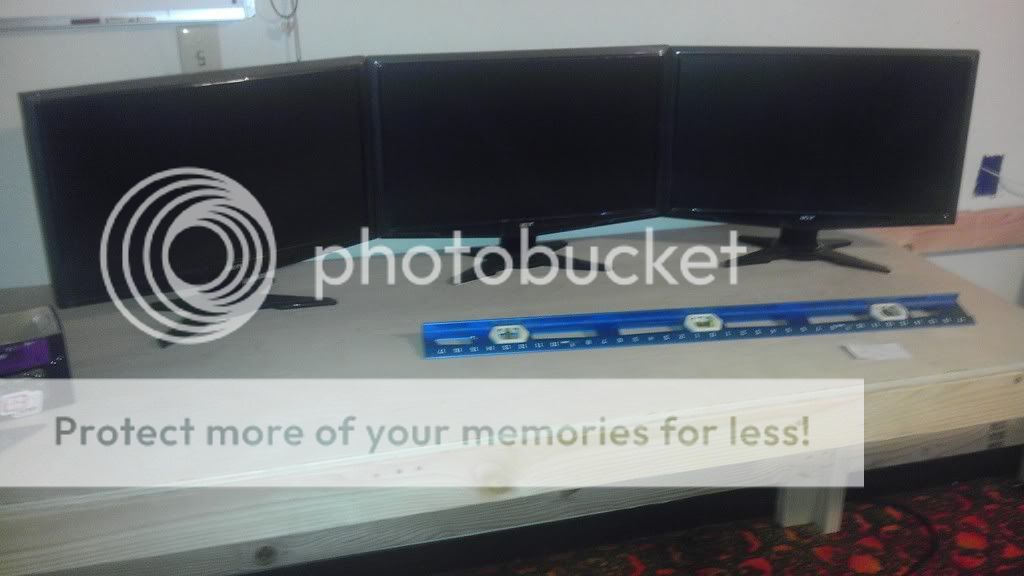
Using Just 2x4's and some melamine we built a super sturdy bench for about $120 and I couldnt be happier with it. Since then I have been looking at my current work/play station with a little bit of disgust, its made up out of 3 seperate desks none of which are exactly the same height. Further more due to my affinity for eyefinity and large PC cases I am finding that my little work nook is getting more and more cramped and cluttered. Heres a pic of the space I am working with please excuse the mess.


So the new plan is to gut the whole thing and create a desk that wraps around the entire area Like so (sorry for the small paint image)

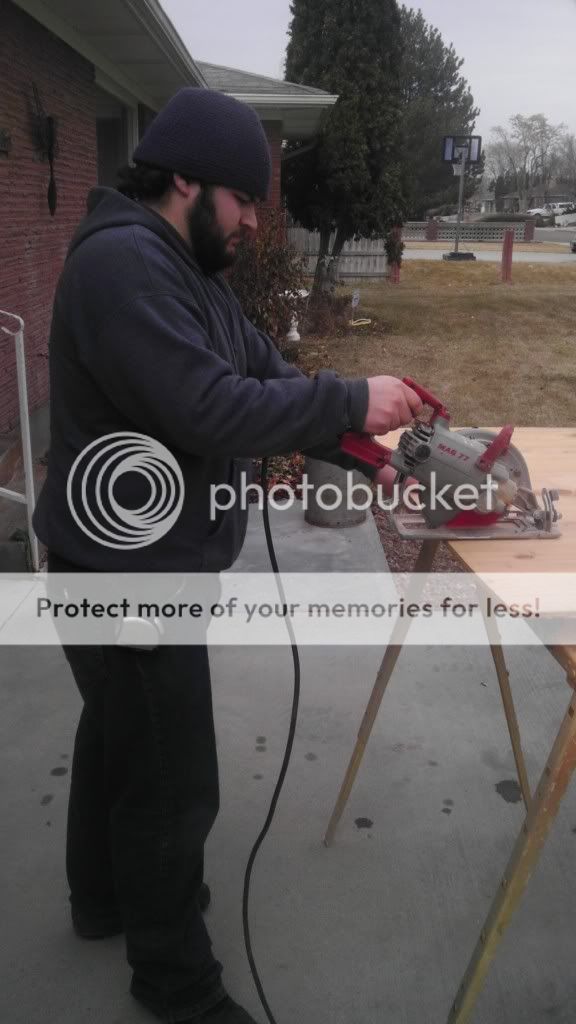
Then I am going to wrap the top of the desk with custom printed Mechwarrior themed vinyl using my wide format digital printer. So on to the construction phase. I have to give a ton of thanks to the two guys working with me (these or their online handles), Talster91 aka my old room mate and Dreyco Valentin who is my brother in law. With out them theres no way I could get these kind of projects done with the quality and speed we do together, We are also building Talster91 a new desk for the gaming rig I helped him build. So here is the start today, we are using birch plywood for the top and kiln dried 2x4's for the frame, using a overlapping design to interlock the tops and frames together. So today we ripped the plywood and tomorrow we will build the frames.
Dreyco
Talster91
Also this arrived today


Day 2
Ok Most of today is dedicated to Talsters desk build Which is specced to be L60xW30 with a 30 inch height
For legs on both desks are a L shape made of two 2x4's screwed together gives great stuctural support.

Next up us cutting and laying out the lower braces and the leg spacing.


When building your own desk its important to have the imagination and vision to know what you want as Talster demonstrates

Next up is setting up the top box


Next up is checking to see if the frame is square.

Damn its a inch out but dont worry theres a easy way to fix that!
Tie Downs are like duct tape for woodworking


Next up is cutting the top to length, we will be anchoring to the top to keep the desk in square.


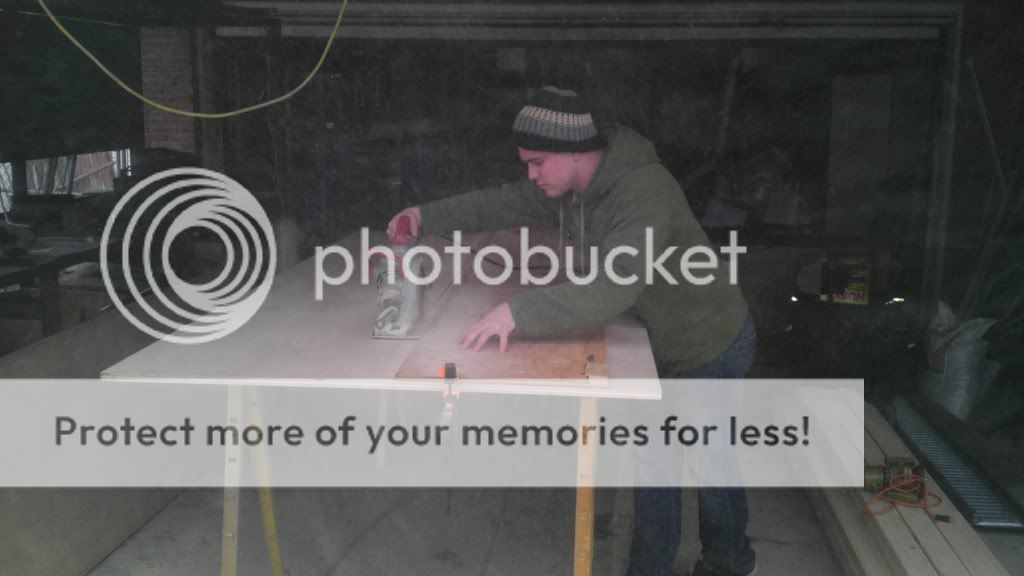
For everything to look good he mapped out his screws and is pre drilling then using a cone bit for pre seating the heads.


Next up is taking a router to all the edges for that smoothed finished look.


Ready for sanding and staining

Also these showed up on my door woo!

Throw some stain on and thats all for today

Day 3
I was down a day more than I expected ( the multi-player demo of Mass Effect 3 may have had something to do with that
 ) Ok so first off I want to thank Dreyco again without him this desk would not have happened and the next stage wouldn't even be possible. Ok down to business, to start with I happened to snag a great deal on a 720p projector which I had been wanting for the launch of ME3 for Xbox 360 (yes I play it on console thats where all my saved games are) so we will be starting there. Parts involved are
Optoma 536 720p 2700 lumen projector
Elite Screen 100 inch 16:9 manual screen
Ceiling Mount For projector
Plan is to recess the screen into the ceiling and then re-route the surround sound and video/console equipment.
First off got to get all electronics out of the room as sheetrock dust is not good for electronics.

Next up is measuring the screen housing and cutting the hole


That done we just put some hooks in the floorboards and time to try a test pull

Threw the projector up and time to see how it looks

Ok that done on to the desk, Cleared out all of the old stuff

With a blank slate its time to get to work

The key to building a desk with lumber like this is to never pre cut, make each cut to the specific spot so its always spot on and you can compensate for imperfections in the wood.

With the first section built (it will be the only complete section with 4 legs each section after this with be missing at least one leg to create a open front for chair and legroom)

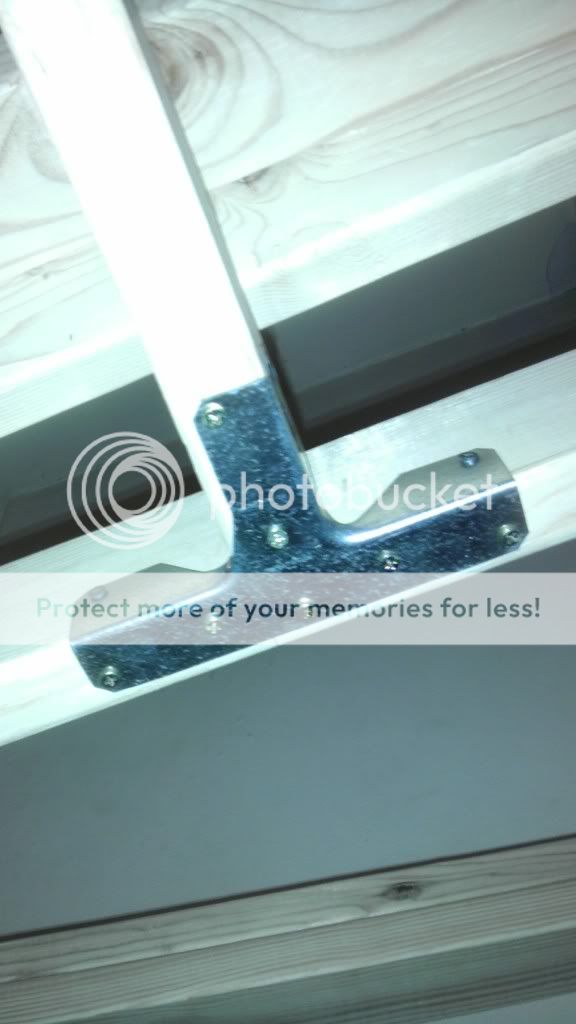
Now we are joining the crossmember with a T bracket
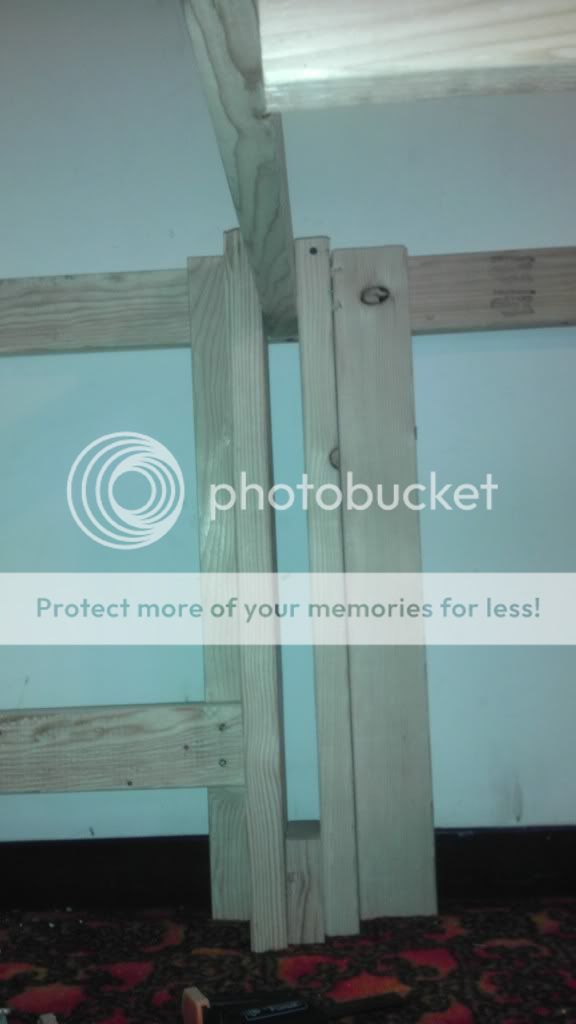
We are double butting our legs for extra support
To limit flex we added a cross support.

Frame is complete

Cutting the tops to fit.

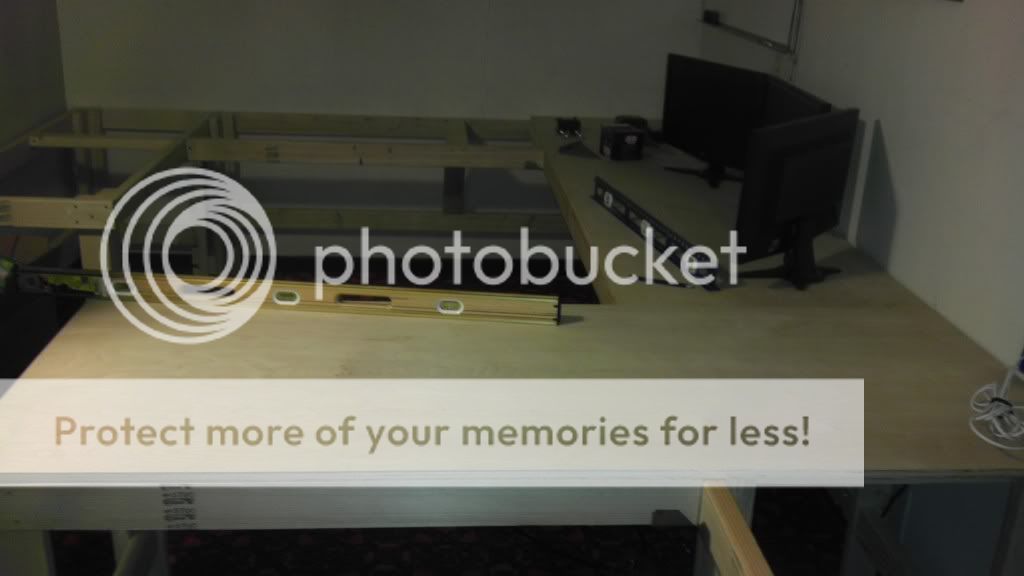
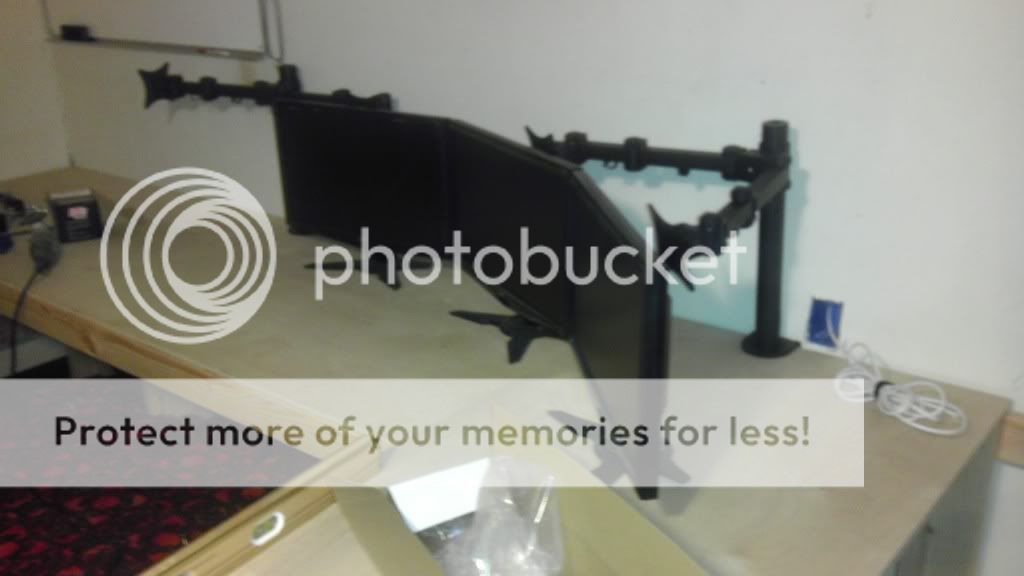
Test fitting the tops and monitors
Next up we mark out the monitor slots and our wire slots


The mounts slide into the slots and get 4 lag bolts into the 2x4 below


Next up we router the holes and screw down the top.


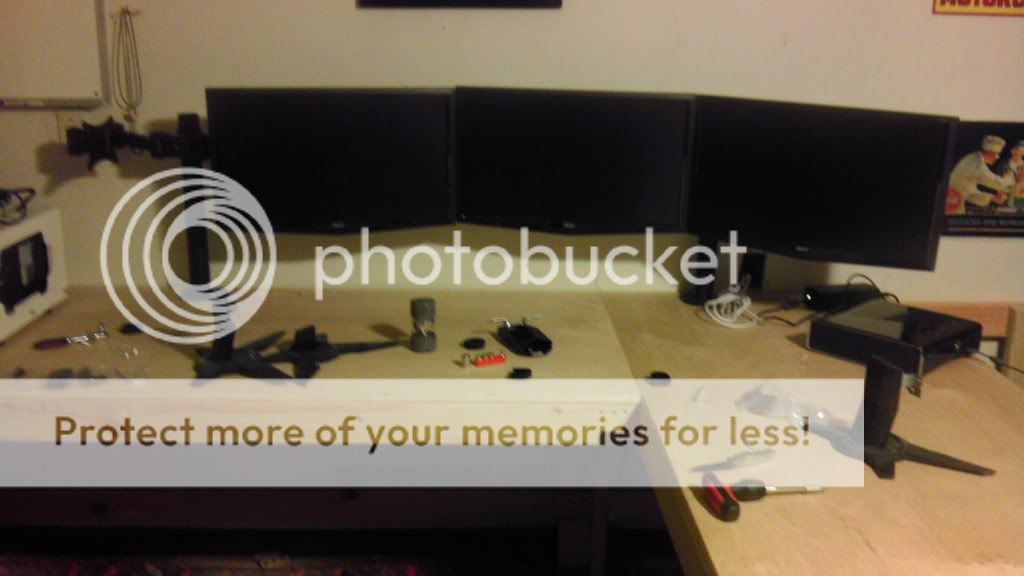
Time to start putting things back together


The next stage is the vinyl top but I have to wait until we change our machine out next week also the other part of the project is being drawn up in CAD I will post something up soon enough.
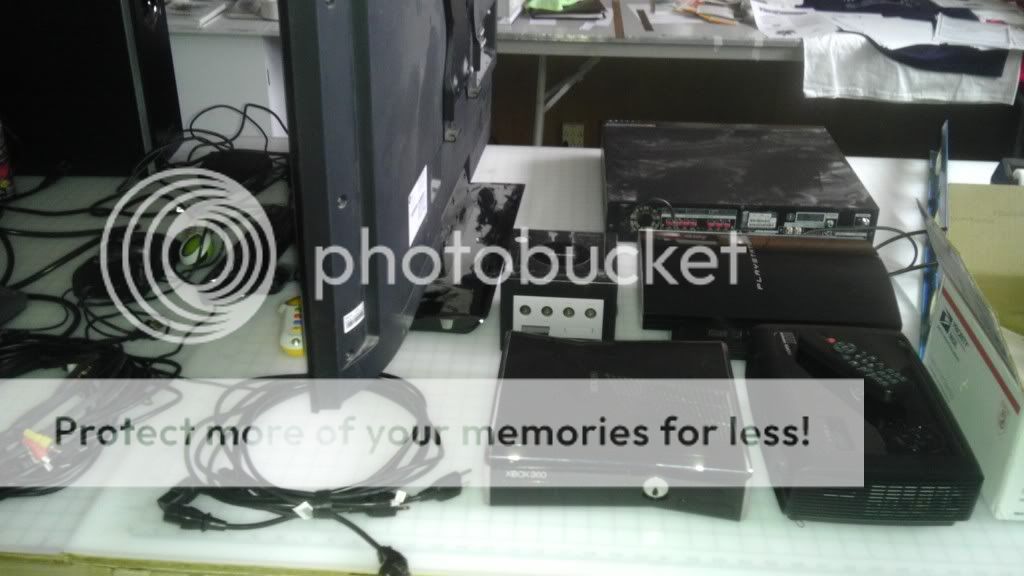
Ok so the next phase in the build involves incorporating a built in gaming PC plus my surround sound, Xbox360 and PS3 plus cooling all of it in a efficient manner. but in the mean time I scrounged a WinTV Card from Haupage off a old PC and ran the antenna and bam I have a DVR and HDTV to my projector!

Also my longer cables came in so cleaner desk!

You will notice Craig Feurgeson from the late late show (DVR FTW!)
Ok so when I installed my projector I was left with a 42 inch Vizio 1080p LCD with no where to go, I sure as hell wasn't going to sell it as I would eat my shorts so I decided I didn't need a whiteboard anymore and used a old wll mount I had kicking around and BOOM

It kinda feels like I am living in a sports bar now.
Sorry for the day late update my new wide format printer showed up a day early so it's been a little crazy here but it means vinyl day is moving ever closer (gotta get some actual work done with it first though) here is a preview of some stuff to come

This just came in I will be posting pictures and a full review of it later
Annnnd then theres this addition to my monitor setup

Small update, my new keys showed up and I am lovin 'em, gonna try and get some MW:LL in tonight so I can get to work on my quickfire Review.


Loving having a nuke key for my delete
Ok well my buddy is running behind with the CAD work at the moment so I am taking a whack at it. Using Free CAD this is what I got together tonight (I have never used any form of CAD before)

Basic model of the area of the desk I am working with the green area will be hinged and the entire PC will be mounted underneath trapdoor style.I have mobo tray and back I salvaged from a LanCool Case.


This will be mounted to the bottom of the highlighted piece of desktop. More CAD stuff to come as soon as I figure out how to make it

Also this showed up today

(wish there was a bigger smiley option.)
Just realised that I haven't posted up any good pics of the area that I will be installing the PC into. Here it is the area is about 30x19.25 on the outer dimensions.


The goal is to have 2 shelves for the surround sound, XBOX 360 and PS3 with fans cooling them and the computer hanging above
A little better CAD model the bottom shelf is a piece of ply thats already there, while the other 2 with be a rubber coated wire mesh for maximum airflow. Bottom is Surround sound Head Unit then Xbox360 Slim then Big fat oldschool PS3 next this to work on is doors, fans and PC placement.

Small update
My 2x4 HDMI Matrix Showed up in the mail yesterday, this little box of awesome will let me switch between 4 different HDMI inputs and out put them to either the 42 inch LCD or my projector or both at the same time! The reason for a device like this is that I plan on watching more stuff on my LCD than projector as much as possible due to the significantly shorter lifespan of the projectors bulb.
 ]
]
Next up is my XFX 6950 2gb showed up today! Its been flashed to a 6970 Bios and although used is in like new condition. I moved my sapphire down to the next slot and slid the PCTV card inbetween and presto enough power to rock my triple monitor setup properly. I added some extra fans to make sure cooling doesn't become an issue.


Now this is not the hardware I plan on mounting inside the desk its just my benching/review setup. For the Desk build I am hoping for a 2011 or AMD build so I will have enough PCI-E lanes for all of my needs.
Ok New update, while I am still wrangling with Cad I decided to start working on the layout of the custom printed vinyl layout for my desk top. As I have said before it will be Mech Warrior themed as that is my favorite gaming franchise and with the advent not or 2 but 4 new Mechwarrior games in the works I couldn't think of anything more appropriate. So right now I am going to be doing some test runs with the artwork and sizing for the areas I have to work with. First up I have the Map of the entire Inner Sphere which I got from the MechWarrior Online art page. I blew it up to 30' tall by 47' and printed it on some heavy duty paper, this is just to see how the artwork looks at this resolution I have not vectored or tweaked it yet but its always important to test print as you never know what you aren't seeing on your monitor.
Doing a rough trim.


Next tape it down to let it stretch a little and offgas.
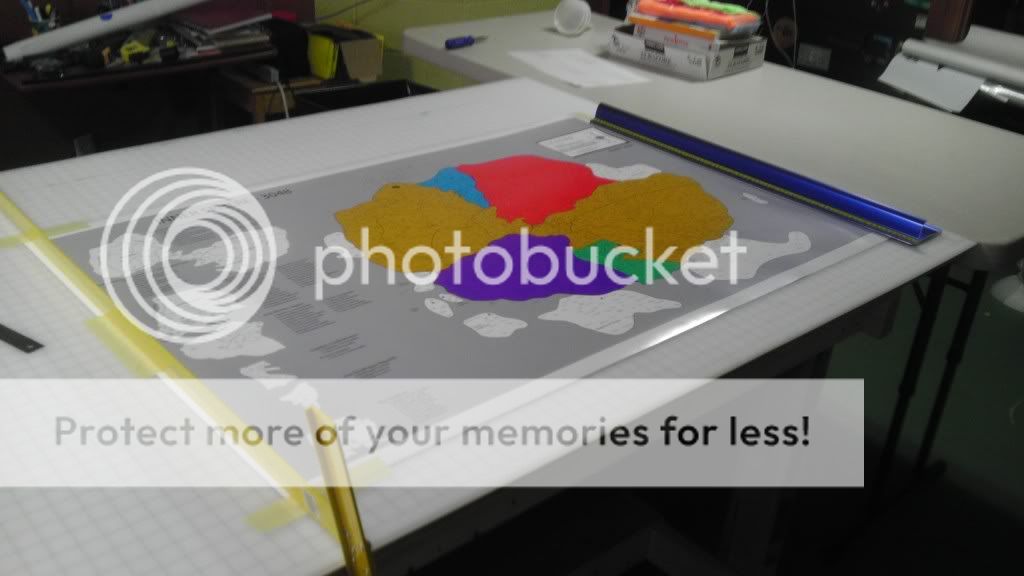
This is the area I want to put the map on.

Do the final trim.
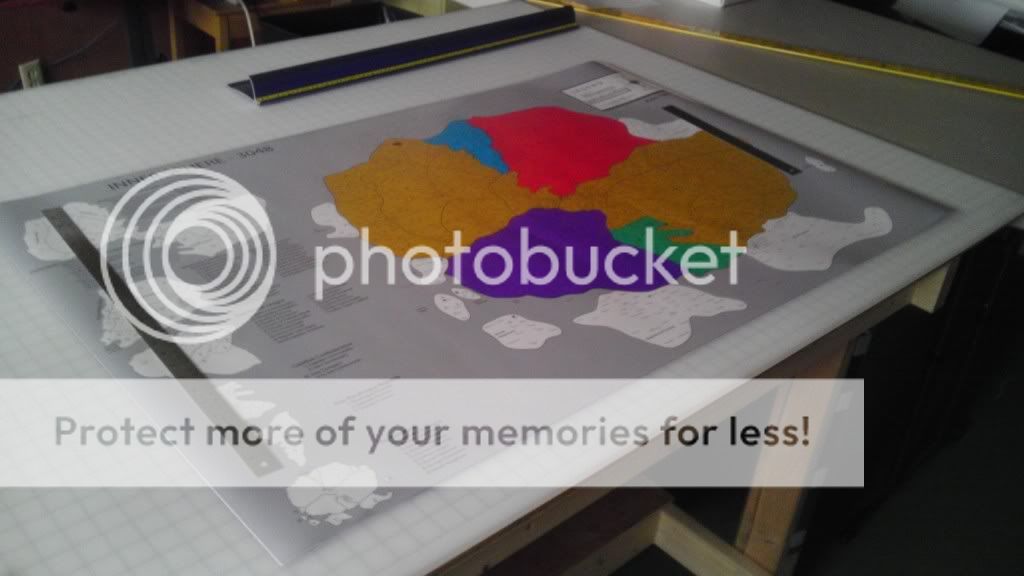
And check how it lays out.


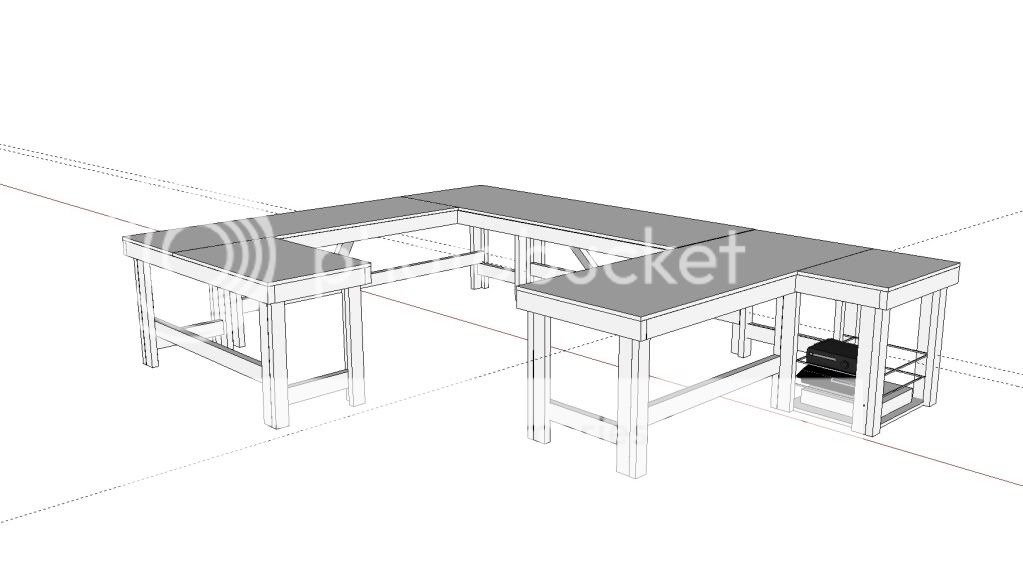
Ok I am getting alot of pm's for a update so here is what I have so for in Sketchup (I switched from free CAD due to the huge amount of models available in sketchup) I will be using either a bench hinge or piano hinge (I am open to suggestions) The model is missing several components at the moment, I couldnt find the right fittings to go between the vid cards and I have no idea how to make tubing yet (still new with digital design stuff) I am using 7970's with EK blocks but that could change depending on parts sourcing ect... I am going to do the entire desk and then make the cad file available to anyone who wants it. The plan is to run a long loop to the radiator with enough flex for it to open or create a joint with 2 off valves and a quick disconnect in between. I am open to idea's for alternate whats to setup the WC loop or any suggestions in general, I want this to be as awesome as possible. I am also going to try to get sponsors for the next stage of the build so hopefully I can take this build up another notch!
Feel free to post questions and critiques and thanks for all of the response guys!


I made the Rog mod roundup, soooo cool! http://rog.asus.com/97282012/news/march-forum-mods-roundup/
Ok so I pretty much have the Sketchup model for the Desk itself done here are some screen shots, now if anyone would like to point me in the right direction for a place to host the Sketchup file I would be happy to make it available to anyone who wants to build something similar.
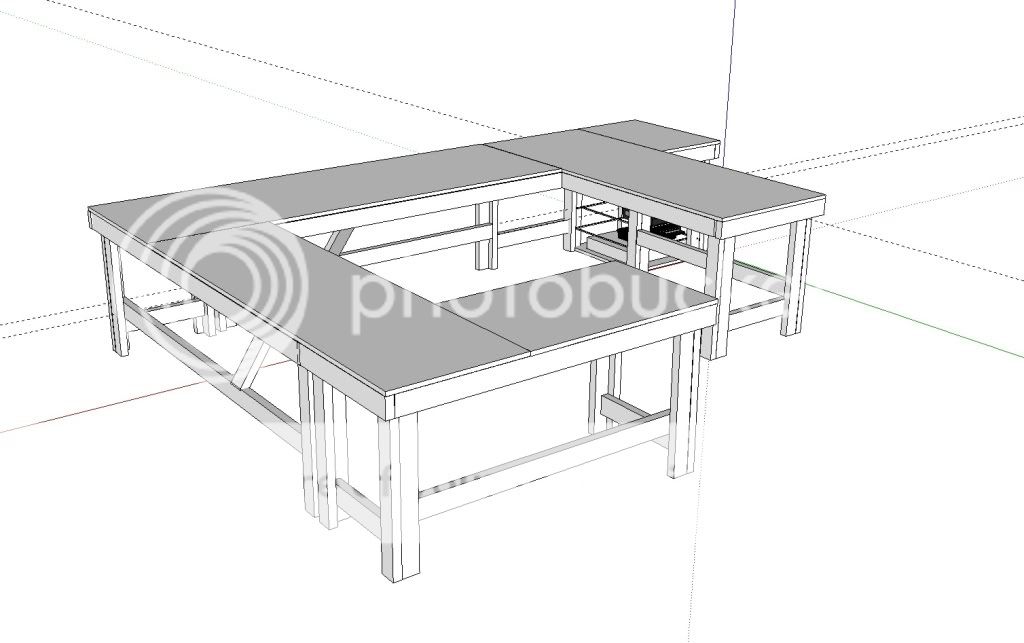
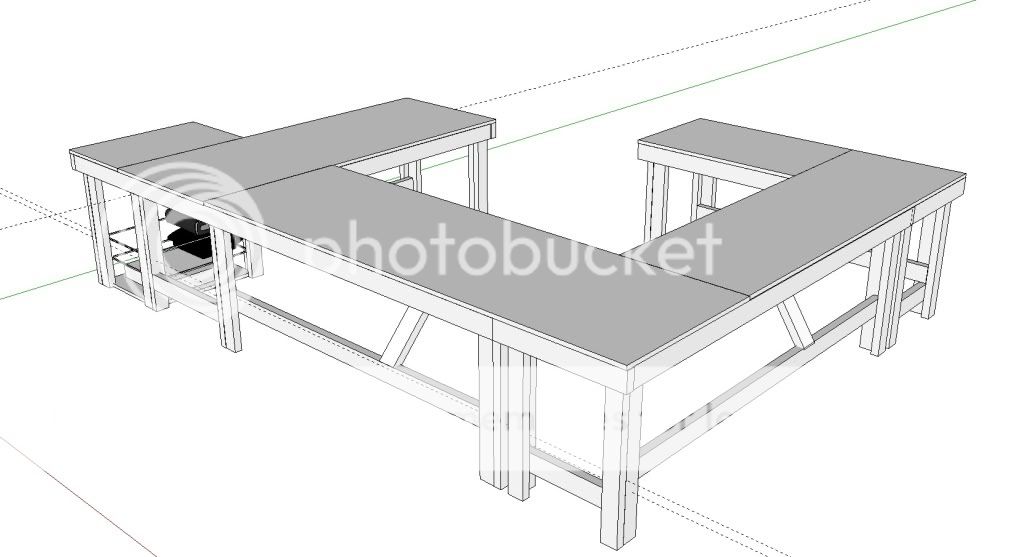


Here is the desk sketchup file, I couldn't upload it to 3D warehouse for some reason so its on 4shared.com http://www.4shared.com/file/WZR7EdOJ/desknoPCparts.html feel free to post any questions or pm me.
More coming soon.
Ok so I have been planning on building a new desk ever since me and my brother in law built me a new PC work bench (Pictured below)
Using Just 2x4's and some melamine we built a super sturdy bench for about $120 and I couldnt be happier with it. Since then I have been looking at my current work/play station with a little bit of disgust, its made up out of 3 seperate desks none of which are exactly the same height. Further more due to my affinity for eyefinity and large PC cases I am finding that my little work nook is getting more and more cramped and cluttered. Heres a pic of the space I am working with please excuse the mess.
So the new plan is to gut the whole thing and create a desk that wraps around the entire area Like so (sorry for the small paint image)
Then I am going to wrap the top of the desk with custom printed Mechwarrior themed vinyl using my wide format digital printer. So on to the construction phase. I have to give a ton of thanks to the two guys working with me (these or their online handles), Talster91 aka my old room mate and Dreyco Valentin who is my brother in law. With out them theres no way I could get these kind of projects done with the quality and speed we do together, We are also building Talster91 a new desk for the gaming rig I helped him build. So here is the start today, we are using birch plywood for the top and kiln dried 2x4's for the frame, using a overlapping design to interlock the tops and frames together. So today we ripped the plywood and tomorrow we will build the frames.
Dreyco
Talster91
Also this arrived today
Day 2
Ok Most of today is dedicated to Talsters desk build Which is specced to be L60xW30 with a 30 inch height
For legs on both desks are a L shape made of two 2x4's screwed together gives great stuctural support.
Next up us cutting and laying out the lower braces and the leg spacing.
When building your own desk its important to have the imagination and vision to know what you want as Talster demonstrates
Next up is setting up the top box
Next up is checking to see if the frame is square.
Damn its a inch out but dont worry theres a easy way to fix that!
Tie Downs are like duct tape for woodworking
Next up is cutting the top to length, we will be anchoring to the top to keep the desk in square.
For everything to look good he mapped out his screws and is pre drilling then using a cone bit for pre seating the heads.
Next up is taking a router to all the edges for that smoothed finished look.
Ready for sanding and staining
Also these showed up on my door woo!
Throw some stain on and thats all for today
Day 3
I was down a day more than I expected ( the multi-player demo of Mass Effect 3 may have had something to do with that
Optoma 536 720p 2700 lumen projector
Elite Screen 100 inch 16:9 manual screen
Ceiling Mount For projector
Plan is to recess the screen into the ceiling and then re-route the surround sound and video/console equipment.
First off got to get all electronics out of the room as sheetrock dust is not good for electronics.
Next up is measuring the screen housing and cutting the hole
That done we just put some hooks in the floorboards and time to try a test pull
Threw the projector up and time to see how it looks
Ok that done on to the desk, Cleared out all of the old stuff
With a blank slate its time to get to work
The key to building a desk with lumber like this is to never pre cut, make each cut to the specific spot so its always spot on and you can compensate for imperfections in the wood.
With the first section built (it will be the only complete section with 4 legs each section after this with be missing at least one leg to create a open front for chair and legroom)
Now we are joining the crossmember with a T bracket
We are double butting our legs for extra support
To limit flex we added a cross support.
Frame is complete
Cutting the tops to fit.
Test fitting the tops and monitors
Next up we mark out the monitor slots and our wire slots
The mounts slide into the slots and get 4 lag bolts into the 2x4 below
Next up we router the holes and screw down the top.
Time to start putting things back together
The next stage is the vinyl top but I have to wait until we change our machine out next week also the other part of the project is being drawn up in CAD I will post something up soon enough.
Ok so the next phase in the build involves incorporating a built in gaming PC plus my surround sound, Xbox360 and PS3 plus cooling all of it in a efficient manner. but in the mean time I scrounged a WinTV Card from Haupage off a old PC and ran the antenna and bam I have a DVR and HDTV to my projector!
Also my longer cables came in so cleaner desk!
You will notice Craig Feurgeson from the late late show (DVR FTW!)
Ok so when I installed my projector I was left with a 42 inch Vizio 1080p LCD with no where to go, I sure as hell wasn't going to sell it as I would eat my shorts so I decided I didn't need a whiteboard anymore and used a old wll mount I had kicking around and BOOM
It kinda feels like I am living in a sports bar now.
Sorry for the day late update my new wide format printer showed up a day early so it's been a little crazy here but it means vinyl day is moving ever closer (gotta get some actual work done with it first though) here is a preview of some stuff to come
This just came in I will be posting pictures and a full review of it later
Annnnd then theres this addition to my monitor setup
Small update, my new keys showed up and I am lovin 'em, gonna try and get some MW:LL in tonight so I can get to work on my quickfire Review.
Loving having a nuke key for my delete
Ok well my buddy is running behind with the CAD work at the moment so I am taking a whack at it. Using Free CAD this is what I got together tonight (I have never used any form of CAD before)
Basic model of the area of the desk I am working with the green area will be hinged and the entire PC will be mounted underneath trapdoor style.I have mobo tray and back I salvaged from a LanCool Case.
This will be mounted to the bottom of the highlighted piece of desktop. More CAD stuff to come as soon as I figure out how to make it
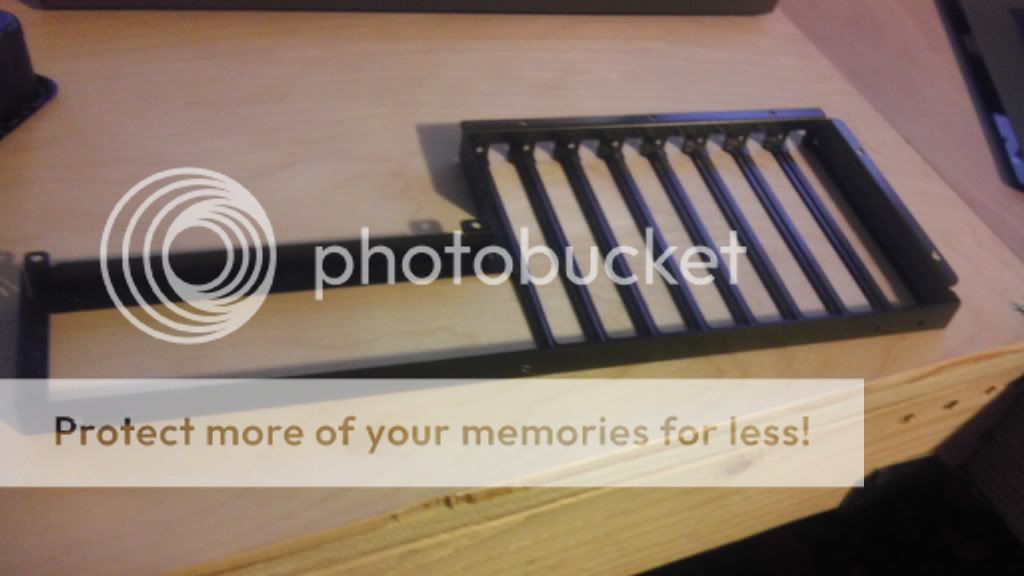
Also this showed up today
Just realised that I haven't posted up any good pics of the area that I will be installing the PC into. Here it is the area is about 30x19.25 on the outer dimensions.
The goal is to have 2 shelves for the surround sound, XBOX 360 and PS3 with fans cooling them and the computer hanging above
A little better CAD model the bottom shelf is a piece of ply thats already there, while the other 2 with be a rubber coated wire mesh for maximum airflow. Bottom is Surround sound Head Unit then Xbox360 Slim then Big fat oldschool PS3 next this to work on is doors, fans and PC placement.
Small update
My 2x4 HDMI Matrix Showed up in the mail yesterday, this little box of awesome will let me switch between 4 different HDMI inputs and out put them to either the 42 inch LCD or my projector or both at the same time! The reason for a device like this is that I plan on watching more stuff on my LCD than projector as much as possible due to the significantly shorter lifespan of the projectors bulb.
Next up is my XFX 6950 2gb showed up today! Its been flashed to a 6970 Bios and although used is in like new condition. I moved my sapphire down to the next slot and slid the PCTV card inbetween and presto enough power to rock my triple monitor setup properly. I added some extra fans to make sure cooling doesn't become an issue.
Now this is not the hardware I plan on mounting inside the desk its just my benching/review setup. For the Desk build I am hoping for a 2011 or AMD build so I will have enough PCI-E lanes for all of my needs.
Ok New update, while I am still wrangling with Cad I decided to start working on the layout of the custom printed vinyl layout for my desk top. As I have said before it will be Mech Warrior themed as that is my favorite gaming franchise and with the advent not or 2 but 4 new Mechwarrior games in the works I couldn't think of anything more appropriate. So right now I am going to be doing some test runs with the artwork and sizing for the areas I have to work with. First up I have the Map of the entire Inner Sphere which I got from the MechWarrior Online art page. I blew it up to 30' tall by 47' and printed it on some heavy duty paper, this is just to see how the artwork looks at this resolution I have not vectored or tweaked it yet but its always important to test print as you never know what you aren't seeing on your monitor.
Doing a rough trim.
Next tape it down to let it stretch a little and offgas.
This is the area I want to put the map on.
Do the final trim.
And check how it lays out.
Ok I am getting alot of pm's for a update so here is what I have so for in Sketchup (I switched from free CAD due to the huge amount of models available in sketchup) I will be using either a bench hinge or piano hinge (I am open to suggestions) The model is missing several components at the moment, I couldnt find the right fittings to go between the vid cards and I have no idea how to make tubing yet (still new with digital design stuff) I am using 7970's with EK blocks but that could change depending on parts sourcing ect... I am going to do the entire desk and then make the cad file available to anyone who wants it. The plan is to run a long loop to the radiator with enough flex for it to open or create a joint with 2 off valves and a quick disconnect in between. I am open to idea's for alternate whats to setup the WC loop or any suggestions in general, I want this to be as awesome as possible. I am also going to try to get sponsors for the next stage of the build so hopefully I can take this build up another notch!
Feel free to post questions and critiques and thanks for all of the response guys!
I made the Rog mod roundup, soooo cool! http://rog.asus.com/97282012/news/march-forum-mods-roundup/
Ok so I pretty much have the Sketchup model for the Desk itself done here are some screen shots, now if anyone would like to point me in the right direction for a place to host the Sketchup file I would be happy to make it available to anyone who wants to build something similar.
Here is the desk sketchup file, I couldn't upload it to 3D warehouse for some reason so its on 4shared.com http://www.4shared.com/file/WZR7EdOJ/desknoPCparts.html feel free to post any questions or pm me.
More coming soon.