Alexander Lee
New member
UPDATE – Design changes! 04/06/2012
Well it has been less than a week since I finished the first designs for the desk and now I have been working to improve them a bit more. I have also come up with a colour scheme which is black, red and white. This colour scheme will mean that I will need to paint some fans into a red, black and white colour combination which could be an interesting project in itself as I plan to have around 20 fans in this build!
Today this update includes the new design which has more straight edges and more glass so that I can get as much light onto the components as possible without having to use a ridiculous amount of LEDs. The plan is for this build to be subtle and look really without a huge amount of LEDs inside it. I am hoping that the ambient lighting behind the monitor will be very subtle and not a very bright colour, in other words, just ambient lighting!
Hopefully the colour scheme will give people some ideas for some names for the project; I hope to get the competition underway shortly in the competitions thread. I have had a very good suggestion already from ‘the orange terminator’ but would like to hear all of your suggestions before I make the very important decision! Edit: We have now come up with a name but will be running some sort of competition to give one of you a prize... I will probably run a random number competition in the competitions thread!

Now onto the actual designs!
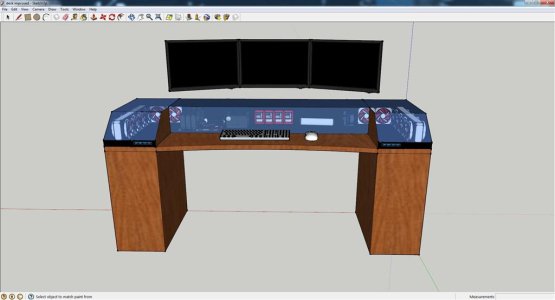
This first picture shows an updated view of the front of the desk. I have now added support for optical bay drives where I will have the fan controllers. Where these are mounted will be a front plate made of aluminium powder coated black.
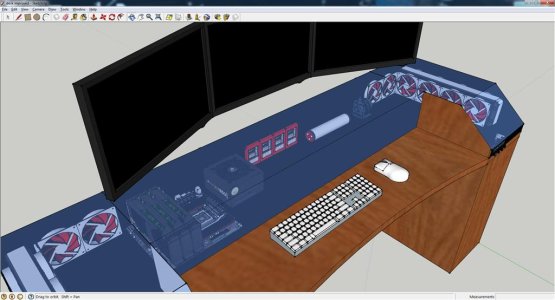
The next screen shot is of the main area of the build, I am not sure if I like the power supply placement though, I would like to move it but not really sure where it will fit in well! I think that that picture gives you a better Idea of the colour scheme I am thinking of for this project. It is likely that the hardware placement in there will change but I was more focusing on trying to get the design and shape of the desk into a position where I was happy with it. As you can see from the bottom of this screen shot I have added a white powder coated piece of aluminium on the inside opposite the radiator to balance the colours a bit more within the build. I will do a more detailed map of hardware placement once I have got everything out of my current pc and had the chance to model it out on my desk to see how things could fit together.
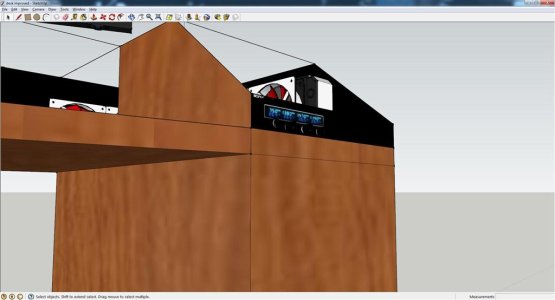
My next image shows a close up view of the fan controller mount and the aluminium plate that it will be mounted onto. The plan is to go for a wooden look on the outside but all aluminium on the inside around the components. This will hopefully give the impression that it is a solid piece of furniture which it should be!
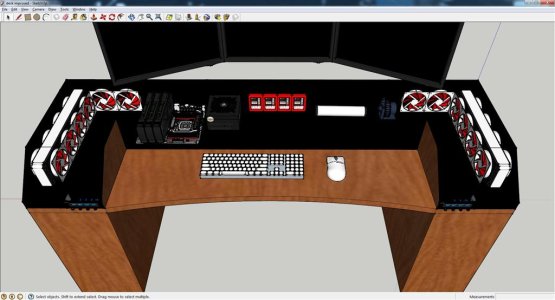
This is just another shot of the desk and the components inside it. I quite like the effect the fans, the SSDs and the motherboard give and think that with some white coolant in the tubing for the loop on top of the black aluminium it will hopefully look quite good.
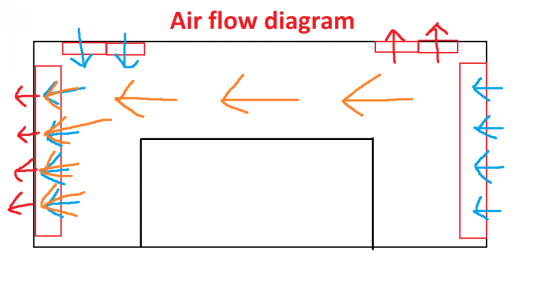
I have quickly sketched out an air flow diagram to show how I think the air flow should move through the desk. Hopefully this will help to explain why I have put the fans where they are.
A fairly long update but thank you for keeping on reading to this point! I would love to hear your suggestions for how I could improve even the smallest of details about this as there is a lot I need to plan and design a lot and any suggestions are very much appreciated. Also, please let me know whether you prefer this design with the straight edges, or the older design with the more curvy edges. If there is enough debate I may even start a poll!
 Keep your eyes open for the competition which will be running in the next few days and I look forward to hearing your naming suggestions!
 The next update will be within the next few days.

Well it has been less than a week since I finished the first designs for the desk and now I have been working to improve them a bit more. I have also come up with a colour scheme which is black, red and white. This colour scheme will mean that I will need to paint some fans into a red, black and white colour combination which could be an interesting project in itself as I plan to have around 20 fans in this build!
Today this update includes the new design which has more straight edges and more glass so that I can get as much light onto the components as possible without having to use a ridiculous amount of LEDs. The plan is for this build to be subtle and look really without a huge amount of LEDs inside it. I am hoping that the ambient lighting behind the monitor will be very subtle and not a very bright colour, in other words, just ambient lighting!
Hopefully the colour scheme will give people some ideas for some names for the project; I hope to get the competition underway shortly in the competitions thread. I have had a very good suggestion already from ‘the orange terminator’ but would like to hear all of your suggestions before I make the very important decision! Edit: We have now come up with a name but will be running some sort of competition to give one of you a prize... I will probably run a random number competition in the competitions thread!
Now onto the actual designs!
This first picture shows an updated view of the front of the desk. I have now added support for optical bay drives where I will have the fan controllers. Where these are mounted will be a front plate made of aluminium powder coated black.

The next screen shot is of the main area of the build, I am not sure if I like the power supply placement though, I would like to move it but not really sure where it will fit in well! I think that that picture gives you a better Idea of the colour scheme I am thinking of for this project. It is likely that the hardware placement in there will change but I was more focusing on trying to get the design and shape of the desk into a position where I was happy with it. As you can see from the bottom of this screen shot I have added a white powder coated piece of aluminium on the inside opposite the radiator to balance the colours a bit more within the build. I will do a more detailed map of hardware placement once I have got everything out of my current pc and had the chance to model it out on my desk to see how things could fit together.

My next image shows a close up view of the fan controller mount and the aluminium plate that it will be mounted onto. The plan is to go for a wooden look on the outside but all aluminium on the inside around the components. This will hopefully give the impression that it is a solid piece of furniture which it should be!

This is just another shot of the desk and the components inside it. I quite like the effect the fans, the SSDs and the motherboard give and think that with some white coolant in the tubing for the loop on top of the black aluminium it will hopefully look quite good.

I have quickly sketched out an air flow diagram to show how I think the air flow should move through the desk. Hopefully this will help to explain why I have put the fans where they are.

A fairly long update but thank you for keeping on reading to this point! I would love to hear your suggestions for how I could improve even the smallest of details about this as there is a lot I need to plan and design a lot and any suggestions are very much appreciated. Also, please let me know whether you prefer this design with the straight edges, or the older design with the more curvy edges. If there is enough debate I may even start a poll!

