You are using an out of date browser. It may not display this or other websites correctly.
You should upgrade or use an alternative browser.
You should upgrade or use an alternative browser.
HELIOS (Caselabs SMH10 | black/copper | EVGA SR-2 | Geforce Titan) - by alpenwasser
- Thread starter alpenwasser
- Start date
spazgadget
New member
If only I had the money...
alpenwasser
New member
Got great expectations for this build - holy crap dude
I shall do my utmost to live up to those expectations.
This is one amazing build of what I read and see so far, I'm mad jelly
Hehe, thank you for the kind words
")
If only I had the money...
Yeah I'm pretty much strapped by now. If anything major goes wrong I'll be in
big trouble. My biggest nightmare is the CPUs or the M/B breaking. It will be
quite tricky to get another SR-2 at this point, and the CPUs were a steal from
eBay that's unlikely to come around again (new in box, retail version, for
~800 USD each). And since I've bought two CPU blocks, two RAM blocks and
a M/B block (which alone was about 140 GBP) changing to a different platform
would leave me with an enormous dead investment.
Oh dear god I'm getting a flight of panic just thinking about it :blink:
Please dear gods of electronics protect my components :sad:
:notworthy:
Lystfiskern
New member
¤voice from a far distant void high up above¤
Have peace in your heart my child and you shall find
equal peace within your soul.
breathe in .......... breathe out
wax on - wax off
Best regards
Miyagi San
woooooot
Have peace in your heart my child and you shall find
equal peace within your soul.
breathe in .......... breathe out
wax on - wax off
Best regards
Miyagi San
woooooot
Last edited:
alpenwasser
New member
¤voice from a far distant void high up above¤
Have peace in your heart my child and you shall find
equal peace within your soul.
breathe in .......... breathe out
wax on - wax off
Best regards
Miyagi San
woooooot
I am now with equal measure terrified and relaxed (ok, maybe slightly more
relaxed than terrified) :lol:
Lystfiskern
New member
sweet - my work here is done for now
alpenwasser
New member
sweet - my work here is done for now
:lol:
Love Caselabs and this build is going to be epic!
Yes they truly are epic. I know that word gets used a bit inflationary but
for Caselabs' products it really is appropriate.
Ohhhh my...all that rad :dribble:
I thought you might like this
")
can i 'borrow' your titan please??
Well, sure you can, for a fee :lol:
I know, technically that's not borrowing, but technically 'borrowing' is not
borrowing either
seriously though...looks epic man, cant wait to see it complete
You and me both, my friend.
MrKambo
New member
Well, sure you can, for a fee :lol:
i wanted to borrow for the benching...ill lend you the 7970's in exchange
alpenwasser
New member
i wanted to borrow for the benching...ill lend you the 7970's in exchange
7970's, as in plural? Hehe, that's probably not even too bad a deal,
depending on what I do with them (not sure how they perform at BOINC)
I've got all my fingers and toes crossed for you bro, hoping everything works.
EVGA should stand behind their products though they are usually really good
Yeah it's still under warranty until 2014 (the 10 year package was not available
back then here
 ). Also, even if they say it falls under warranty, whether
or not they still have some to replace mine is another issue altogether.
The thing is it's been in storage for quite a long time and I've moved twice
since then. But I have done a test run with 1 CPU and it powered up and
posted.
So for now I'm more worried about the second CPU or screwing something
up myself (or something else going wrong). Although since the second CPU
is still in a sealed (and intact) retail package it should probably be fine.
Thanks for the support, guys!
alpenwasser
New member
New Workshop
[size=+2]New Workshop[/size]
Alright, I mentioned this in a previous post. I've started to make a proper, albeit
not huge, workshop in our apartment with my dad over the weekend. Since
much work for this rig (and for others *hinthint* ) will be done here, I thought
it appropriate to post some info about this undertaking in this thread.
[size=+1]The Tools[/size]
My dad used to be an engineer in construction, and we still have a lot of tools
from back then. :rock:
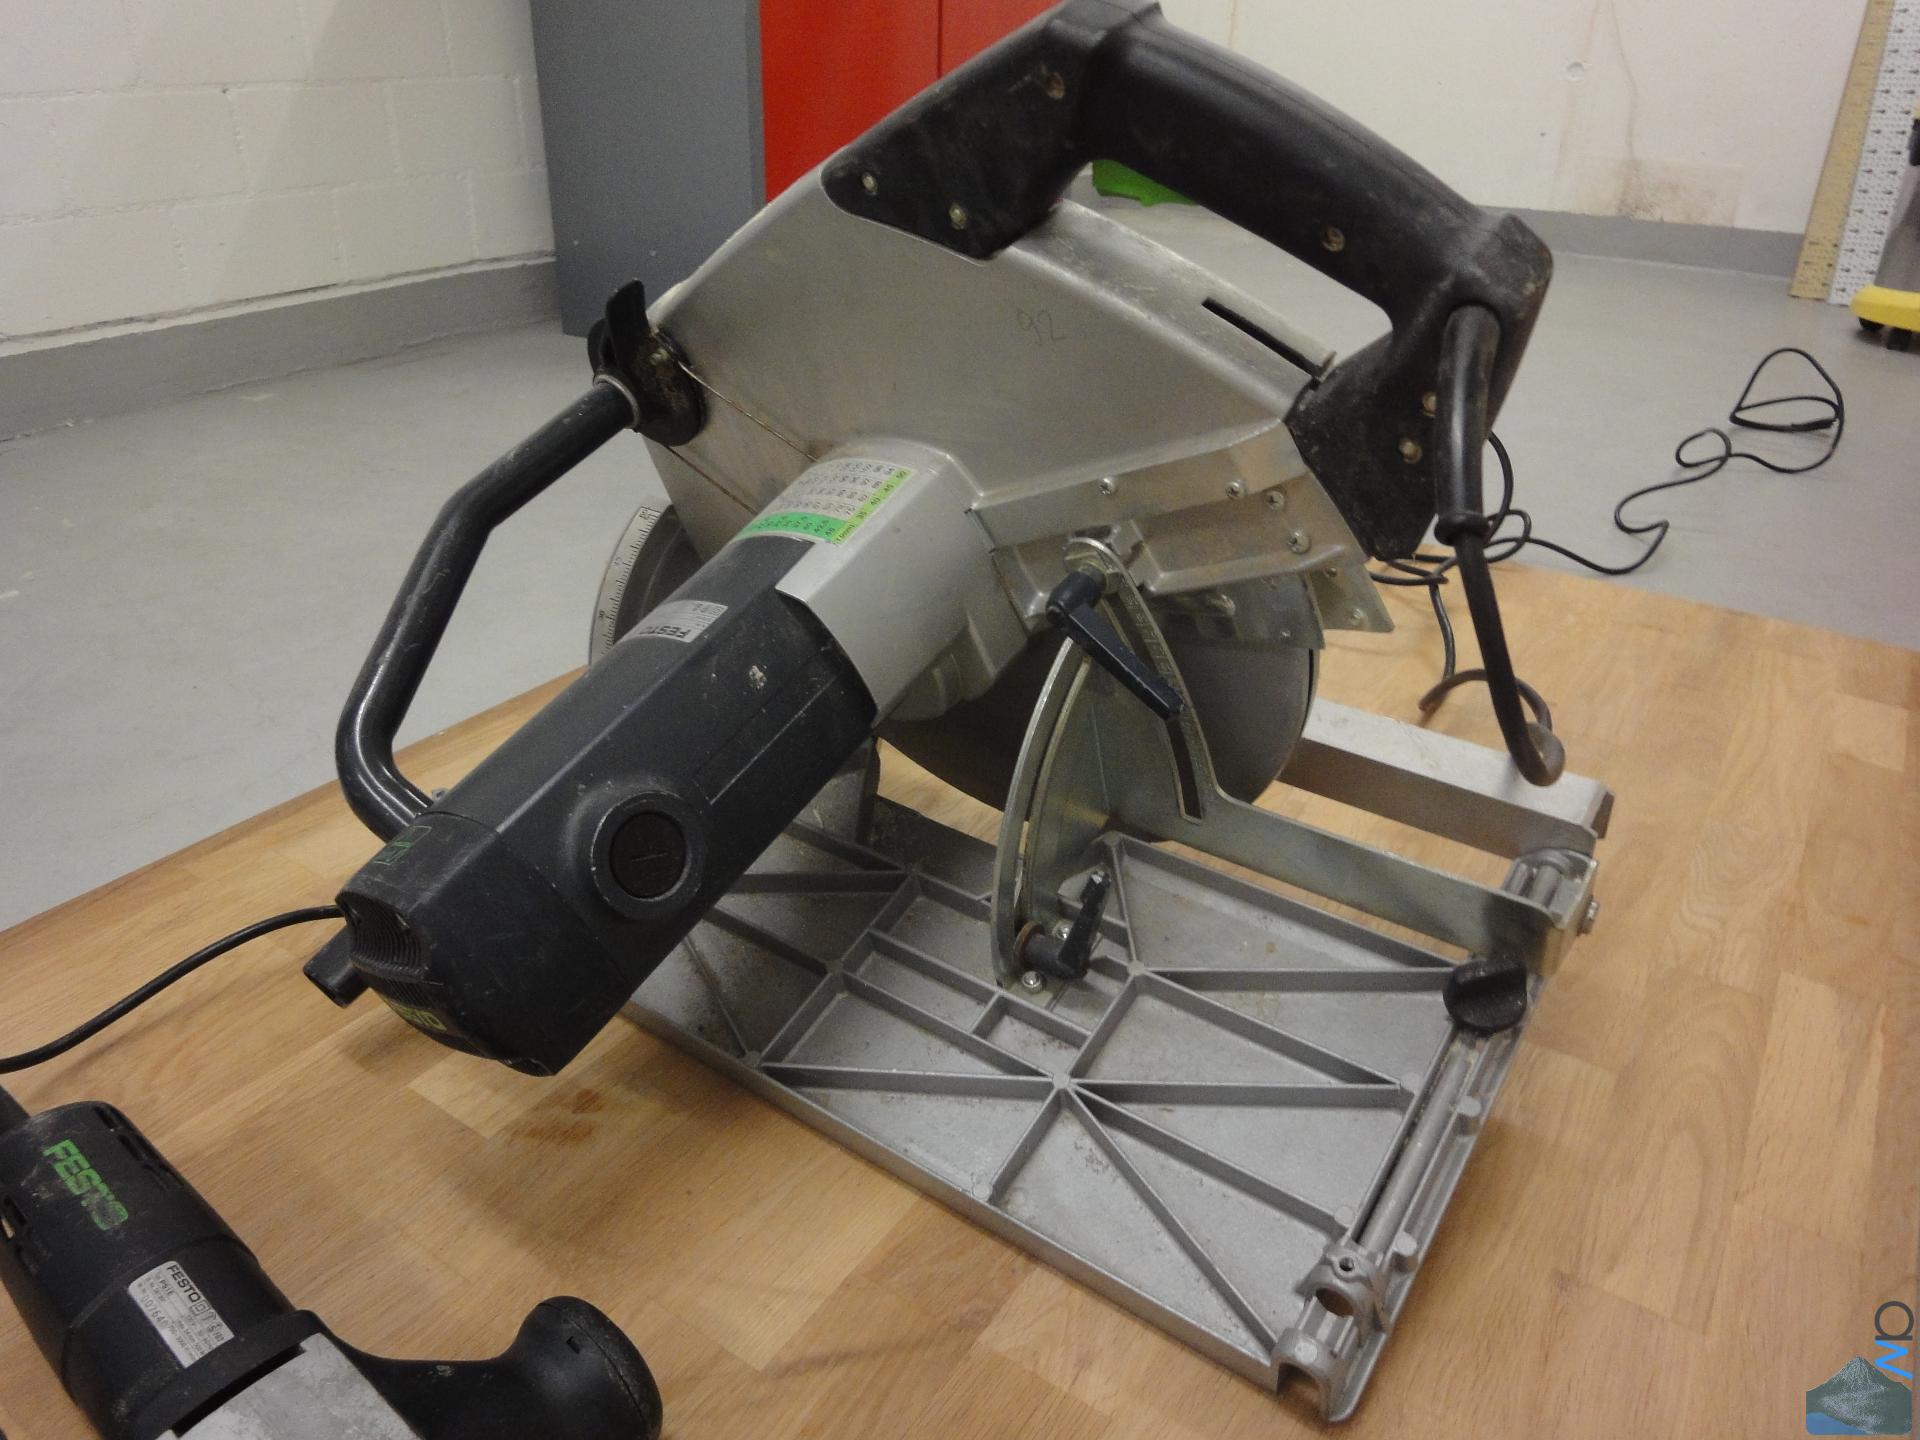
The Saws
We ordered a massive plate of wood for the load bearing table part (not the
one in this picture, that was just for support during work).
However, we needed to make a cutout for a chimney that comes from the
lower apartment through ours to the roof (we live on the 2nd floor according
to British numeration, and on the 3rd floor according to the American numeration,
and there's one more floor above ours).
Both the circular saw and the jig saw are professional grade tools which were
originally bought for the construction company dad used to run.

Circular Saw, Motor Side
This thing is rather massive for something you just have laying around

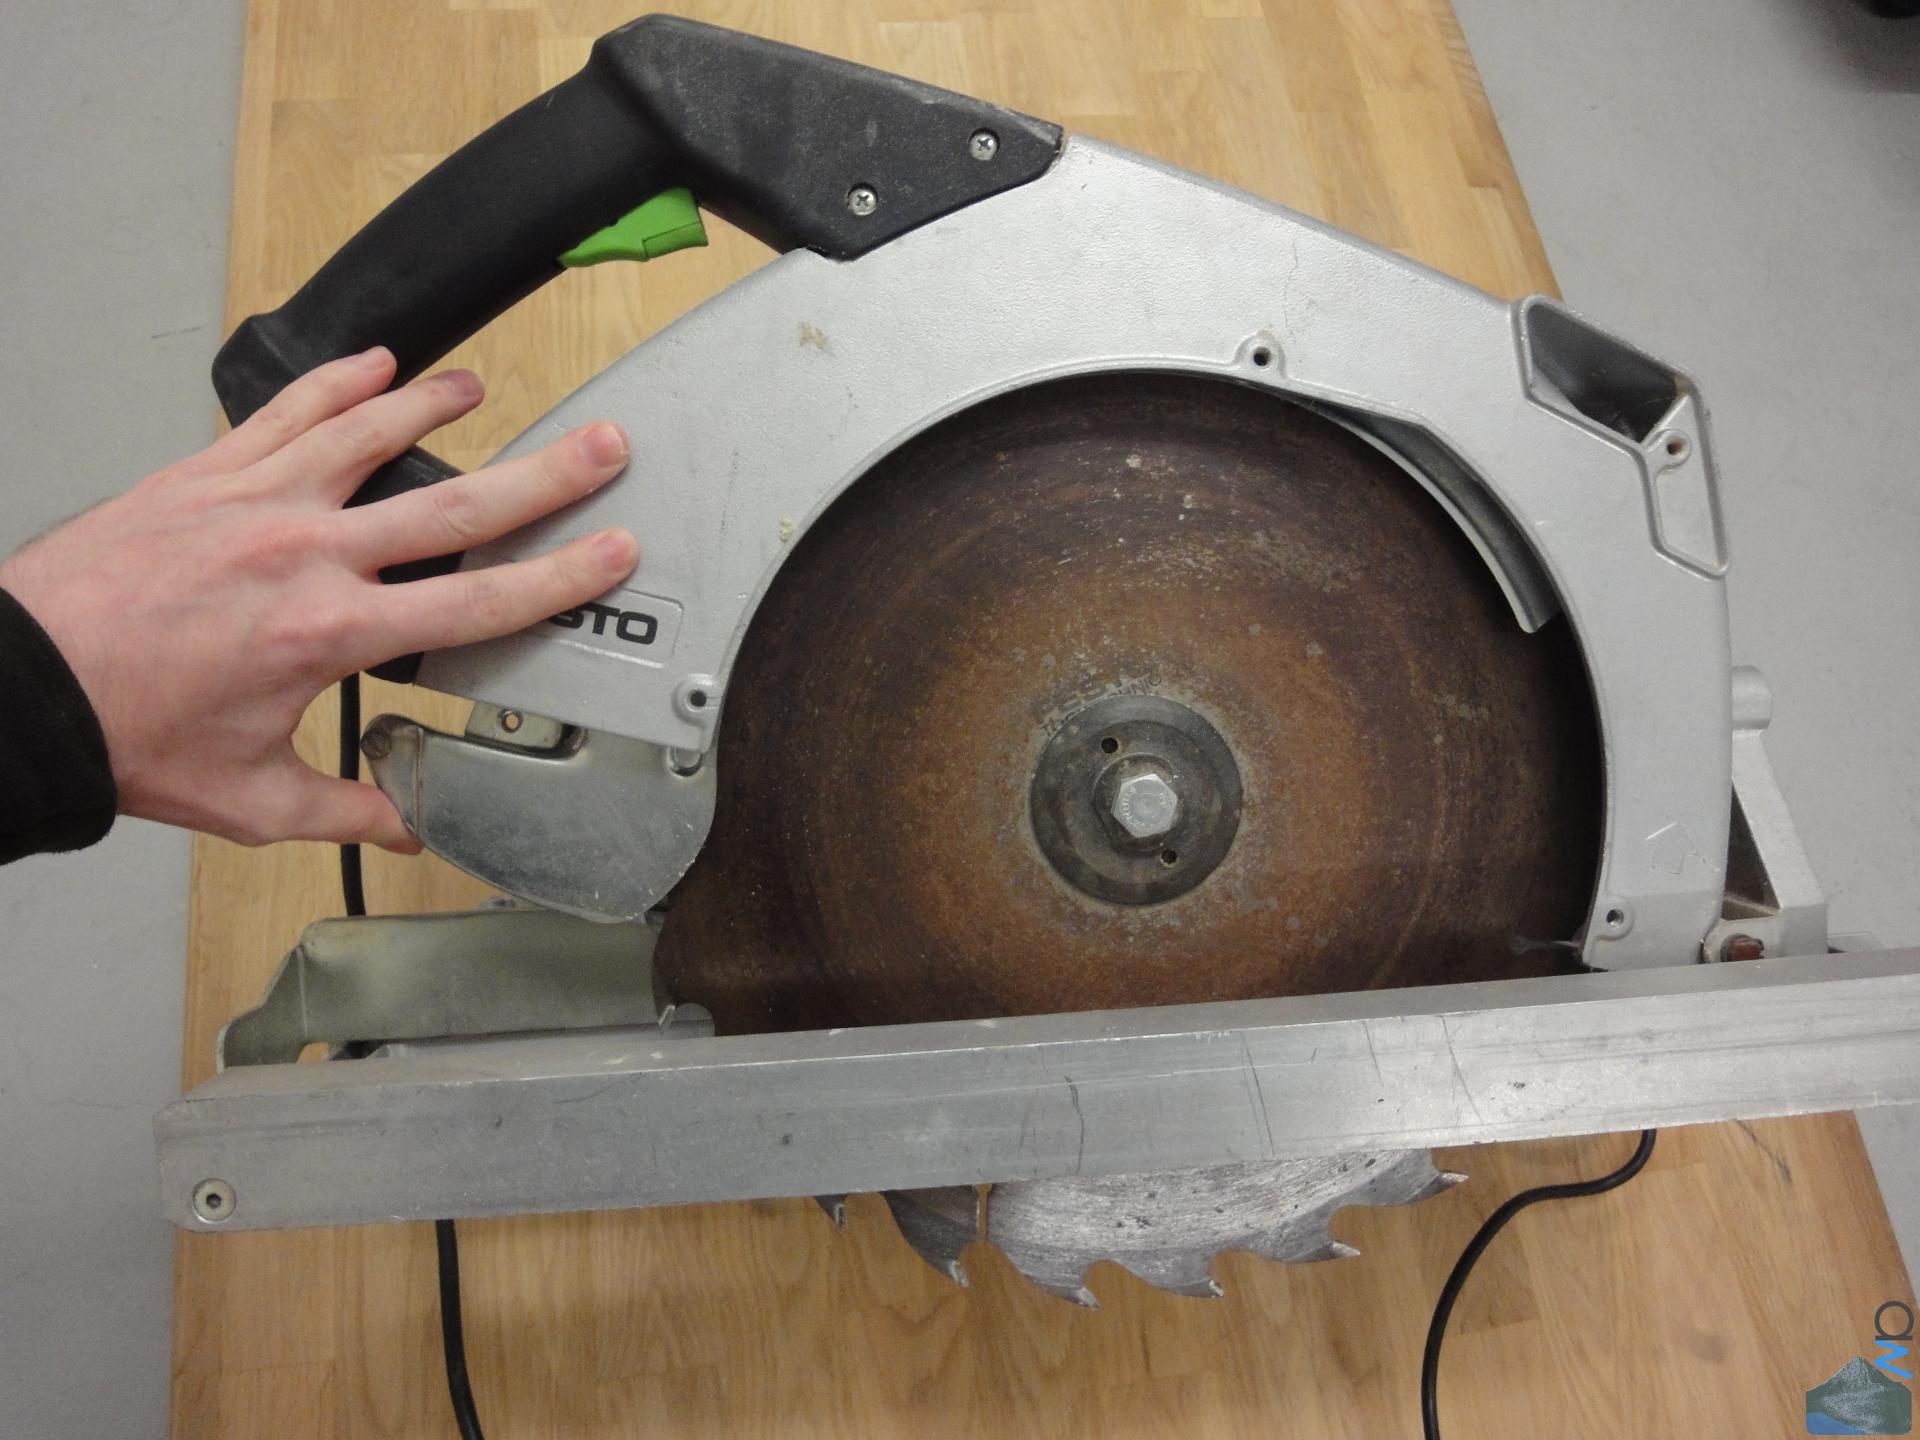
Circular Saw - Blade
Do not worry about that film of rust. That happens as soon as it is slightly humid.
The main substance of the blade is actually still in very good condition, as is
the rest of the tool.
Also, compare my hand for size :lol:

Jig Saw
I've known this jig saw forever. I used to make swords and guns out of wood
with this baby when I was a kid (~8-ish). And no, there were no accidents.
Dad showed me how to do it and after that it was not really difficult.

Jig Saw - The Case
You know how nowadays tools always come in those cheap plastic boxes?
Yeah, not so back then.

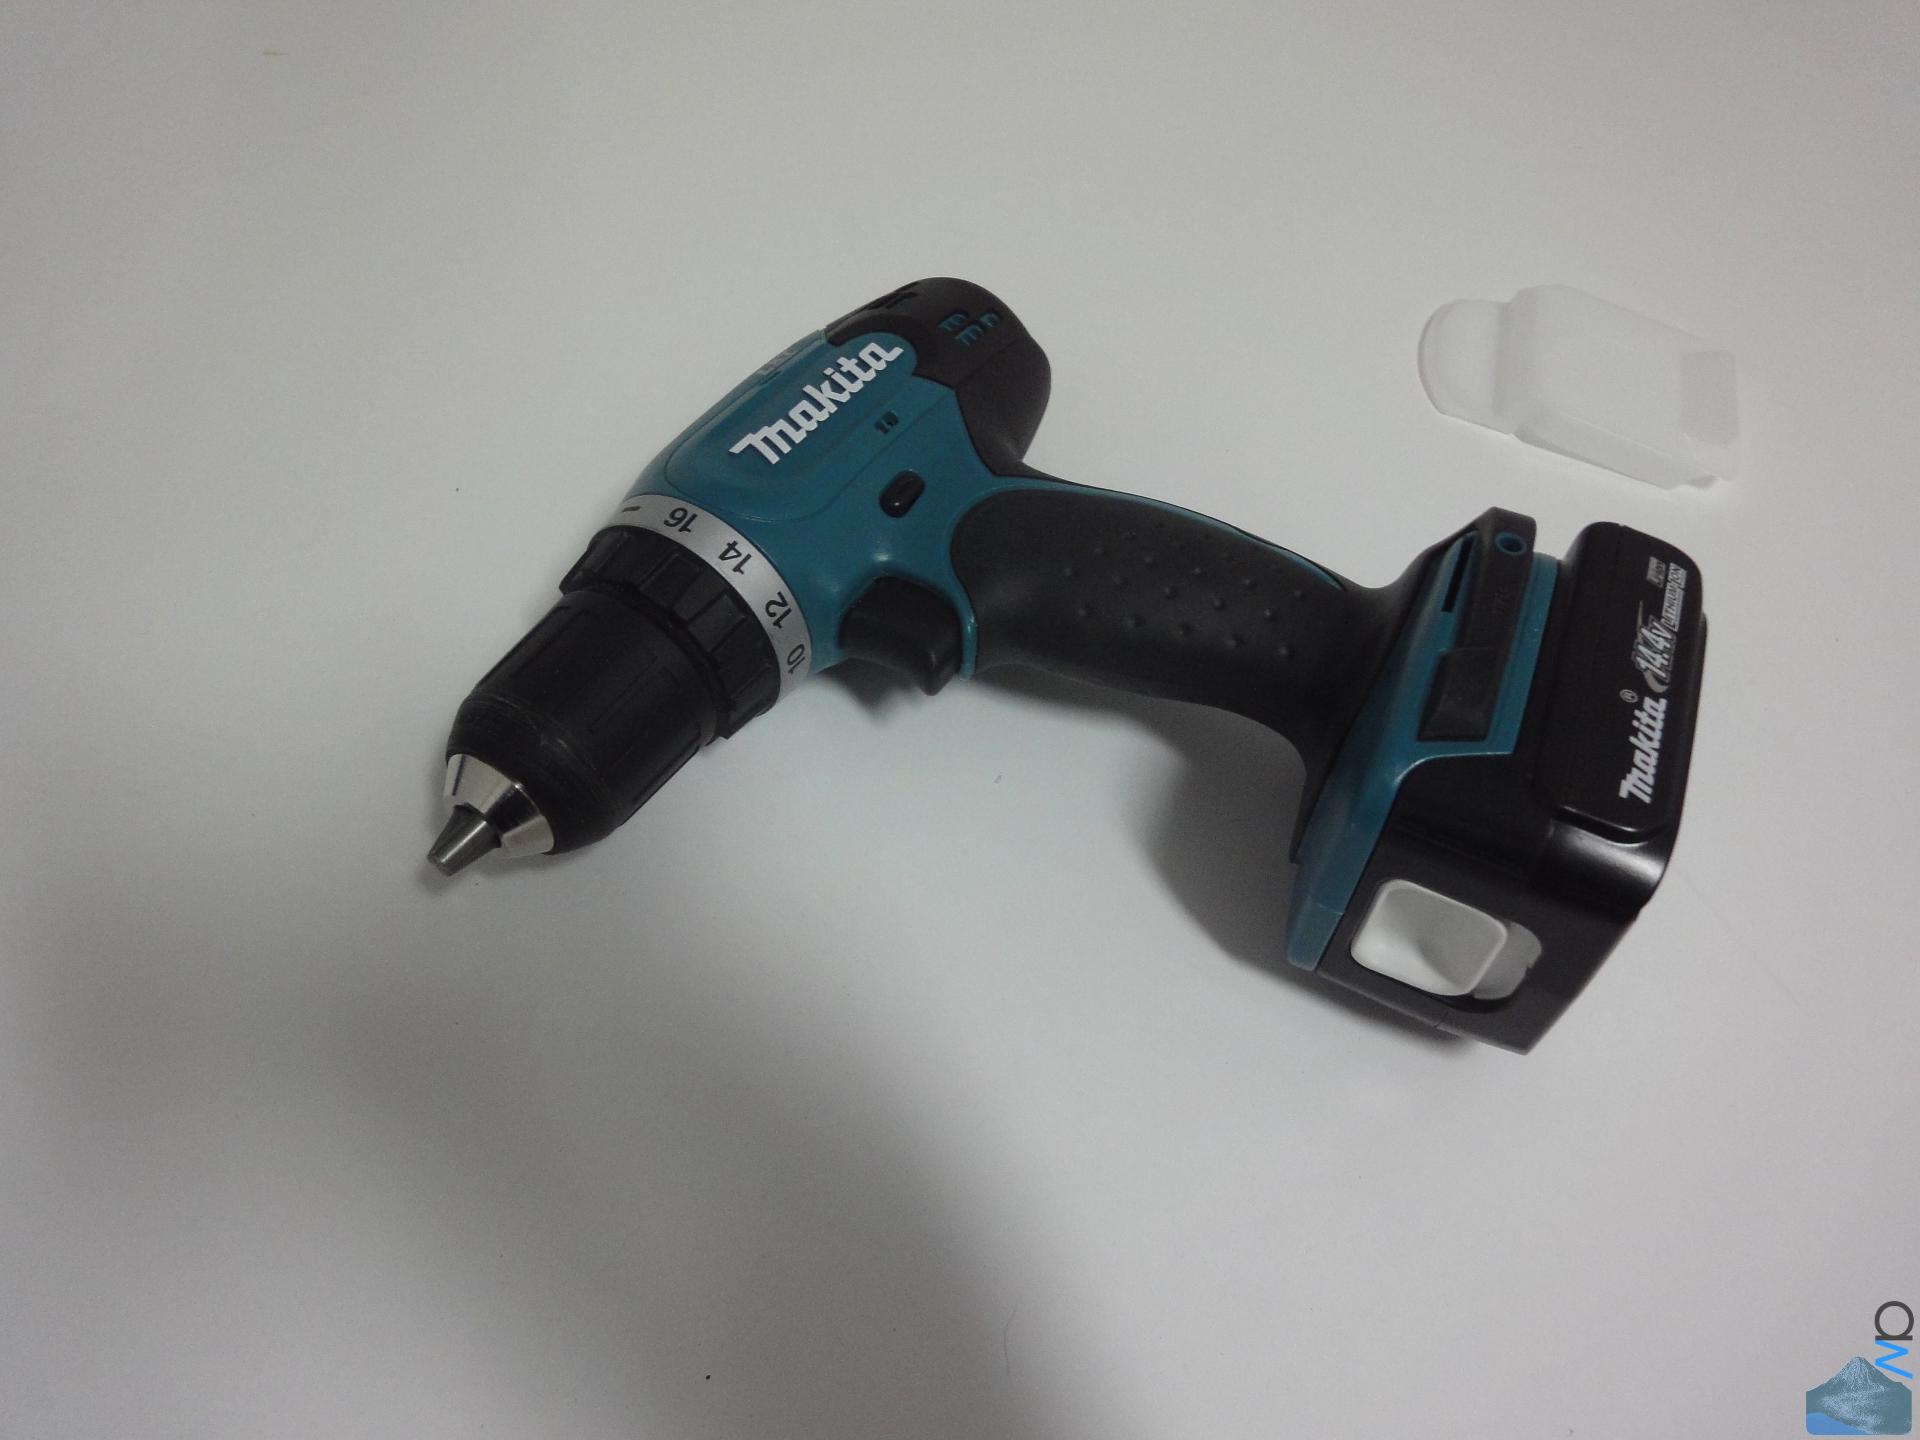
Makita Bit Driver
It's not the most heavy-duty of tools (we have a proper Bosch rotary hammer
for that, also from dad's construction business), but very good quality and a
lot more handy than a full blown hand drill.
Very handy for general modding work

Load Plate - Overview
An overview shot of the load bearing plate in place.

Load Plate - Across
Here you can see that chimney and the cutout I mentioned.

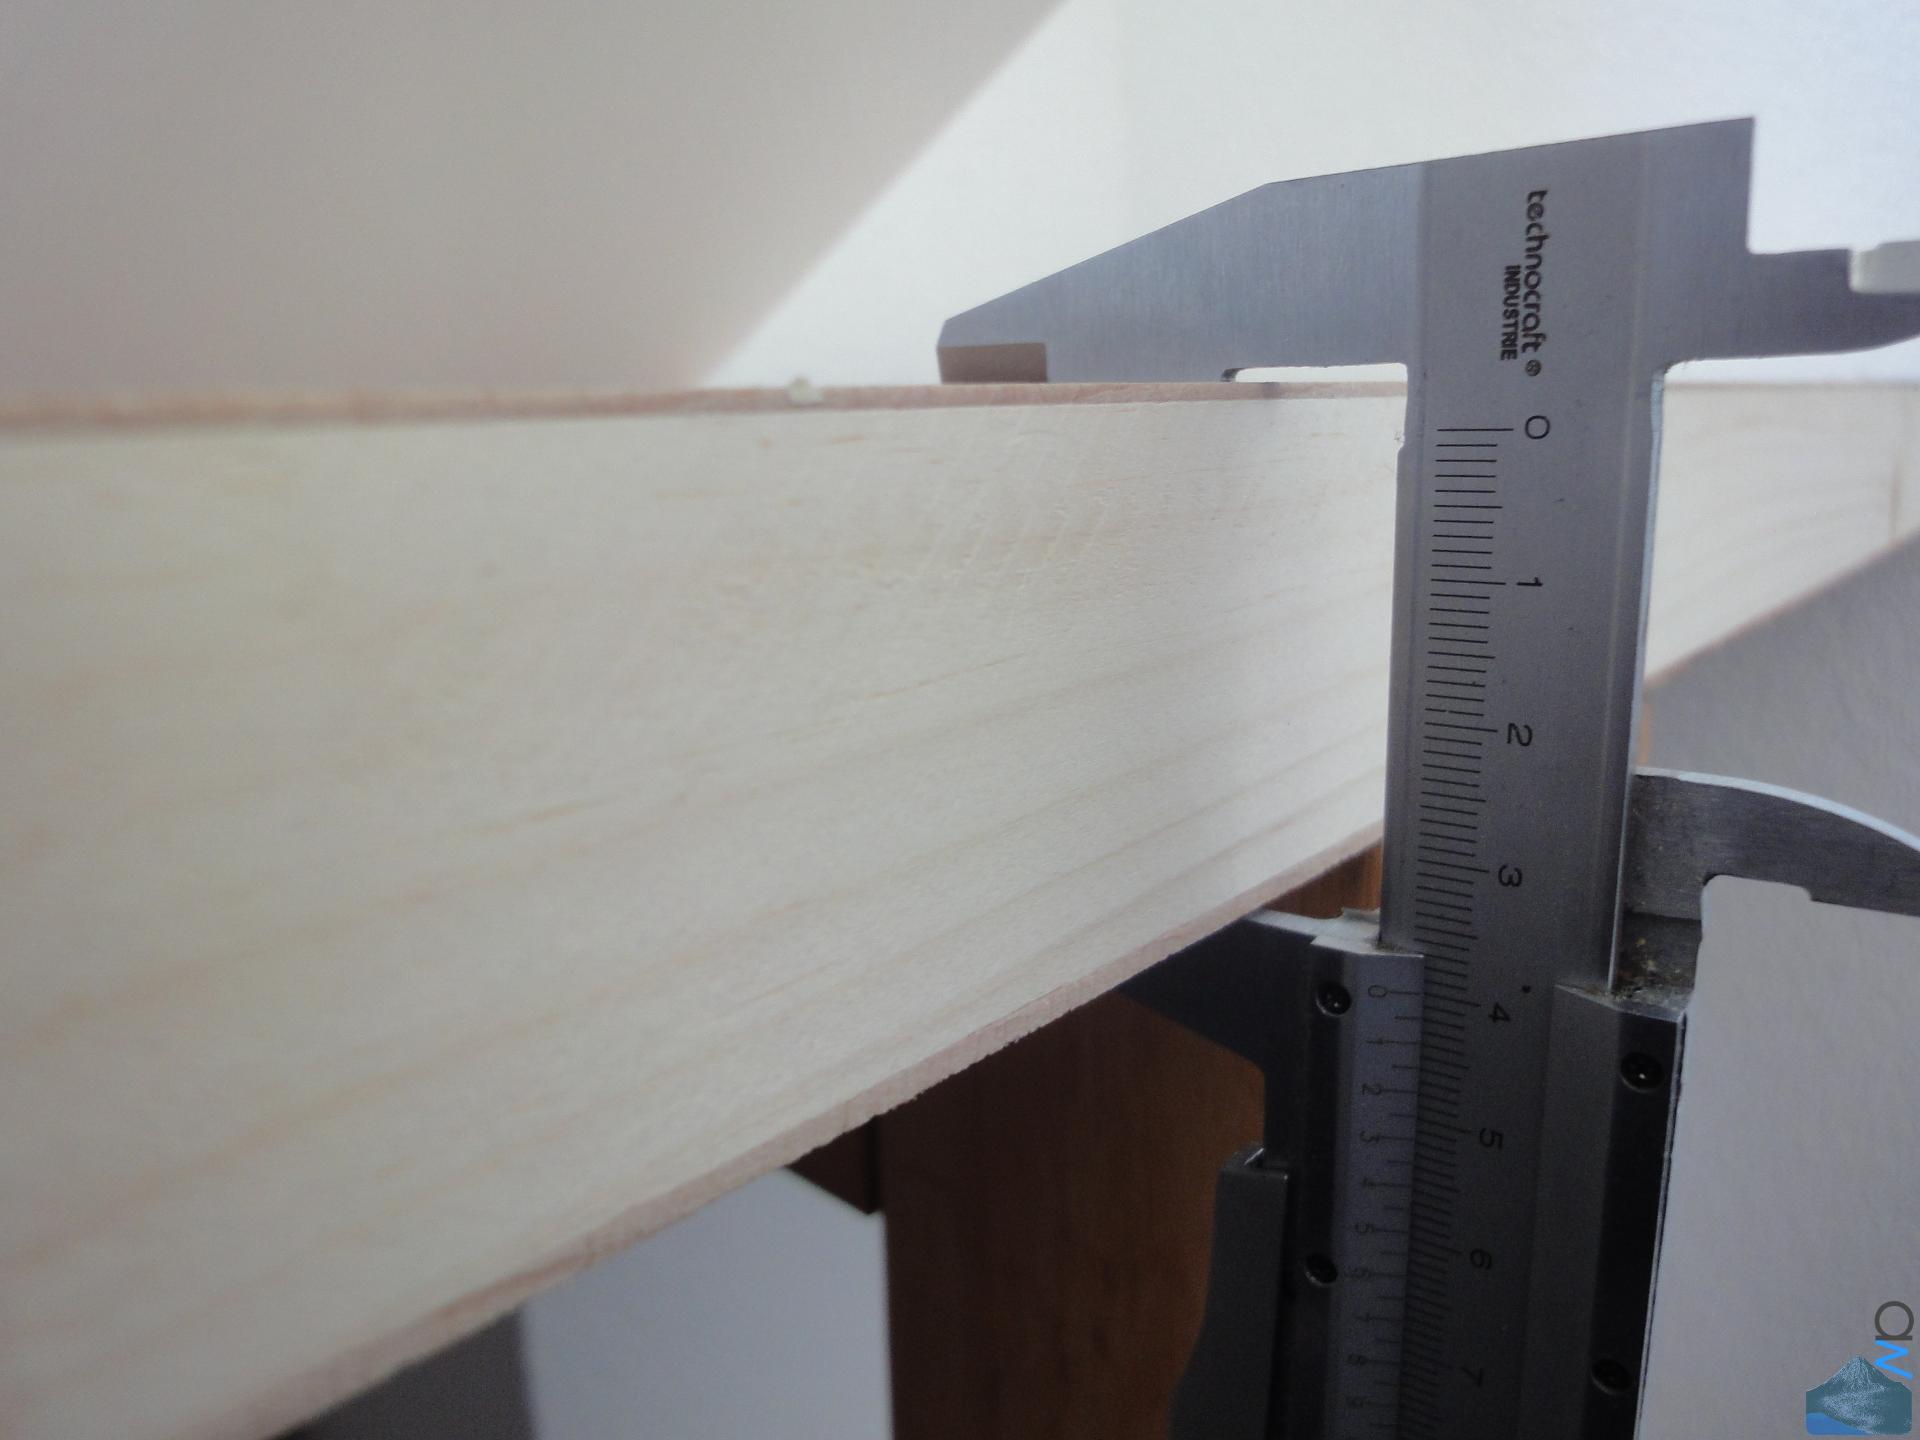
Load Plate - Thickness
I can easily sit on this thing without it bending

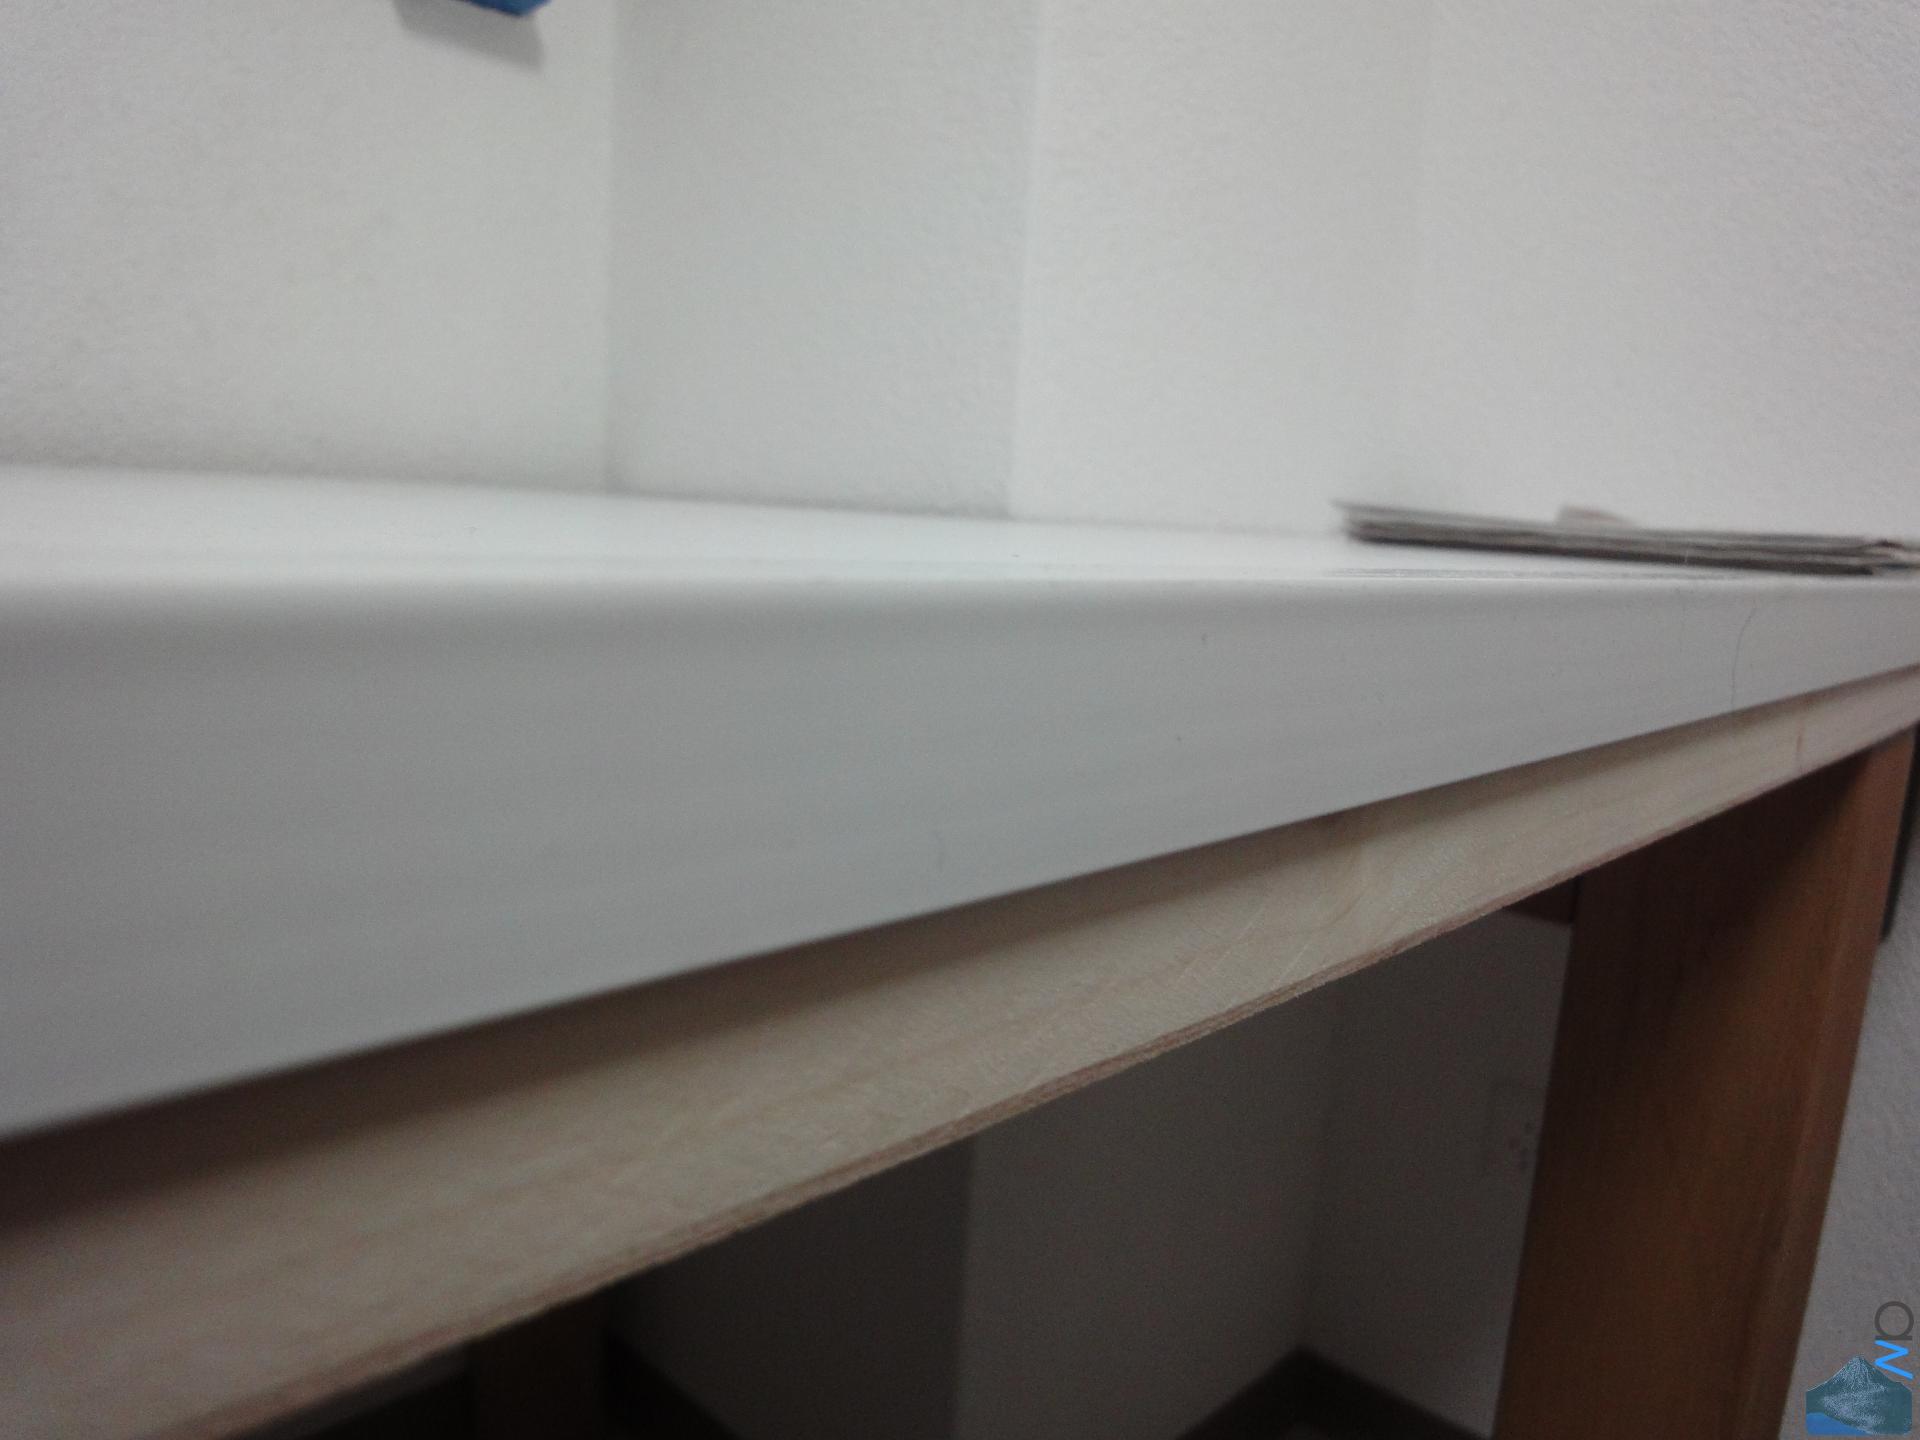
Cover Plate - Impression
Just to give you an impression of the cover plate. Its purpose is to provide
a surface that is easier to clean, doesn't soak up solvents and paint as
easily and can be replaced if damaged too heavily. It will be taped to the load
plate with some heavy-duty double sided tape; works like a charm.

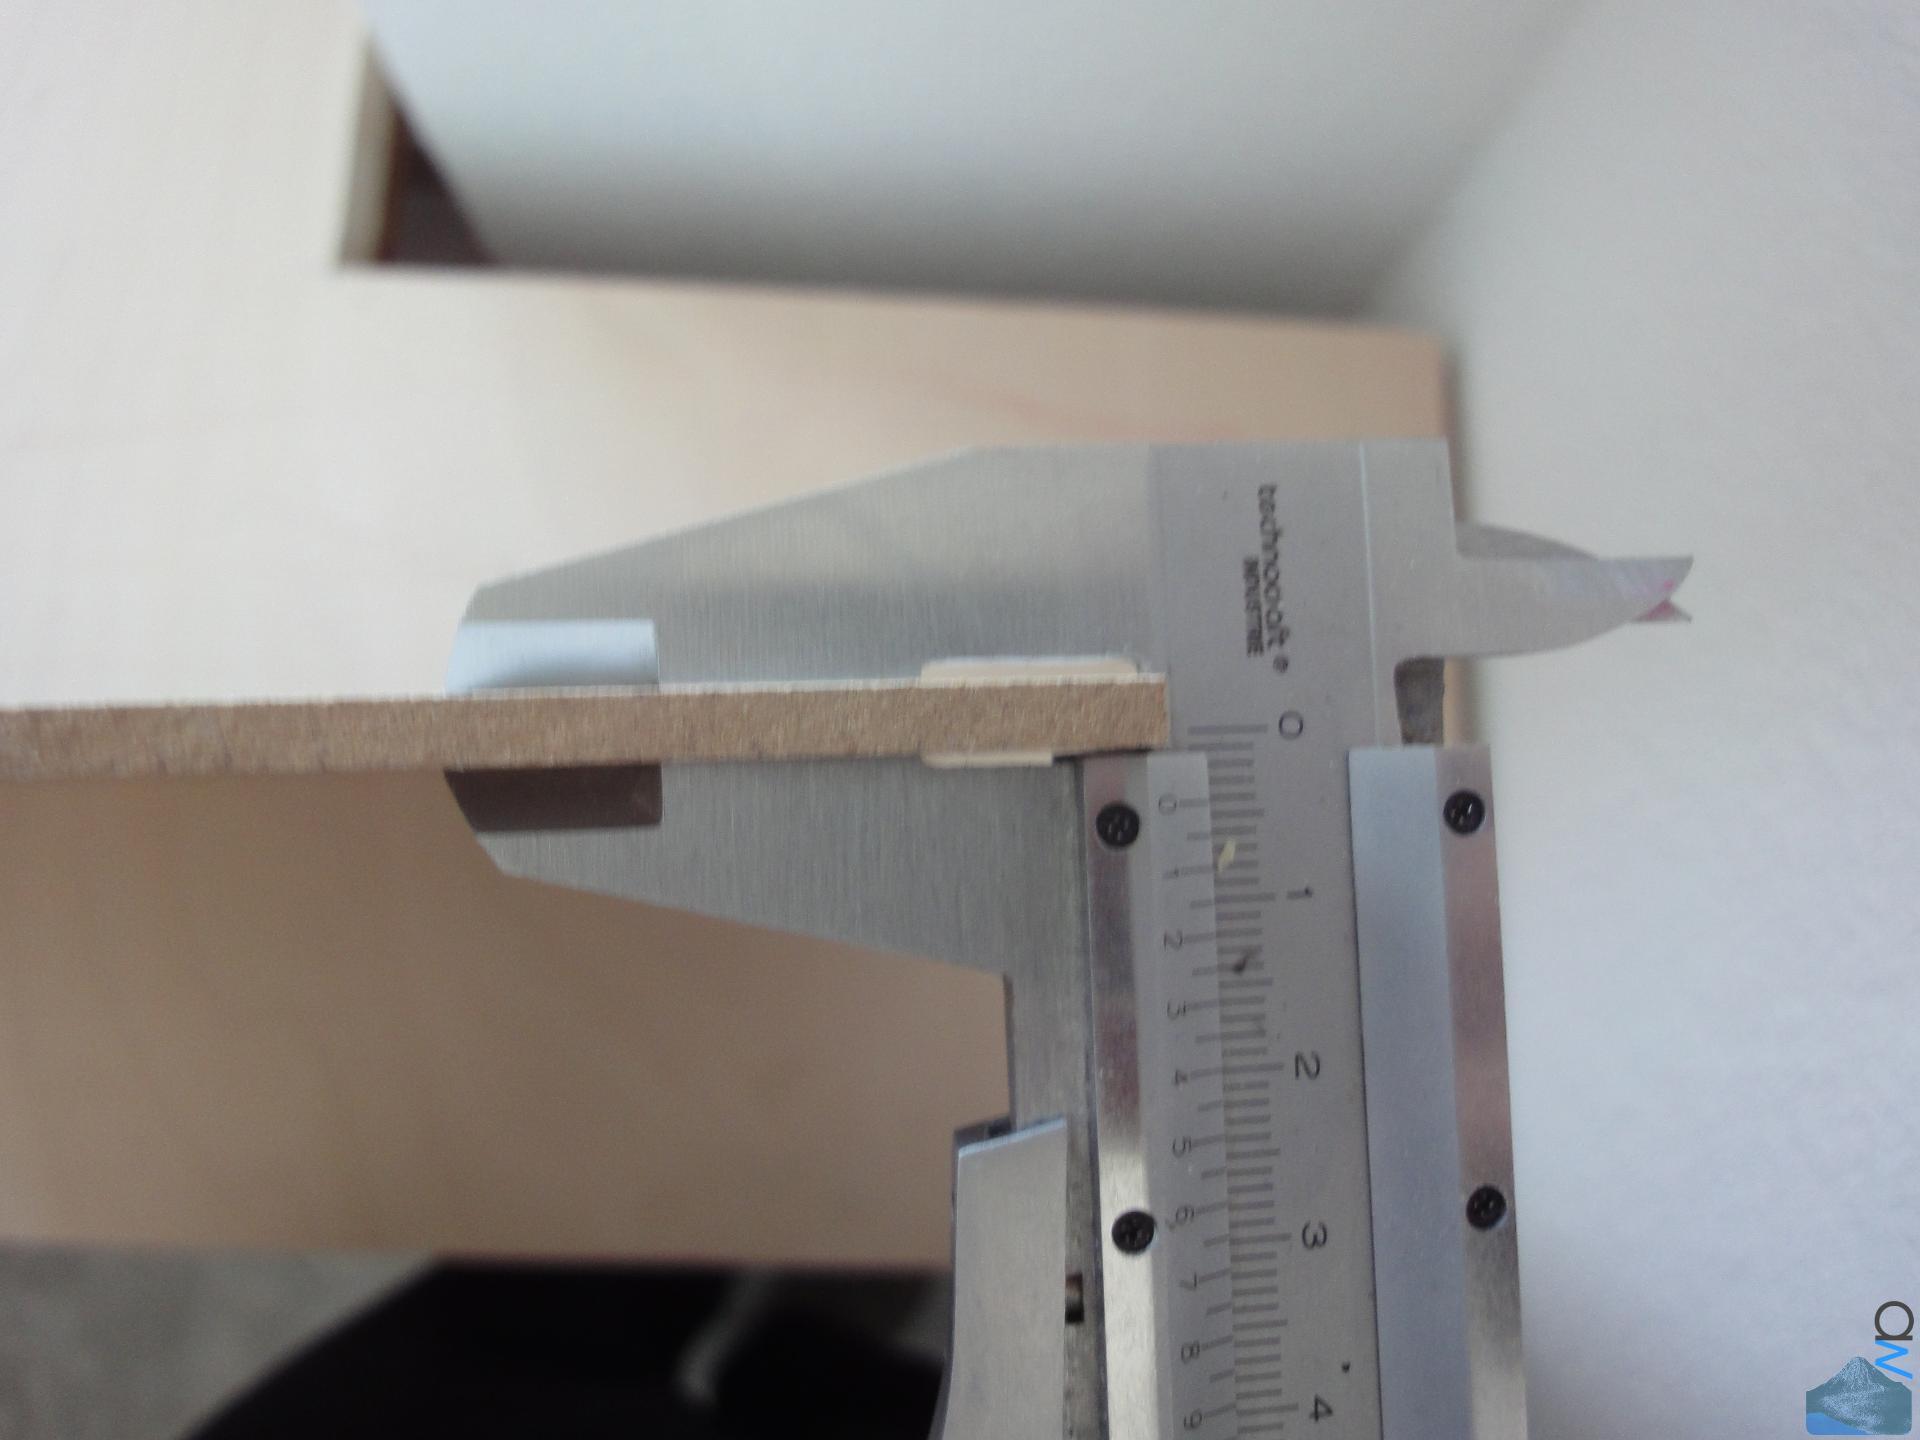
Cover Plate - Thickness
It doesn't need to be very thick.

Sandwich
The two plates taped together.

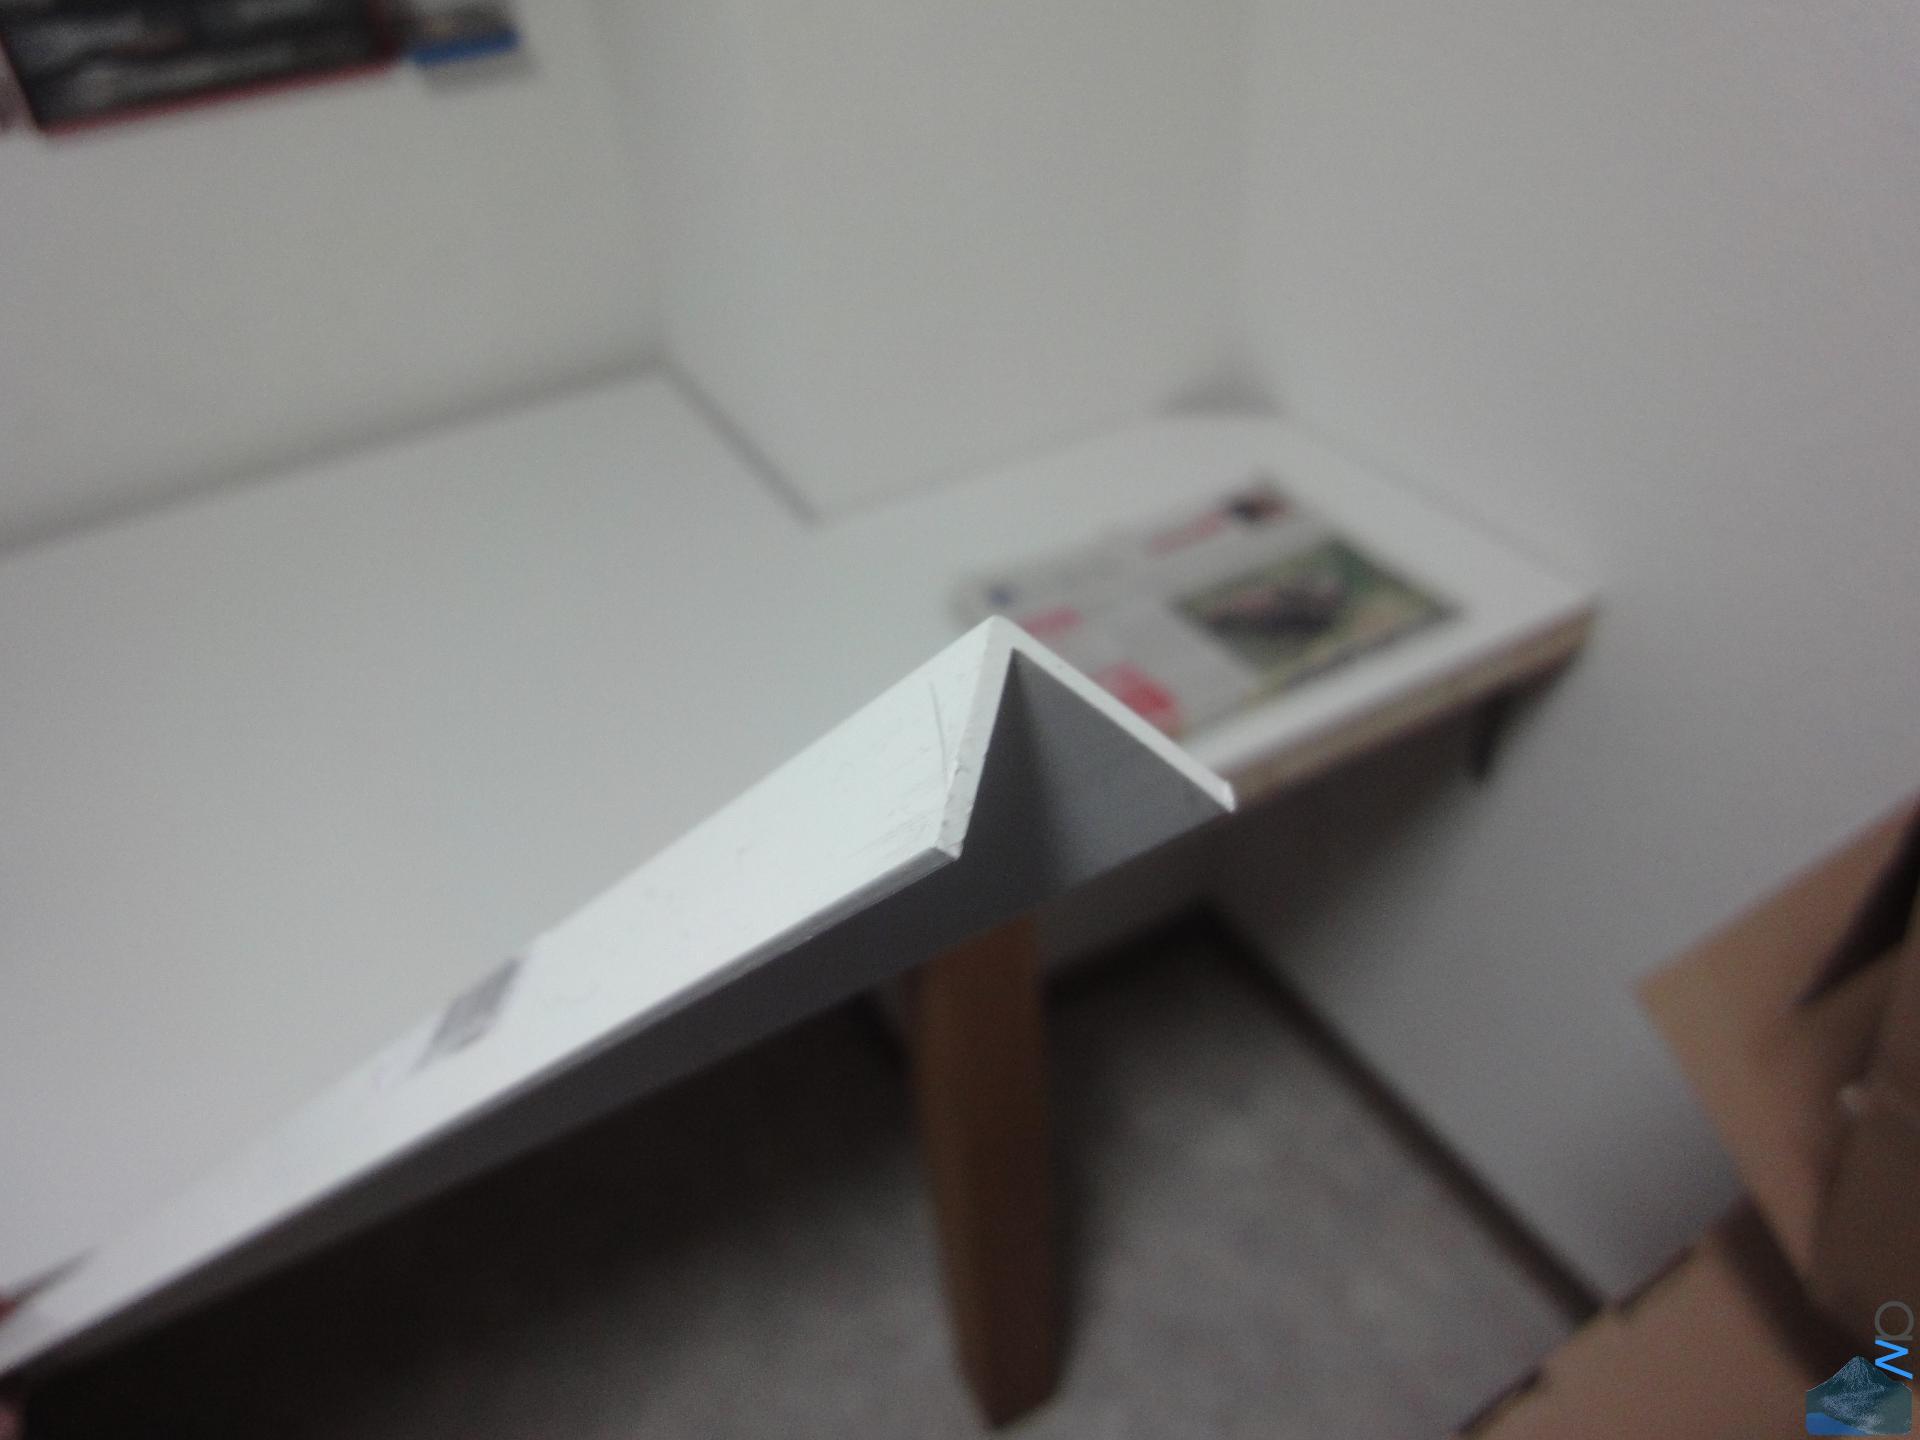
Protective Angle
The edges of the plates are rather sharp. One could either sand them down,
or do what we did. The plastic angle also provides some additional protection
to the table's edge, so we went for that. Also, it's a lot less work than
sanding every edge down properly, even with a good sanding tool (which we
do have though).

Protective Angle - Mounted
It's also taped down with the same double sided tape. One might think that
this is a bit insufficient, but in actuality everything holds together perfectly
bomb proof.

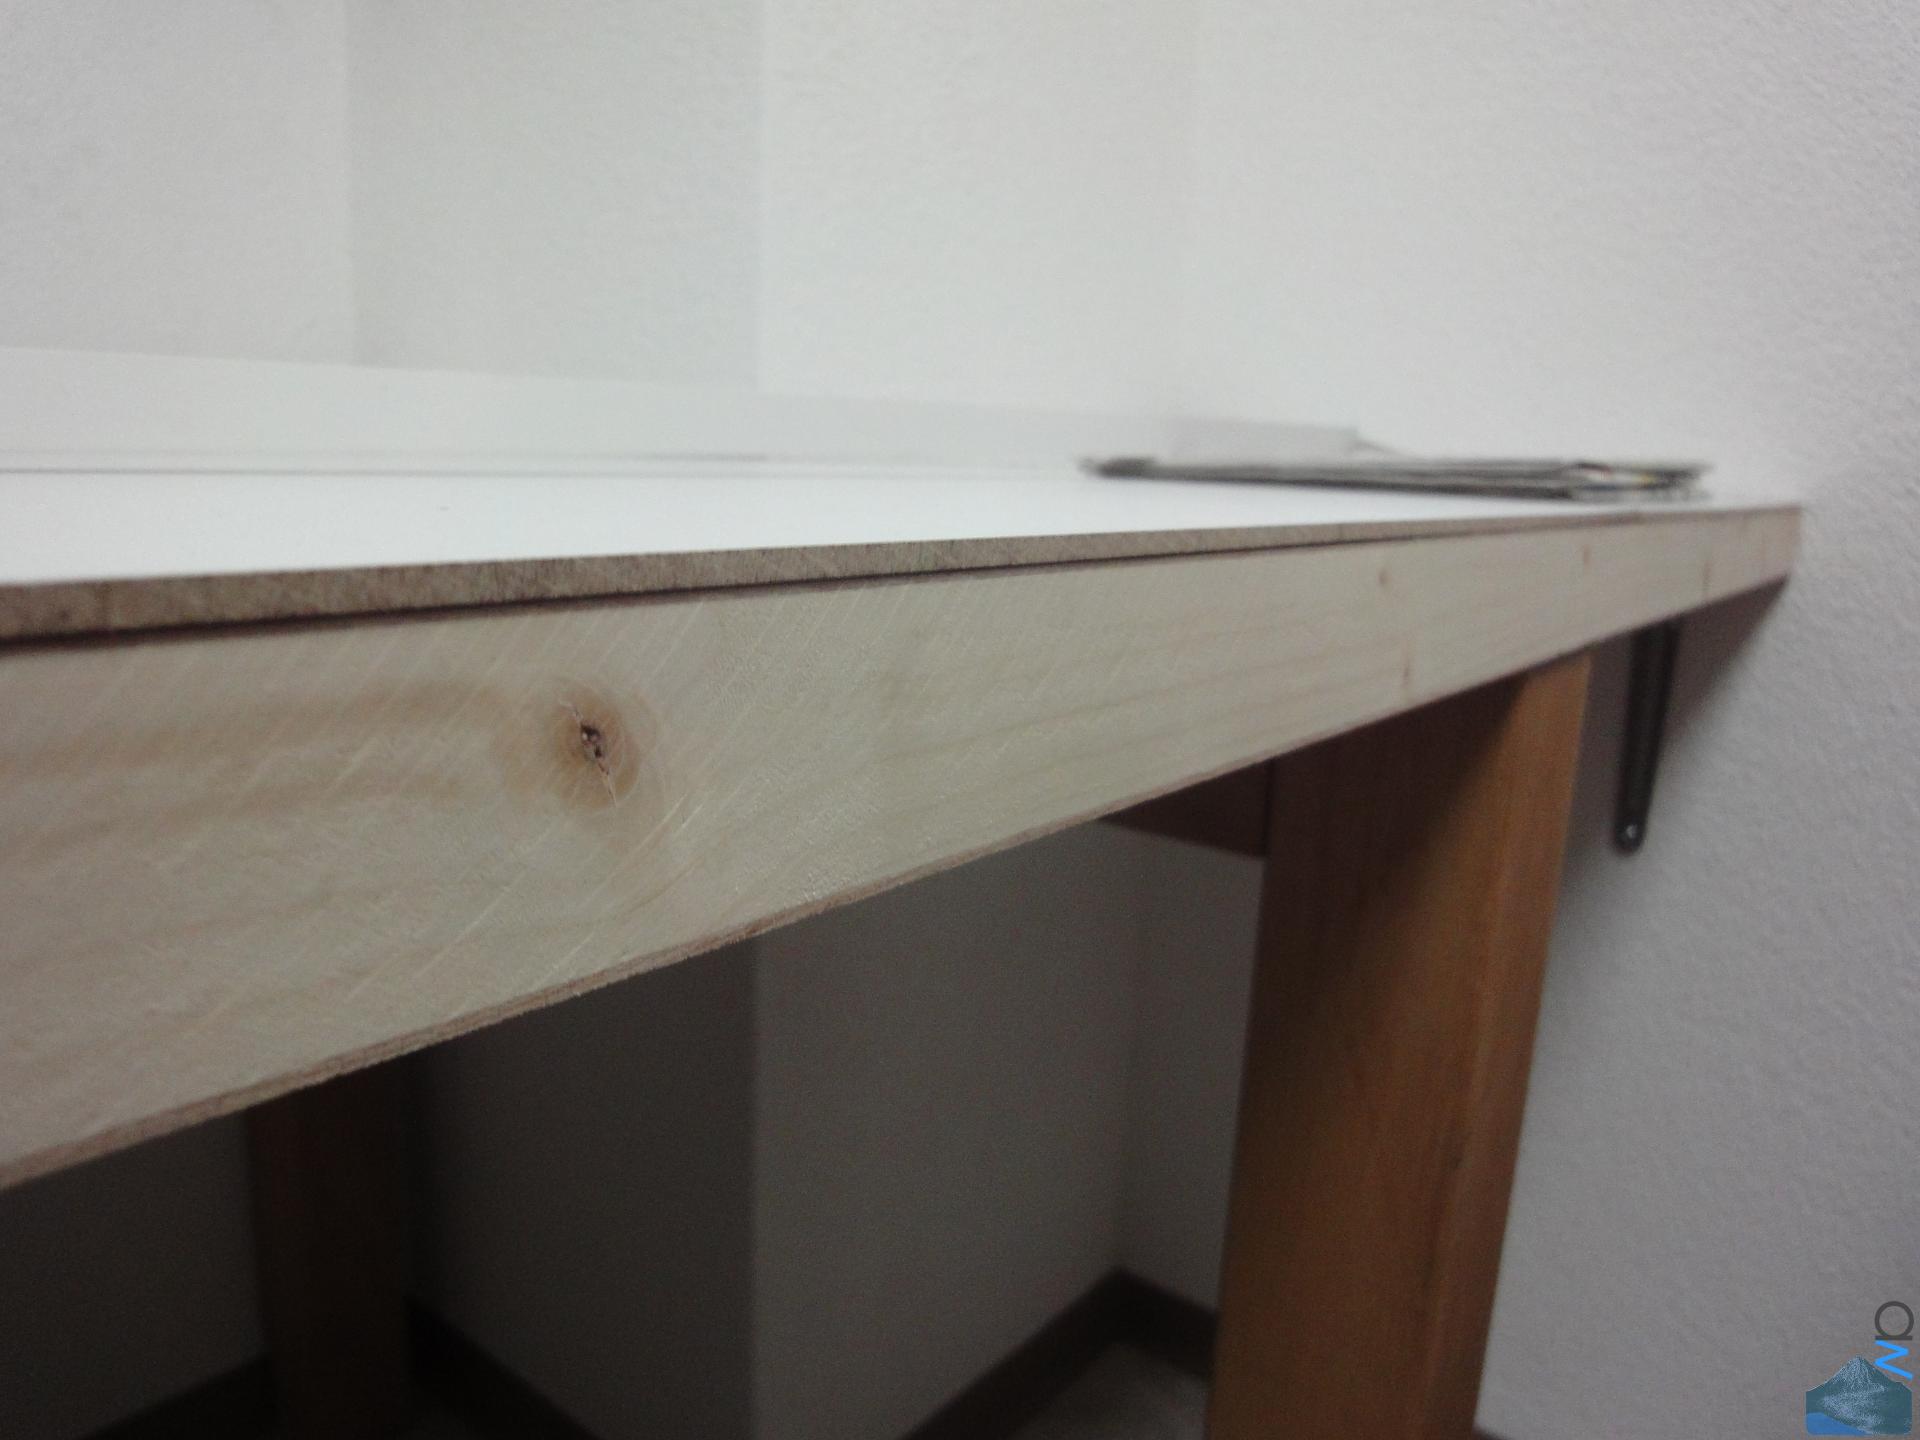
Support Beams
Remember that support plate on which the two saws are laying in the first pic?
Yeah, we reused the support beams for that table for this one. If anyone is
wondering why we didn't just use the table itself: For one thing it's too small,
and secondly the table plate is not made for heavy duty use.
The support beams themselves are very stable though, so it was a no-brainer
to reuse them for this project. In this picture, they are not yet bolted to the
load plate.

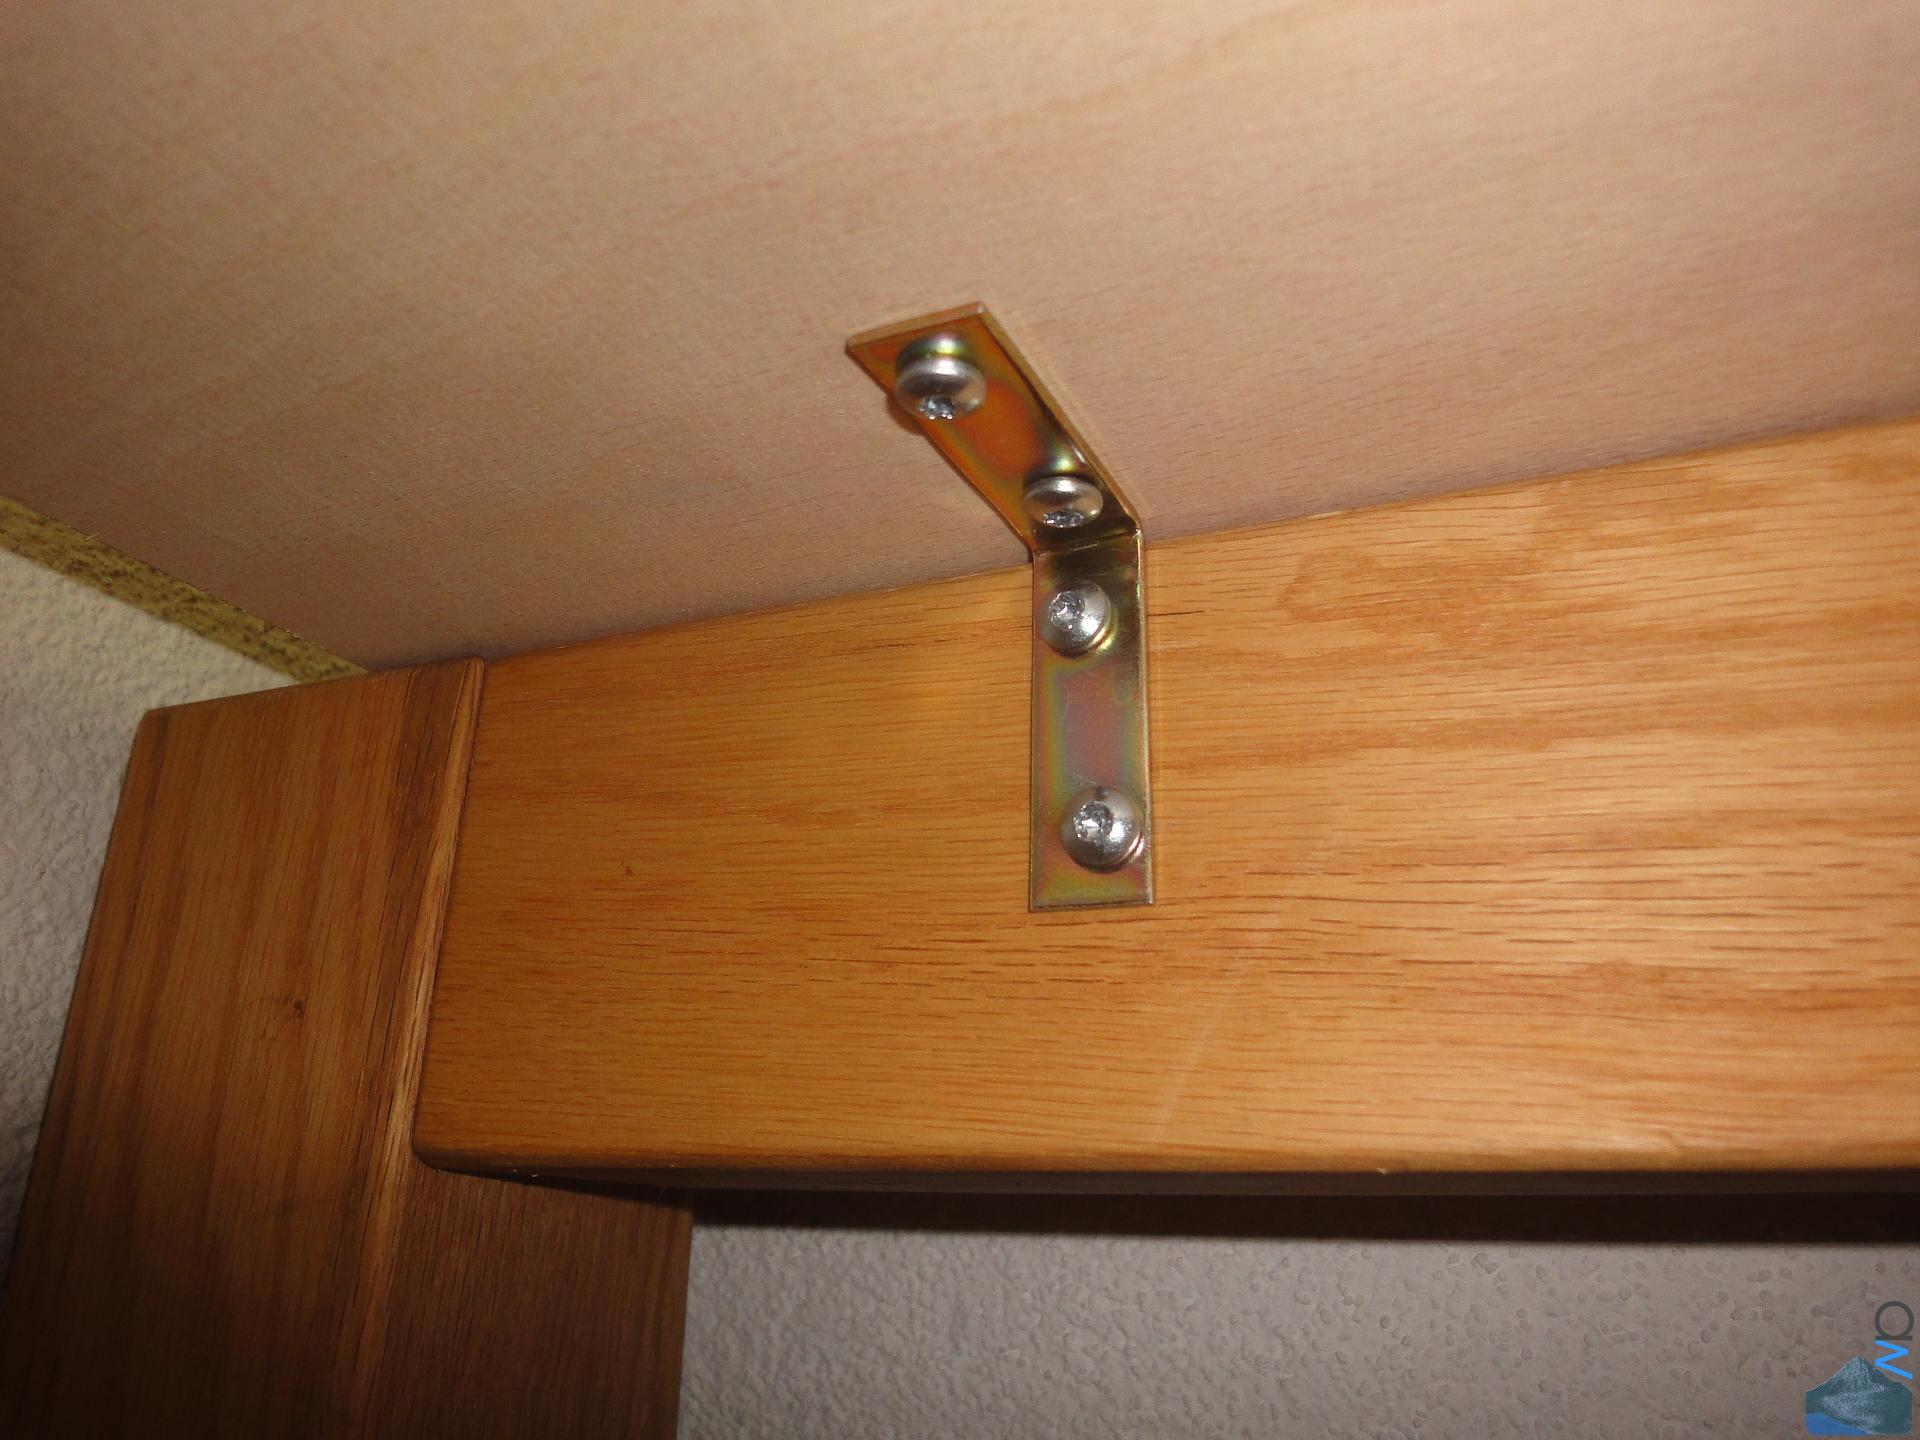
Support Beam - Bolted
Each support beam is bolted to the load plate with 4 of these.
Apologies about the flash, but there's not a whole lot of light beneath the table

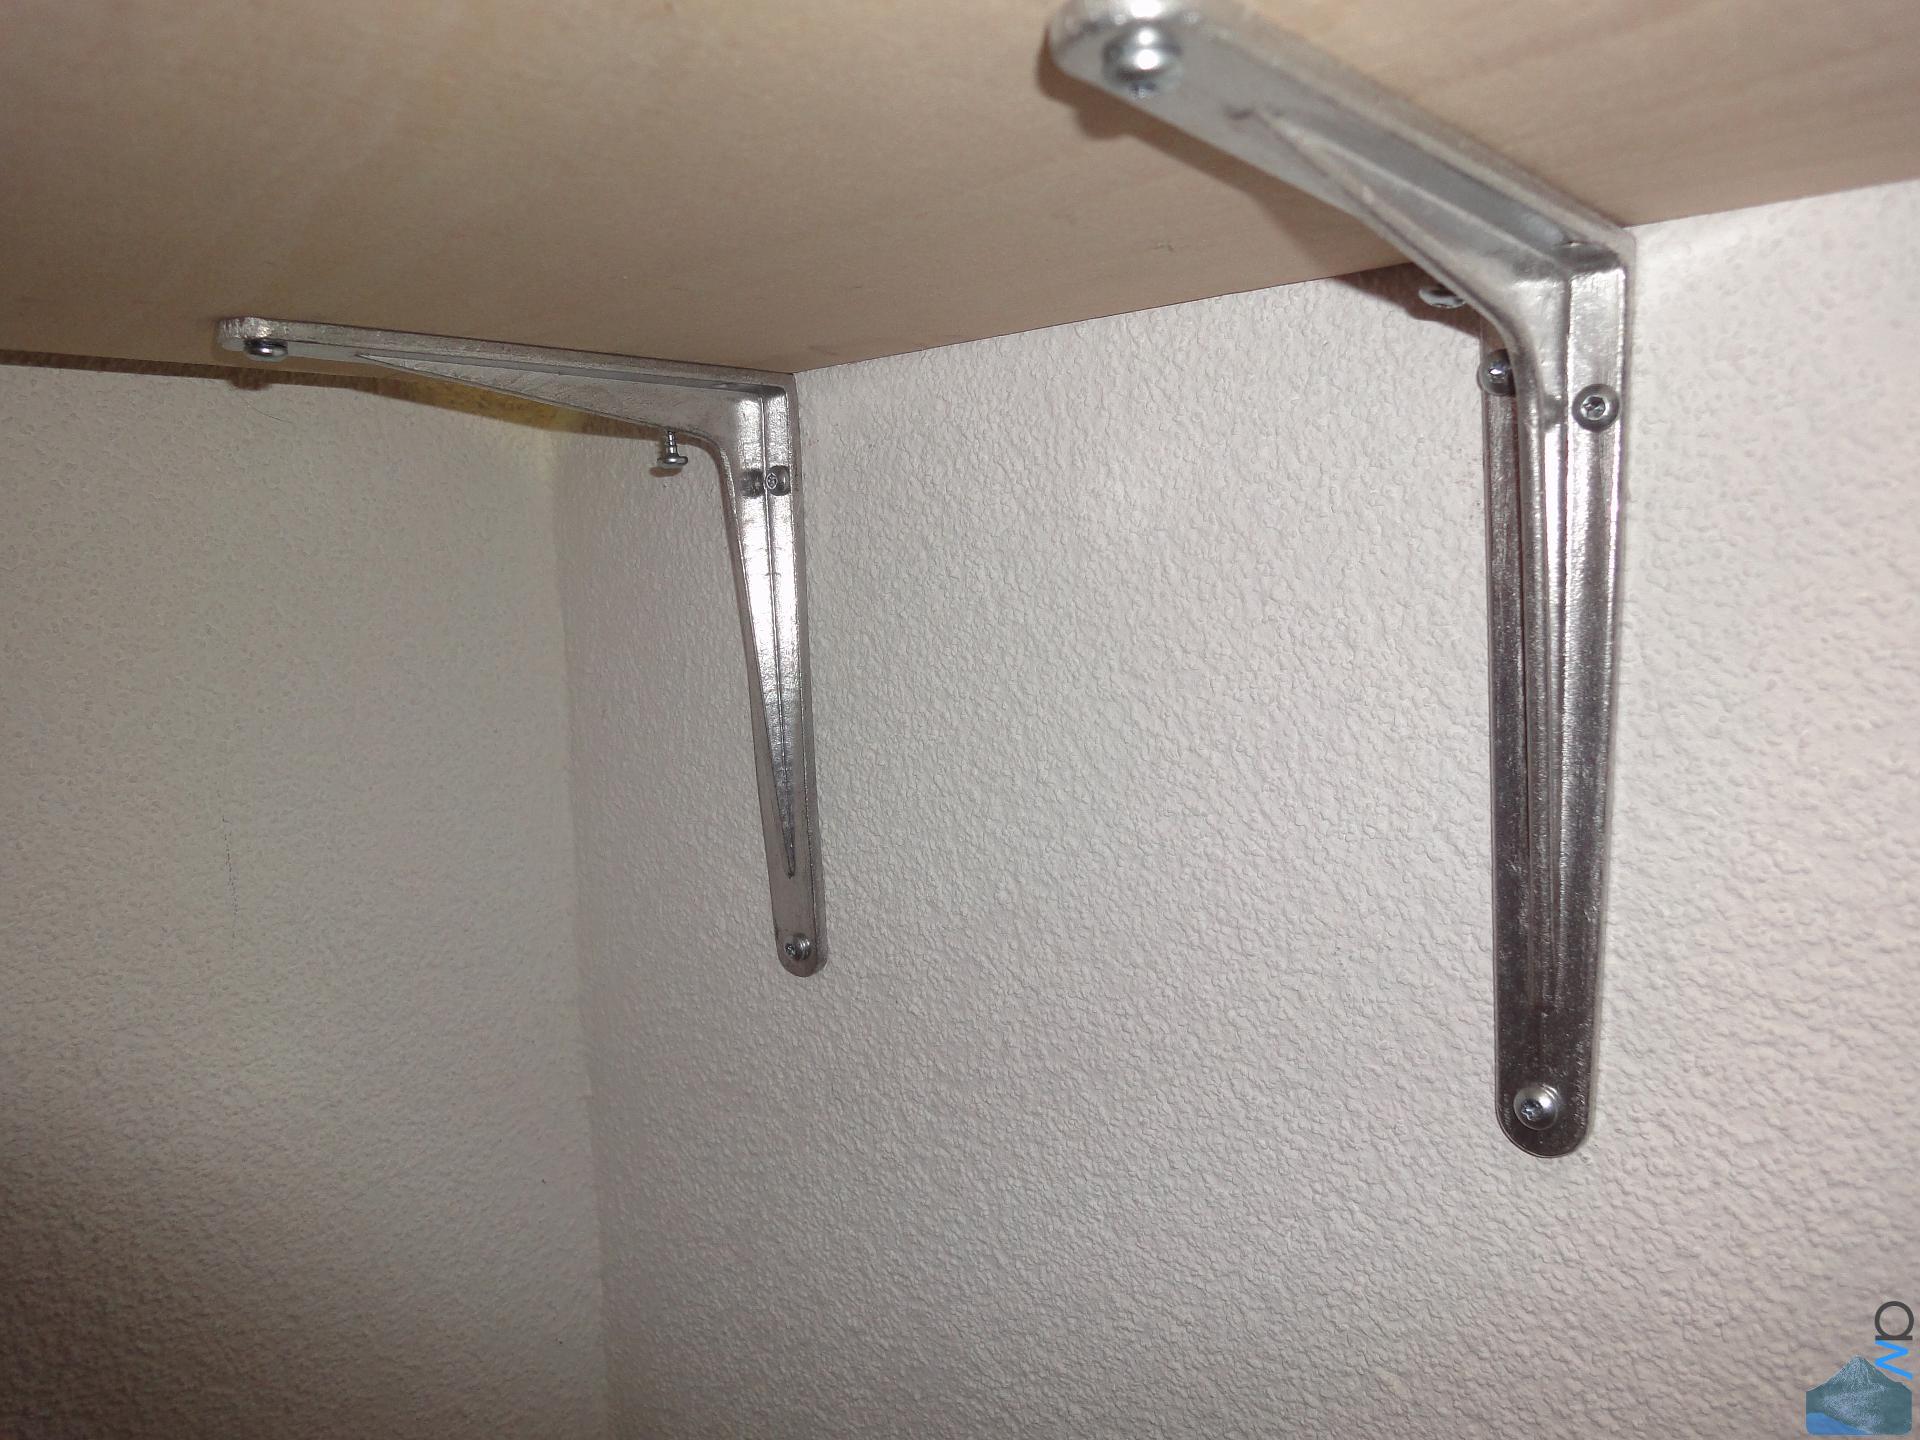
Wall Mount - Side
To prevent the table from moving around when working on it, it is bolted to both
the side and the back wall. The screws are not fully in here because we're not
done yet.

Wall Mount - Back

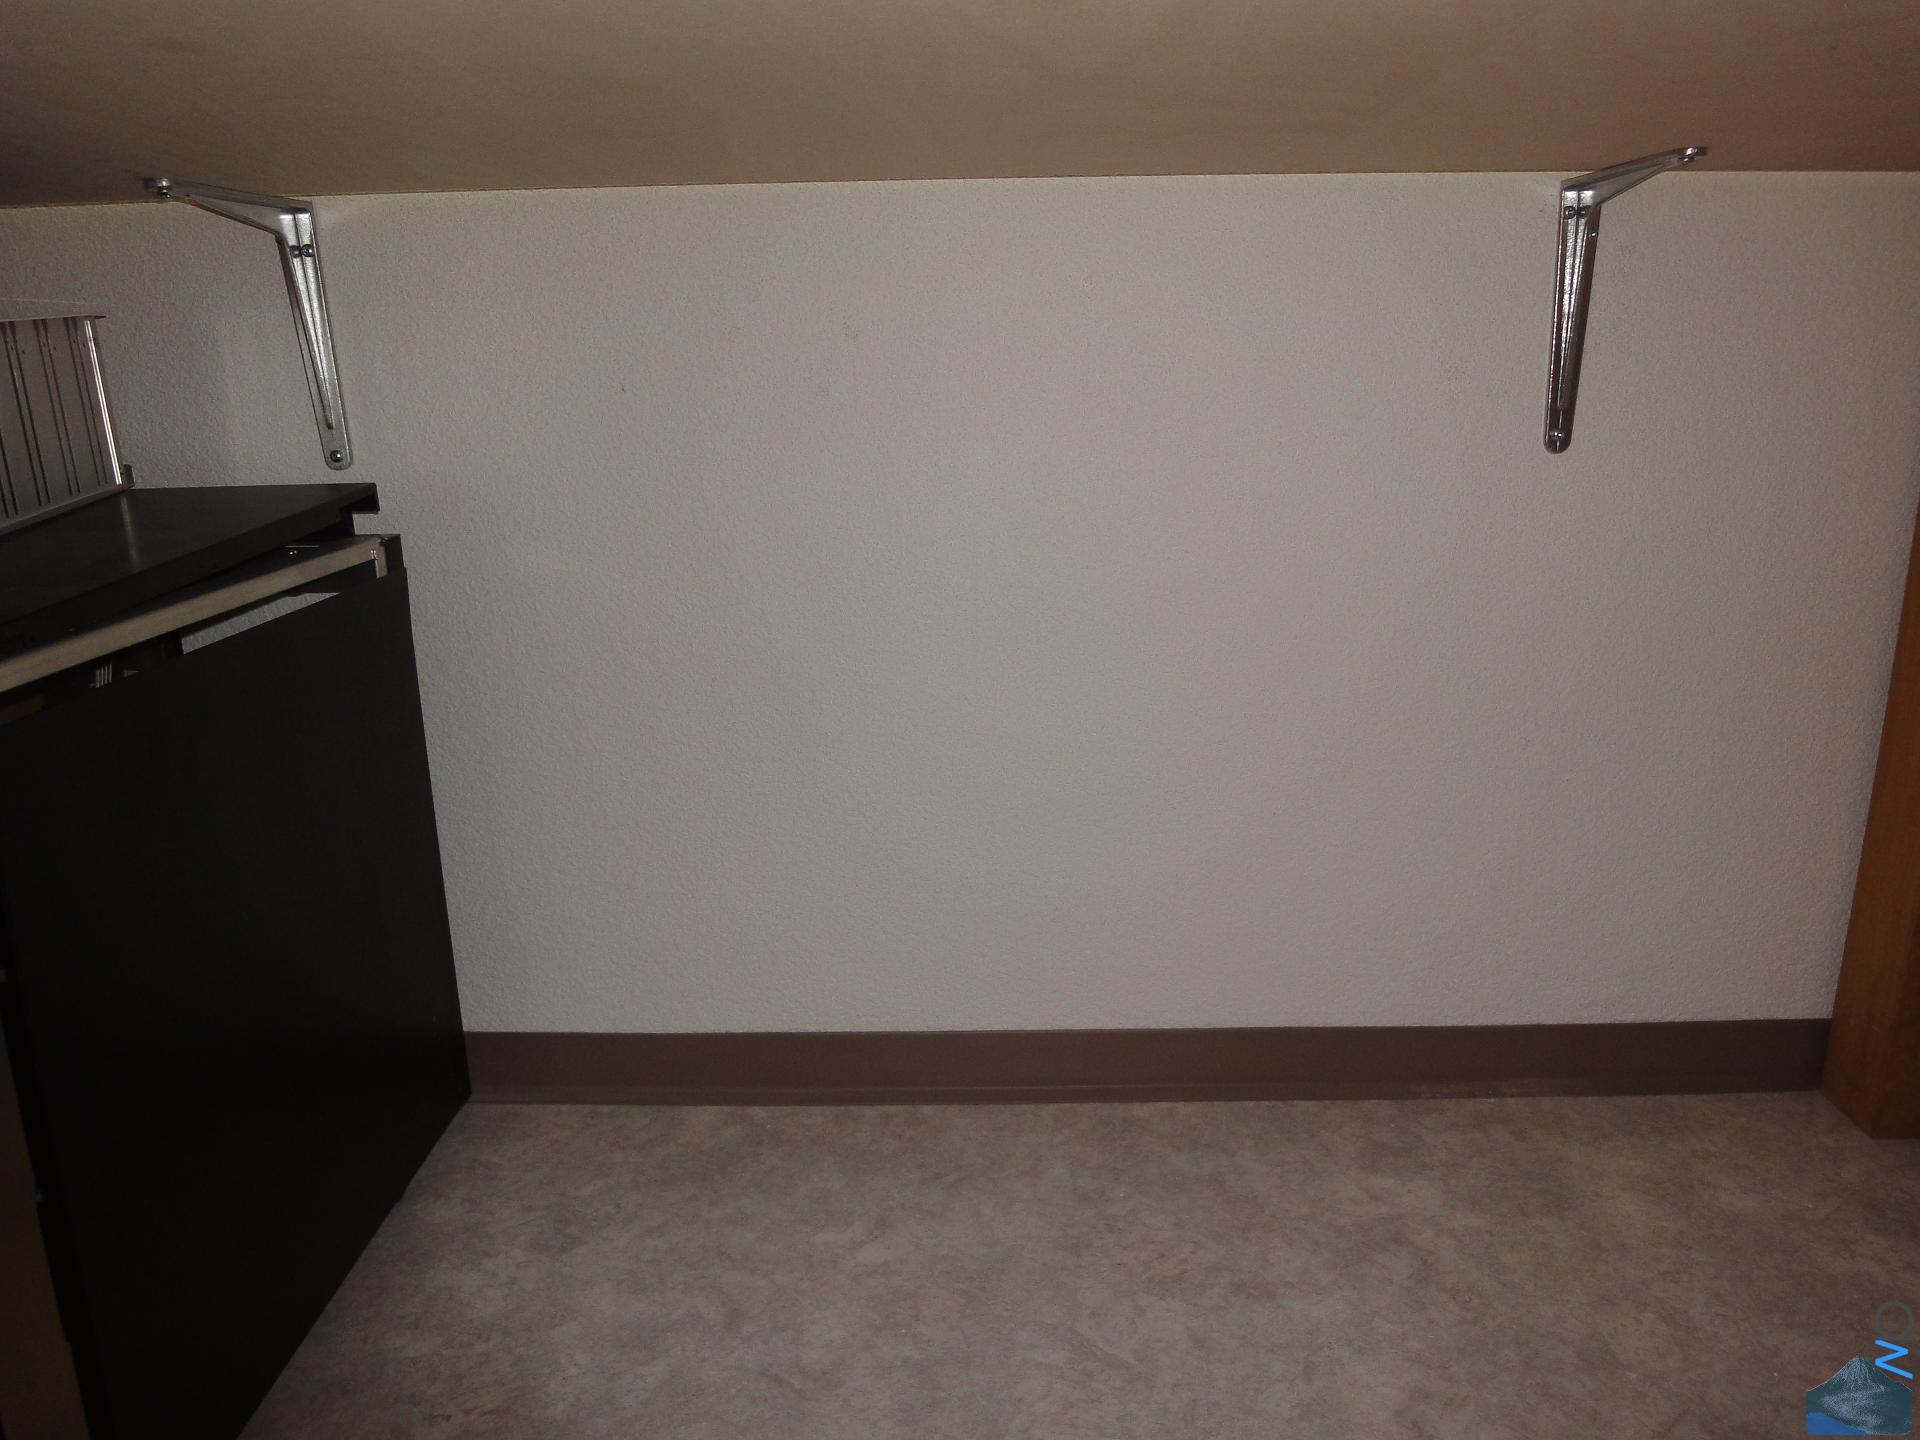
Overview
And that's how it stands now. Still not completely done, but you get the idea.
That's the remains of a Lian Li PC-343B under the table btw.

[size=+2]New Workshop[/size]
Alright, I mentioned this in a previous post. I've started to make a proper, albeit
not huge, workshop in our apartment with my dad over the weekend. Since
much work for this rig (and for others *hinthint* ) will be done here, I thought
it appropriate to post some info about this undertaking in this thread.
[size=+1]The Tools[/size]
My dad used to be an engineer in construction, and we still have a lot of tools
from back then. :rock:
The Saws
We ordered a massive plate of wood for the load bearing table part (not the
one in this picture, that was just for support during work).
However, we needed to make a cutout for a chimney that comes from the
lower apartment through ours to the roof (we live on the 2nd floor according
to British numeration, and on the 3rd floor according to the American numeration,
and there's one more floor above ours).
Both the circular saw and the jig saw are professional grade tools which were
originally bought for the construction company dad used to run.

Circular Saw, Motor Side
This thing is rather massive for something you just have laying around
Circular Saw - Blade
Do not worry about that film of rust. That happens as soon as it is slightly humid.
The main substance of the blade is actually still in very good condition, as is
the rest of the tool.
Also, compare my hand for size :lol:
Jig Saw
I've known this jig saw forever. I used to make swords and guns out of wood
with this baby when I was a kid (~8-ish). And no, there were no accidents.
Dad showed me how to do it and after that it was not really difficult.

Jig Saw - The Case
You know how nowadays tools always come in those cheap plastic boxes?
Yeah, not so back then.

Makita Bit Driver
It's not the most heavy-duty of tools (we have a proper Bosch rotary hammer
for that, also from dad's construction business), but very good quality and a
lot more handy than a full blown hand drill.
Very handy for general modding work
Load Plate - Overview
An overview shot of the load bearing plate in place.
Load Plate - Across
Here you can see that chimney and the cutout I mentioned.

Load Plate - Thickness
I can easily sit on this thing without it bending
Cover Plate - Impression
Just to give you an impression of the cover plate. Its purpose is to provide
a surface that is easier to clean, doesn't soak up solvents and paint as
easily and can be replaced if damaged too heavily. It will be taped to the load
plate with some heavy-duty double sided tape; works like a charm.

Cover Plate - Thickness
It doesn't need to be very thick.
Sandwich
The two plates taped together.
Protective Angle
The edges of the plates are rather sharp. One could either sand them down,
or do what we did. The plastic angle also provides some additional protection
to the table's edge, so we went for that. Also, it's a lot less work than
sanding every edge down properly, even with a good sanding tool (which we
do have though).
Protective Angle - Mounted
It's also taped down with the same double sided tape. One might think that
this is a bit insufficient, but in actuality everything holds together perfectly
bomb proof
.
Support Beams
Remember that support plate on which the two saws are laying in the first pic?
Yeah, we reused the support beams for that table for this one. If anyone is
wondering why we didn't just use the table itself: For one thing it's too small,
and secondly the table plate is not made for heavy duty use.
The support beams themselves are very stable though, so it was a no-brainer
to reuse them for this project. In this picture, they are not yet bolted to the
load plate.

Support Beam - Bolted
Each support beam is bolted to the load plate with 4 of these.
Apologies about the flash, but there's not a whole lot of light beneath the table
Wall Mount - Side
To prevent the table from moving around when working on it, it is bolted to both
the side and the back wall. The screws are not fully in here because we're not
done yet.
Wall Mount - Back
Overview
And that's how it stands now. Still not completely done, but you get the idea.
That's the remains of a Lian Li PC-343B under the table btw.

MrKambo
New member
7970's, as in plural? Hehe, that's probably not even too bad a deal,
depending on what I do with them (not sure how they perform at BOINC)
im a F@H man, i know the Beta Core 17, can do about 40k PPD on a 7970, not sure about other distributed projects
Yes plural, i have 2 reference 7970's with voltage control
alpenwasser
New member
im a F@H man, i know the Beta Core 17, can do about 40k PPD on a 7970, not sure about other distributed projects
Yes plural, i have 2 reference 7970's with voltage control
Rant incoming! :lol:
Yeah I used to do F@H until quite recently (~ 9 million points so far) until I got
fed up with the fact that there's not GPU support on Linux. I'm not installing
Windows just for folding since my folding rig will actually also be my work rig.
If I had a separate rig for doing work I'd probably consider making a Windows
rig for folding alone but alas...
I understand that resources for development are limited and that you need
to consider what benefits you get from an investment (in this case, porting
GPU folding to Linux), but I just feel treated a bit disrespectfully.
Also, since it is possible to get it to work in Linux with WINE (it's a bit
finicky and doesn't always work, but it can be done) it cannot be that
bloody difficult to port it, for fuck's sake.
I'm also not very pleased with the fact that the client is closed source
software and nobody is allowed to look into what the hell is actually going
on in there. They claim this is to prevent people screwing with the credits
system. But that just says to me that they don't fully understand how to
do this in the first place. If you do it right, it must not fucking matter whether
or not people can look at your source code; the should not be able to mess
with the system!
I'm aware that most people don't care at all about this. But if I'm spending
my hard-earned money (which is a substantial amount of my income as a
college student) on this, I want to bloody know what the shit is being
computed on my machine, and I have a fucking right to do so.
Overall, I just feel like I'm being treated with quite a bit of disrespect as a
donor, and I don't really feel like donating the equivalent of hundreds (so far)
or thousands (if I kept going) USD to a project that basically treats me like
a moron. :cussing:
BOINC is not at all without its problems, I'm well aware of that. The credits
system is quite screwed up, but that's not because the source code is open.
The reason for that is that different projects can basically operate indepen-
dently without central governing and determine themselves how much credit
they approve for their donors.
You might make 40k points for one day's work on one project and 80k per
day on another project. So the global overall rankings are quite meaningless,
the thing that carries importance are the rankings per individual project.
The culture on the side of the project (not talking about the donors here,
to be clear) is a lot more friendly and open. Problems (and there are quite
a few, indeed) are discussed openly and you actually more or less know
what the hell is going on as a donor as long as you bother to actually
inform yourself.
Also, I quite like the freedom of being able to select what projects to
compute for. You can do physics, medicine (there's protein folding research
being done on BOINC as well), maths and other stuff.
Currently I'm doing work for the Milkyway project and Enigma (they have
a few messages from WWII that so far have not been decoded and now
they're trying brute force :lol: ). Once I get HELIOS up and running I'll
probably also be doing Rosetta and GPU Grid (both medical research, since
I do think that is quite important as somebody befallen with health issues).
Just to avoid misunderstandings: I have no problem with other people doing
F@H, and I do think that the project's aims are noble and their intentions
good, but some of the people making decisions seem to be suffering a bit
from the "we're so successful we can do anything and nobody will bloody
care let alone stop us" attitude.
Anyway, since nobody will probably ever read this rand in its entirety, I
will now stop :lol:
MrKambo
New member
Rant incoming! :lol:
Yeah I used to do F@H until quite recently (~ 9 million points so far) until I got
fed up with the fact that there's not GPU support on Linux. I'm not installing
Windows just for folding since my folding rig will actually also be my work rig.
If I had a separate rig for doing work I'd probably consider making a Windows
rig for folding alone but alas...
I understand that resources for development are limited and that you need
to consider what benefits you get from an investment (in this case, porting
GPU folding to Linux), but I just feel treated a bit disrespectfully.
Also, since it is possible to get it to work in Linux with WINE (it's a bit
finicky and doesn't always work, but it can be done) it cannot be that
bloody difficult to port it, for fuck's sake.
I'm also not very pleased with the fact that the client is closed source
software and nobody is allowed to look into what the hell is actually going
on in there. They claim this is to prevent people screwing with the credits
system. But that just says to me that they don't fully understand how to
do this in the first place. If you do it right, it must not fucking matter whether
or not people can look at your source code; the should not be able to mess
with the system!
I'm aware that most people don't care at all about this. But if I'm spending
my hard-earned money (which is a substantial amount of my income as a
college student) on this, I want to bloody know what the shit is being
computed on my machine, and I have a fucking right to do so.
Overall, I just feel like I'm being treated with quite a bit of disrespect as a
donor, and I don't really feel like donating the equivalent of hundreds (so far)
or thousands (if I kept going) USD to a project that basically treats me like
a moron. :cussing:
BOINC is not at all without its problems, I'm well aware of that. The credits
system is quite screwed up, but that's not because the source code is open.
The reason for that is that different projects can basically operate indepen-
dently without central governing and determine themselves how much credit
they approve for their donors.
You might make 40k points for one day's work on one project and 80k per
day on another project. So the global overall rankings are quite meaningless,
the thing that carries importance are the rankings per individual project.
The culture on the side of the project (not talking about the donors here,
to be clear) is a lot more friendly and open. Problems (and there are quite
a few, indeed) are discussed openly and you actually more or less know
what the hell is going on as a donor as long as you bother to actually
inform yourself.
Also, I quite like the freedom of being able to select what projects to
compute for. You can do physics, medicine (there's protein folding research
being done on BOINC as well), maths and other stuff.
Currently I'm doing work for the Milkyway project and Enigma (they have
a few messages from WWII that so far have not been decoded and now
they're trying brute force :lol: ). Once I get HELIOS up and running I'll
probably also be doing Rosetta and GPU Grid (both medical research, since
I do think that is quite important as somebody befallen with health issues).
Just to avoid misunderstandings: I have no problem with other people doing
F@H, and I do think that the project's aims are noble and their intentions
good, but some of the people making decisions seem to be suffering a bit
from the "we're so successful we can do anything and nobody will bloody
care let alone stop us" attitude.
Anyway, since nobody will probably ever read this rand in its entirety, I
will now stop :lol:
i actually read all that, and i completely agree, when i was highly active few years back i was massive fan of ubuntu im talking 10.4 days and i could never work out why they hadnt got GPU working on it, now i actually tried the Wine method you mentioned and its shocking!! so much instability it was pointless
the SMP client for Linux was amazing! on a i5-750 ppd was insane for those days.
its the F@H Cores that need to be ported now from what i understand, using OpenCL will allow this (Core 17) im literally waiting for my PSU to get back and ill be ripping into this, because im a Linux fan, if it wasn't for need to gaming i would have left Windows when Vista was released.
Ive never looked into any of the other projects tbh, i was introduced to F@H and have believed in its cause since, not saying the others are pointless, everyone has their own interests.
F@H seems to be the most popular across the 'Internet'
alpenwasser
New member
i actually read all that
Success, thank you! :rock:
, and i completely agree, when i was highly active few years back i was massive fan of ubuntu im talking 10.4 days and i could never work out why they hadnt got GPU working on it, now i actually tried the Wine method you mentioned and its shocking!! so much instability it was pointless
Yeah I tried it once as well. Was not pleased :huh:
the SMP client for Linux was amazing! on a i5-750 ppd was insane for those days.
I agree about that. I've also never had any stability issues with it,
chugged along 24/7 for months on end
its the F@H Cores that need to be ported now from what i understand, using OpenCL will allow this (Core 17)
Oh, that would be nice.
im literally waiting for my PSU to get back and ill be ripping into this, because im a Linux fan, if it wasn't for need to gaming i would have left Windows when Vista was released.
Yes, a kindred spirit! :worship:
I used to game quite a lot on my PC. But I switched from Win to Ubuntu
~ 2007 (and to Arch in Spring 2011 when Ubuntu introduced Unity)
and since the PS3 was still pretty much up to par by then I mostly
started gaming on that (plus there are some pretty nice PS3 exclusive
games, like the Metal Gear Solid series).
Also I just didn't have the time anymore and for the occasional gaming
session the PS3 was perfectly suited.
But I'm extremely happy about Steam coming to Ubuntu and might
dual boot Arch with Ubuntu on HELIOS at some point :rock:
Ive never looked into any of the other projects tbh, i was introduced to F@H and have believed in its cause since, not saying the others are pointless, everyone has their own interests.
I have no problem with the cause at all, just with the project's treatment
of its donors. But I have found it an interesting experience to broaden my
horizons a bit. I would still consider going back if they ever really support
GPUs in Linux. I'm admittedly sort of a statistics whore and that's one area
where F@H is a lot more suited to my preferences than BOINC :lol:
F@H seems to be the most popular across the 'Internet'
That was correct the last time I checked, yes.
Last edited:
That's quite a nice rant , and it's also the reason why I really like linux. Sure there are plenty open-source software on Windows but there are way more on linux. I really like the fact that if you don't trust a piece of software you can just look "inside" and see what's going on. But then again can't live without Windows either(games).
I'm dual-booting Windows and Mint14 atm but I've tried Arch as well some time ago and I have to say that I quite enjoyed settings up everything by myself (using their wiki ofcourse).
, and it's also the reason why I really like linux. Sure there are plenty open-source software on Windows but there are way more on linux. I really like the fact that if you don't trust a piece of software you can just look "inside" and see what's going on. But then again can't live without Windows either(games).I'm dual-booting Windows and Mint14 atm but I've tried Arch as well some time ago and I have to say that I quite enjoyed settings up everything by myself (using their wiki ofcourse
).alpenwasser
New member
That's quite a nice rant
Hehe, thanks :blush:
I tend to be quite good at those, but usually I spare my fellow human beings,
especially in real life. I don't really know anybody else who shares my interest
in this hobby (well, one guy, but I haven't seen him in ages
) so listeningto me going on about these sorts of topics is more annoying to the people
around me than anything else.
But I'm happy to have found folks who share my interests
, and it's also the reason why I really like linux. Sure there are plenty open-source software on Windows but there are way more on linux.
Indeed. And it's not just about there being more software but the whole culture
around the OS is very different (and a lot more suited to my preferences).
I wouldn't say Windows is a bad OS per se (for the most part, and Linux
isn't perfect either), but once you've tried something UNIX-like it's just
so blatantly obvious that Windows has been dumbed down for soccer mums,
stay-at-home dads and office drones that you can't really do anything
interesting with it anymore. Sure there's plenty of neat software, but
the system itself is locked down and absolutely unsuited for satisfying any
serious technical interest.
It's just so... mundane and boring.
Just to be clear: I'm not saying that everybody using Windows is a moron
and technical illiterate, my point merely is that Windows has clearly been
designed for those people.
I really like the fact that if you don't trust a piece of software you can just look "inside" and see what's going on.
+1. I recently took a peak at the Linux kernel's source code, namely the
scheduler. And even though my C knowledge isn't really that great at all
I was already able to understand some things.
It was really very fascinating.
But then again can't live without Windows either(games).
I'm dual-booting Windows and Mint14 atm but I've tried Arch as well some time ago and I have to say that I quite enjoyed settings up everything by myself (using their wiki ofcourse
I originally switched to Arch because I'd gotten a bit bored by Ubuntu and
didn't really like the first implementation of Unity (what I've seen recently
actually doesn't look too bad, they seem to have worked out the major kinks).
I dropped Gnome last fall and switched to a tiling window manager (i3, for a
shot of my desktop see here), and I must admit it's quite awesome
.But last fall I'd gotten a bit bored by Arch as well and tried FreeBSD for a change.
Not just out of technical curiosity, but also because I'm very interested
in the history of UNIX and its descendants, and since FreeBSD is a direct
descendant of the original true UNIX I thought I would have a look.
I must admit I was quite pleasantly surprised. Installed it on my laptop, and
pretty much most things worked out of the box. I did accidentally exclude
the necessary drivers for my mouse upon compiling X, but that can happen
.But Wifi, sound etc. all worked out of the box without any special
intervention.
And ZFS! Hell, yeah! It. Is. Awesome! :rock:
But since you do need to do certain things differently on FreeBSD and I don't
have the time at the moment to read up on them constantly I reinstalled
Arch on that machine this week again. I need to take apart my current main
rig for some parts and therefore I need the laptop as a temporary substitute.
I might install FreeBSD as my main OS on HELIOS though, not sure yet.
After all, BOINC is available on that as well, although I'm not sure about GPU
support. Might just have to give it a shot.
Similar threads
- Replies
- 2
- Views
- 196