You are using an out of date browser. It may not display this or other websites correctly.
You should upgrade or use an alternative browser.
You should upgrade or use an alternative browser.
EVOLUTION by PEXON Cable management/ few pics of progress
- Thread starter PEXON
- Start date
badtaylorx
Member
you suck and your work looks like dog shit...........
think its possible to get any farther from the truth???
your skill with an x-acto knife is GODLY
think its possible to get any farther from the truth???
your skill with an x-acto knife is GODLY
This is my kinda build log! Keep it coming dude!
PEXON
SleevingMaster
you suck and your work looks like dog shit...........
think its possible to get any farther from the truth???
your skill with an x-acto knife is GODLY
At first I was like...

then I was like

then I was like


yassarikhan786
New member
Wow, that looks really good
 .
.
PEXON
SleevingMaster
No mistakes this time. The back PSU cover got masked this time, before ANY spraying.
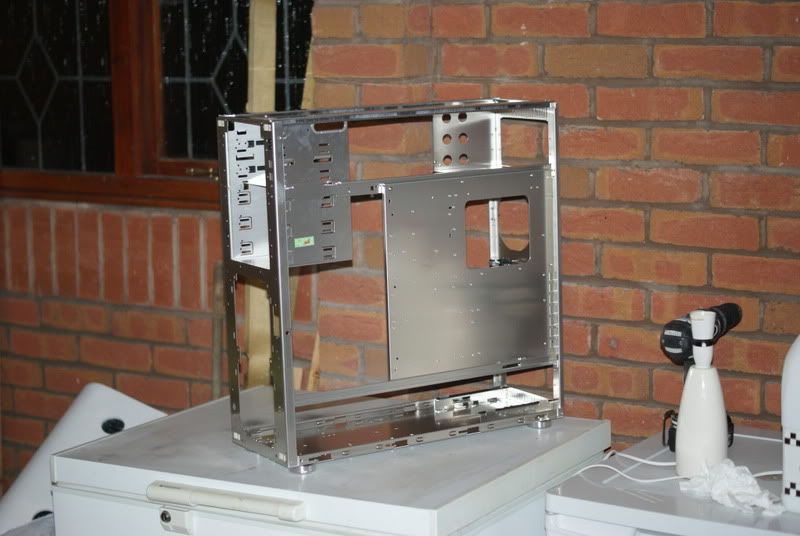
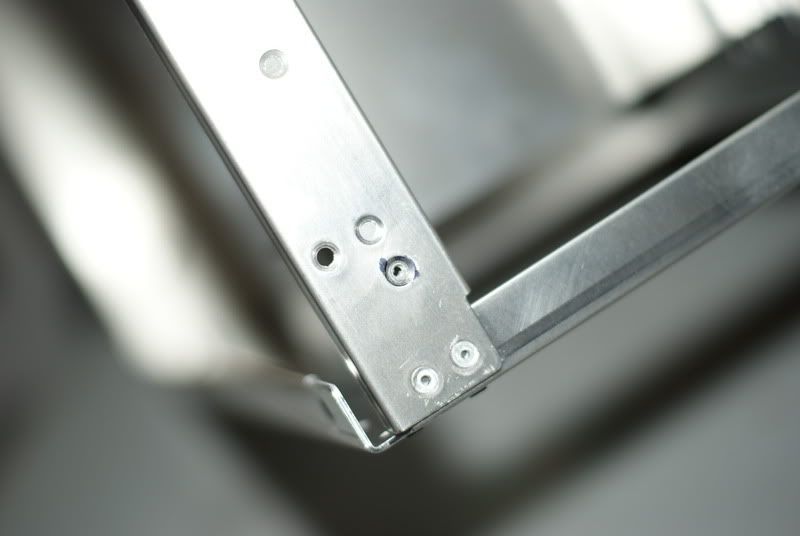
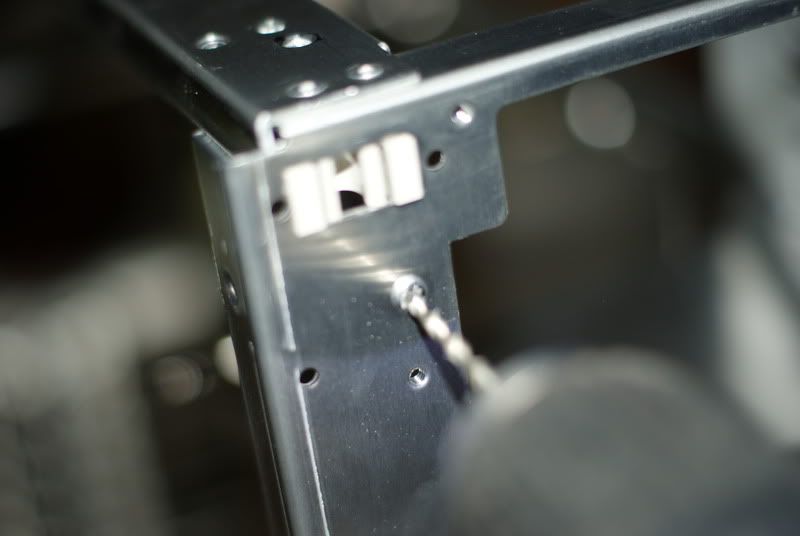
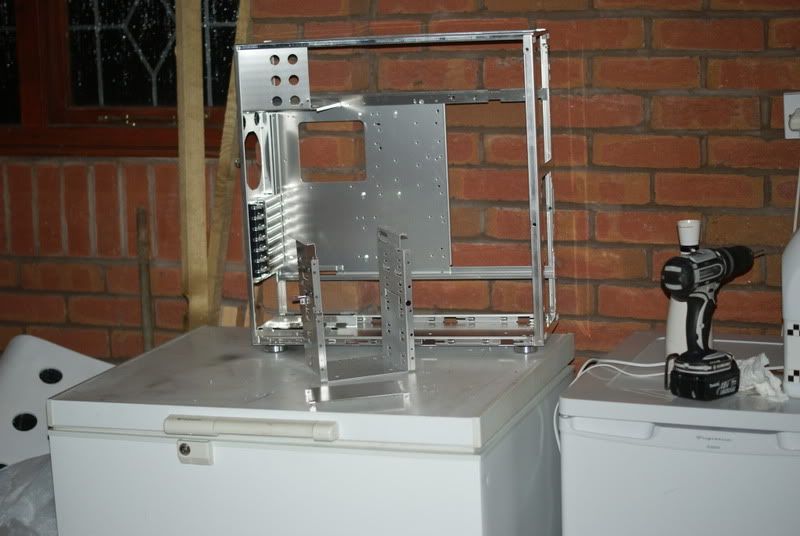
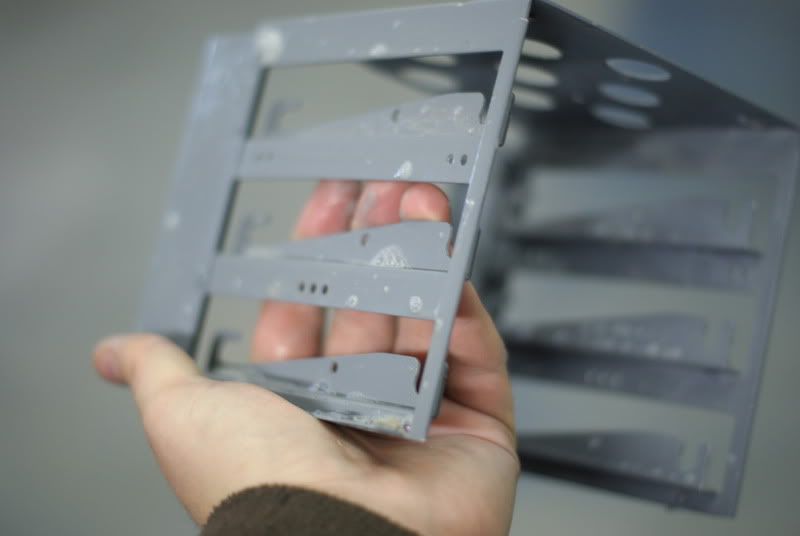
I took the beast outside, into the garage to lose some weight. I wanted to strip out the hard drive cage at the top and the 5 1/4" drive bays at the front. I managed to bring a drill home from work today, good thing about working for your dad!
 BUT I forgot a few 2mm drill bits. I managed to find a few small bits in a toolbox at home so, at least something went, kind of to plan... :S lol
Nothing too taxing, just about 12-15 rivets to drill the head off of.
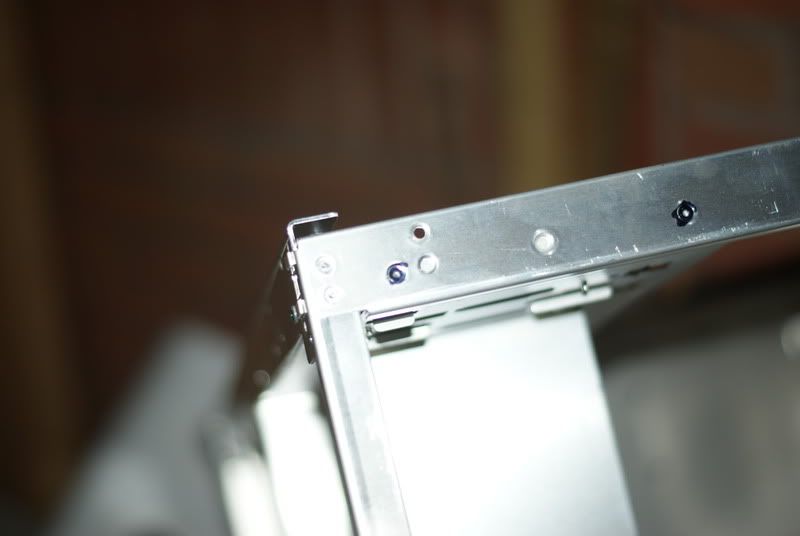
Easy, drill the head off and the body comes out. Simples.
After drilling a few rivets, the blanking plates and the 5 1/4" bay lots is rigidity and the mid-plate popped straight out.
The beast won't even fit inside my old PC case box!!!
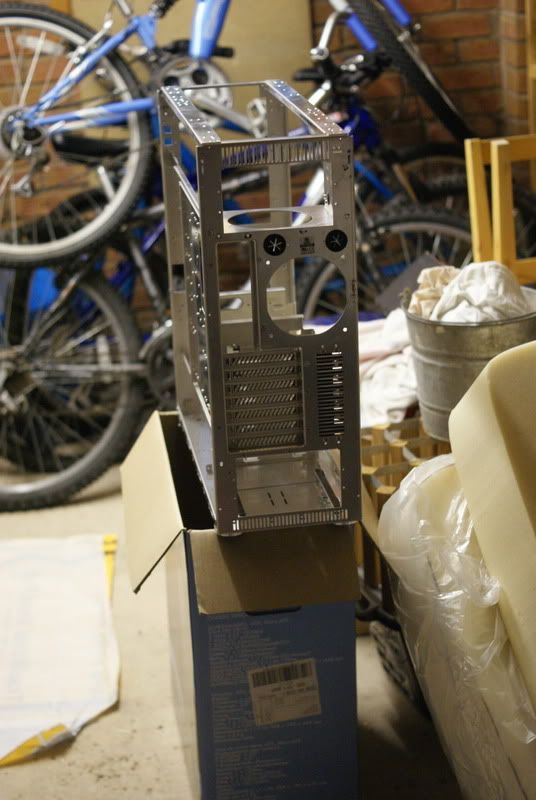
She's looking a bit naked!
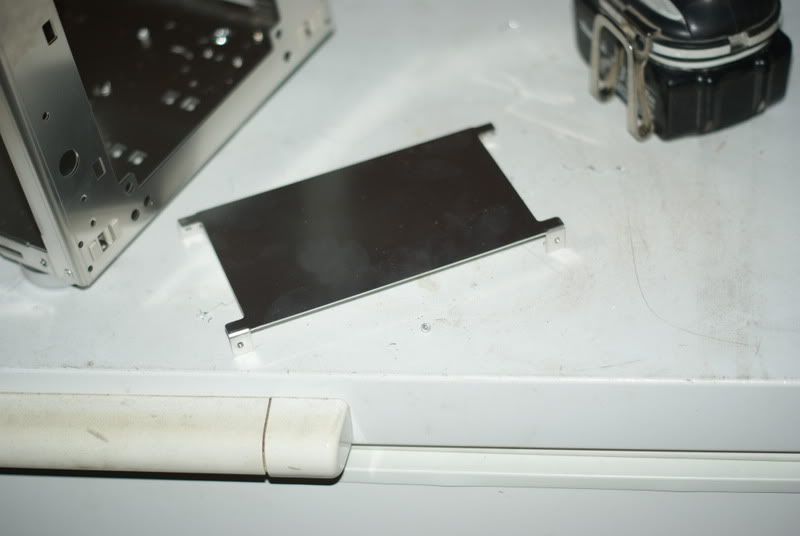
The PSU blanking plate coat a lick of matt-black, WITH masking tape on this time lol
I managed to get a few more rivets out on the top drive bay, but unfortunately, the drill couldn't quite reach down the last two, it was a rotary tool jon, which will have to wait unfortunately. Thats pretty much it for today, not a fat lot done, work was a bit busy, trying to get stuff ready for a job were starting Wednesday. I'll be working away from Wednesday to Sunday, so there will be no updates, I can do little bits and pieces in the evenings and take photos and will be sure to update when I get back. Thanks for looking again guys!
I took the beast outside, into the garage to lose some weight. I wanted to strip out the hard drive cage at the top and the 5 1/4" drive bays at the front. I managed to bring a drill home from work today, good thing about working for your dad!
Nothing too taxing, just about 12-15 rivets to drill the head off of.
Easy, drill the head off and the body comes out. Simples.
After drilling a few rivets, the blanking plates and the 5 1/4" bay lots is rigidity and the mid-plate popped straight out.
The beast won't even fit inside my old PC case box!!!
She's looking a bit naked!
The PSU blanking plate coat a lick of matt-black, WITH masking tape on this time lol
I managed to get a few more rivets out on the top drive bay, but unfortunately, the drill couldn't quite reach down the last two, it was a rotary tool jon, which will have to wait unfortunately. Thats pretty much it for today, not a fat lot done, work was a bit busy, trying to get stuff ready for a job were starting Wednesday. I'll be working away from Wednesday to Sunday, so there will be no updates, I can do little bits and pieces in the evenings and take photos and will be sure to update when I get back. Thanks for looking again guys!
Beattie282
New member
very nice man! wish i had the skills and patience to do this stuff
CloneageDK
New member
You got excellent taste in cars.
The GT-R is simply stunning to look at (if you're into that sort of thing). And I imagine it drives quite well ^^
Oh, and the work you've put into this is amazing. Like some of the other have commented, you must have a huge patience.
Or maybe it's willpower from hell xD
In any case, I'll be looking forward to future updates. Keep it up!
PEXON
SleevingMaster
Not a massive update again, but I have managed a few bits, let me show you. Oh and I've spent silly money on bits and pieces, I really need to curb my spending! :duh:
First off I got a package from Nils from MDPC-X during the week (I was away so didn't get it 'til Saturday morning). Awesome stuff from a top guy, but hey, whats new?! :thumb:
Yadda yadda yadda, whats in the package!
A PROPER ATX pin removal tool, not like the cack Phobya one, Nils provides proper Molex ones, not cheap, but work much better than the cheaper versions.
Popped the pin out first try, no tug of war or the flimsy tool bending, pop in, push, drops out, simple.

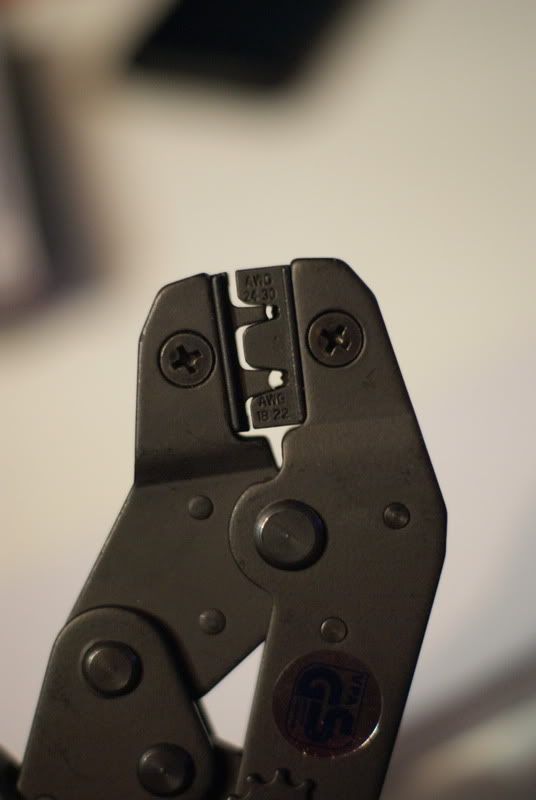
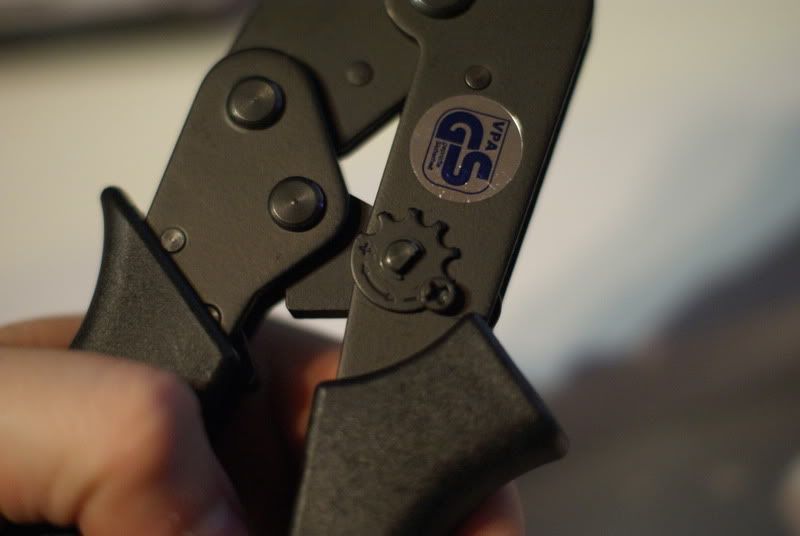
Individually tailored to crimp at its best.
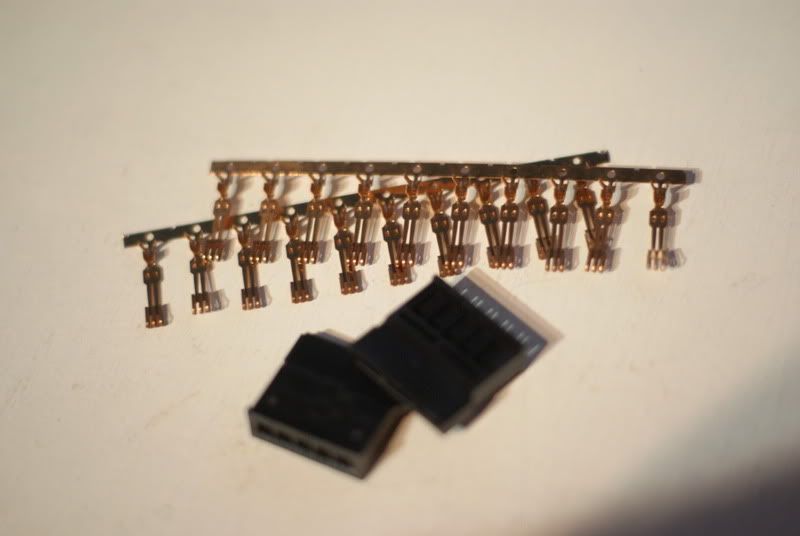
I also got a load of crimps
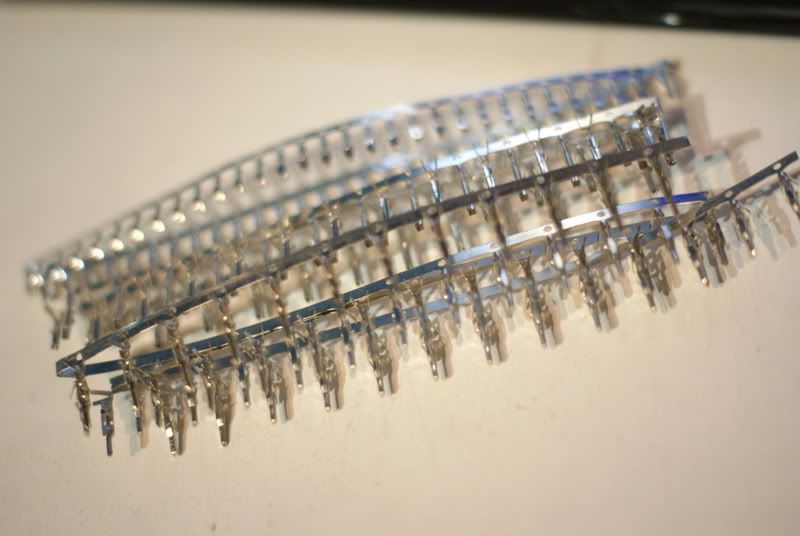
Some sata crimps and connectors as well.
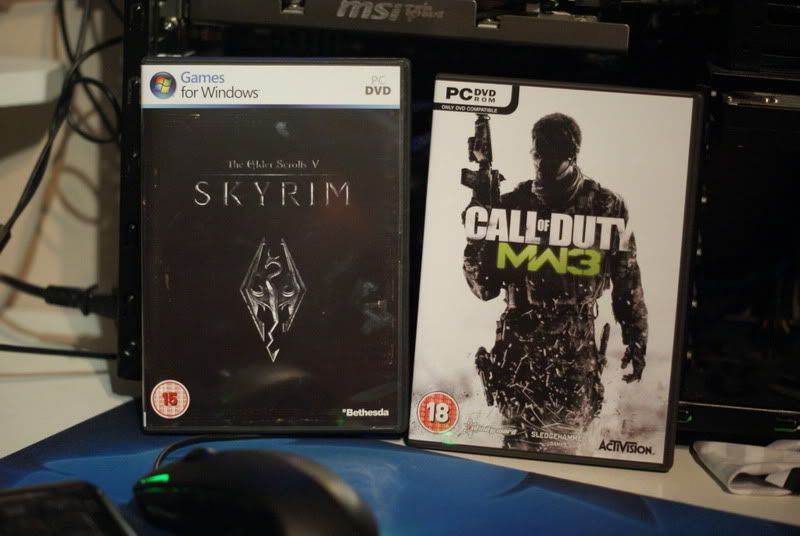
I bought a couple of games, one EPIC one and one not so.... :hehe:
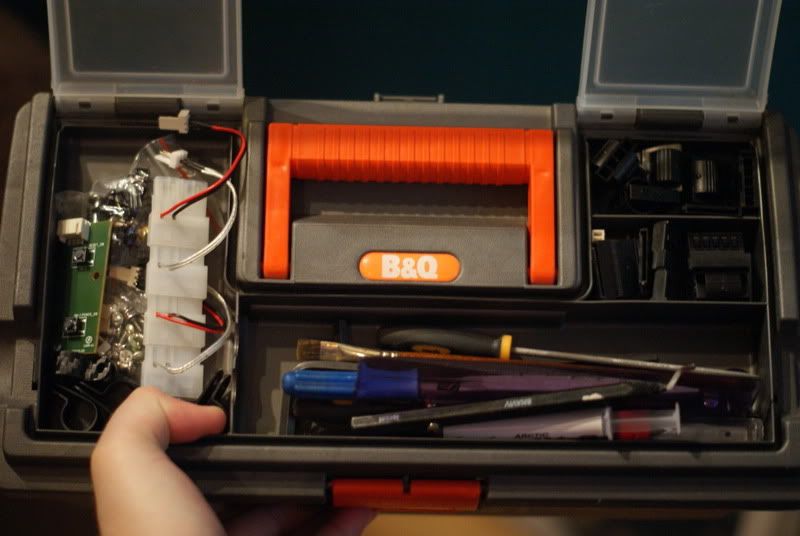
I also tidied up my little computer modding toolbox
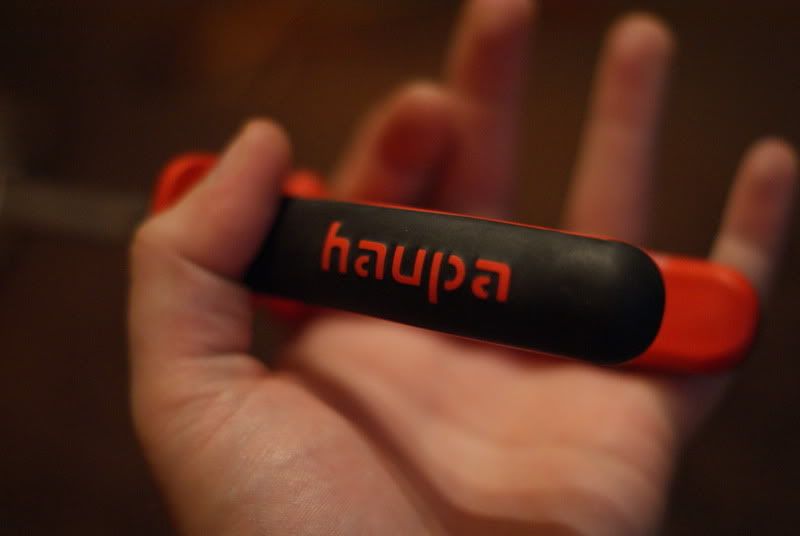
I got these awesome wire strippers, thats the good thing about working for your dad and being in engineering; I got them for free!
MY dad just put them through our account with the electrical wholesaler whilst getting some bits for a job and he didn't want any money for them. Bless him. lol. They weren't cheap, (£55! but we get a discount
 ) but god-damn they work with ease. No cuts in the wire, nice clean removal of the sheathing with no damage whatsoever, just what you want!
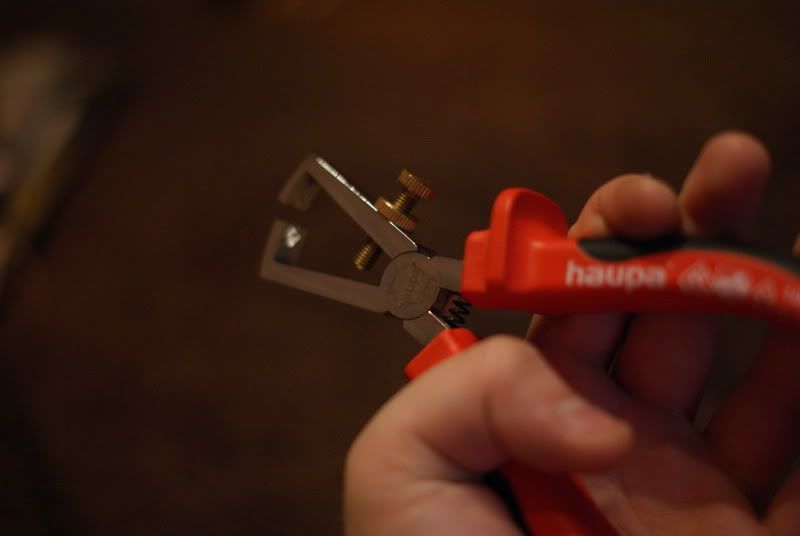
I just did a little test with them, not bothered about lengths of the removal, they are SO easy to use and silly neat! I just did it on some 16AWG I had lying around.
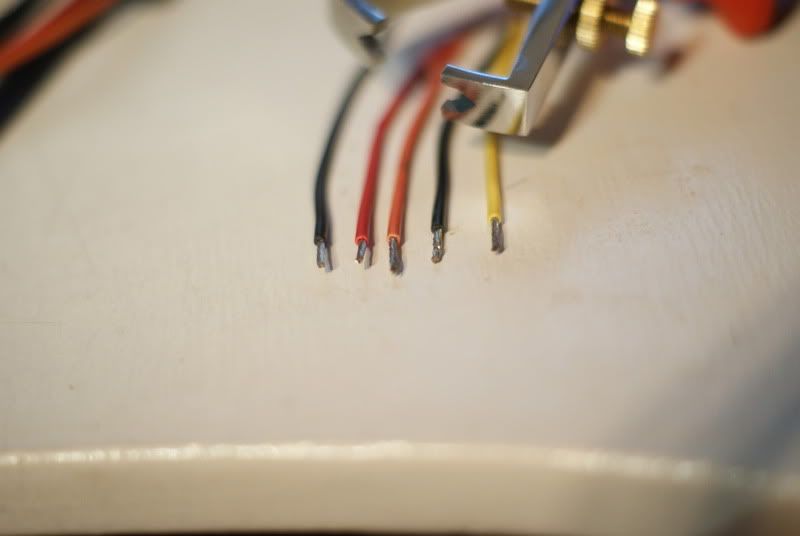
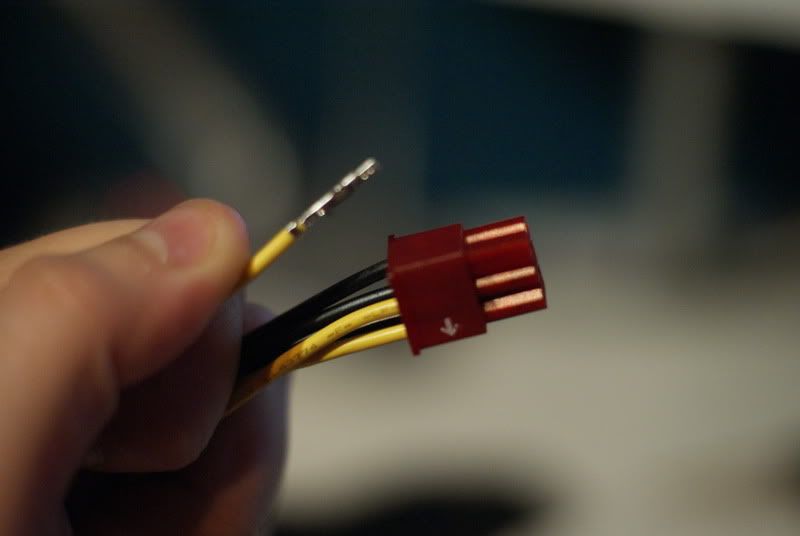
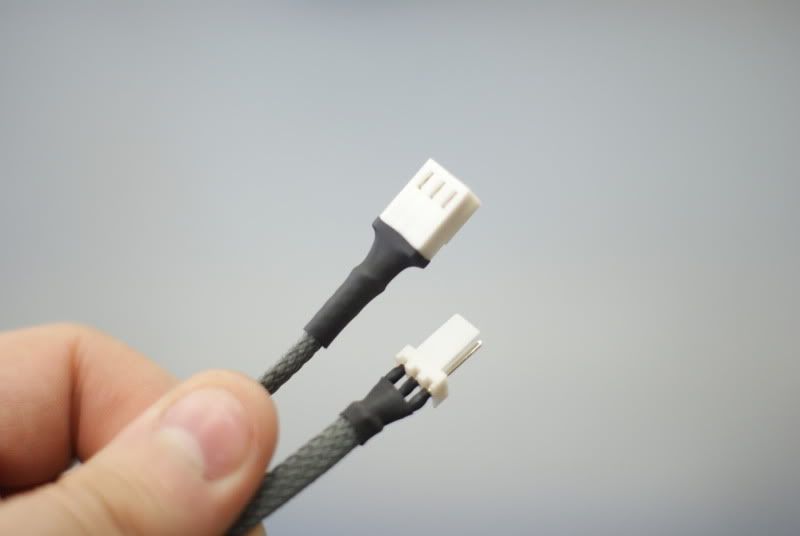
I started ripping off all the 24pin atx-power cables, cut them off, stripped them and used the crimping tool to get an awesome finished product. Hats off tho Nils, the crimping tool and supplied crimps are epic.
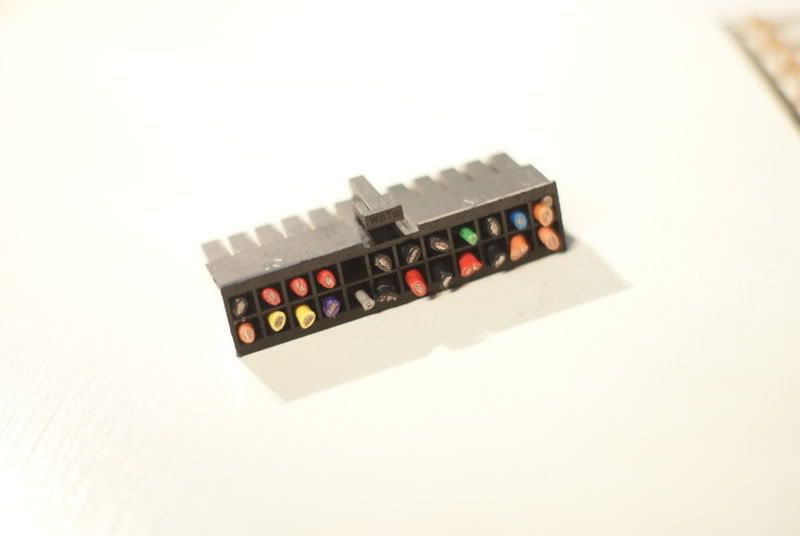
Heres the 24 pin terminal...
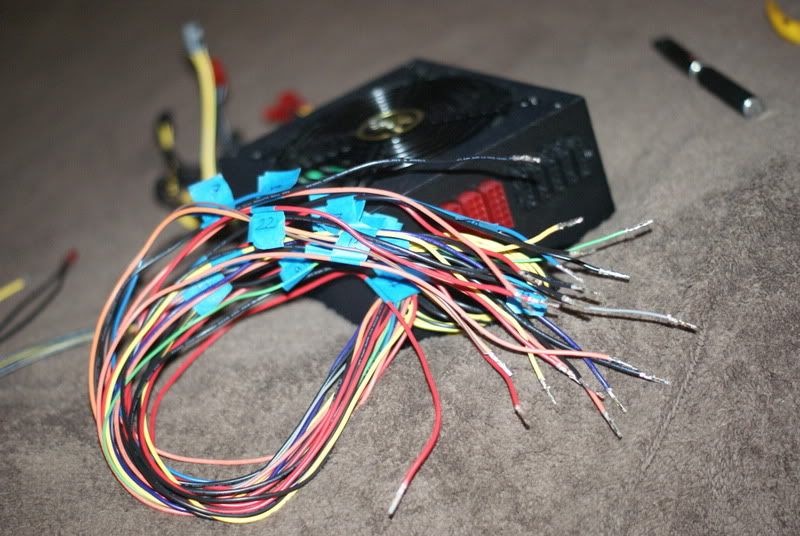
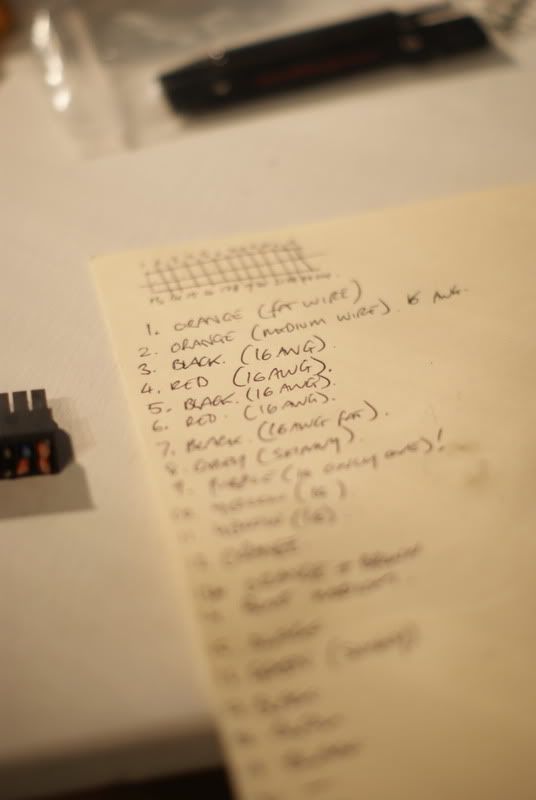
And I made a note of all the cables and where they go.
Thanks a lot for looking guys, I think the next big task is painting the case and sleeving the rest of the PSU, again thanks, till next time!
First off I got a package from Nils from MDPC-X during the week (I was away so didn't get it 'til Saturday morning). Awesome stuff from a top guy, but hey, whats new?! :thumb:
Yadda yadda yadda, whats in the package!
A PROPER ATX pin removal tool, not like the cack Phobya one, Nils provides proper Molex ones, not cheap, but work much better than the cheaper versions.
Popped the pin out first try, no tug of war or the flimsy tool bending, pop in, push, drops out, simple.
Individually tailored to crimp at its best.
I also got a load of crimps
Some sata crimps and connectors as well.
I bought a couple of games, one EPIC one and one not so.... :hehe:
I also tidied up my little computer modding toolbox
I got these awesome wire strippers, thats the good thing about working for your dad and being in engineering; I got them for free!
I just did a little test with them, not bothered about lengths of the removal, they are SO easy to use and silly neat! I just did it on some 16AWG I had lying around.
I started ripping off all the 24pin atx-power cables, cut them off, stripped them and used the crimping tool to get an awesome finished product. Hats off tho Nils, the crimping tool and supplied crimps are epic.
Heres the 24 pin terminal...
And I made a note of all the cables and where they go.
Thanks a lot for looking guys, I think the next big task is painting the case and sleeving the rest of the PSU, again thanks, till next time!
PEXON
SleevingMaster
Time for another decent update, back in the workshop for a few days so I have a chance to get some work done. I've also been doing a bit of tatting whilst at home in the evenings, namely staying up till 1o'clock cutting sleeving.
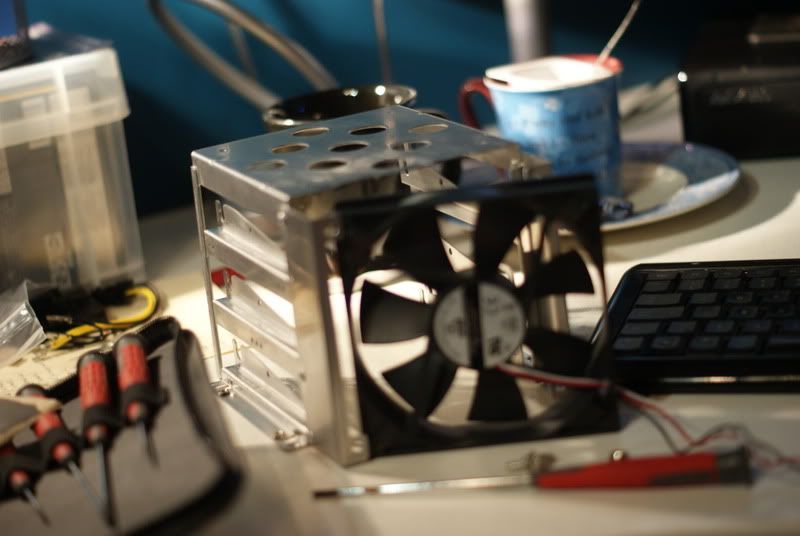
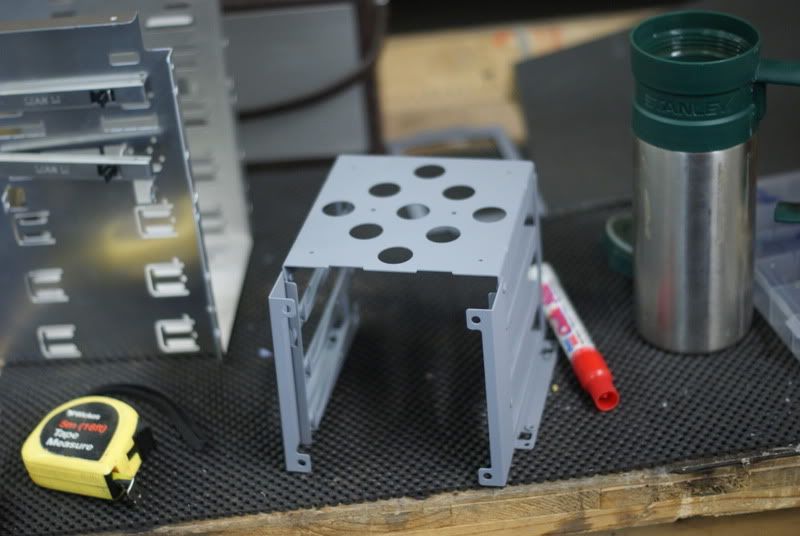
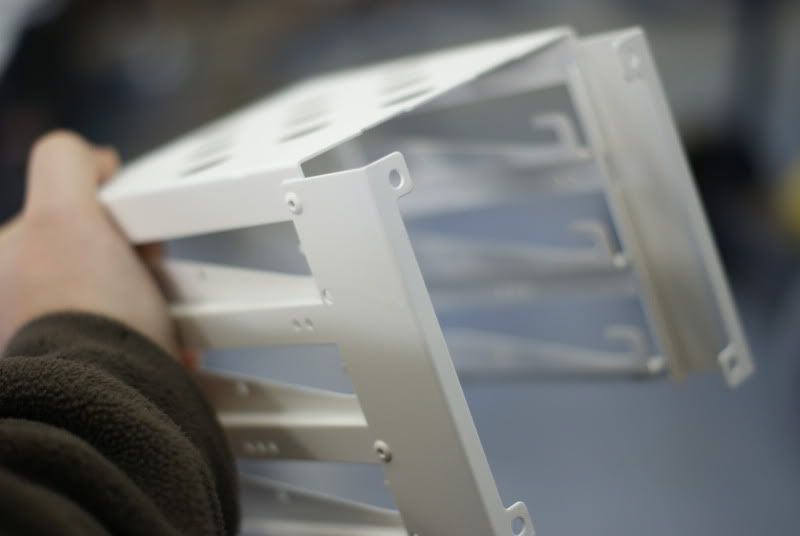
Anyway, first off. I managed to remove the hard-drove cage, I stripped the rivets down and took off the front 120mm fan.
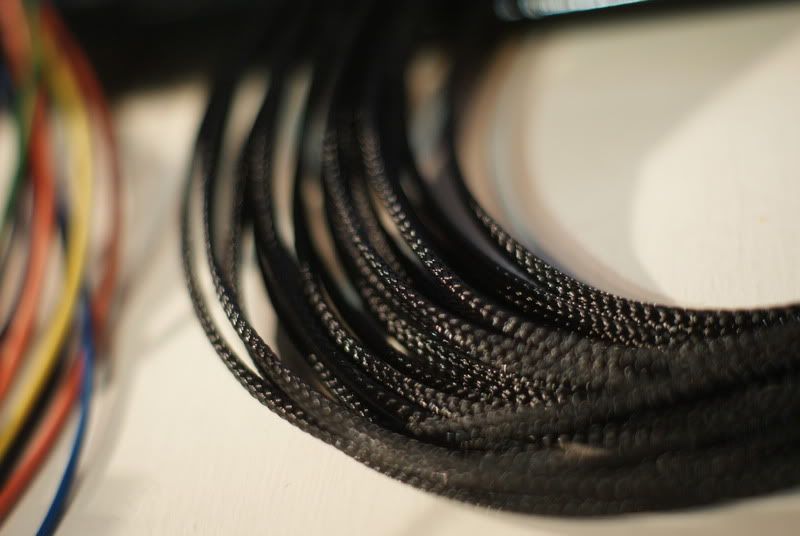
I started cutting, measuring to ensure I got the same length sleeve each time as well as burning the ends of the sleeve.
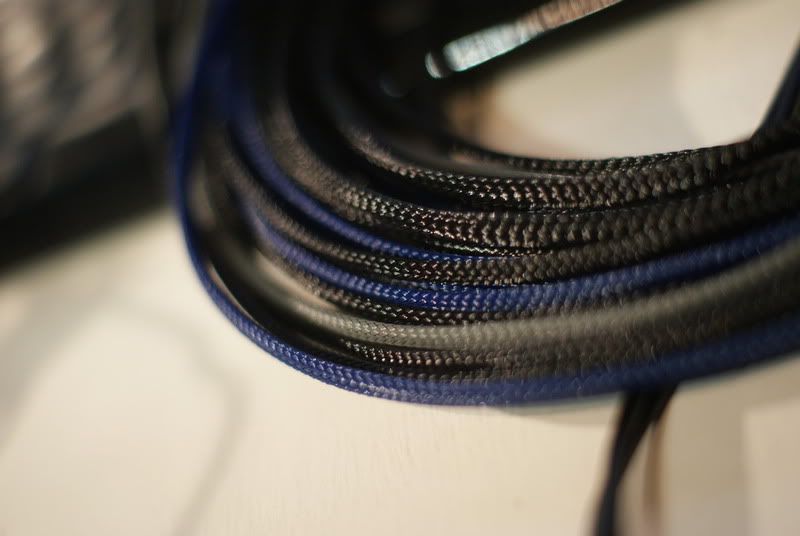
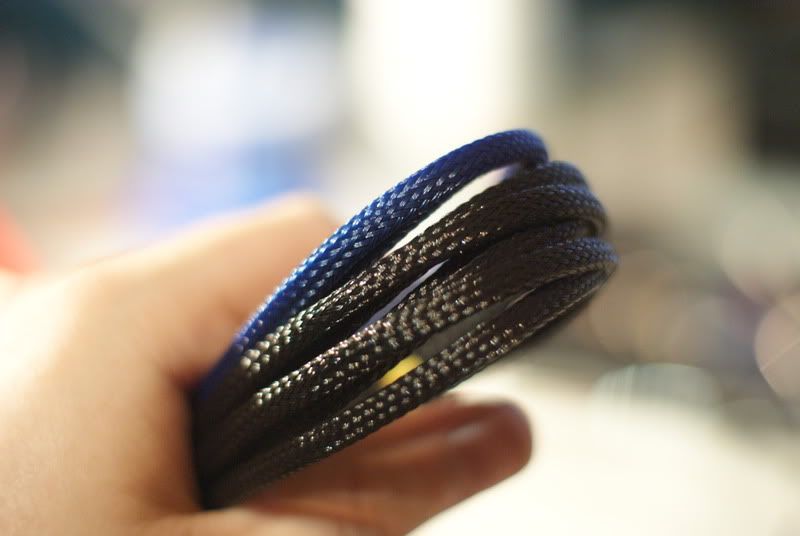
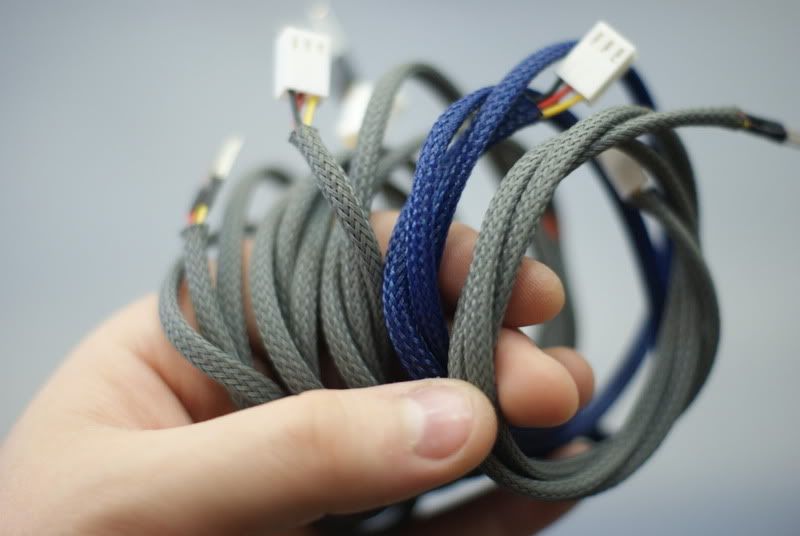
Then a little bit of blue, navy blue, not a tacky sky blue, to add a bit of variety. Oh and a little bit of grey too, again to break it up without it looking to, I don't know, tacky with all bright colours.
I started to put some sleeving on the 24 pin ATX connection.

Next up is the case exhaust fan and hard-drive cooling fan. I don't wan't to go too overboard with the white LED case/ rad fans and to keep the cost down, as the case came with the 2x 120, I might as well use them. I wanted them to fit in with how I painted the Enermax fans; white frames, black fans.
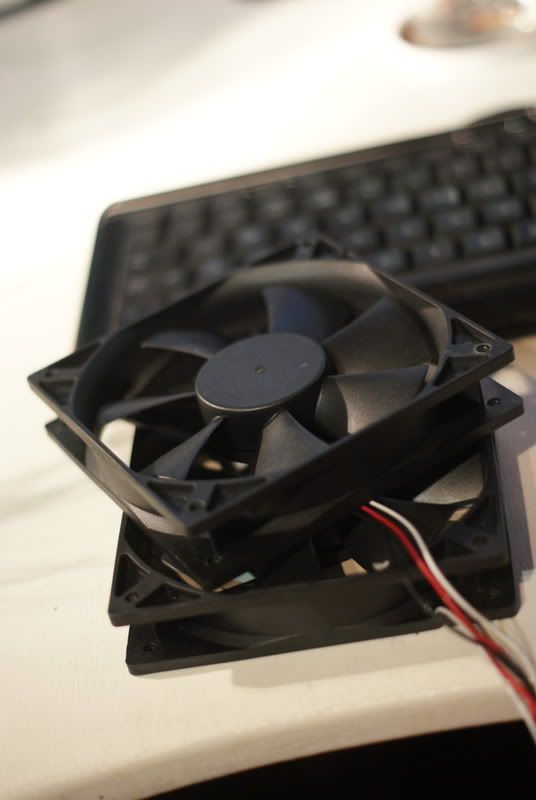
Simple case of popping off the rubber cap off the rear and removing the washer and popping the fan off.
And as usual, give it a sand down prior to the first coat of primer, to get a solid finish.
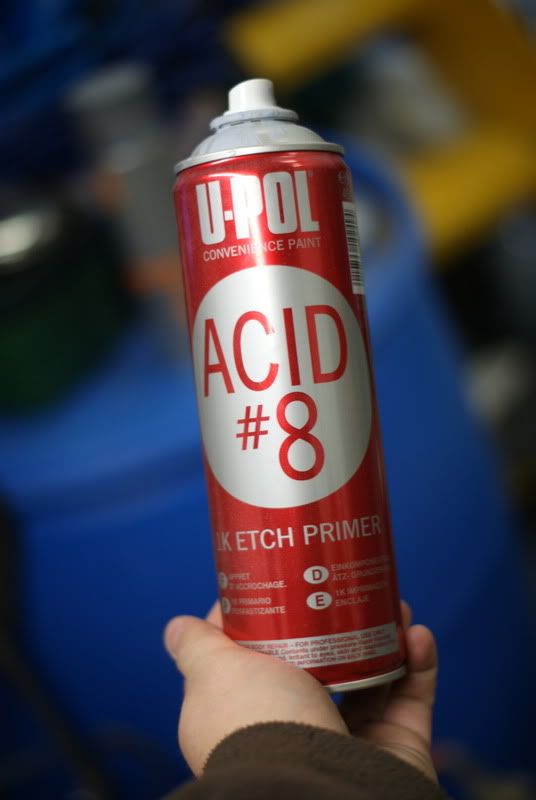
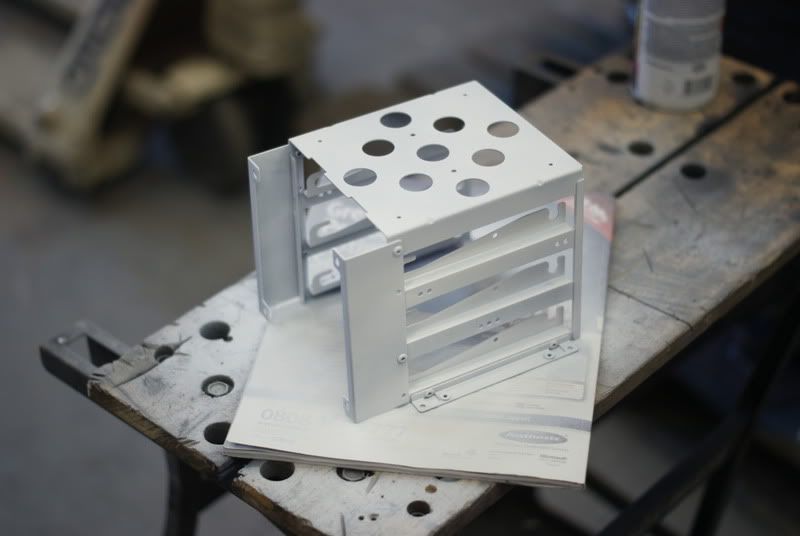
The primer on the hard-drive dock had dried (Acid-Etch), so time for a coat of regular grey primer.
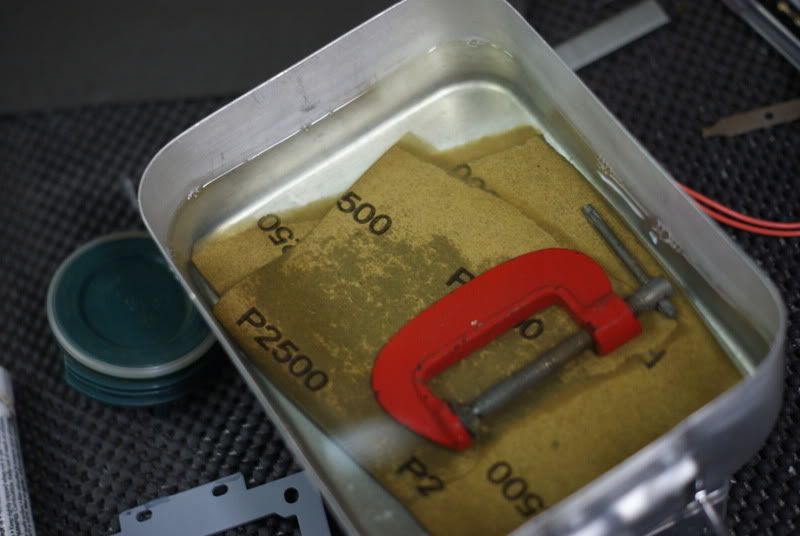
Not before soaking some 2500 wet and dry paper in some warm water and a bit of washing-up liquid to break the surface tension of the water to prevent any clogging. Lol at the army canteen!
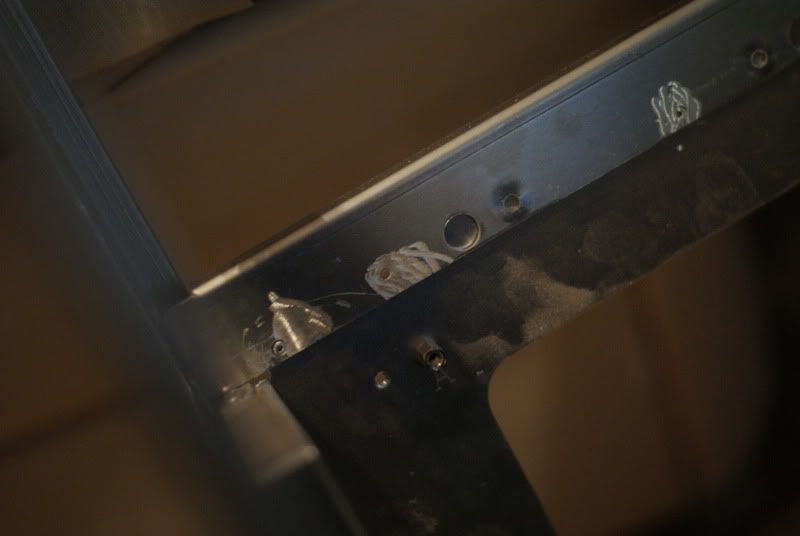
The PSU back bracket got a few chunky bits of paper that stuck on after priming, god knows how!
Even 2500 grit paper can be a bit destructive, even when used wet...
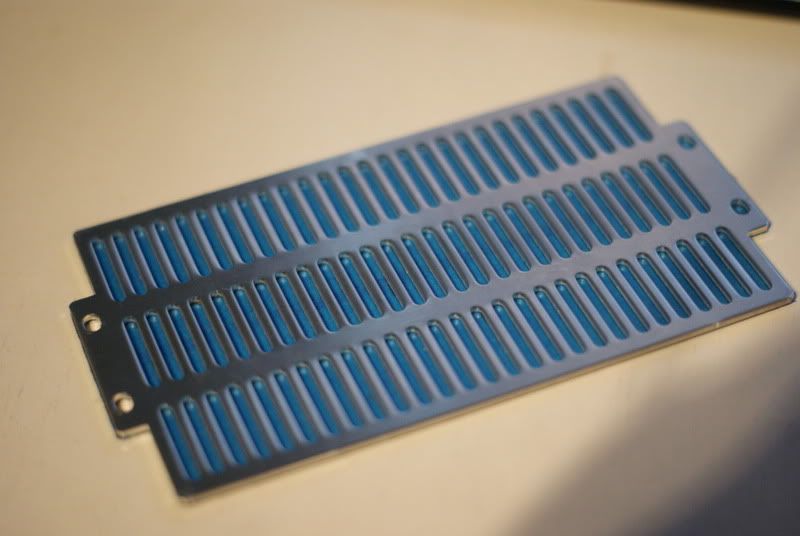
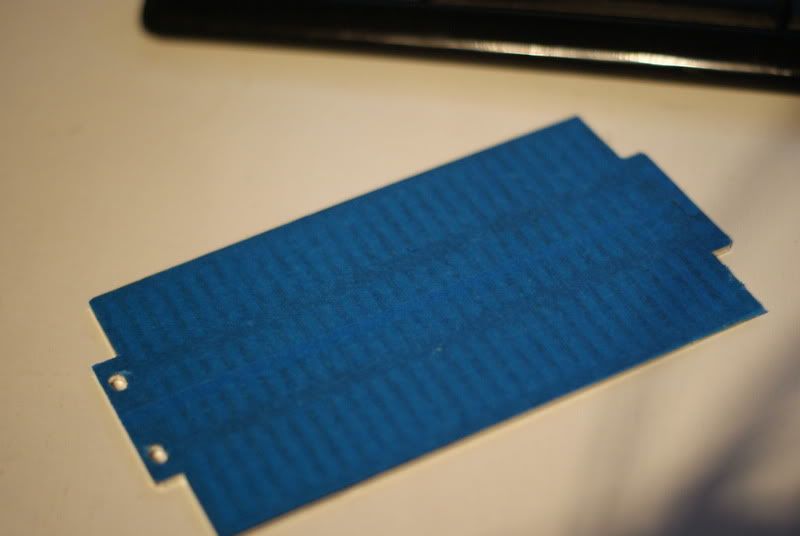
So, next up, the 5 1/4" drive bay dock. On either side, there are 2 notches that are used to mount the side strengthening bracket are screwed on to, I need to remove these are I am going to rotate the dock by 90 degrees to the left, just for aesthetic reasons when the side panel is removed. I didn't like the idea of unpopulated bays on the front and the fan controller knobs jutting out the front. I will need to make a blanking plate to fit in the front where the bays are meant to be placed, but I can do that as and when, the case isn't ready to fit the 240 up front or 360 up top, let alone painted... its slow going and I'm rambling so.... lol
Action shot! (sarcasm detected).
PWND

Sanding down

I need to get some more metal filler, it needs to filled and sanded as I'm nowhere near happy with the result, the ally is pretty soft and the sanding disk running at '5' on the rotary tool was probably to aggressive.
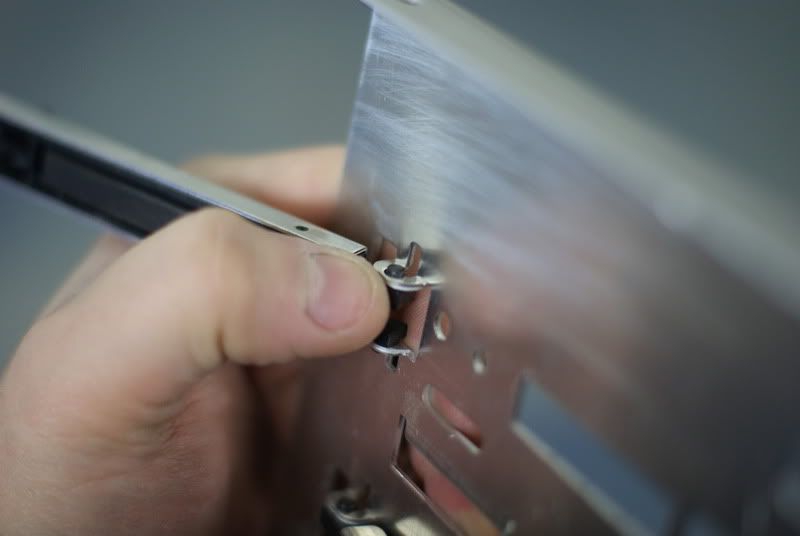
I needed to remove the hot swap clips on the 5 1/4" dock so be able to paint it, there are two tabs holding on a set of plastic nipples; so the tabs need to be gingerly bent over, not to aggressively so they weaken. When bend back on one side, both the hot swap tabs popped right out, ready to be sanded and primed.
Time for priming with the epic acid-etch. #8 Halfords special, bloody well should be at 10 quid a can!
Just a lick on where the tabs were cut off to see how much filler was needed.
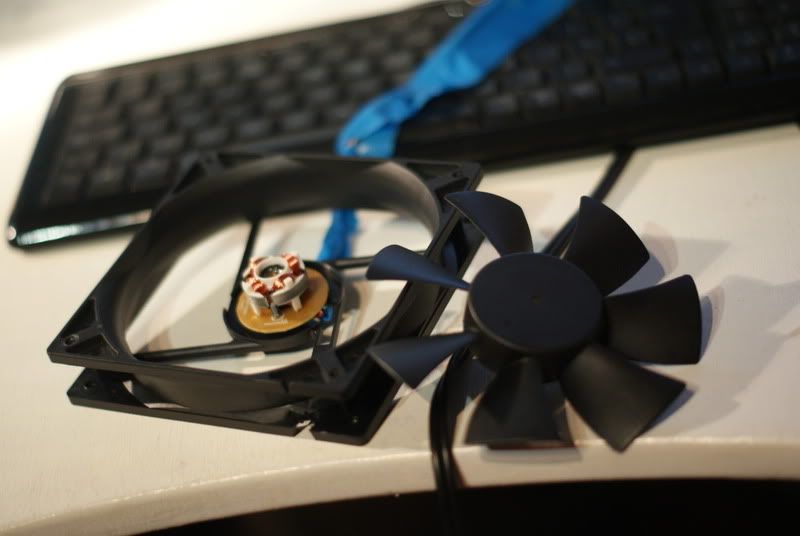
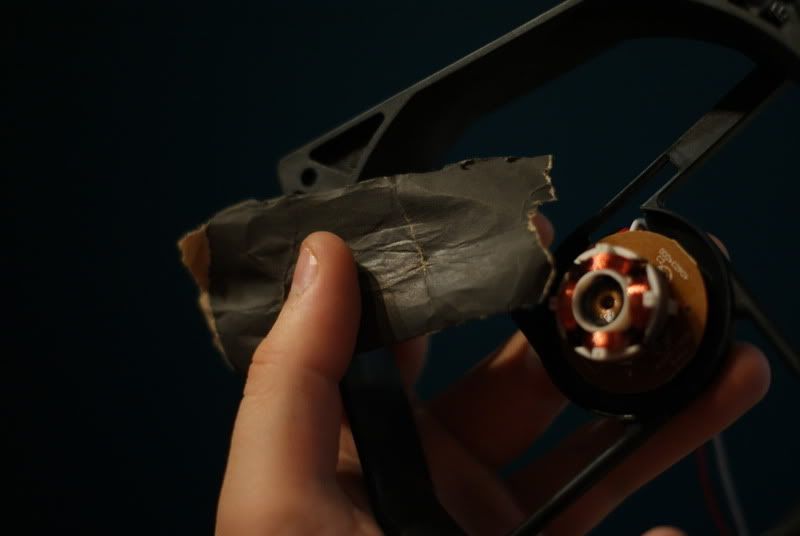
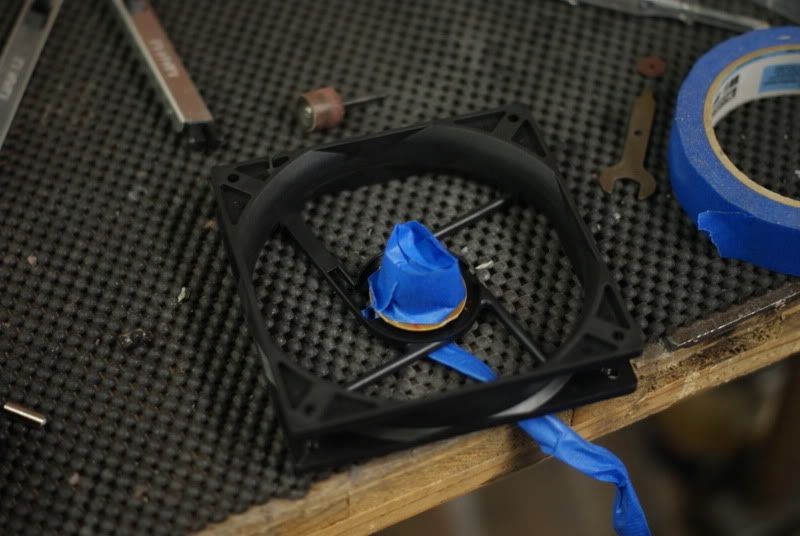
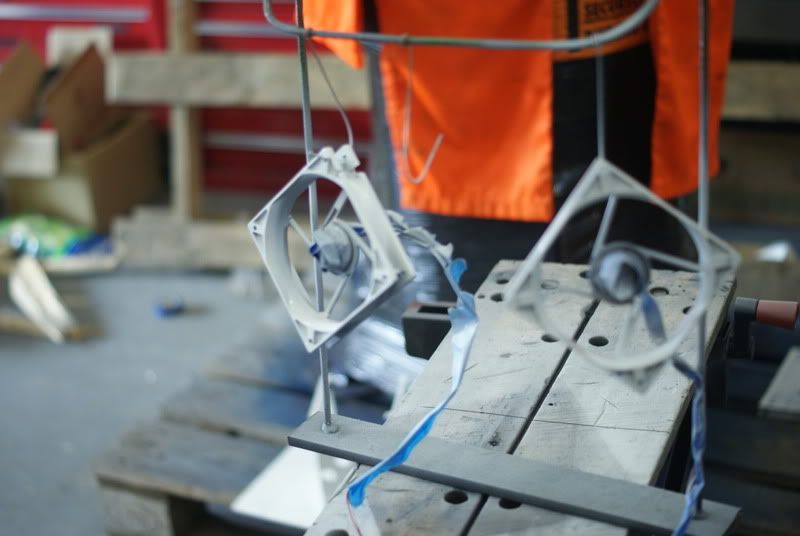
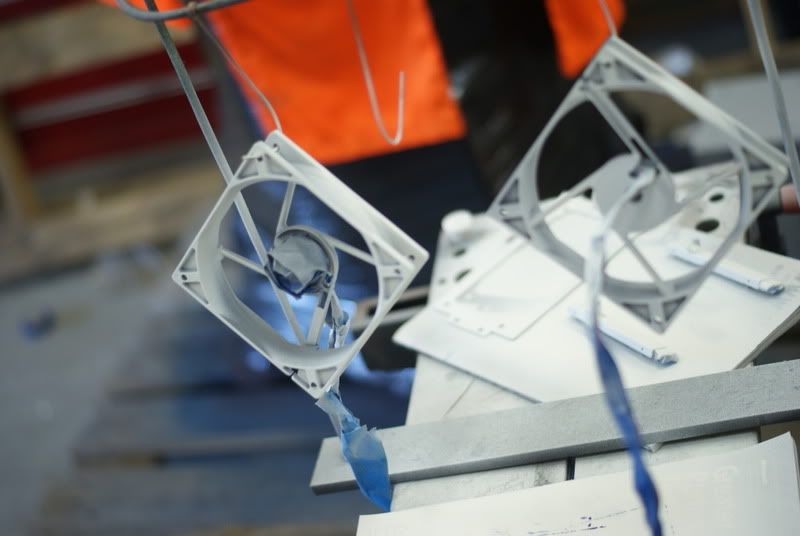
The 120mm HDD bay fan and exhaust fans needed to be protected, well the electro-magnetic dynamo and pcb/ cables did.
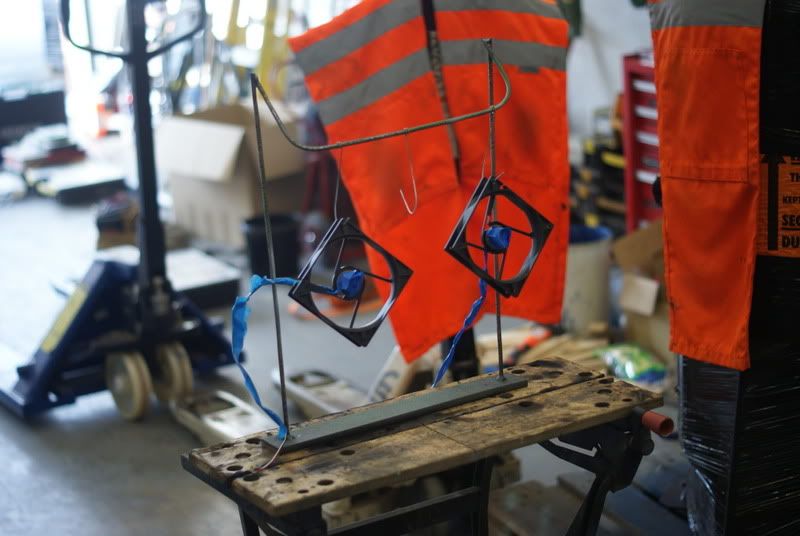
U jelly of my mad welding skills. I had a little spraying jig from other little jobs I did.
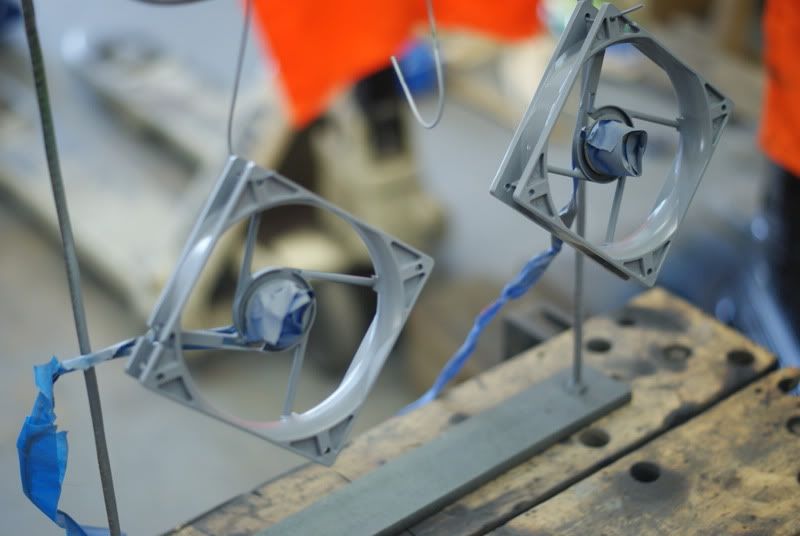
All white
Masking up the hot swap tabs.
Primed (and sanded with 1500)
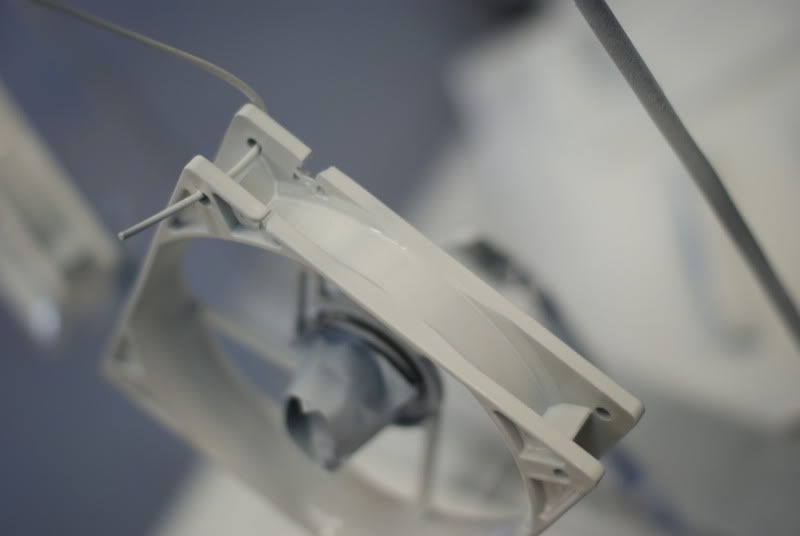
And a lick of white on the fan frames.
LOTS of light dustings of paint, due to the cold weather. I don't want to put loads on and get a cack tonne of runs to sand.
I really like this picture for some reason. lol
Thats all for tonight! Thanks for looking and as always some feedback, positive or negative would be welcome! Thanks, James
Anyway, first off. I managed to remove the hard-drove cage, I stripped the rivets down and took off the front 120mm fan.
I started cutting, measuring to ensure I got the same length sleeve each time as well as burning the ends of the sleeve.
Then a little bit of blue, navy blue, not a tacky sky blue, to add a bit of variety. Oh and a little bit of grey too, again to break it up without it looking to, I don't know, tacky with all bright colours.
I started to put some sleeving on the 24 pin ATX connection.
Next up is the case exhaust fan and hard-drive cooling fan. I don't wan't to go too overboard with the white LED case/ rad fans and to keep the cost down, as the case came with the 2x 120, I might as well use them. I wanted them to fit in with how I painted the Enermax fans; white frames, black fans.
Simple case of popping off the rubber cap off the rear and removing the washer and popping the fan off.
And as usual, give it a sand down prior to the first coat of primer, to get a solid finish.
The primer on the hard-drive dock had dried (Acid-Etch), so time for a coat of regular grey primer.
Not before soaking some 2500 wet and dry paper in some warm water and a bit of washing-up liquid to break the surface tension of the water to prevent any clogging. Lol at the army canteen!
The PSU back bracket got a few chunky bits of paper that stuck on after priming, god knows how!
Even 2500 grit paper can be a bit destructive, even when used wet...
So, next up, the 5 1/4" drive bay dock. On either side, there are 2 notches that are used to mount the side strengthening bracket are screwed on to, I need to remove these are I am going to rotate the dock by 90 degrees to the left, just for aesthetic reasons when the side panel is removed. I didn't like the idea of unpopulated bays on the front and the fan controller knobs jutting out the front. I will need to make a blanking plate to fit in the front where the bays are meant to be placed, but I can do that as and when, the case isn't ready to fit the 240 up front or 360 up top, let alone painted... its slow going and I'm rambling so.... lol
Action shot! (sarcasm detected).
PWND
Sanding down
I need to get some more metal filler, it needs to filled and sanded as I'm nowhere near happy with the result, the ally is pretty soft and the sanding disk running at '5' on the rotary tool was probably to aggressive.
I needed to remove the hot swap clips on the 5 1/4" dock so be able to paint it, there are two tabs holding on a set of plastic nipples; so the tabs need to be gingerly bent over, not to aggressively so they weaken. When bend back on one side, both the hot swap tabs popped right out, ready to be sanded and primed.
Time for priming with the epic acid-etch. #8 Halfords special, bloody well should be at 10 quid a can!
Just a lick on where the tabs were cut off to see how much filler was needed.
The 120mm HDD bay fan and exhaust fans needed to be protected, well the electro-magnetic dynamo and pcb/ cables did.
U jelly of my mad welding skills. I had a little spraying jig from other little jobs I did.
All white
Masking up the hot swap tabs.
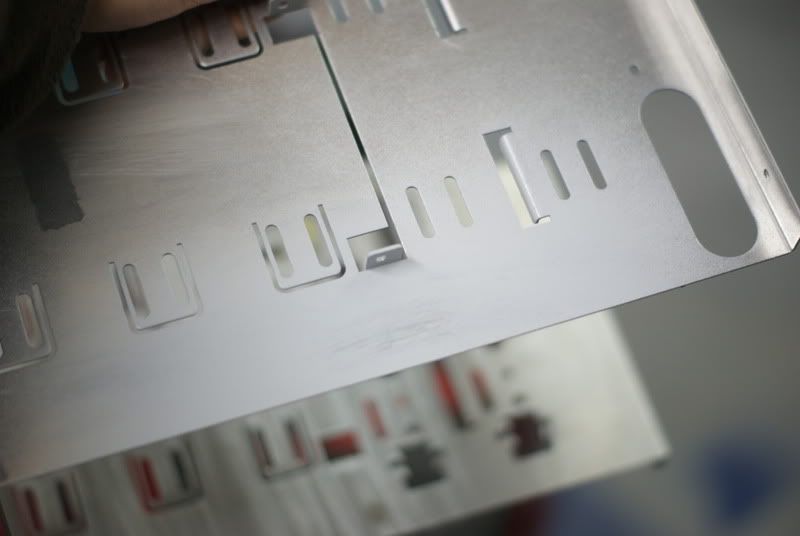
Primed (and sanded with 1500)
And a lick of white on the fan frames.
LOTS of light dustings of paint, due to the cold weather. I don't want to put loads on and get a cack tonne of runs to sand.
I really like this picture for some reason. lol
Thats all for tonight! Thanks for looking and as always some feedback, positive or negative would be welcome! Thanks, James
yassarikhan786
New member
Epic paint job and I am jelly of your welding skills
 .
.
PEXON
SleevingMaster
A little update tonight, not a lot done really, just time consuming stuff and a bit of a disaster with some spraying. :wallbash:
The top side of the case was taken off as well as the top USB/ mic in-out hub, simple case of removing a few screws, very, very carefully as I don't want to damage/ mark the head of the screw as it will be seen easily.
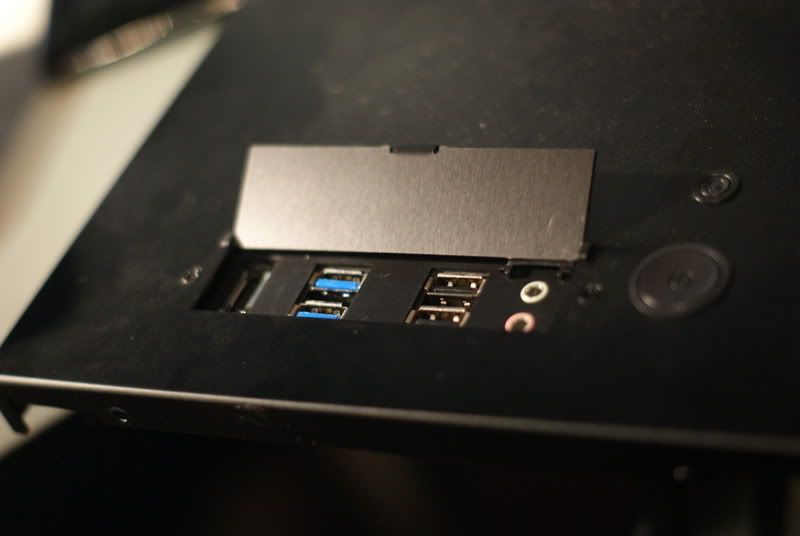
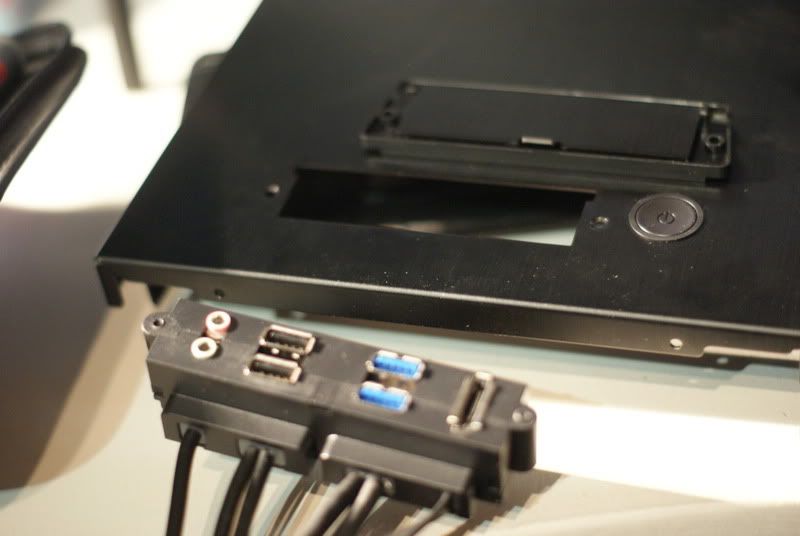
Easy job. I may look at getting some anodized (black/ gunmetal) reset and start, anti-vandal switches on the top to fit in with the style of the build as silver/ stainless ones would look odd and stainless on alloy is a big no-no anyway.
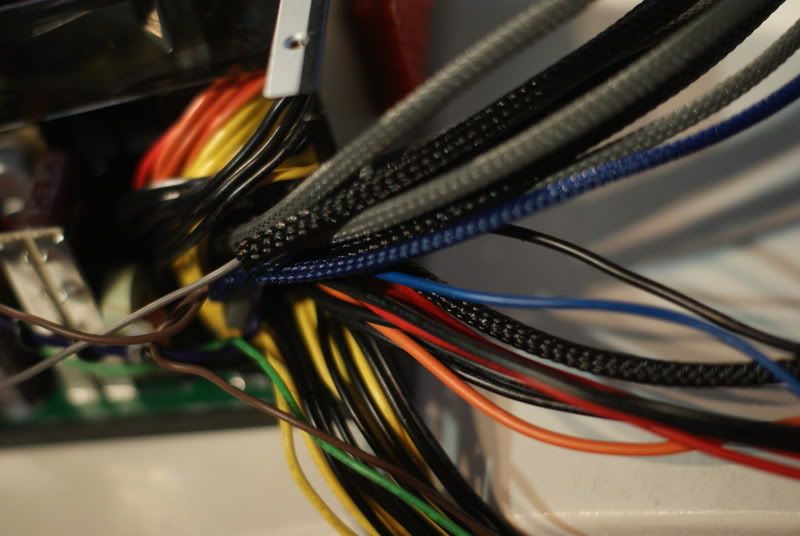
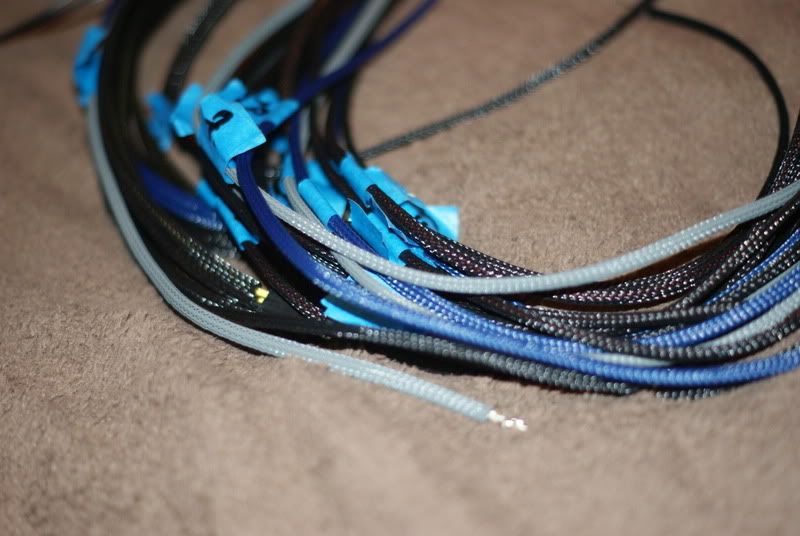
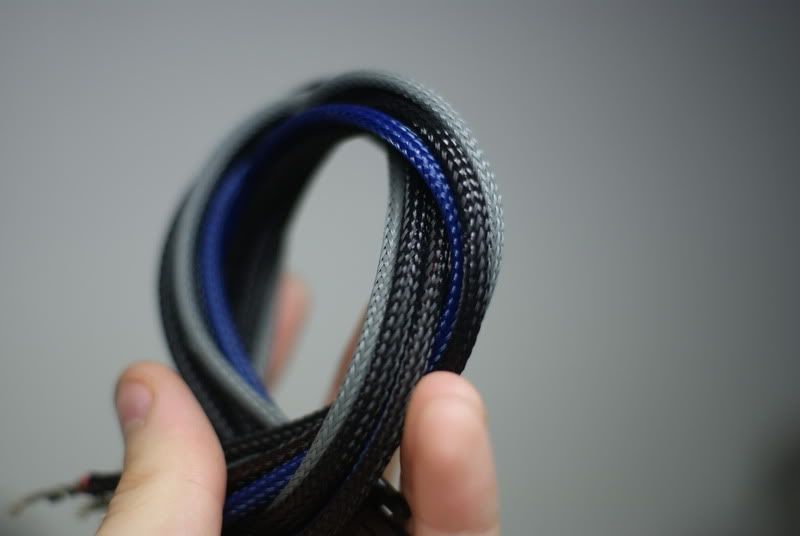
I got all the sleeving on the 24 pin ATX power cables. I still need to get some proper shrink tubing. The stuff I have was from Halfords and is only 2:1 shrink ratio. I think I need some 4:1 for it to bit down properly, as the 2:1 ratio tube wasn't going into the terminals very well, without bunching up and refusing to go in without brute force. Not good.
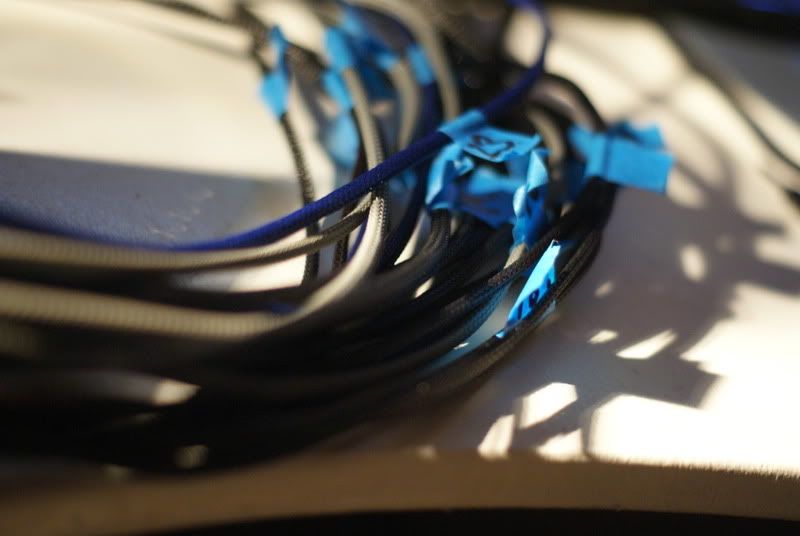
I also spent 4 or 5 hours cutting the 6 plus 2 PCI power cables, stripping, crimping and sleeving (not shrinking).
Finally getting somewhere with the PSU, its starting to look good with all the sleeving on.
This morning, I got a couple of hours of work in at our workshop. The HDD bay was sprayed, as you know and it turned out pretty well. I'm pleased with it.
The finish came out good, it just needed 2500 grit wet and dry sanding and having a final coat with some lacquer.
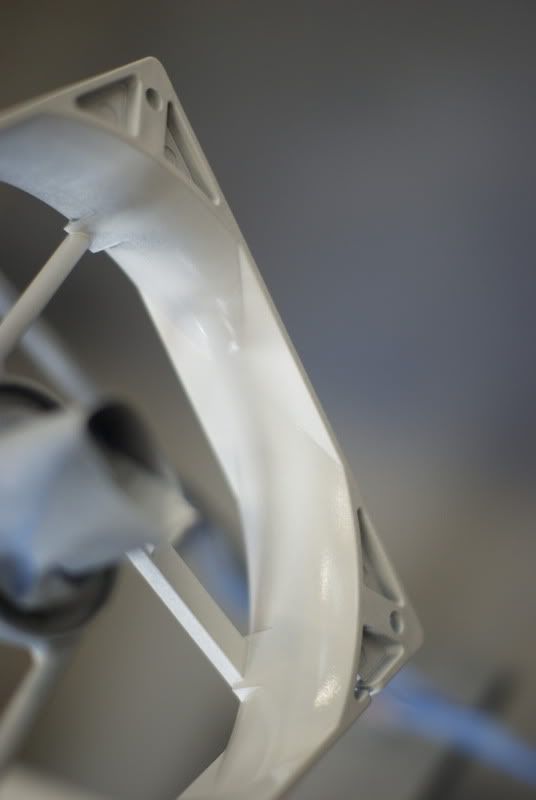
Not so good with the fan frames however.
I came to spray the backside of the frames, the first coat went on like a beaut, I did, unfortunately run out of spray, so I got some more, the axact same stuff, smae brand, colour in matt etc and applied it... just wait and see what happened.
Air temps were about 8 degrees so I go the space heater out to aid the paint drying.

The new paint didn't take to the 'old,' paint, even though it was the EXACT same spray, same model no etc.

Only good for one place, the bin. Most likely, I'll get some more Enermax fans on pay-day. But I'm still pretty pee'd off.
The hot-swap bracket got a bit of damage with the new paint, but it wasn't as bad as the frames, so could be buffed out with some wet and dry. Ah well, these things come to test us! I also got some sleeving on some SATA power cables and fan extension cables...
I know I'm not the best with shrink tubing, but I'm still learning.
Again, thanks for looking peeps. Any feedback welcome. Cheers for looking!
The top side of the case was taken off as well as the top USB/ mic in-out hub, simple case of removing a few screws, very, very carefully as I don't want to damage/ mark the head of the screw as it will be seen easily.
Easy job. I may look at getting some anodized (black/ gunmetal) reset and start, anti-vandal switches on the top to fit in with the style of the build as silver/ stainless ones would look odd and stainless on alloy is a big no-no anyway.
I got all the sleeving on the 24 pin ATX power cables. I still need to get some proper shrink tubing. The stuff I have was from Halfords and is only 2:1 shrink ratio. I think I need some 4:1 for it to bit down properly, as the 2:1 ratio tube wasn't going into the terminals very well, without bunching up and refusing to go in without brute force. Not good.
I also spent 4 or 5 hours cutting the 6 plus 2 PCI power cables, stripping, crimping and sleeving (not shrinking).
Finally getting somewhere with the PSU, its starting to look good with all the sleeving on.
This morning, I got a couple of hours of work in at our workshop. The HDD bay was sprayed, as you know and it turned out pretty well. I'm pleased with it.
The finish came out good, it just needed 2500 grit wet and dry sanding and having a final coat with some lacquer.
Not so good with the fan frames however.
I came to spray the backside of the frames, the first coat went on like a beaut, I did, unfortunately run out of spray, so I got some more, the axact same stuff, smae brand, colour in matt etc and applied it... just wait and see what happened.
Air temps were about 8 degrees so I go the space heater out to aid the paint drying.
The new paint didn't take to the 'old,' paint, even though it was the EXACT same spray, same model no etc.
Only good for one place, the bin. Most likely, I'll get some more Enermax fans on pay-day. But I'm still pretty pee'd off.
The hot-swap bracket got a bit of damage with the new paint, but it wasn't as bad as the frames, so could be buffed out with some wet and dry. Ah well, these things come to test us! I also got some sleeving on some SATA power cables and fan extension cables...
I know I'm not the best with shrink tubing, but I'm still learning.
Again, thanks for looking peeps. Any feedback welcome. Cheers for looking!

PEXON
SleevingMaster
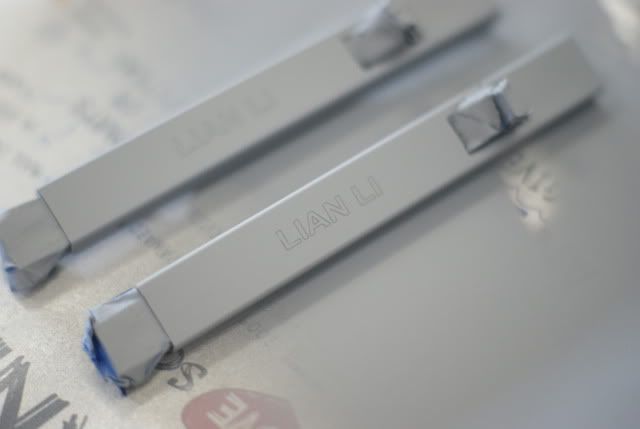
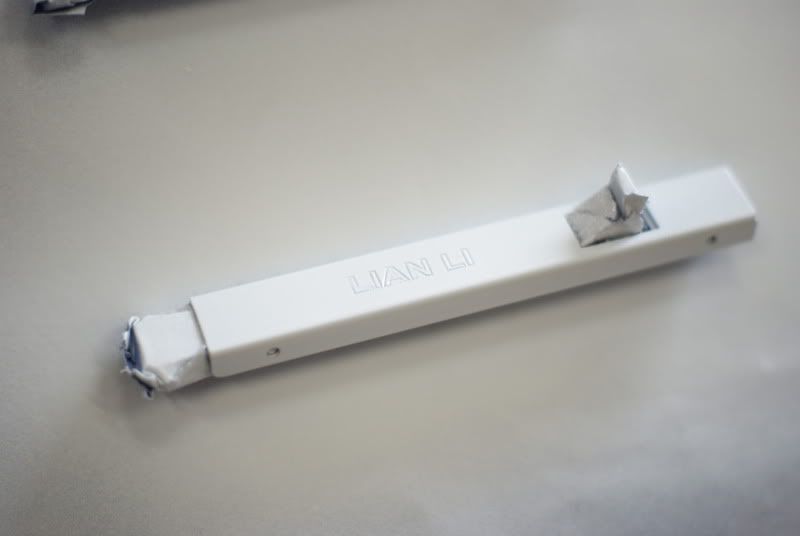
No cus they are in the bin and they normally collect it when I get into work on friday XD. Its not worth it, they are only the cheapo Lian ones that came with the case. I'm quite happy actually, gives me an excuse to get some Enermax ones and put some carbon on them! I'm daft I know!


PEXON
SleevingMaster
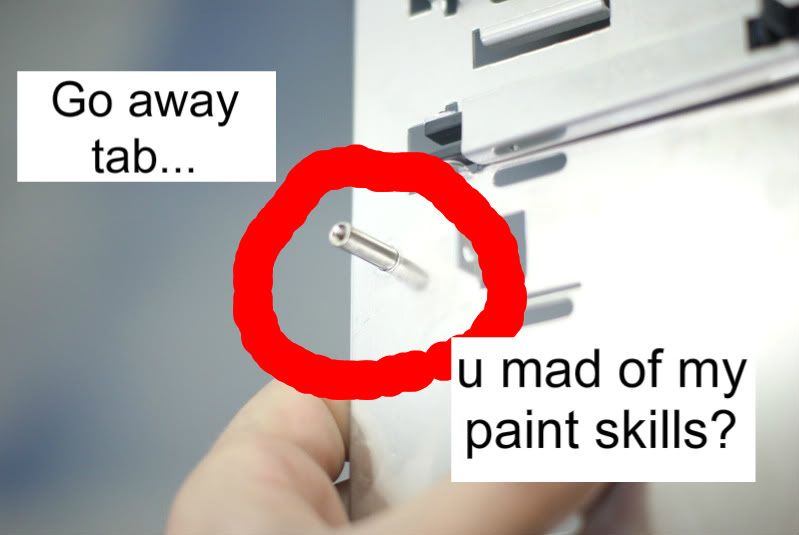
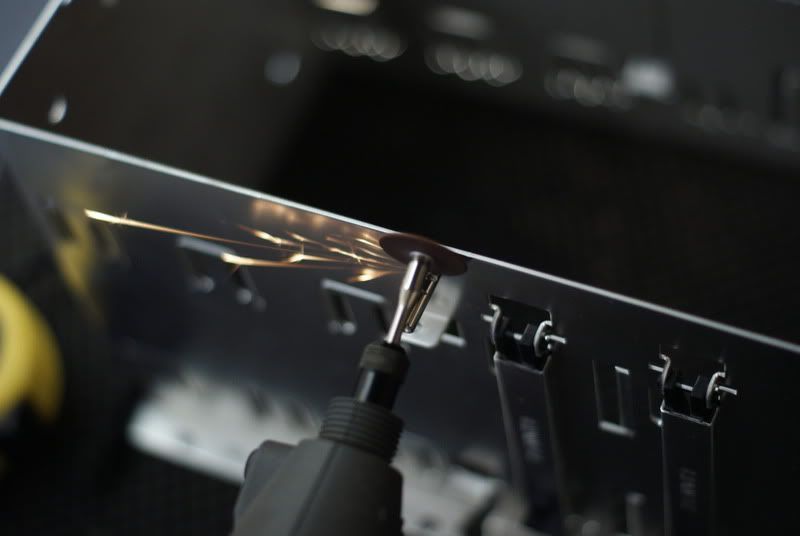
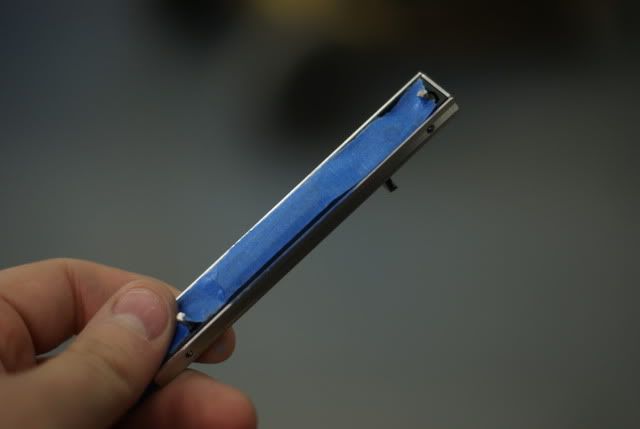
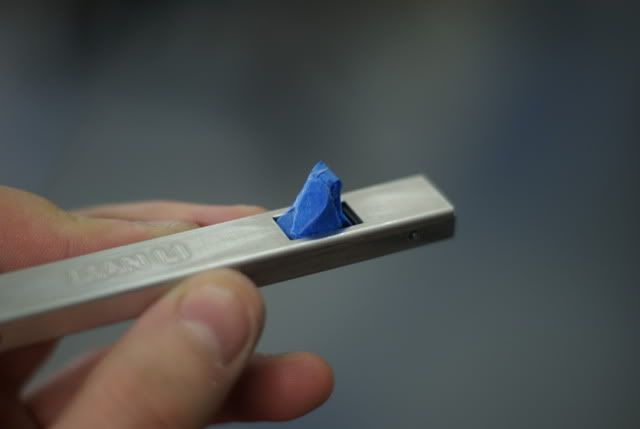
Managed to remove another one of the top bays tonight. Easy 5 minute job with a rotary tool. I also flattened down some of the rivet- drill holes.

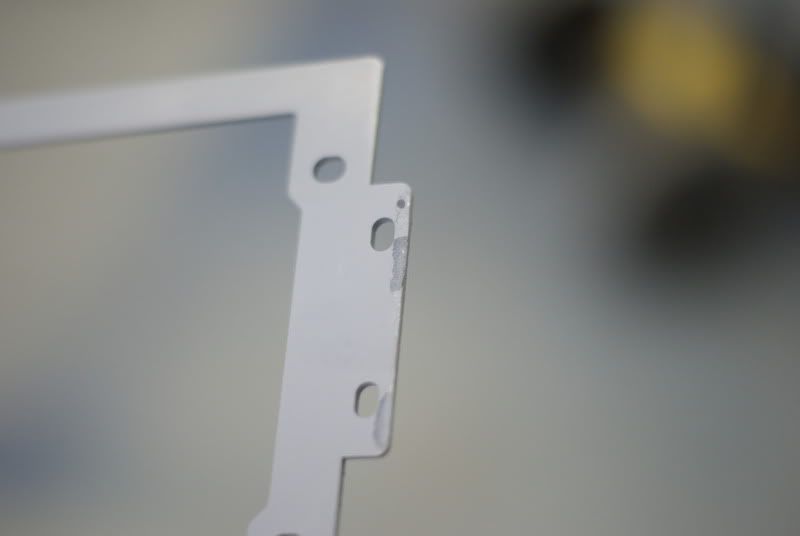
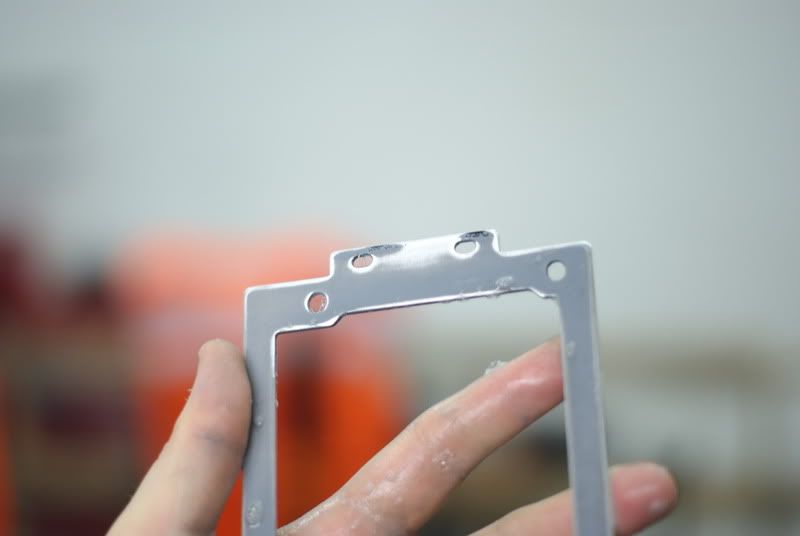
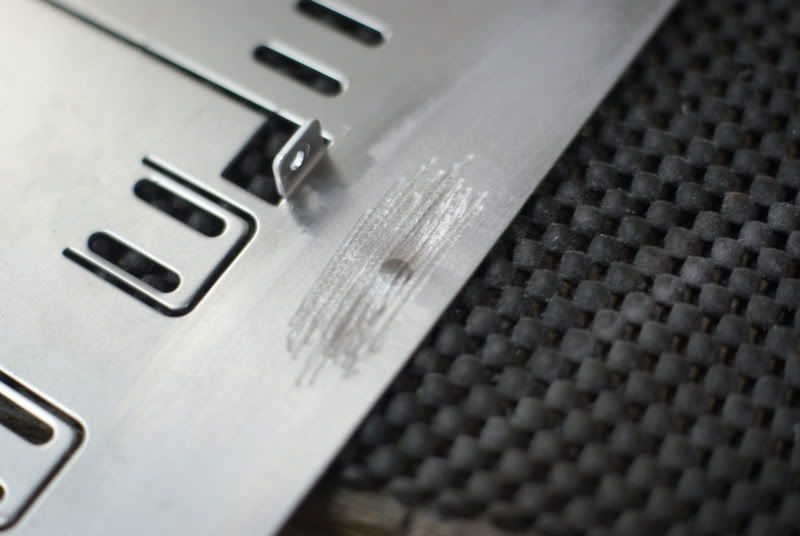
As you can see, I caught one of the edges with the rotarty tool, as it was a little awkward getting it in there in the first place, I just clipped it a few times. Never mind, I can just fill it in with metal- putty.
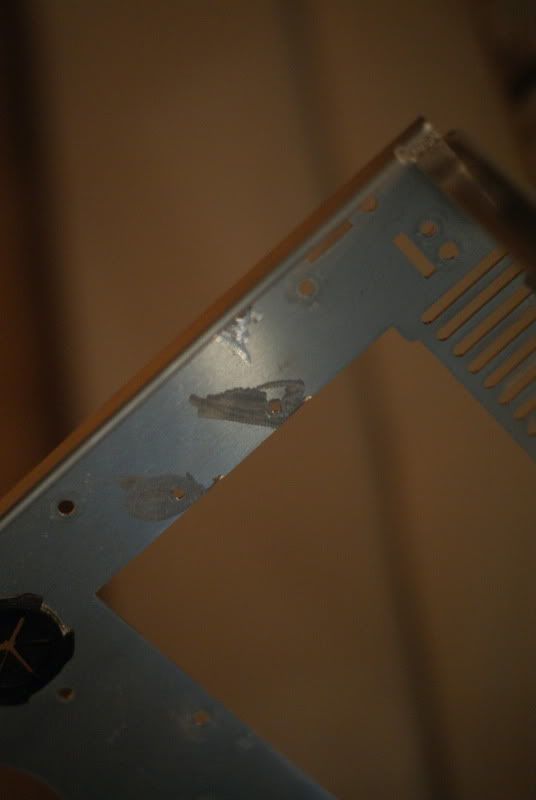
As you can see, I caught one of the edges with the rotarty tool, as it was a little awkward getting it in there in the first place, I just clipped it a few times. Never mind, I can just fill it in with metal- putty.
Similar threads
- Replies
- 2
- Views
- 174