g0t.w00t?
New member
Intro
The last time I built a system was roughly 5 years ago. It was using a Rampage III Extreme, i7 950, 6GB Corsair Dominator GT's, 120GB Corsair Force GT SSD, 2 x 1TB Samsung F3's, EVGA GTX580 SC, Noctua NH-D14 and a Corsair TX750. I built that rig in a Corsair 800D, and it has served me very well all this time.

Isn't she glorious? Nope, a shadow of her former self with bits hanging out and the door off due to old age thermal issues. Yes, that's a 10cm Red CCFL hanging out.
Cue a month ago, and a Thunderstorm hit, and hit hard. A transformer down the street exploded, power went out, and sadly my rig was fried. I was a very sad man.
Luckily, we have thunderstorm coverage and gold level insurance. A few quotes later and I had $2700 AUD to play with. $2500 was the most I could spend on a new machine, as I have a wedding to help pay for (mine!). So the hunt began for new parts. Now, I knew that 2011-3 was coming soon, and I knew that if I wanted a complete machine that I wouldn't be able to afford to go that high-end.
The Parts!

So I settled for 1150 and a Devil's Canyon CPU, a 4790K to be exact.

ROG motherboards have always seriously impressed me, and I wanted to theme the new rig completely black and red, so the motherboard became a Maximus VII Hero.

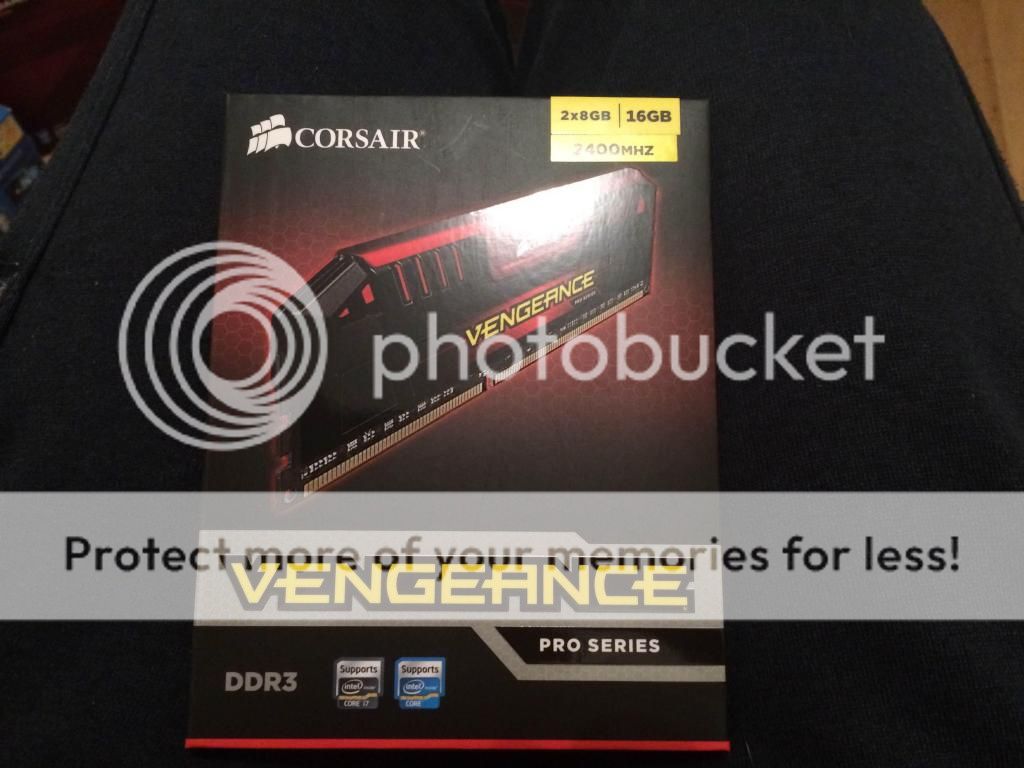
I have a nerd-hard-on for Corsair and have for a long time now, so they were the only brand for me for PSU, RAM and Cooling - an AX760, 16GB Vengeance Pro 2400MHz and H105 respectively found their way into my shopping cart.


I couldn't spring for a ROG GPU, and while the Tri-X Sapphire cards are really impressive, I went with something that saved me 20 bucks and wouldn't stick out like a sore thumb - an MSI R9 290 Gaming. It had pretty good reviews, so I felt safe selecting it to fit my colour scheme.

For storage, as I needed to scrimp and save where I could without sacrificing too much quality, I opted for 2 x 120GB Samsung 840 EVO SSD's and 2 x Toshiba 2TB HDD's. The EVO's are going to be in RAID0 and the 2TB HDD's will replace my last F3 that hasn't died.


For extra fans, I opted to follow the advice of fellow OC3D forum members and LinusTechTips channel and run 2xSP120's in Push with 2xAF120's in Pull on the H105. Exhaust will be taken care of by 3xAF140 Quiet editions with the low noise adapters installed.


And finally, a new tube of NT-H1 TIM, as my old stuff was past expiry and had lost its lid, becoming rock hard in the tube. I don't think anyone needs a picture of that stuff")
---------------
The waiting process for the new parts was painful. The shop I ordered from seriously buggered up my order and it kept getting pushed back 1-2 days here and 1-2 days there. Finally after 3 weeks I have all the parts in my hot little hands.
Apologies for the horrid shadowy pics. I don't have anywhere fancy to take the pics and it was midnight when I took them. Light source was directly above me in a tiny home office.")
So join me in the coming days, as I begin to piece my new baby together, and tweak her just to my liking. I will of course be overclocking, to see if I can get a place on the benchmark leaderboards of certain Aussie forums I visit.
The last time I built a system was roughly 5 years ago. It was using a Rampage III Extreme, i7 950, 6GB Corsair Dominator GT's, 120GB Corsair Force GT SSD, 2 x 1TB Samsung F3's, EVGA GTX580 SC, Noctua NH-D14 and a Corsair TX750. I built that rig in a Corsair 800D, and it has served me very well all this time.
Isn't she glorious? Nope, a shadow of her former self with bits hanging out and the door off due to old age thermal issues. Yes, that's a 10cm Red CCFL hanging out.
Cue a month ago, and a Thunderstorm hit, and hit hard. A transformer down the street exploded, power went out, and sadly my rig was fried. I was a very sad man.
Luckily, we have thunderstorm coverage and gold level insurance. A few quotes later and I had $2700 AUD to play with. $2500 was the most I could spend on a new machine, as I have a wedding to help pay for (mine!). So the hunt began for new parts. Now, I knew that 2011-3 was coming soon, and I knew that if I wanted a complete machine that I wouldn't be able to afford to go that high-end.
The Parts!
So I settled for 1150 and a Devil's Canyon CPU, a 4790K to be exact.
ROG motherboards have always seriously impressed me, and I wanted to theme the new rig completely black and red, so the motherboard became a Maximus VII Hero.
I have a nerd-hard-on for Corsair and have for a long time now, so they were the only brand for me for PSU, RAM and Cooling - an AX760, 16GB Vengeance Pro 2400MHz and H105 respectively found their way into my shopping cart.
I couldn't spring for a ROG GPU, and while the Tri-X Sapphire cards are really impressive, I went with something that saved me 20 bucks and wouldn't stick out like a sore thumb - an MSI R9 290 Gaming. It had pretty good reviews, so I felt safe selecting it to fit my colour scheme.
For storage, as I needed to scrimp and save where I could without sacrificing too much quality, I opted for 2 x 120GB Samsung 840 EVO SSD's and 2 x Toshiba 2TB HDD's. The EVO's are going to be in RAID0 and the 2TB HDD's will replace my last F3 that hasn't died.
For extra fans, I opted to follow the advice of fellow OC3D forum members and LinusTechTips channel and run 2xSP120's in Push with 2xAF120's in Pull on the H105. Exhaust will be taken care of by 3xAF140 Quiet editions with the low noise adapters installed.
And finally, a new tube of NT-H1 TIM, as my old stuff was past expiry and had lost its lid, becoming rock hard in the tube. I don't think anyone needs a picture of that stuff
---------------
The waiting process for the new parts was painful. The shop I ordered from seriously buggered up my order and it kept getting pushed back 1-2 days here and 1-2 days there. Finally after 3 weeks I have all the parts in my hot little hands.
Apologies for the horrid shadowy pics. I don't have anywhere fancy to take the pics and it was midnight when I took them. Light source was directly above me in a tiny home office.
So join me in the coming days, as I begin to piece my new baby together, and tweak her just to my liking. I will of course be overclocking, to see if I can get a place on the benchmark leaderboards of certain Aussie forums I visit.


