Bombproof Builders Desk.....Build

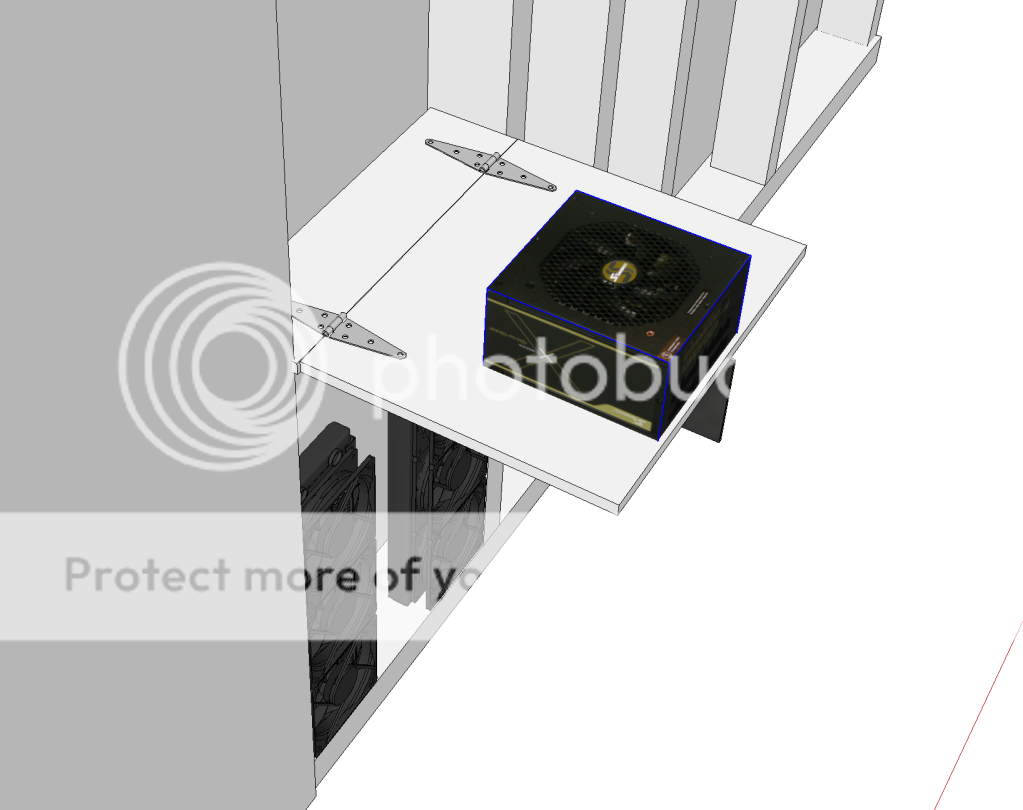
Well as of right now the plan is to used a L piano hinge so we should see a full 180 degree rotation on the trap door.

While I like the idea of a raised section the problem then becomes wiring as the rear ports would all be facing me and there will be a massive amount of cables going into the rear I/O so that would look really untidy. My plan is to have nothing really visible but then have the wow factor of the trap door, a bit of a hybrid of Form and Function.

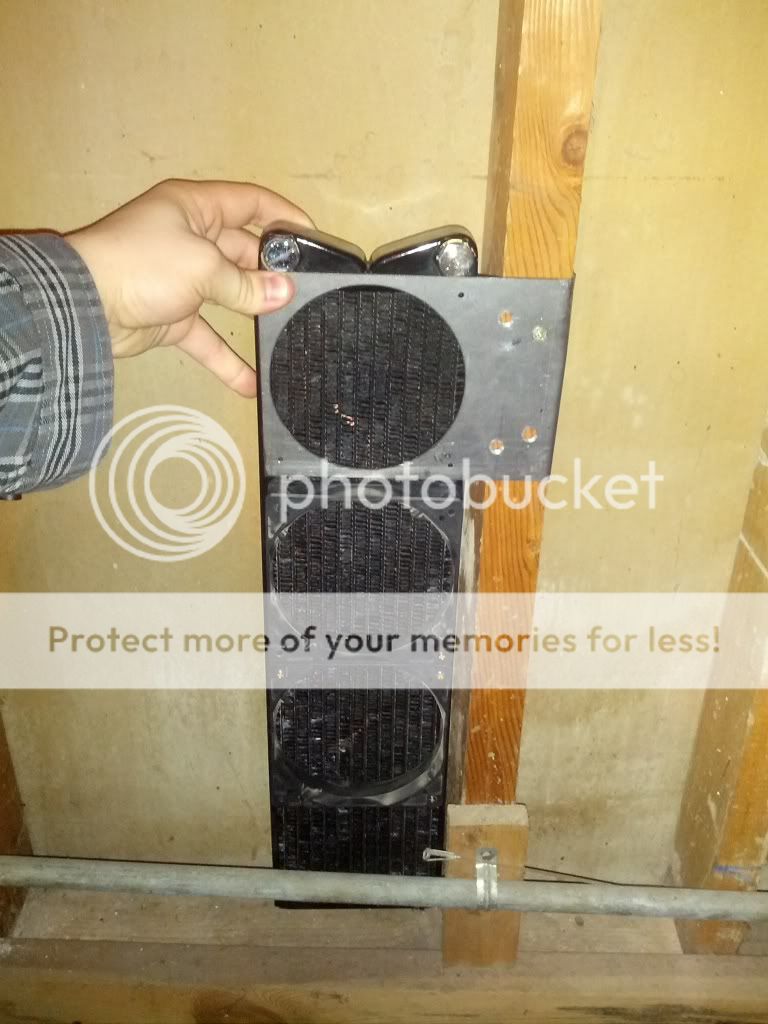
As soon as I have the x79 running in the Shinobi as a temp rig I will get back to sketchup and illustrate more of this as well as my plans for Disk drives and HDD/SSD storage plus switch and indicator integration.

Thanks again for the comments and questions guys, it is really encouraging. Also how do you embed a video on this forum?
 
Ok guys I shot a video update but I am having issues with it unfortunately so here is a regular old update.

Ok so I have been on a backup rig for over 2 months now and it has been killing me. So I now have most of the components I am planning on using in the desk build, so I threw all of them into a Bitfenix Shinobi XL case to test all of the components and make sure I am happy with the performance and everything works before I go through the trouble of mounting it up. This is just a temp build so its not my prettiest work.

DSCN2632.jpg


DSCN2633.jpg


DSCN2634.jpg


DSCN2645.jpg


DSCN2640.jpg


Also I managed to snag a Dell 30 inch 2560x1600 to replace my triple monitor setup. I freaking love it! I may go up to three of them but at the moment 1 is enough. Specs for the system are as follows

Intel 2011 8320 w/ XSPC Raystorm waterblock

MSI Big Bang II Mobo

Gigabyte 7970 with EK Acrylic waterblock and backplate

G-Skill 16gb 1866 ram

Swiftech 360mm rad with gentle typhoons in a push configuration

Swiftech 240mm rad with Noctua fans in a pull configuration

Swiftech Pump with XSPC res.

Koolance 3/8 ID and 5/8 OD compression fittings

Corsair 1000w PSU

Asus Blu Ray drive

Crucial M4 256 SSD

WD Green 2TB Media Drive


Ok Guys I am ordering more parts for the build however I will not be posting much till the beginning of September as I have a huge workload to get done before I head to PAX Prime :D I will be going full steam ahead on the project when I get back. Thanks again for everyone following the build I will try to get the video update redone and working in the next few days though.
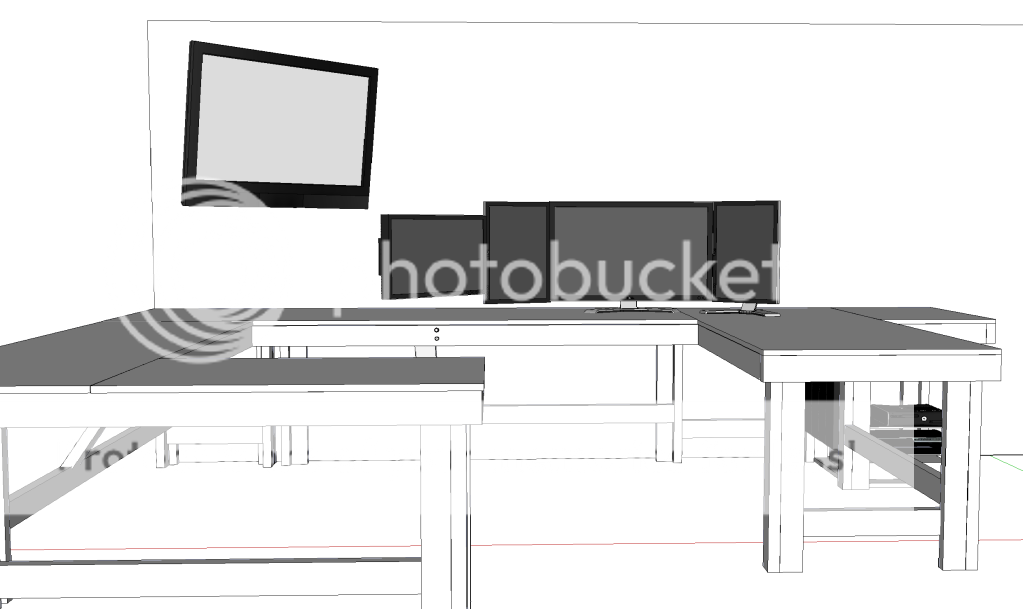
 
This Build still lives but there have been some changes, including a second PC. Here are some screenshots for what I have planned :D


OverallDeskshot.png


OverallWallPCBackDeskOverall.png


OverallWallPCupAngle-1.png


OverallWallPCupAngle.png


WallPCtopshot.png


Untitled.png


OverallWallPCup.png


WallPCFullshotdown.png


More to come soon.
 
Ok, sorry for not posting more details with the design updates guys, it was late and I had just gotten them done. Anywho So its been a couple months since my last update, between PAX, work and a unexpected medical issue I haven't been able to post much. However I have been making headway on the build so here is a list of some of the changes.

First off obviously is the monitor setup I have added 2 Dell 2007 1600x1200 monitors to my Dell 30 for a PLP setup, I have to say that out of all monitor configurations I have tried this is by far the one I prefer most it allows for crazy high levels of productivity without being crazy wide or narrow.

I also have a 24 inch 1920x1200 monitor to the left, that is for the next phase of my project. I am mounting a PC in the wall behind the Desk as the designs above illustrate. The room behind my office us unfinished as its where the HVAC is located in the house, so I decided to do something fun and interesting with this area as its basically used for just storage. The PC will be mounted on a hinged board with dual triple rads bellow. The reasons I did this are threefold

1. As some people have brought out there may be issues running a liquid cooled rig in this horizantal configuration and before I go through the trouble of modifying my desk this way (I have a backup configuration) This will serve as a proof of concept build for the liquid cooling layout and help me work the bugs out in a more forgiving setup with cheaper components. And should it not work I will put it in the up position and be no worse off.

2. I will need another PC up and running ans I am modifying and building the desk rig so this will serve as my backup and interim rig.

3. It s a chance to do something cool and different with PC components, duh!

So the specs for this rig are

i5 2500K processor
EVGA FTW mATX Mobo
Koolance 360WB
655 Pump
AMD 6970 Video Card with Heatkiller waterblock
2x 360mm slim rads
8gb of G-skill 1866Mhz ram
SeasonicX 750w psu

More coming soon, I am waiting for parts today and tomorrow, thanks for reading!
 
Ok guys, small update today but I can say that I will be posting more regularly as all of the parts I need for the next stage of the build are either here or in the mail. Anywho today was all not tech work on the desk. First off as this coffee stain will show you I need a better way to have beverages on my desk.

IMG_20121207_153008.jpg


Enter the stainless steel 3 3/4 inch cupholders :D

IMG_20121207_153035.jpg


IMG_20121207_153050.jpg


They have a drain at the bottom that I will have a plug for, so should I spill a drink in the holder I simply put the trash bag bellow in and drain it.

IMG_20121207_153044.jpg


I will be using my 3 and 3/4 inch hole saw for these. Costs alot of money but work every penny, remember modders, the right tool for the right task :thumb:

IMG_20121207_153135.jpg


First one cut and mounted (sorry forgot to snap a pic before I put it in)

IMG_20121207_154213.jpg


Then number 2

IMG_20121207_154553.jpg


And Bam! 2 sexy additions to my already awesome desk :)

IMG_20121207_2224271.jpg


Ok, next up in anticipation of the 6970 and motherboard tray arriving for the wall PC part of the build I decided to mount the power and reset buttons for the wall PC. First off a strait edge to make sure my marks are right.

IMG_20121207_193724.jpg


Then a couple of pilot holes.

IMG_20121207_194034.jpg


Now the trick with these is to drill with 2 different size paddle bits from each side so I can get the mounting ring for the switches in the hole. So 3/4 inch in the front.

IMG_20121207_194148.jpg


Then 1 inch in the back

IMG_20121207_194328.jpg


Getting the rings to stay in place was a pain in the butt however my trusty leatherman came through for me on this one.

IMG_20121207_194554.jpg


These were a bit of a hassle but I am really happy with how they turned out.

IMG_20121207_200920.jpg


But now I have this awesome place to put my beer but I have to keep a tacky bottle opener lying around, cluttering up the top of my desk. Well I solved that problem today as well :D

IMG_20121207_2229151.jpg


One last piece of advice guys, when ever I mod I test, test, test :drink:

IMG_20121207_211539.jpg

IMG_20121207_211544.jpg

IMG_20121207_211605.jpg


Expect another update in a week guys and as always thanks for reading!
 
Awesome setup deiseldog49,
I really like your cup(bottle)holders and bottle opener.
Testing procedure : test - drink, test - drink,test - drink.....ect. ...lol
Someplace to keep your beer while your building.
 
Looks great! I love very large desk areas / desk space and custom setups like this. Amazing work. I will have another closer look tomorrow :)
 
Ok guys, quick update. The Motherboard tray I am using for the wall PC (Btw does anyone think I should just have a seperate thread for the wall PC?) its a Lian Li tray for one of their old benching stations , not in production anymore so the only color I could find it in was red, oh well it will give it the build some style and make it go faster I guess:rolleyes: 
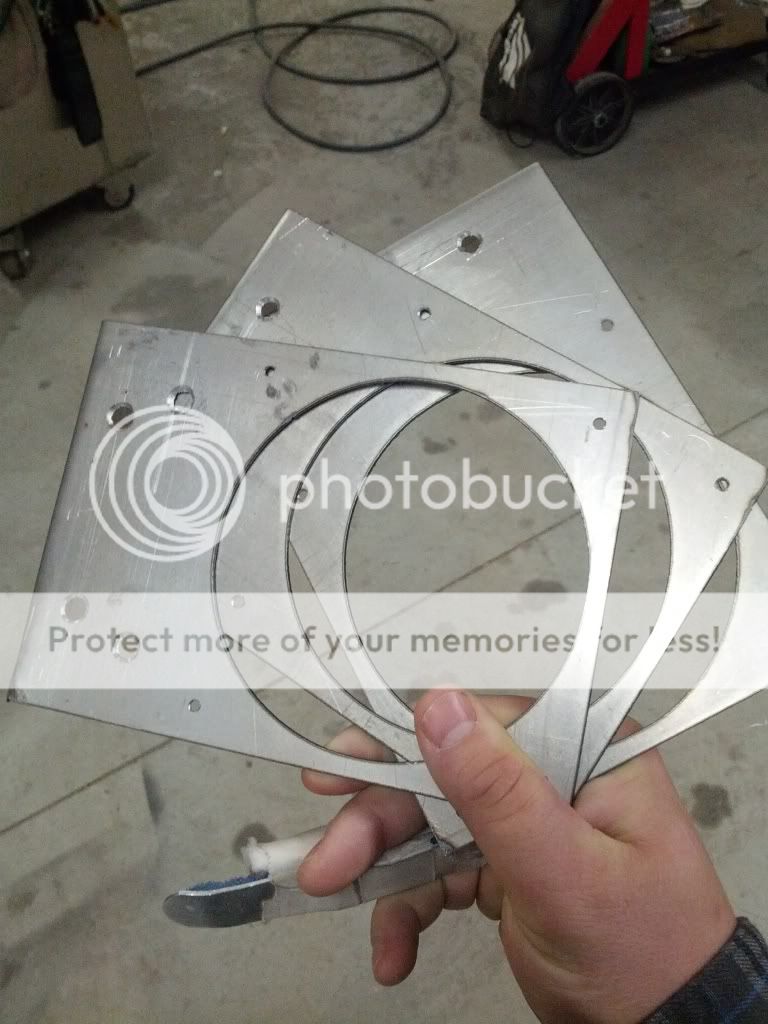
Anywho so I really like how re-enforced the PCIE Bracket is on this tray, ther are a total of 6 screws holding it to the tray making it really rigid. Which is good since it will have to support a water cooled video card hanging upside down.

So I go to mount the mobo and the motherboard hits once of the PCIE supports

IMG_20121210_152939.jpg


IMG_20121210_153328.jpg


I remove it and it fits really well everywhere else

IMG_20121210_153338.jpg


IMG_20121210_153346.jpg


Slap on a old GTX 9800 since the 6970 isn't here yet and everything fits in a really snug package.

IMG_20121210_153602.jpg


However I would really like to fit that other Riser support on there. So I guess the question is, do I settle for less streagnth and hope for the best or man up, whip out the dremmel and void my motherboards warranty? What do you guys think?
 
Ok guys, small update, today I am back over at Bryans shop to get some parts fabbed up. Here we have the Plasma Cutter we will be cutting the parts out with.

IMG_20121217_183938.jpg


And these are the items the parts are being made for.

IMG_20121217_183930.jpg


Templates made up, its time to cut.

IMG_20121217_184950.jpg


IMG_20121217_184959.jpg


IMG_20121217_185001.jpg


Smooth em out, and drill out the holes for attaching to the 2x4

IMG_20121217_191042.jpg


IMG_20121217_193706.jpg


Bend them to shape and I have some sweet purpose built Brackets to hang my Rad from.

IMG_20121217_195728.jpg


Next up is a new triple rad template, as the compessed paper one I have is just not going to last. 16 Gauge steel, should last me the rest of my modding career :D

IMG_20121218_1828041.jpg


Went outside, and who do I see? Gerry! Man he has gotten big!

IMG_20121217_195947.jpg


Ok so I will be having Brandon make alot more parts for me after the first of the year. But now onto the actual area I will be installing the wall PC into. Now, to be clear everything I am doing is just test fitting. I will be cleaning up the area and paint it as well.

IMG_20121218_182844.jpg


IMG_20121218_182922.jpg


Next up my 6970 came in and I got to slap my Heatkiller WB on it (Man I love the way these look)

IMG_20121217_014425.jpg


IMG_20121218_183059.jpg


Sorry I dont have more to show right now, I hurt my hand, and due to the holiday. I will have more soon and hopefully have the wall mount fabbed up in the beginning of january.
 
Last edited:
Back
Top