ZEUS (Fractal R4 | blue/black | internal UT60 Rad) - by alpenwasser

hooleee geezus that cabling looks sweet :P

Thanks! :)

the only thing i'm not really liking is the whole bunch of lacing on the 24 pin and on the molex and sata. personally i think it'll look cleaner without them

You mean those fat bundles of lacing cord around the whole thing that make it round? Yeah
those are a bit large at the moment. Personally, I'm quite happy with the 24 pin as it is, but the
other one will have to be redone, sine it's not only very large but also not clean. But I've had to
bind it very tightly to get it to fit through the hole in the PSU's side.

I don't think I'm done yet with the lacing to be honest, but I'll first mount everything in, and then
I'll see how orderly I can get everything to look with the minimal amount of lacing cord. It's an
iterative process I would say.
 
Back Panel Progress

Back Panel - Progress

I've been working on the back panel. Fitting is done, what's left is more or less half the painting
and some finishing touches.

Paint

Since I don't want to repaint the entire panel, I'm using this to paint each hole individually.
Yes, it's a rather slow process. :lol:

(click image for full res)


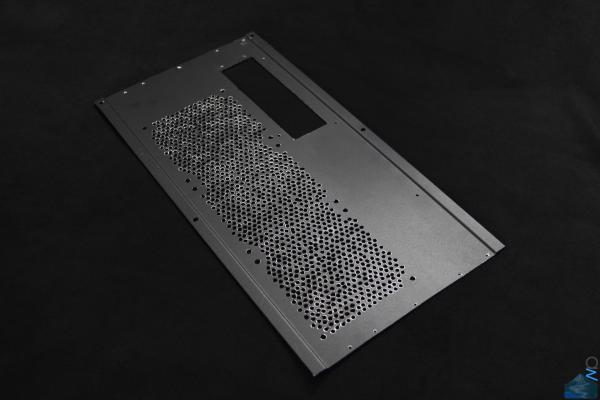
Back Panel - Inner Side

This side has not been painted yet. I thought this would provide some good contrast to see
the difference.

(click image for full res)


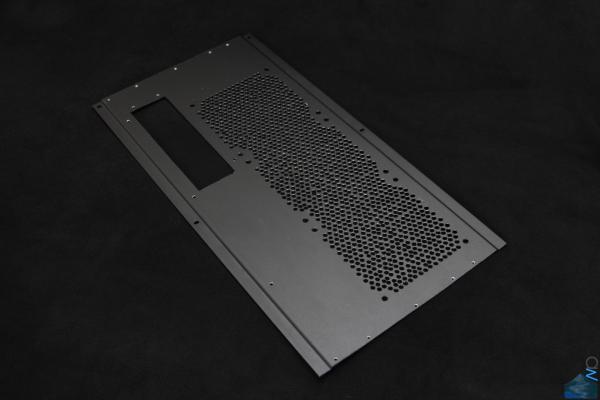
Back Panel - Outer Side

The screw holes won't be painted, since they won't be visible (also, they are threaded).

(click image for full res)


Back Panel - Test Fit

It fits nice and snug, and it's all solid and good.

(click image for full res)


Back Panel - M/B Test Fit

The M/B fits nicely to the new back panel. The I/O shield lines up perfectly.
You can also see the screws used to mount the panel. As you can see, there's no nuts involved, the threads
are directly in the back panel. It's thick enough for this to work nicely, as long as you're not too brutal there's
no danger of ripping the threads out of the aluminium.

(click image for full res)


Todo

Next I'll be painting the panel's inner side, cutting the screws down to size and putting the hole thing together
permanently.

Thanks for stopping by. :)
 
that lacing look well sweet

Thanks! :)

Reservoir Modding


The Problem

A few years ago (probably ~2007) I bought this nice little reservoir for my Eheim 1046.
It's a very handy little thing, and it's built like a bloody tank (seriously, you could bludgeon
somebody to death with this).

However, back then Aquacomputer had not yet fully jumped on the G1/4" train and was still
using G1/8" in many of their products (as they had since their inception).

This requires a rather ugly and unwieldy adapter when wanting to use modern fittings, such
as the lovely blue Monsoon ones I've bought.

The adapter itself looks like this:

(click image for full res)


And with a fitting on it:

(click image for full res)


The Plan

Well, it's quite simple really: Retap the hole to G1/4". However, this would leave me with a
slight problem: Naked aluminium exposed to the coolant. I will be using a corrosion inhibitor
in my loop, but I want to reduce the chance for corrosion to ruin the party by painting over the
naked aluminium and sealing the hole thing against the coolant.

Disclaimer

I'm well aware of what galvanic corrosion is and how it works (well, I'm not a chemist, but I have
a better grasp of it than most people I'd say). I'm not saying that what you're about to bear witness
to is a good idea or something you should necessarily try yourself. It's an experiment. If it works,
great, if not, I haven't lost anything since I have no more use for the reservoir anyway. But don't
anybody start panicking about corrosion please. I'm aware of the risks, I've weighed them and
I've made an informed decision to go ahead.

Protecting the Insides

Obviously we don't want to crash into the opposing inner wall with our drill.

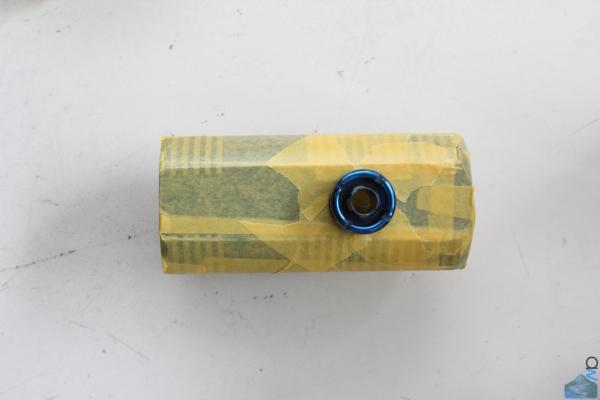
(click image for full res)


The Drill and Tap

The 11.80 mm drill bit with the G1/4" tap.

(click image for full res)


Improvising

The 11.80 didn't fit into the drill bit adapter, so I had to improvise a bit. The adapter actually
belongs to a Bosch pneumatic drill hammer, but that thing is way too powerful for this sort
of thing, so I decided to go with this configuration. It worked surprisingly well.

Naturally I didn't just drill the G1/8" to 11.80 mm, but first to 9 mm, 10 mm and then to
11.80 mm (a 11 mm drill bit would have been handy, 10 to 11.80 is a rather large step).

(click image for full res)


Lubrication

I didn't have any actual lubricant specifically for this, so I just used some of the gun lubricant I have
laying around (both for drilling and tapping the thread). Since it's made for the high speed movement
of a gun action, it works very well for this.

(click image for full res)


Tapping Hole

The 11.80 mm hole before threading.

(click image for full res)


Threading

And after cutting the thread. You can clearly see how thick the walls are on this thing. That's
why you need to lubricate very well. Otherwise the drill just blocks.

(click image for full res)
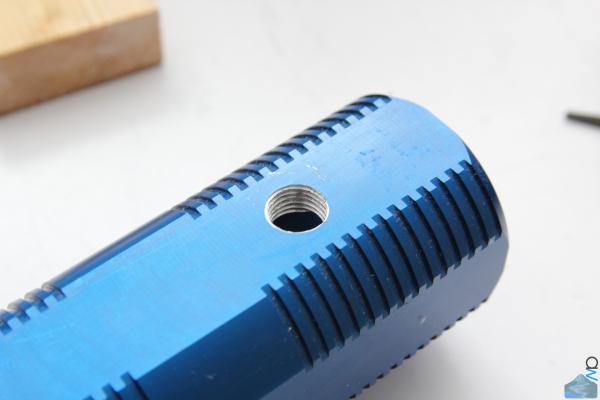


Test Fit

As expected, much better. :)

(click image for full res)


Protection

Alright then, let's paint that sucker! I did one coat of etch primer and two coats of paint.
Obviously I can't really do proper surface treatment within the thread, or put on too much
paint since it will just get stripped off by the fitting's thread anyway, but this should work
well enough to prevent the coolant from getting to the naked aluminium.

(click image for full res)


And on the inside:

(click image for full res)


Painted

The coat is pretty thick and has bonded nicely to the surface.

(click image for full res)


Done

The Monsoon fitting hides the paint job very well, and it goes in and out without
strippint the paint off the threads (there were two small patches of paint stripped
off, but I've covered those with the Humbrol enamel paint and things are nice and
sealed now).

As you can see, the reservoir has sustained the occasional scratch over the years.

(click image for full res)
 
niiiiiiiiiiiiiice. Hope everything works out well with the repainted threads, that's a neat little res you got there.

Hehe, yeah I hope so too. If the experiment fails, I'll get over it. I have no other use for the
res anyway. But of course it would be awesome if things stayed trouble-free :).

I've found a nice little vid of how they make this reservoir:

Making Of Aquainlet
 
My dream is to machine a pc case from a massive block of aluminium or steel (as in - take a
660 x 270 x 660 block and mill a case out of it). :dribble:

Hilariously unrealistic, but maybe one day I can do that with a block of wood and some hand power
tools, that should be feasible.

Ah well, not that I can legitimately complain, my Caselabs ain't exactly something to sneeze at
either. :lol:
 
Must admit, I did have to watch that vid all the way through - love things like that - very therapeutic.

Apparently my Grandad used to have a lathe in the shed, it was powered with a foot pedal.
 
Must admit, I did have to watch that vid all the way through - love things like that - very therapeutic.

I've watched that vid probably about a dozen times by now. So relaxing. :)

Although one of the most awesome milling vids I've ever come across is this one, milling
a helmet from a 120 kg block of solid alu:

5 Axis Machine Cutting Helmet

I mean, seriously, that's just pure porn, especially when you have a look at the presentation
shots at the video's end. :dribble:

Apparently my Grandad used to have a lathe in the shed, it was powered with a foot pedal.

*envy*
 
That's just effing ridiculous! I need one.

It probably won't be very practical, but oh dear god it's awesome! :drool:

Love that Res Mate!! Nice work!

Sorry to go Off Topic, But what's happened to Helios, the other rig you're building?

Thank you! :)

Legitimate question. I've decided to finish ZEUS first because it's a bit more urgent. Both my
dad and I need our precious data server up and running. Aside from that, I can get some good
practice on ZEUS for HELIOS (making custom cables, sleeving, painting, dremeling etc.).

HELIOS is still coming, no worries! ;)

Fair enough! Both projects are shaping up to be full of amazing work, so I can't wait to see ZEUS up and running, and more progress on HELIOS!
 
Fair enough! Both projects are shaping up to be full of amazing work, so I can't wait to see ZEUS up and running, and more progress on HELIOS!

Thank you very much for the kind words, means a lot! :)

SHE LIVES!

I've put her together (yeah, I know Zeus is technically male, but whatever :lol: ),
and things are working so far. :)

There's still no W/C loop and it's all a bit temporary, but I thought I'd see if the
PSU and everything else works ok.

Currently I'm playing around with ZFS (via zfsonlinux, running Arch), trying to
figure out how to best organize my HDD's and set everything up the best way
possible. Since ZFS is so absolutely phenomenal (i.e. all other file systems
are ridiculously puny compared to it, and BTRFS doesn't count since it's not
production-ready at this point) there's lots of stuff to try out and experiment
with.

I have ~12 TiB of data to get onto this machine and store safely, so this
might take a while. :lol:

I will report more on ZFS' features and why I'm most likely going to stick with
it when I have everything set up and running properly.
 
Complete! (For Now)

Complete! (For Now ;))


Finally I'm pretty much done. There's still a few tiny details I might iron out once
I get the time (busy with HELIOS at the moment for the most part), but for now
I'll leave her as she is.

Overall I'm pretty happy with how things have turned out. I won't claim to be the
first one who's ever done a similar mod, but I'm the first one I know of, and I think
it's a pretty neat idea for my specific usage scenario. Not having to use any add-
on cards has allowed me to use the internal space of the R4 in a very optimal
fashion for the hardware I've put in this rig.


Some Niggles and Thoughts

I'm not 100 % happy with the back plate, and if I had to redo it I would either have
somebody CNC it or at least find a workshop where I can use a drill press, but
considering nobody's ever going to see it anyway I'm actually still pretty satisfied
with the result. And now that the black fans are underneath the holes and the holes
have been painted inside and outside the errors in the hole pattern are actually
much harder to spot and don't just jump out at you anymore (at least not with
me :lol: ).

Also, the SATA power cable sleeving is not yet perfect, but it's just so much work
to redo it that I might leave it as is nonetheless. We'll see, maybe I'll get so bored
at some point that I'll feel compelled to redo the sleeving on those cables. :D

The yellow on the pump is a bit of an eye sore as well, but I haven't really found
a way to repaint the yellow bits so that they actually look good, so I'd rather have
that factory-looking yellow than a horrible paint job on that. I'm considering just
painting the entire pump black, we'll see. It's not like the yellow is very visible, quite
the opposite in fact.

I must admit that the SP120's, even though they are the quiet edition fans, are
not really quiet and the fan controller I've made has definitely been a good
investment of my time. So with the fans turned down it really is a pretty quiet rig,
especially considering that the WD R4's are enterprise HDDs and are therefore
not exactly the quietest of drives.


Aside from that I'm very happy with the rig, I think it's a pretty nice little machine. :)
It's not perfect, but with the means I had at my disposal I think I've done pretty well.
It's also been a very good learning experience, and I intend to incorporate the lessons
learned into HELIOS (which is one of the reasons I completed this project first).


Temps

Temps are pretty good at the moment:
  • Ambient temp: 23.7 C
  • Idle temps: 31 C, 31 C, 28 C, 27 C (four cores)
  • Load temps (BOINC): 44 C, 45 C, 43 C, 42 C (stock voltages)
  • HDD temps when CPU is under load: 41~42 C (RE4), 32~33 C (Red)

I will be overclocking this machine to some degree, but not too much. It still needs
to stay rather quiet. I will update with results when I have them.


Anyway, enough with the chit-chat.

(click image for full res)


(click image for full res)


(click image for full res)


(click image for full res)


(click image for full res)
 
Last edited:
Back
Top