[Scratch build] Floating Cave

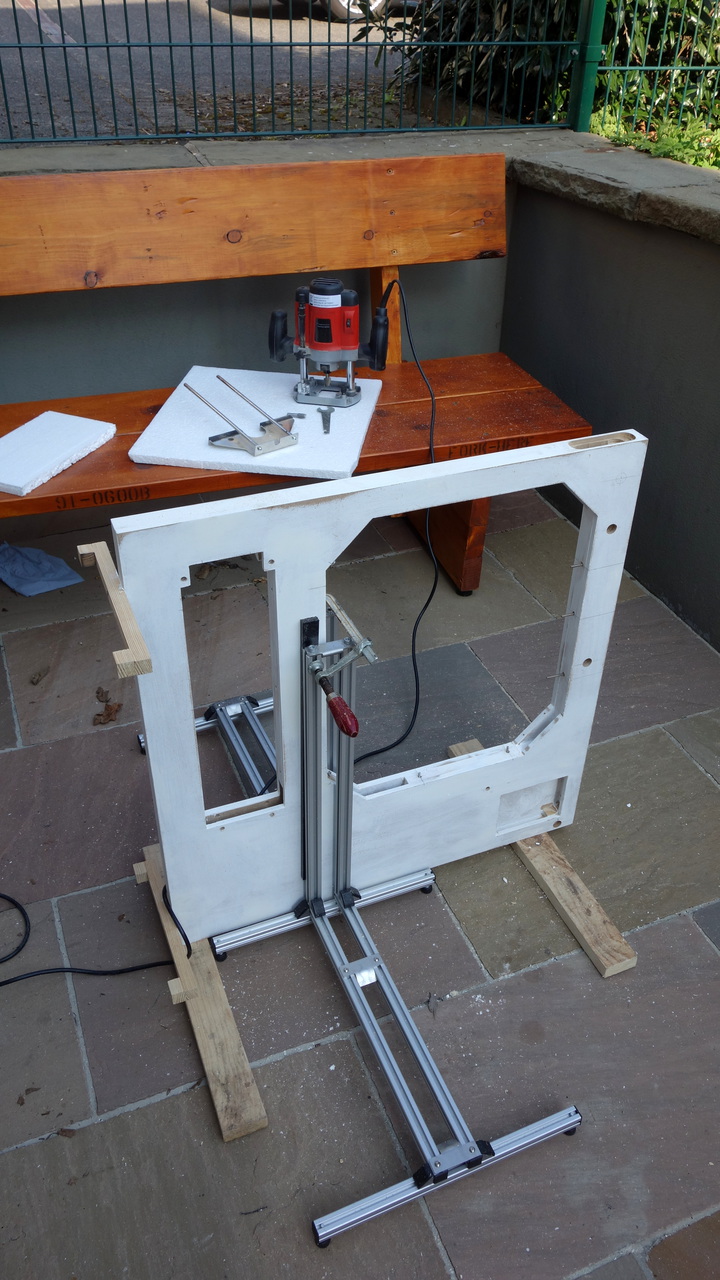
Time to use the router again!


Got a problem while shaping the opening for the front panel. I could not reach the deeper areas with mounted guidance of the router. So I had to do them free handed. I don’t like the result but don’t know if I should risk damaging the main contour.


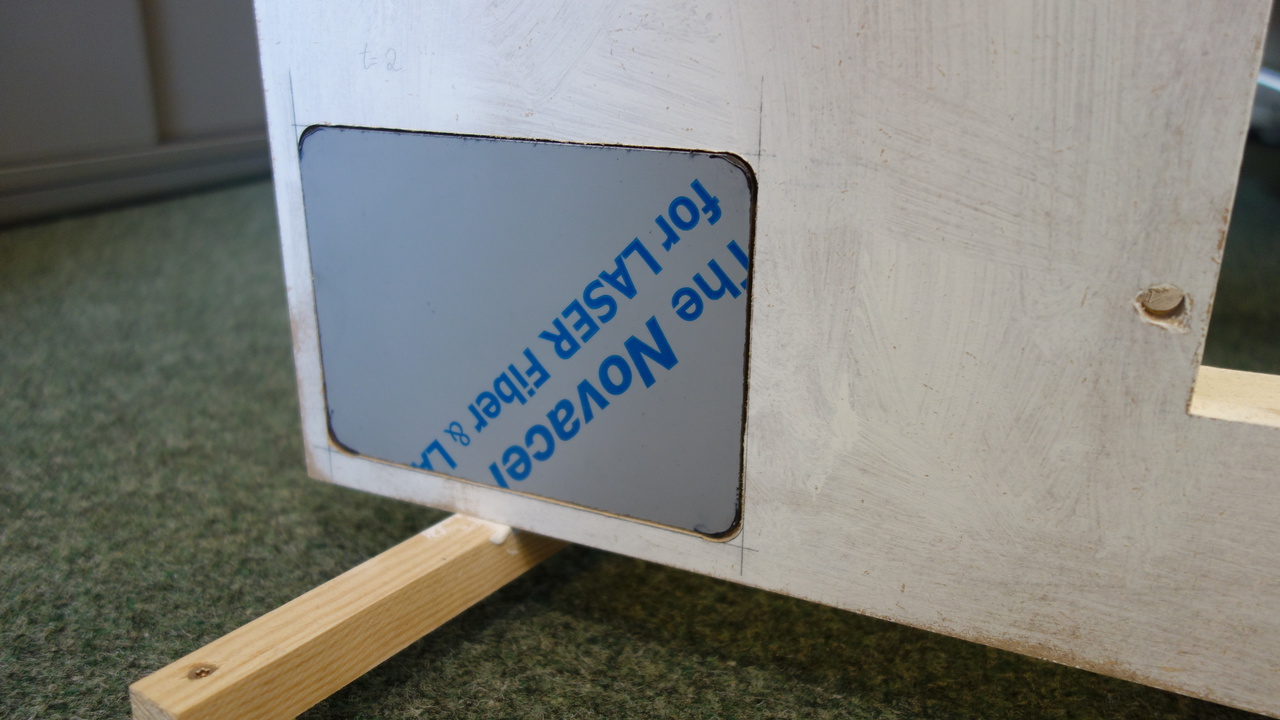
Front panel mounted, but backside front. Don’t want to get scratches on the grinding pattern.


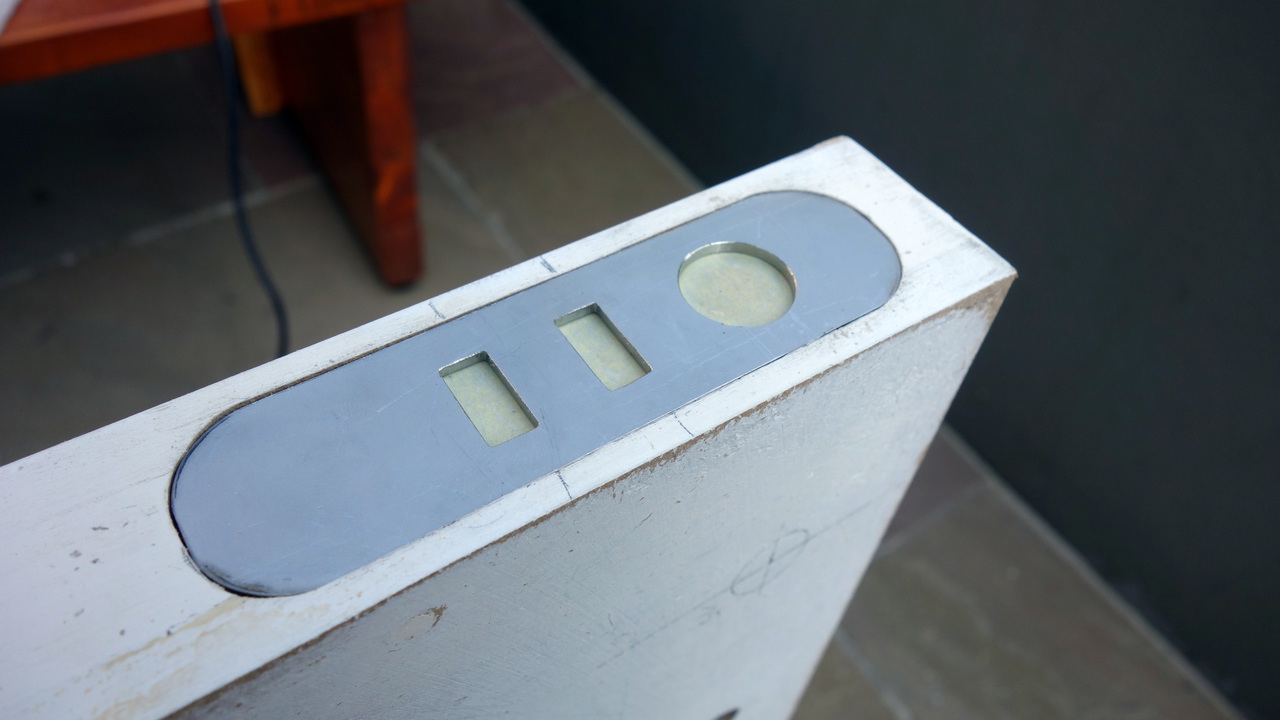
Next step was to cut the panel for power and network cable. It too is made from 2 mm stainless steel, with a nice grinding pattern on it. The openings for the cable will be sanded and filled to look better.
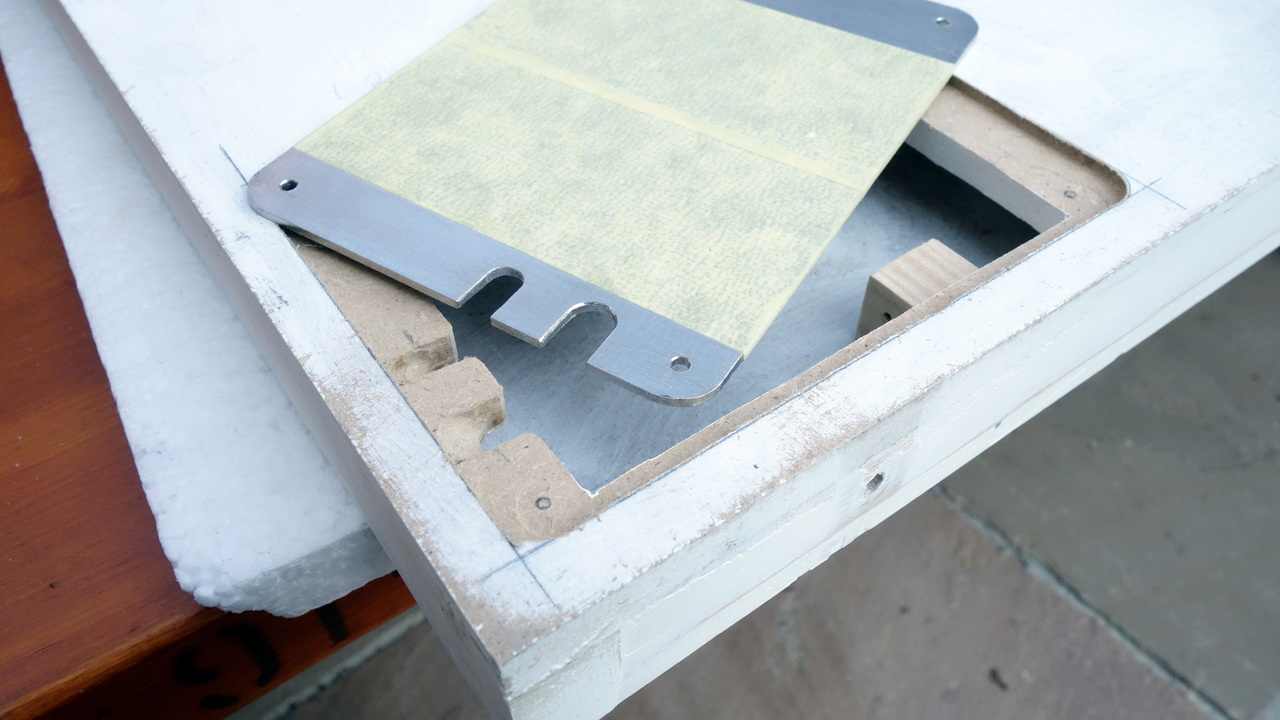


The new bought watercooling components: 300 €
MDF-plates: 30 €, aluminium and other raw material 50 €, furniture foils 30 €, glas tubes 25 €, 50x RGB-LEDs 3 €, 10 m RGB stripes 20 €, fibre optics 20 €, screws, sleeving, silicon O-rings, other stuff ~30 €,...

I did not had to pay for all the raw material, I am using a lot of restover pieces from work. And I do not have to pay for the use of the machines, even the help with the CNC is for free. Even some suppliers from work help me, I'll get the anodization of the aluminium parts for free, same with the energie chains. Without these possibilities this project would not be affordable for me. I hope to keep my budget for the case itself (without watercooling stuff) around 250 € overall, but I am not shure if I'll reach this goal.
 
The front panel has to be fixed from the backside. There’s only room for the fixing screws at the lower end. So I have to use a strong U-shaped profile and two M4 screws. To prevent the upper end to swing, only the lower screw has a limit stop. The upper screw pulls the upper end of the front panel back and guarantees a strong fixation.


I had to adapt several of my aluminium profiles and to add some nuts. But then I had a long awaited premiere: first time MB mounted in the new case.


GP and soundcard had to join. I removed some parts of the energy chains to get the perfect length.


I used an old power supply for adapting the mounting profiles. Picture shows work in progress (power supply still in oblique position).


To mount the top plate of the reservoir I first had to add some threads.

 
Next step was to work on some long awaited parts, since I had to wait again for some help with the inner T-slots. I did all other manufacturing steps on the manual milling machine. The upper part of the reservoir is made from aluminium. I finished the cover for the lower part as well. Don’t mind the quality of the surfaces, they will be glass-bead blasted and anodized later.


Now all parts for my reservoir are finished. Time for test sitting!


Looking sweet dude.subbed

Thanks!

I turned my focus back to the energy chains and some minor issues which aren’t easy to photograph. I had to rework the end part of the energy chains to increase their bend angle to 90°.
I milled a framework for the ATX and USB energy chains. Photo shows work in progress, grinding of the inner edges isn’t finished.


Then I got impatient, couldn’t wait anymore and assembled all three energy chains. I have to unmount them again, but that’s worth it.


huh, never thought I'd say this, but that's a damn-fine use of cable chains... that's a wicked idea.. stealing that for sure.
 
I have great news!
Alphacool and Aquatuning are sponsoring my build! Special thanks to Matthias and Eddie for their help and persistent chat! I’m really happy and a little overwhelmed, with these parts I am able to bring this build to a whole new level.
The package gives a first impression of what’s coming:


My anticipation was nothing compared to the unpacking itself:


Short first overview what I am going to do with all this stuff:

- second 420 mm radiator (modell NexXxos ST30) will be located behind the existing one, like initially planned
- both radiators are connected with quick disconnect couplings; by this they’re fast and easy to remove for cleaning
- new VPP755 pump with „Eisdeckel“ covers will replace my old DDC
- all old 8/6 mm couplings are replaced by 13/10 mm “Eiszapfen”
- in the viewable main area I am going to use hard tubes with 16/13 diameter. Got all stuff needed, even a heat gun and bowing aid.
- got two versions of the “Eisblock” CPU cooler, one very new in acrylic, one in chrome. And a additional modding cover

First look at the new couplings. What a difference to my old ones!


I’m not absolutely sure how to do the final tubing, depends on how all components fit together. Plans are like this:


There’s one “big” problem with the new pump: it’s really huge compared to the DDC! By this the pump needs a new location, there’s not enough space underneath the reservoir. It will most likely take place behind the power supply.


And then there’s the question with the CPU cooler: which one shall I use? Which combination?

While thinking about it I had to take a look at my old CPU cooler. I used coolers of the Alphacool NexXxos series for three times, then I switched to the Phobya. Now I going back to the roots!


The „Eisblock“ made from polished acrylic is quite new. Don’t know if it’s even available on the market yet.


Had to put a LED on it. It has 4 mounting holes for 5 mm LEDs:


Any ideas/suggestions for the CPU coolers?

With this update this worklog is completely up-to-date to the actual status of the project. But there’s still a long way to go…
 
This week I could not proceed as expected. I started milling the new holders for the second radiator, but could not finish my work. This weekend there’s no time to go to the workshop. But there are other news:
First, Aquatuning did a second shot and send me this Norprene-tubing. I don’t like the transparent tubings, they all have problems with opacity and their general life span. The Norprene is made for extreme life expectancy and heavy duty use. And I love the industrial look, I even am not going to remove the descriptions on it.


Then I’m really proud and happy to introduce my second sponsor: bequiet! supports my project with their great Dark Power Pro 11 power supply with 850 W, and 6 pieces 140 mm Silent Wings 3 fans. Special thanks to the team and especially Julia!


I was looking for a new power supply, because my actual bequiet! Pure Power is quite old and lacks any modular cable management.


And I am really impressed by the quality and design of the Dark Power Pro. Never thought that something profane like a power supply would be able to get me this excited.


Had to do a first try:


I’m so inspired by the look that I am going to change my plans. Plan was to use a CNC to mill a very complicated aluminium cover which would have been integrated in the wall between the main room and the power supply. Now I’m thinking about just doing a cut-out in the wall, so you can have a good look at the power supply, its fan and the electronics beneath the fan. This would intensify my industrial look.
What’s your opinion?

The fans are of superior quality as well. I really appreciate the details. The frame is shrouded with rubber, and there are three mounting concepts. There’s a click-system for directly mounting it to a case, optionally directly on the wall or with 1 mm distance for ultimate decoupling. I’m going to use the third option with “normal” screw fixation. The holes are completely isolated with rubber, too. Due to the unusual shape of the main frame without covering the edges, I have to redo my holding system for the radiator. It’s going to be a lot of work, but there’s one big advantage: I get 10 mm more space in height. This is especially useful for the new radiator on the back.


Till I can proceed milling my parts I am working on some detail planning. And I am waiting for a soldering station to be delivered to start with some cable work.
 
Last edited:
I worked on the configuration of the CPU-cooler for the last few days. Couldn’t decide which to choose, so I just tried out all of them… this is the result:


Any thoughts about it? Which one do you like most?
 
Thanks to both of you for sharing your thoughts with me! It may be a luxury problem, but still is a difficult decision for me. Good thing is I can delay my decision till the end of the project.

My aluminium parts are back from anodization. Unfortunately, the parts for the reservoir vary in color. This can occur when using different alloys. I’m hoping that it will not be noticeably in the end.


Didn’t show you the „comb“ yet. It is the top cover for the GPU.


I rebuild the Phobya radiator unit to use the Silent Wings 3 fans. Had to cut the magnet holders, rework the white end parts and to shorten some of the fan holders.


Then I started to work on the opening for the power supply. Like mentioned before, I discarded my original plan with an aluminium cover. Next idea was to do a rectangular opening to get wide view of the power supply fan and the nice grill. But doing this would have eliminated nearly the complete wall. So I decided to do just a round hole in the size of the fan. To intensify the industrial look I used a clamping section.


The energy chains had been mounted again to drill their mounting holes.


Then I manufactured some small parts. The bushings are used for fixing the guide rods into the side panel. The bracket is used for mounting the pump.


I found a good place for the pump. Close to the reservoir and as low as possible. There is a 2 mm gap remaining to the power supply. Whole pump is vibration-cushioned. I hope this will work good enough to prevent any vibrations to the case.


Today I did a first test with the pump and reservoir. The position of the connectors isn’t final yet. The position of the pump is a problem for de-airing, as expected. Had to unmount it and swing it around. Maybe the problem will get eliminated by the final tubing setup.
I filled the reservoir nearly to the top and started the pump. Pump was loud and nothing spectacular happened. Then I started de-airing, and made a big mess. Without air the pump started to show its full potential. And it’s really powerful. The water splashed out of the top opening of the reservoir, and I had to do an emergency stop. One advantage of this pump is the possibility to control the speed onboard. I put it on min speed, which worked well for this test-setup. The difference in pressure between in/out of the reservoir results in a very interesting height difference of the water within the tubes.
And without air the pump is really, really silent. And, best of all, there are no vibrations. I was really concerned about vibrations of the pump, my old DDC is a disaster at this point. But the VPP755 just has no vibrations. My mounting solution seems to be adequate enough.
My reservoir works fine, nothing to mention about it. All tubes and connections seem to be tight.


Back
Top