UPDATE 10/07 2013 Even more mesh! and AquaTuning is sponsoring
Yeah, well... It's still the same image but now with a 'transparent' background, which obviously failed but I like the contrast to I kept it. It's the logo I made for my Black Beast build (of which I have no pics, which I now regret cause it was pretty awesome).
")
Take as long as you need mate, it's your build! Just enjoy doing whatever it is that you do atm and we'll wait. I'm already happy that you do this build log at all!
")
I like the idea of the scratched pipes but I'm afraid that it won't go with the exterior too well seeing as that looks pretty clean. Even with the mesh

My opinion would be that you would then also have to do that to the exterior which would be a shame imo. What if you just sand the pipes a bit, but only in one direction? (Very rough sanding paper, wrap it around and pull it from one side to another). Kind of like a brushed alu look, not all shiny and industral but not messy and 'ghetto' either?
Your choice though, I've liked everything you've done with it so far so I'm sure that whatever you decide to do will look good
Yeah, I had a feeling the picture got somehow inverted, but the contrast now looks awesome nideed
Thanks for the suggestion. What you say about it not going well with the exterior is true, perhaps brand new and shiny pipes is what suits the look best?
However, about the "sand it one direction" does sound promising. I like the look of brushed metal and if I can achieve it the way you are saying it would be completely awesome!

I have to be careful about the fine line between industrial and ghetto look, don't I?
haha
I guess I'll have to get some small samples to try it out on and then see what suits the best
But that will be done at a later stage!
Anyways, thanks again for the input and suggestions. As a thanks I'd like to ask you to check below, because
HERE COMES AN UPDATE! :lol:
 I still can't change the first post of this thread to keep it updated with correct information. I guess I've passed the "be able to edit date" and no moderator has replied to me (I sent a message almost a month ago). I guess I'll have to send a new one and hope someone replies
UPDAAAAAAATE!
Even more mesh! and AquaTuning is sponsoring - 10/07 -2013
I still can't change the first post of this thread to keep it updated with correct information. I guess I've passed the "be able to edit date" and no moderator has replied to me (I sent a message almost a month ago). I guess I'll have to send a new one and hope someone replies
UPDAAAAAAATE!
Even more mesh! and AquaTuning is sponsoring - 10/07 -2013
UPDATE 10/07 - 2013
HIP HOPP TO THE TOP!
Hope you're all doing great!
I just got home from a 2 week vacation and I'm ready to share this update with you! I thought I'd get it out sooner than this but I didn't have the time required and who doesn't want to enoy their vacation while it lasts?
This update will be about something that's not new but still wonderful - even more mesh! I can't get enough of it and it will cover my build quite much. I'll let the pictures and text below talk for themselves so be sure to enjoy it!
BUT!
Something have happened that will have a huge influence on this mod. That is that I've got a new collaboration partner named
AquaTuning!
AquaTuning is a web-store featuring water cooling components with a huge range of nice and great products. They are based in Germany but have multiple language-choices on their site. They do send with UPS and the package is delivered to your door within days
AquaTuning joins me as a collaboration partner and supplies me with a complete water cooling system for Big Bro' Prodigy. This will definately raise the awesome-factor of my project a lot. It will be very interesting and exciting to work with water as I've never done that before
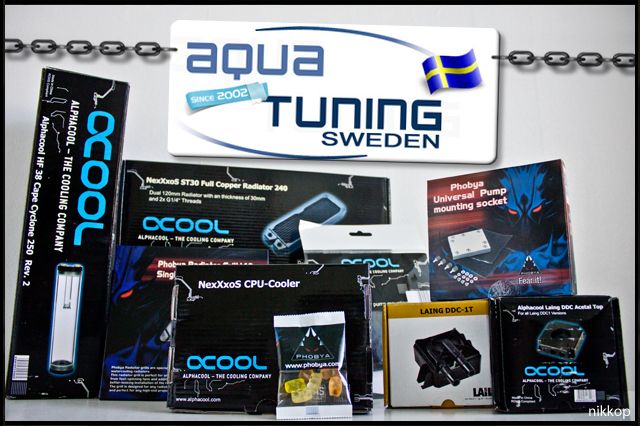
Below you see a couple of pictures of the package and a picture of the products themselves:
The products will be unboxed and photographed in the next update and I will show every product on it's own
This will be the first complete water cooling system I've ever installed so it will be fun to learn something new, at the same time as it will look completely awesome (hopefully
)
Here's the
picture! I'll only give you a few as a start, more to come in the next update
The package I've been waiting for and been thrilled about!
I open the package up and see that everything is well packed and compact. I didn't think all would be able to fit in this box even tho' it does weight some, haha
And here's a picture of all the products I've been supplied with! What I've been supplied with in the package and for this build can be seen in the list below:
The products;
As you may see it's not a 100% complete water coolig system yet. What is missing is connections/fittings and some kind of tubing. The fittings are needed on every component in the loop and the tube is of course there to transport the liquid
The reason I haven't gotten any yet is because I don't know what will suit the best. I will find out once I've installed all components and thereafter order the fittings and tubing as I want it to be perfect
That was what I had to show for the moment regarding the new collaboration partner
AquaTuning and the products that will be inside this project. Can you imagine a complete water cooling system inside the
Big Bro' Prodigy? I can and I like the imagination of it!
Where everything will be mounted, how it will look and stuff a like will of course be shown later on when the time has come. I have quite a few ideas in my head that I need to try
______________________________________________________
Let's continue with the case-mod itself that will be about nothing less than even more mesh!
(which makes me happy as I love it)
Here's the botton of the case itself where all the contacts will be reached. I have earlier sawn out some holes for the I/O- and PCI-contact and the PSU a like. I did this before I got the idea that I'd like to use the mesh I've gotten my hands on.
Now at a later stage I've made the decision that I want this bottom part to be covered with nothing less than mesh, as well
I try to get the mesh piece inside but I notice that there's two raised parts in the tray (marked with red arrows) that will create some problem as the level won't be straight and smooth.
This is how I want it to look once it's done. With mesh on the inside of the case and then the motherboard tray and I/O on top of it
I could make two things at the same time - Put in even more mesh and remove those tiny "boulders", so I started masking it up and called upon my tools
I sawn a huge part of the bottom tray away - where I earlier had made holes for all the contacts. I will later on make the same holes in this mesh so I can reach all the contacts
The hole thing about this was that I wanted to have visible mesh on the inside.
The rear/back part that I earlier cut some mesh for was to be fixed as well. Since I will have a covering mesh even in the back I had to get rid of what's there original, as the fan-mounting, holes and such stuff.
I mark what is to be sawn and I then saw the parts away, quite some parts got off
What is remain to do on these is to make all the cuts smoother and maybe paint the parts so you don't see any scracthes or proof that it has been sawn/modified - even tho the mesh will cove that up quite good
Since both the top, bottom and rear/back and the front have gotten a mesh-makeover I thought it was time to puzzle up the case to see what it looks like
We've seen the parts a lone but not togheter as a case so it's time!
I myself think that it looks extremely wonderful and I'm very pleased with the result
The inside:
Seen from behind:
And last but definately not least, seen from the front! Both with and without the motherboard I/O-tray. Looks very nice with the mesh and the contrast it makes to the black of the rest of the case
______________________________________________________________
It feels like the modification of the case itself is starting to somehow come to an end and look good!
What remains to be done is to saw the holes in the bottom-tray to allow the contacts to be reachable and then attach all the mesh-parts with rivets and stuff a like. After the modification of the case itself is done there will of course be other moments I will work with, such as sleeving the PSU, mounting and constructing the water cooling loop etcetc.
There's however
one thing on the case that I have an awesome idea about that I think will be really good. However I don't want to reveal it quite yet, haha
I first want to try it out and see if it fits and such stuff. As a teaser I can reveal that it will be about somehow modifying/replacing the
top handles with something that will look better and suit my style in this build even more
Please do comment, ask or give suggestions! I get happy when people write
Thank you for reading and following,
Best Regards
Nikkop