You are using an out of date browser. It may not display this or other websites correctly.
You should upgrade or use an alternative browser.
You should upgrade or use an alternative browser.
CaseLabs STH10
- Thread starter Blade Runner
- Start date
Blade Runner
New member
I managed to get the OS onto the M.2 SSD late last night so I will be busy reinstalling programs for today.
The boot time is staggering, and the system seems more stable, with the mobo showing "AA" all the time.
Instalation of the OS was hit and miss, there seems to be no definitive way of doing it. There are lots of guides online but they are all different.
I finally managed it by part following a youtube guide but even then I had to change CSM back to enabled, contrary to the video to get it to load.
I could not write down the actual method I used, it was more of a case of bashing away at the keys like a monkey until it worked
Blade Runner
New member
Those SSD numbers. :drool: Those fittings! :drool: I'm surprised you don't see those fittings in more builds.
The SSD is pretty darn quick!
") Its speed gain is actually noticeable in use, not just a benchmark gain and it is replacing a Samsung 850 PRO which was hardly a slouch.
Its speed gain is actually noticeable in use, not just a benchmark gain and it is replacing a Samsung 850 PRO which was hardly a slouch.The Chaingun fittings are very bulky, maybe that's why they are not used more? I could not have used them in a few places on the rest of my loops. They only just fit the Razor GPU waterblocks.
Blade Runner
New member
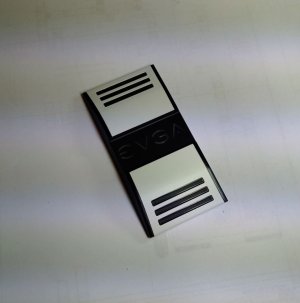
I took apart the EVGA SLI bridge last week to paint the brushed aluminium parts white to match the case.
I did take photos of the whole process (It comes apart with two small screws for the main bit and the metal is stuck on with double sided tape) but I managed to delete the pictures so all I have left is the finished bridge below.
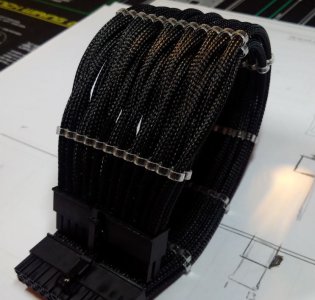
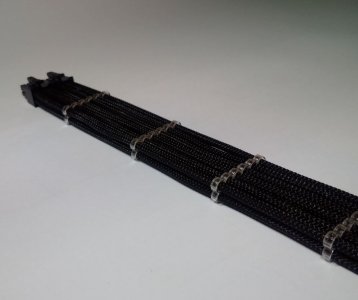
I made the main 24 wire power cable today, its only very short so no room for errors. I measured and then drew a full scale template of where the two connectors are in relation to each other.
I have tied it up curled so that it gets used to the tight bend it has form when the mobo gets installed.
The wires have to swap from one side to the other due to having two male connectors but the swap over will be in the rear chamber and its turned out quite neat anyway.
I did take photos of the whole process (It comes apart with two small screws for the main bit and the metal is stuck on with double sided tape) but I managed to delete the pictures so all I have left is the finished bridge below.
I made the main 24 wire power cable today, its only very short so no room for errors. I measured and then drew a full scale template of where the two connectors are in relation to each other.
I have tied it up curled so that it gets used to the tight bend it has form when the mobo gets installed.
The wires have to swap from one side to the other due to having two male connectors but the swap over will be in the rear chamber and its turned out quite neat anyway.
Attachments
-
 SLI_PaintedWhite.JPG49.9 KB · Views: 133
 -
 MoboCableCloseUp.JPG59.7 KB · Views: 111
 -
 MoboCableWiresSwapSides.JPG80.1 KB · Views: 117
 -
 MoboCableCurledToShape.JPG54.3 KB · Views: 109
 -
 MoboCableConnectorsHalfWiredUp.JPG68.2 KB · Views: 134
 -
 MoboCableConnector.JPG39.4 KB · Views: 120
 -
 MoboCablesCutToLength.JPG41.8 KB · Views: 114
 -
 MoboCableConnectorsTemplate2.JPG40.5 KB · Views: 114
 -
 MoboCableConnectorsTemplate.JPG25.5 KB · Views: 109
TheOrangeOne
New member
Looks epic dude! Great work!!!!
Blade Runner
New member
Looks epic dude! Great work!!!!
Thank you
I am nearly worked up on the build, well as far as I can go without the motherboard and GPUs fitted.
I cant even add any more LED lights or strips, I will have planes trying to land on the thing if I do........................
")
I had a message today from the X99 E-WS full cover water block people, the block is going to be about another 3-4 weeks before I get it

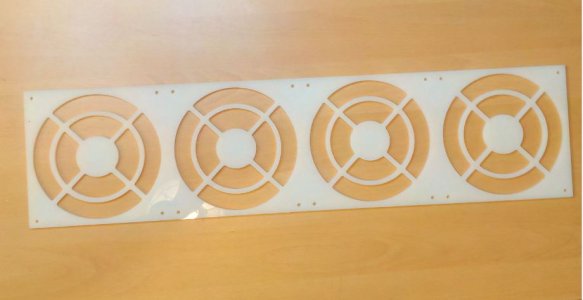
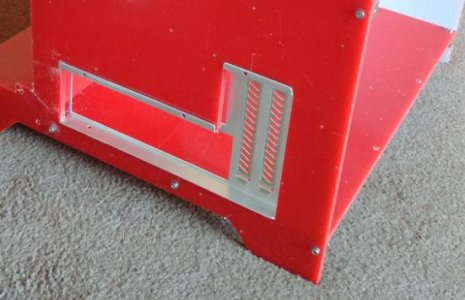
I cant do anything about this so I just have to live with it and in the mean time I will play around a bit with my next project, a scratch build in Acrylic using a Lian-Li PCI back plate and Parvum modding cubes.
I use a local signwriter who has a good CNC machine for cutting acrylic (he made the custom fan grill for the current build pictured below)
I expect I will have made a few mistakes on the first cutting plans, I ain't done this before and its tricky trying to work out where all the holes need to go for the modding cubes, its all good clean fun....................
I will start another build log once I get started properly on "The Cube" (At the moment I am thinking along the lines of a Micro ATX Z97 with dual 980s with everything under water but all that could change!).
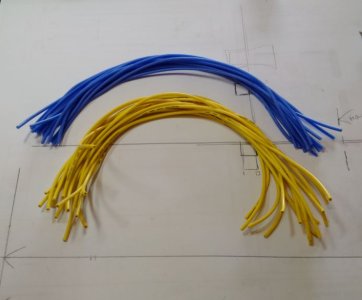
Also pictured is one of the 3 GPU power cables, I have another 2 to make yet.
I am making them long then I will cut them to length once they are curled into position once the GPUs are fitted.
Attachments


Last edited:
Blade Runner
New member

Blade Runner
New member
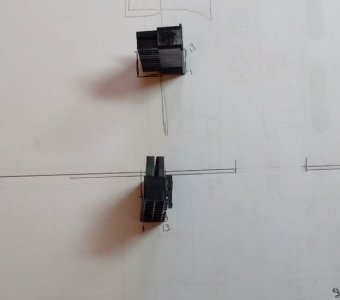
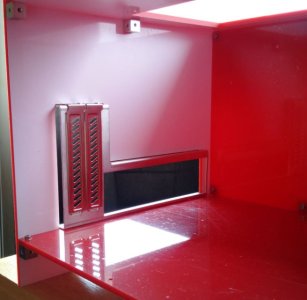
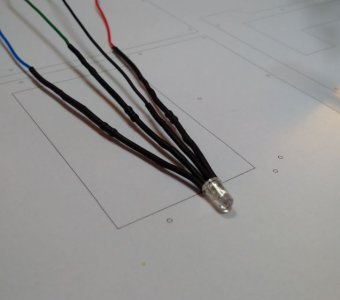
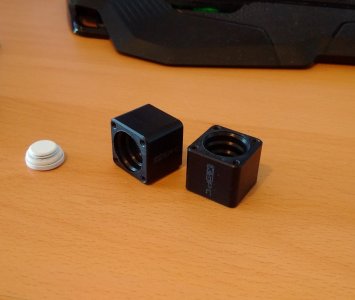
I had to make up a couple more RGB LED bulbs for the top chambers Monsoon light port rotarys.
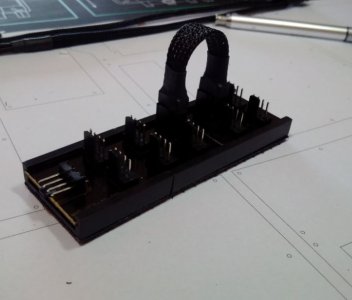
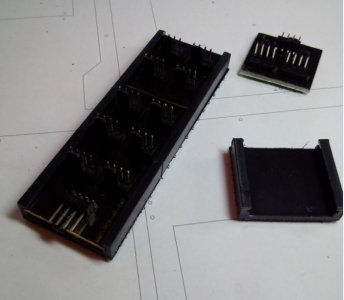
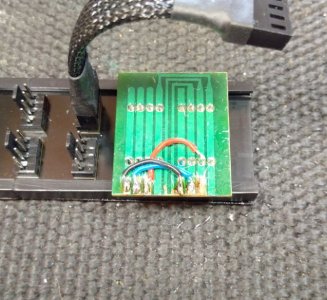
I have already made up as far as I can go the 8 RGB LEDs needed for the XSPC Razor GPU & RAM water blocks but I needed a splitter.
I could not find a simple 8 way 4 pin splitter so I cut down a 6 way and added it to another 6 way, joined with a very short 4 wire cable.
ETA That did not work! I forgot about the PCB lanes which were severed by cutting it down. See the last pic, a few bits of wire and a bit of solder and its as good as new!
This will be fixed somewhere in the back of the case when the GPUs are fitted and I know exactly where the wires will need to run
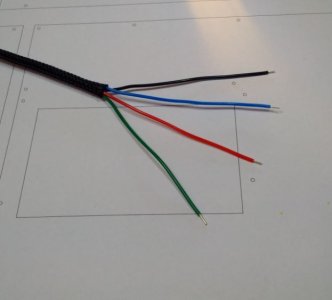
Just a shout out for my new wire stripper, its a Knipex and it works - very very well. I have never been a fan of the automatic type of wire stripper, I have found them very hit and miss. This mini Knipex is perfect for PC modding as it is adjustable from 18awg right down to 28awg. its not cheap but it feels like it will last a lifetime and it is super accurate, a real pleasure to use.
I have still been messing around with my scratch build and got my mate to cut out my prototype drawings.
Ignore the horrible red colour, it was offcuts that were lying around and it was cheap. The panels have fitted together pretty well and I only have the holes for the modding cubes in the wrong places in 4 locations.
This will be my last post for a while, I am going into Papworth hospital in a weeks time for a spot of open heart surgery - Google "Standstill Operation" if you are not squeamish.......
Should be back posting in August and by that time the water block for the motherboard should have turned up which will allow me to get this build finished.
I have already made up as far as I can go the 8 RGB LEDs needed for the XSPC Razor GPU & RAM water blocks but I needed a splitter.
I could not find a simple 8 way 4 pin splitter so I cut down a 6 way and added it to another 6 way, joined with a very short 4 wire cable.
ETA That did not work! I forgot about the PCB lanes which were severed by cutting it down. See the last pic, a few bits of wire and a bit of solder and its as good as new!
This will be fixed somewhere in the back of the case when the GPUs are fitted and I know exactly where the wires will need to run
Just a shout out for my new wire stripper, its a Knipex and it works - very very well. I have never been a fan of the automatic type of wire stripper, I have found them very hit and miss. This mini Knipex is perfect for PC modding as it is adjustable from 18awg right down to 28awg. its not cheap but it feels like it will last a lifetime and it is super accurate, a real pleasure to use.
I have still been messing around with my scratch build and got my mate to cut out my prototype drawings.
Ignore the horrible red colour, it was offcuts that were lying around and it was cheap. The panels have fitted together pretty well and I only have the holes for the modding cubes in the wrong places in 4 locations.
This will be my last post for a while, I am going into Papworth hospital in a weeks time for a spot of open heart surgery
- Google "Standstill Operation" if you are not squeamish.......Should be back posting in August and by that time the water block for the motherboard should have turned up which will allow me to get this build finished.
Attachments
-
 CubePrototype2.JPG45 KB · Views: 111
 -
 CubePrototype1.JPG41.4 KB · Views: 120
 -
 SplitterMod3.JPG41.3 KB · Views: 115
 -
 SplitterMod.JPG39.8 KB · Views: 121
 -
 KnipexStripper.JPG39.8 KB · Views: 121
 -
 RGB_Cable.JPG33.9 KB · Views: 119
 -
 RGB_StrippedNeatWithKnipex.JPG27.9 KB · Views: 108
 -
 RGB_Sleeved.JPG37.6 KB · Views: 104
 -
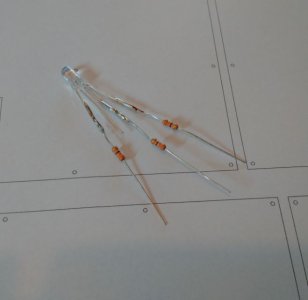 RGB_Resistors.JPG29.6 KB · Views: 123
 -
 RGB_SolderResistors.JPG78.6 KB · Views: 110
 -
 SplitterMod2.JPG87.8 KB · Views: 112
Last edited:
TheOrangeOne
New member
Good luck in the surgery matey!!!
Dawelio
Active member
Best of luck in your surgery mate, looking forward to how you continue this
Don't rush yourself, take your time to recover.
What Feronix said, couldn't have putted it out better myself.
Good luck with your surgery mate, hope it goes well. And take your time and no rushing, we're all still here when you are fully back healthy!
Blade Runner
New member
Thanks to everyone for the kind words, the op' went well and I am back home now feeling a bit tired but other than that, pretty good.
I am not up for any modding yet but I have got a few pictures of what I did before I went away which I did not get a chance to post.
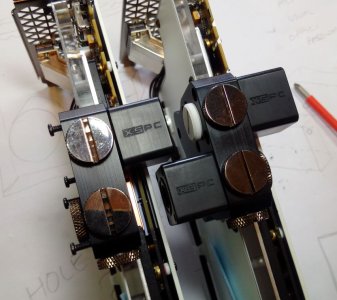
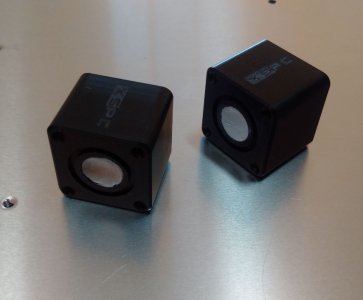
The XSPC Razor waterblocks are joined with 40mm cubes, one on the left, the next on the right and so on.... I did not really like the look of this so I decided to add some "dummy" blocks to even it out. I wanted to keep the series flow loop.
I thought I would just fill up two blocks with epoxy putty but when I came to fit them realised that the screws from the block above would not let me screw them in place with a watertight joint.
Back to the drawing board.......... I ended up drilling out the centre of the dummy blocks to give them clearance around 1/4 blank plugs (I had to use smaller headed plugs than the stock large XSPC ones)
I am quite pleased with the result, it is symmetrical now and looks more robust.
I am not up for any modding yet but I have got a few pictures of what I did before I went away which I did not get a chance to post.
The XSPC Razor waterblocks are joined with 40mm cubes, one on the left, the next on the right and so on.... I did not really like the look of this so I decided to add some "dummy" blocks to even it out. I wanted to keep the series flow loop.
I thought I would just fill up two blocks with epoxy putty but when I came to fit them realised that the screws from the block above would not let me screw them in place with a watertight joint.
Back to the drawing board.......... I ended up drilling out the centre of the dummy blocks to give them clearance around 1/4 blank plugs (I had to use smaller headed plugs than the stock large XSPC ones)
I am quite pleased with the result, it is symmetrical now and looks more robust.
Attachments


Blade Runner
New member
The Postman was busy while I was away and delivered a few bits I need to finish the build once my breast bone heals.
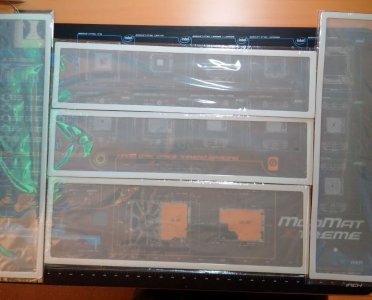
The full set of DEMCiflex filters for the STH10 had to come from the states but only took about 10 days from when I ordered them so not bad at all.
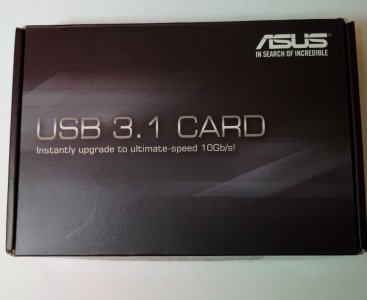
The USB3.1 card will fill the final PCI-E slot and be useful for super fast external backups..
I have read on the E-WS owners thread, and noticed it myself too that the SM951 M.2 SSD runs very hot and when used hard throttles itself due to the heat. I bought an Alphacool mosfet water block, which I will remove the heatsink and make up a new custom heatsink from some copper flat bar so that it fits on the M.2 using thermal pads and a couple of mounting screws.
Talking of thermal pads I also ordered some of the newly released Alphacool Eisschicht (ice) thermal pads in both 1mm and .5mm thick. These pads have a thermal conductivity of 17W/mK which is pretty wicked.
I will use them to fit the full cover motherboard mono block when it arrives. Not just the PLX chips but also the CPU will get these new pads.
Finally I had never been happy with cutting heat
shrink to length, even with the careful measurement and re measurement it is easy to get a slightly angled or incorrect length. I found this mini paper guillotine on Amazon and it works a treat.
The full set of DEMCiflex filters for the STH10 had to come from the states but only took about 10 days from when I ordered them so not bad at all.
The USB3.1 card will fill the final PCI-E slot and be useful for super fast external backups..
I have read on the E-WS owners thread, and noticed it myself too that the SM951 M.2 SSD runs very hot and when used hard throttles itself due to the heat. I bought an Alphacool mosfet water block, which I will remove the heatsink and make up a new custom heatsink from some copper flat bar so that it fits on the M.2 using thermal pads and a couple of mounting screws.
Talking of thermal pads I also ordered some of the newly released Alphacool Eisschicht (ice) thermal pads in both 1mm and .5mm thick. These pads have a thermal conductivity of 17W/mK which is pretty wicked.
I will use them to fit the full cover motherboard mono block when it arrives. Not just the PLX chips but also the CPU will get these new pads.
Finally I had never been happy with cutting heat
shrink to length, even with the careful measurement and re measurement it is easy to get a slightly angled or incorrect length. I found this mini paper guillotine on Amazon and it works a treat.
Attachments
-
 DEMCiflexSTH10_FullDustFilterSet.JPG86.6 KB · Views: 76
 -
 AsusUSB_3.1_Card1.JPG59.5 KB · Views: 75
 -
 AsusUSB_3.1_Card2.JPG85 KB · Views: 69
 -
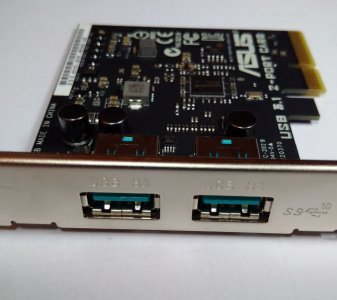 AsusUSB_3.1_Card3.JPG81.5 KB · Views: 94
 -
 M.2_WatercooledHeatSink.JPG44.1 KB · Views: 78
 -
 AlphacoolEisschichtThermalPads.JPG66.9 KB · Views: 72
 -
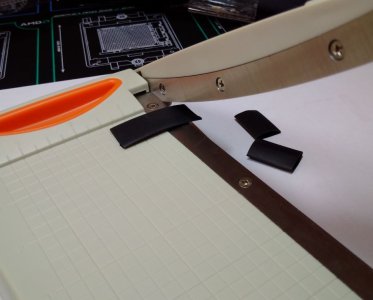 HeatshrinkGuillotine.JPG62.6 KB · Views: 87
Last edited:
Permafrost
Compo Whore
where did you order the filters from dude?
also looking forward to see what you do with the waterblock for the SM951
also looking forward to see what you do with the waterblock for the SM951
Blade Runner
New member
where did you order the filters from dude?
also looking forward to see what you do with the waterblock for the SM951
I ordered the filters from http://www.demcifilter.com/c58/CASELABS.aspx
Which was a link I followed on the CaseLabs site. I wrongly thought they were in the USA like CaseLabs but it seems they are in South Africa. Either way both times I have ordered stuff from them it has turned up quickly.
The difficult part for the SM951 waterblock will be mounting it, there are 2 mobo mounting screws very close which I think I may be able to use if I replace the standard mobo mounting screws with standoff screws to get get me up to a level with the rear of the waterblock.
Permafrost
Compo Whore
I ordered the filters from http://www.demcifilter.com/c58/CASELABS.aspx
Which was a link I followed on the CaseLabs site. I wrongly thought they were in the USA like CaseLabs but it seems they are in South Africa. Either way both times I have ordered stuff from them it has turned up quickly.
The difficult part for the SM951 waterblock will be mounting it, there are 2 mobo mounting screws very close which I think I may be able to use if I replace the standard mobo mounting screws with standoff screws to get get me up to a level with the rear of the waterblock.
ok cool, i'll have a look on there site very soon.
how long did it take for you to get your caselabs parts and which option did you select?
as for the SM951 i've seen a guy use a ram waterblock..
http://www.overclock.net/t/1551060/official-samsung-sm951-owners-club/70
Blade Runner
New member
ok cool, i'll have a look on there site very soon.
how long did it take for you to get your caselabs parts and which option did you select?
as for the SM951 i've seen a guy use a ram waterblock..
http://www.overclock.net/t/1551060/official-samsung-sm951-owners-club/70
The filters took about 10 days from my order, I used the FedEx option:- FedEx (Zone D)(3-5days) (I live in a remote part of the uk)
I did think on using a ram waterblock but as my M.2 is mounted directly flat to the board and will be nearly all covered by a GPU, I need a waterblock that extends out past the side of the motherboard/ GPU to give me space to fit the derlin block that the 1/4 fittings and the pipes attach to.
The 80mm M2 will need about 120mm of flat bar to cover it and reach the mounting screws I am planning on using and then I will need about another 60-80mm to fit the block/ pipes to. All in I think the overall length of the heatsink copper bar will be in the region of 200mm.
Similar threads
- Replies
- 2
- Views
- 199