**all credit given to Exempt @ OCForums.com for writing the original post - I edited parts for a modern touch and additions/updates to the process**
First off, IHS = Integrated Heat Spreader - its the silver 'thing' mounted on top of your Pentium 4's, and Athlon64's (excluding mobiles) - its actually a piece of zinc-plated copper bonded to the Core and/or PCB if your processor to protect it from being crushed during Heatsink/water block mounting
Disclaimer: This WILL void the living hell out of your processor's warranty, you can't deny that you lapped your IHS like you would deny that you overclocked it if something went wrong - I am NOT responsible for any damage that may occur your CPU in this process (not much damage can really be done by lapping your IHS, except for bending the fragile gold pins - just be careful, and read the steps carefully)
Hello OC techies, I’ve been coming to this site since it first came up way back when so I finally decided to register after reading the Tips part on Lapping. It was a nicely composed article, maybe a bit to in depth for noobs, but hey at once we were all noobs...so no knocking them. Anyways, I wanted to add to that article because lapping, which is similar to lathing is COMMON practice for me on all my CPU's with IHS's. I will explain why...
1. Lapping or sanding the CPU can greatly decrease heat when overclocking.
2. Lapping is relatively safe and if you have the correct sandpaper..It’s free...
3. I said it’s free and it reduces heat from the CPU. Do I need to say more?
1. A Intel CPU socket 478 or LGA775 (socket T), or AMD CPU socket 754 (with IHS), socket 939, or socket 940 - this can only be done safely to CPU's with an IHS
2. 220, 400, and 600 grit sandpaper - can get at local hardware store most times, and 1000, 1200, 1500, 2000, 2500 grit sandpaper (or "micron" grit equivalent) - some can be found at auto parts stores, and some online stores have pre-built lapping kits - www.easypckits.com has the best kit(s) that I’ve seen yet - I highly recommend these for anyone planning on lapping their IHS or HSF
3. A neoprene foam piece large enough to cover the surface area of the gold pins on the back of the CPU, or a piece of foam that came with the CPU.
4. Preferably a piece of glass at least 5 inches by 6 inches wide or a really flat surface, I mean REALLY flat, not concrete flat lol.
5. Any good tape, scotch, masking, painters, duct, you get the point
Ok that’s it, not too many materials needed; hers what you do.
1. Take the Neoprene foam or CPU protective foam, and gently place it on the back side of the CPU's gold pins, make sure that it covers the pins decently (be VERY careful not to bend the pins - especially A64 pins).
2. Take a piece of the 220 grit sandpaper, and tape the edges of the sandpaper to the piece of glass.
3. Place the glass on a flat surface; I use a 12x12" sheet of 1/4" Plexiglas.
4. now take the CPU and gently move it in a circular motion (or figure-8) on the sandpaper, rotating 90º after every 15-20 seconds of lapping to ensure you are lapping it evenly (you can be sure it's lapping evenly by making an X from corner-to-corner with a sharpie), when the X is completely sanded off w/ 220grit and the copper is exposed completely, you are ready to move on to the next step/grit paper
"Now wait a sec, how do I know how much I should lap this sucker before I ruin my CPU?
Use the 220 grit sand paper until the entire IHS surface is copper, then stop and get ready to switch sandpaper.
If your hardcore like me, I go for quite a while, when I use this method, otherwise I will take the CPU and go get it lathed but that’s a whole nother' story...
5. Once you reach the copper (and sharpie'd X is gone) on the CPU take off the 220 grit sandpaper and switch it to the 400 grit, tape it down, and start going in circles again. - follow step #4 lapping procedure (rotating object being lapped 90º after every 15-20 seconds of sanding/lapping)
6. Repeat step 5 with 600 grit and 1000 grit sandpaper
if you continuously look at the surface of the CPU you will notice that the deeper looking scratches go away rather quickly and after a few minutes it will start to look smooooth...oh yah that’s what we want.
7. Now if you went the extra method, getting the 1200 grit sandpaper, (this isn't necessary, but will still help... it's just a perfectionist thing), then you will follow up with this last switch out of the sandpaper to the 1200 and move the CPU in circles again until you have a semi mirror finish.
8. feel free to go above 1200 grit paper, as they do make 1500, 2000, and 2500 grit paper (as well as their "micron" counterparts)
now clean up your mess, make a double check to make sure that there is not metallic dust on the gold pins from the sanding. (I use good ole' canned air & a soft toothbrush)
9. clean the IHS with cotton swabs and high-purity isopropyl alcohol nicely (wipe it off with a soft rag and let it dry for a few minutes - if you got some alcohol in the s478 P4's IHS hole, let it dry for 30 minutes to be sure that there is no alcohol left under the IHS).
10. Apply thermal compound (Arctic Silver 5 recommended), insert CPU into socket, and overclock that sucker.
Common Questions:
Q: What if sand/copper dust gets in the hole on my s478's IHS?
A: Don't worry, it won't hurt anything, the core is the only thing contained under the IHS, there are no open electrical traces/bridges on the top of the PCB
Q: Where can I find ultra-fine grit sandpaper for lapping?
A: Auto parts stores will usually have paper up to 2000grit, but to ease your search, some AWESOME lapping kits for HSF's & IHS's are available at www.EasyPCKits.com - the owner is a VERY nice person, and he sells a quality product at a pretty decent price
Q: Can this step-by-step procedure be followed for lapping Heat sinks & Water blocks?
A: Yes, but its recommended that you go straight up & down rather in a circle when sanding/lapping one of these, as it is much harder to hold a larger object such as a water block or HSF flat to the lapping surface when sanding/lapping in a circular motion
If anyone has other questions, let me know
-Justin
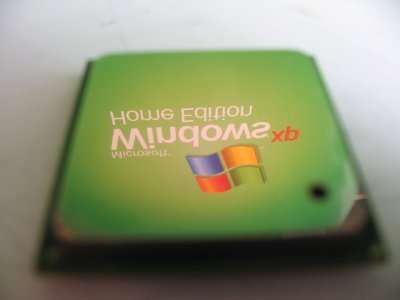
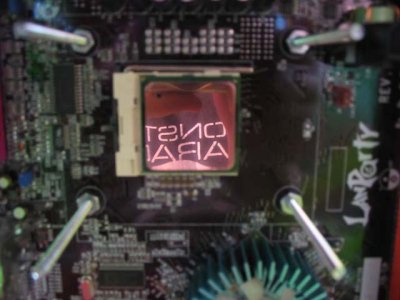
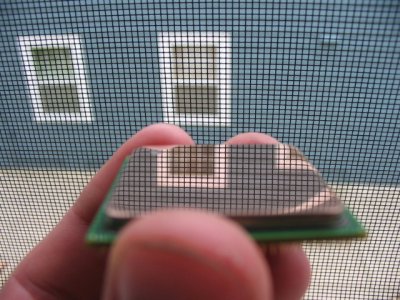
**attached are pictures of my s478 P4's IHS lapped to 2500 grit (wore down to 3000+ grit from lapping on it for almost 30 minutes) - total process took about 2 - 2 1/2 hours on a Saturday when I had nothing else to do**
First off, IHS = Integrated Heat Spreader - its the silver 'thing' mounted on top of your Pentium 4's, and Athlon64's (excluding mobiles) - its actually a piece of zinc-plated copper bonded to the Core and/or PCB if your processor to protect it from being crushed during Heatsink/water block mounting
Disclaimer: This WILL void the living hell out of your processor's warranty, you can't deny that you lapped your IHS like you would deny that you overclocked it if something went wrong - I am NOT responsible for any damage that may occur your CPU in this process (not much damage can really be done by lapping your IHS, except for bending the fragile gold pins - just be careful, and read the steps carefully)
Hello OC techies, I’ve been coming to this site since it first came up way back when so I finally decided to register after reading the Tips part on Lapping. It was a nicely composed article, maybe a bit to in depth for noobs, but hey at once we were all noobs...so no knocking them. Anyways, I wanted to add to that article because lapping, which is similar to lathing is COMMON practice for me on all my CPU's with IHS's. I will explain why...
1. Lapping or sanding the CPU can greatly decrease heat when overclocking.
2. Lapping is relatively safe and if you have the correct sandpaper..It’s free...
3. I said it’s free and it reduces heat from the CPU. Do I need to say more?
1. A Intel CPU socket 478 or LGA775 (socket T), or AMD CPU socket 754 (with IHS), socket 939, or socket 940 - this can only be done safely to CPU's with an IHS
2. 220, 400, and 600 grit sandpaper - can get at local hardware store most times, and 1000, 1200, 1500, 2000, 2500 grit sandpaper (or "micron" grit equivalent) - some can be found at auto parts stores, and some online stores have pre-built lapping kits - www.easypckits.com has the best kit(s) that I’ve seen yet - I highly recommend these for anyone planning on lapping their IHS or HSF
3. A neoprene foam piece large enough to cover the surface area of the gold pins on the back of the CPU, or a piece of foam that came with the CPU.
4. Preferably a piece of glass at least 5 inches by 6 inches wide or a really flat surface, I mean REALLY flat, not concrete flat lol.
5. Any good tape, scotch, masking, painters, duct, you get the point
Ok that’s it, not too many materials needed; hers what you do.
1. Take the Neoprene foam or CPU protective foam, and gently place it on the back side of the CPU's gold pins, make sure that it covers the pins decently (be VERY careful not to bend the pins - especially A64 pins).
2. Take a piece of the 220 grit sandpaper, and tape the edges of the sandpaper to the piece of glass.
3. Place the glass on a flat surface; I use a 12x12" sheet of 1/4" Plexiglas.
4. now take the CPU and gently move it in a circular motion (or figure-8) on the sandpaper, rotating 90º after every 15-20 seconds of lapping to ensure you are lapping it evenly (you can be sure it's lapping evenly by making an X from corner-to-corner with a sharpie), when the X is completely sanded off w/ 220grit and the copper is exposed completely, you are ready to move on to the next step/grit paper
"Now wait a sec, how do I know how much I should lap this sucker before I ruin my CPU?
Use the 220 grit sand paper until the entire IHS surface is copper, then stop and get ready to switch sandpaper.
If your hardcore like me, I go for quite a while, when I use this method, otherwise I will take the CPU and go get it lathed but that’s a whole nother' story...
5. Once you reach the copper (and sharpie'd X is gone) on the CPU take off the 220 grit sandpaper and switch it to the 400 grit, tape it down, and start going in circles again. - follow step #4 lapping procedure (rotating object being lapped 90º after every 15-20 seconds of sanding/lapping)
6. Repeat step 5 with 600 grit and 1000 grit sandpaper
if you continuously look at the surface of the CPU you will notice that the deeper looking scratches go away rather quickly and after a few minutes it will start to look smooooth...oh yah that’s what we want.
7. Now if you went the extra method, getting the 1200 grit sandpaper, (this isn't necessary, but will still help... it's just a perfectionist thing), then you will follow up with this last switch out of the sandpaper to the 1200 and move the CPU in circles again until you have a semi mirror finish.
8. feel free to go above 1200 grit paper, as they do make 1500, 2000, and 2500 grit paper (as well as their "micron" counterparts)
now clean up your mess, make a double check to make sure that there is not metallic dust on the gold pins from the sanding. (I use good ole' canned air & a soft toothbrush)
9. clean the IHS with cotton swabs and high-purity isopropyl alcohol nicely (wipe it off with a soft rag and let it dry for a few minutes - if you got some alcohol in the s478 P4's IHS hole, let it dry for 30 minutes to be sure that there is no alcohol left under the IHS).
10. Apply thermal compound (Arctic Silver 5 recommended), insert CPU into socket, and overclock that sucker.
Common Questions:
Q: What if sand/copper dust gets in the hole on my s478's IHS?
A: Don't worry, it won't hurt anything, the core is the only thing contained under the IHS, there are no open electrical traces/bridges on the top of the PCB
Q: Where can I find ultra-fine grit sandpaper for lapping?
A: Auto parts stores will usually have paper up to 2000grit, but to ease your search, some AWESOME lapping kits for HSF's & IHS's are available at www.EasyPCKits.com - the owner is a VERY nice person, and he sells a quality product at a pretty decent price
Q: Can this step-by-step procedure be followed for lapping Heat sinks & Water blocks?
A: Yes, but its recommended that you go straight up & down rather in a circle when sanding/lapping one of these, as it is much harder to hold a larger object such as a water block or HSF flat to the lapping surface when sanding/lapping in a circular motion
If anyone has other questions, let me know
-Justin
**attached are pictures of my s478 P4's IHS lapped to 2500 grit (wore down to 3000+ grit from lapping on it for almost 30 minutes) - total process took about 2 - 2 1/2 hours on a Saturday when I had nothing else to do**


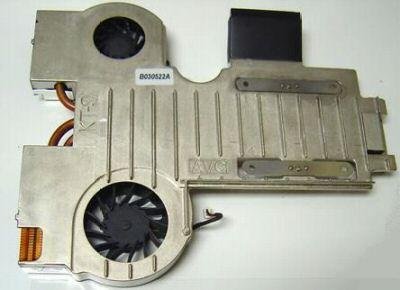
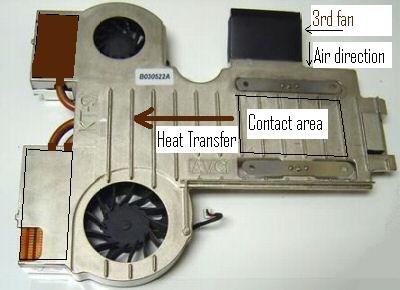
") that's a heatsink, lapping is something reserved for the chips themselves...
that's a heatsink, lapping is something reserved for the chips themselves... when I first seen it.