You are using an out of date browser. It may not display this or other websites correctly.
You should upgrade or use an alternative browser.
You should upgrade or use an alternative browser.
The Ultimate case
- Thread starter secretreeve
- Start date

secretreeve
New member
i took a peice of plexi i found around the house, added some white backing, blue leds and some silver tape.
im going to use it as a mounting point for my SSD when i get one and thought the blue led would add a little internal colour to the case
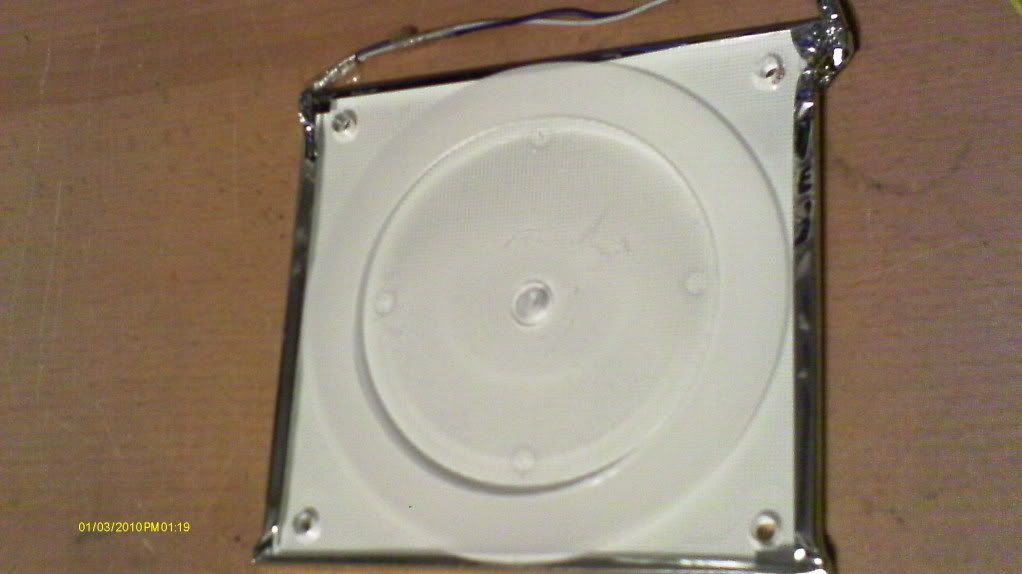
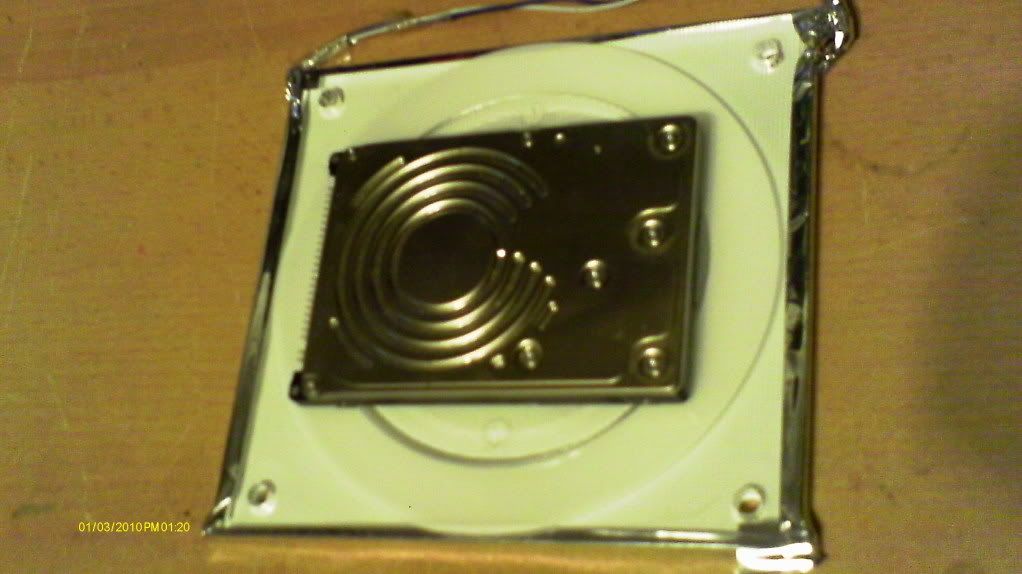
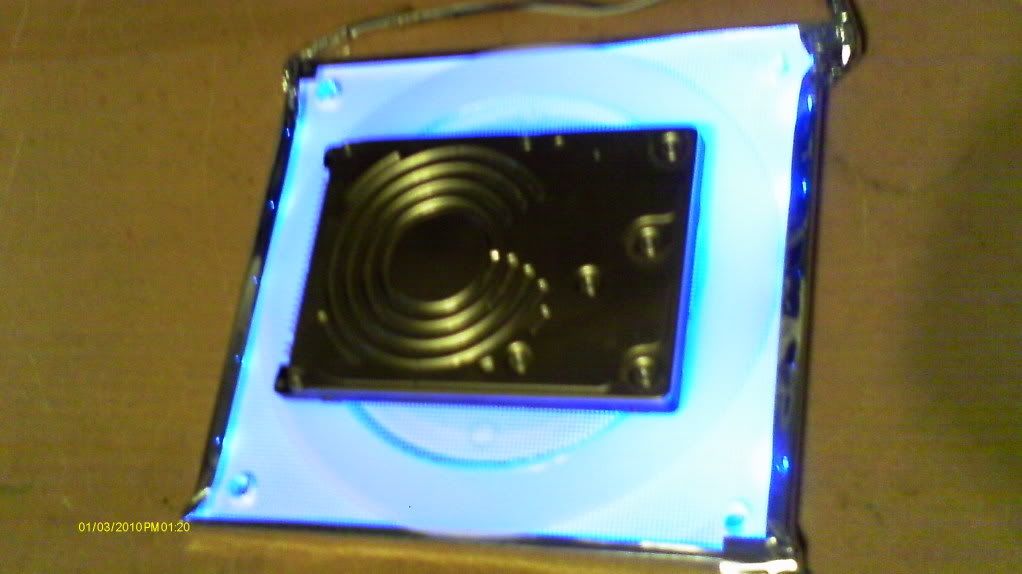
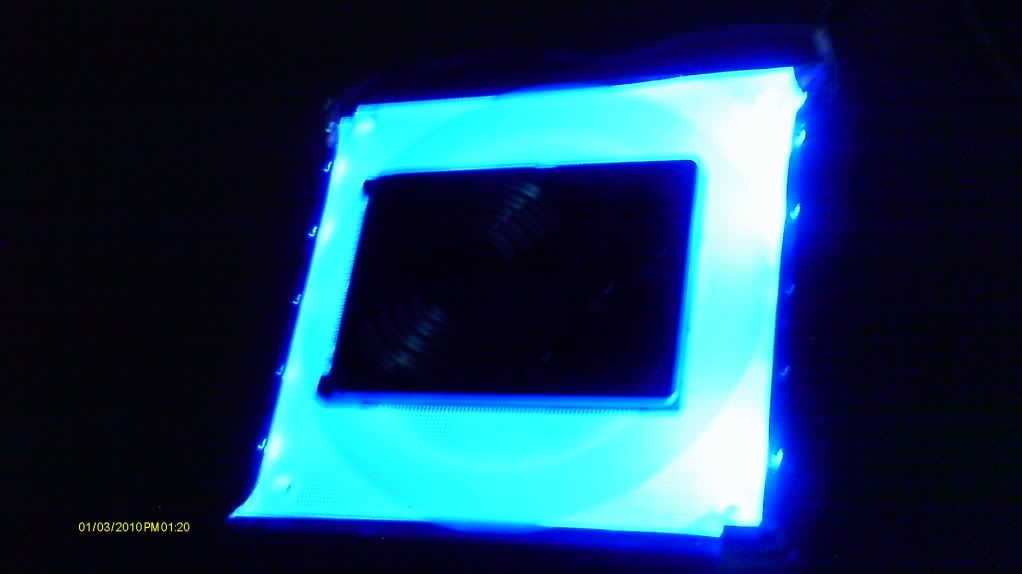
its a bit brighter running off a psu but i whacked a molex onto a 4 AA battery box with switch and had it running off the 5v pins on the molex instead of the 12v its meant to run on.
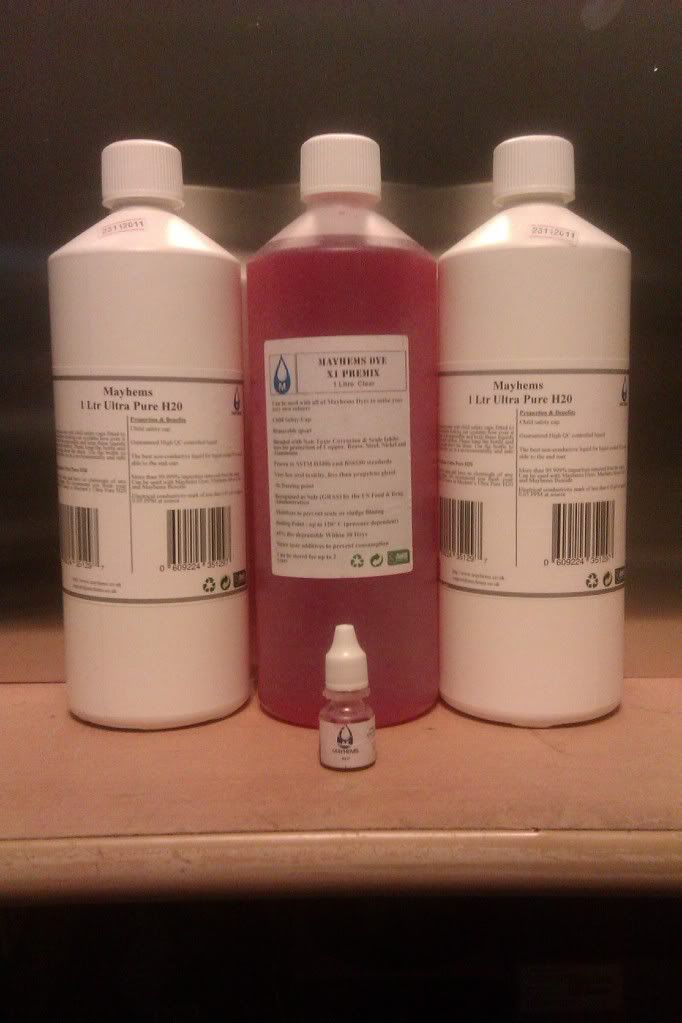
i received the MAYHEMS fluids i ordered from specialtech and heres the X1 premix dyed red with 2x 1L bottles of MAYHEMS ultrapure H20
im going to use it as a mounting point for my SSD when i get one and thought the blue led would add a little internal colour to the case
its a bit brighter running off a psu but i whacked a molex onto a 4 AA battery box with switch and had it running off the 5v pins on the molex instead of the 12v its meant to run on.
i received the MAYHEMS fluids i ordered from specialtech and heres the X1 premix dyed red with 2x 1L bottles of MAYHEMS ultrapure H20
secretreeve
New member
thanks doc.
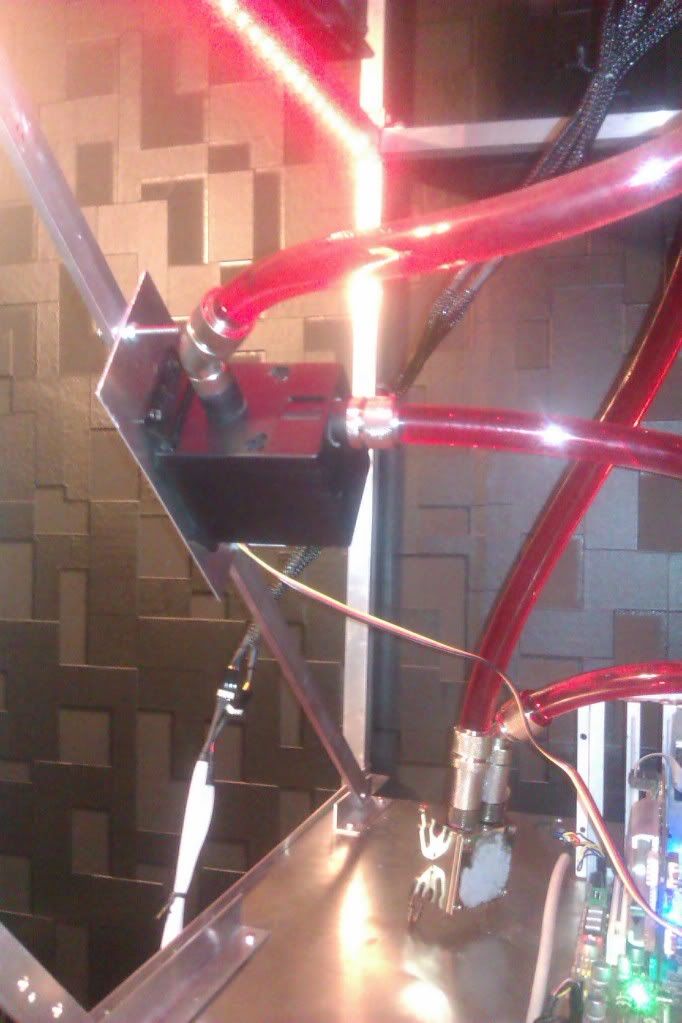
im getting some mayhems X1 fluid for the loop to replace whats in it atm cause its 8 months old and needs changing. when i do that im going to swap a few fittings around, shorted some of the tube, like at the top between the rads, the cpu > gpu tube, shorten the 240 rad > res tube a lil, and lengthen the tube from the pump to the cpu so when the tray is pulled out theres enough slack.
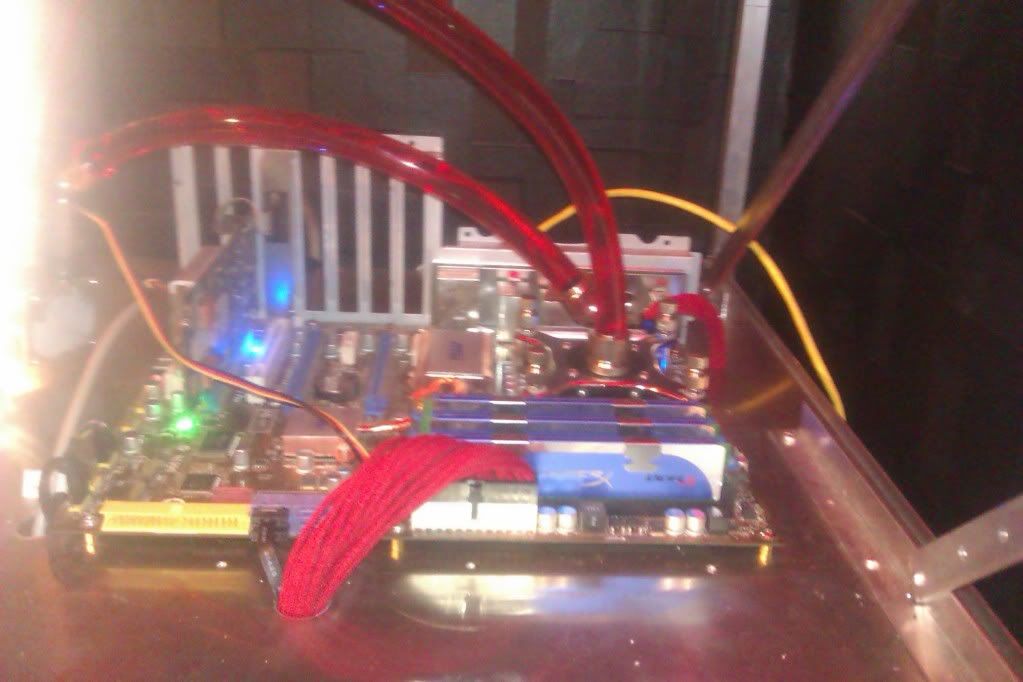
ran prime95 for max heat for 2 hours and max load temp was 48*c, hardware below.
intel core i7 920 chipset (stock 2.66ghz)
msi x58 motherboard
GTX460 1gb oc edition card
EK 800lp/h pump
EK basics res
magicool 360 slim rad
black ice GT 240 rad
13/16mm compression fittings throughout and matching masterkleer tube
5x scythe gentle typhoon 1850 RPM fans pulling cold air through the rad
overall im happy with the temps, they're the same as when i had the cpu on the 240 rad without the gpu on the loop using 8/10mm fittings and rad next to the mobo tray. so overall not to bad, new fluid should knock another 2 maybe 3 degrees c off and hopefully the revised loop will help as well.
as for case construction,
i finished up the final horizontal bars on the framework, put the strength bars on the mobo tray at the bottom to stop if from bowing and wrapped up the front panel, stil lwaiting for my lamptron package to arrive to finish that off though.
on the 3rd of feb i will be ordering a few sheets of metal to start work on the rear panel and the divider sheets.
on the 17th of feb im ordering in the red transluscent acrylic panels that will go on the front and sides.
so updates will be a lil slow from this point on but will pick up again soon after the acrylic panels.
to be honest, its nearing the end of the build. still looking into spraying the front panel black though.
im getting some mayhems X1 fluid for the loop to replace whats in it atm cause its 8 months old and needs changing. when i do that im going to swap a few fittings around, shorted some of the tube, like at the top between the rads, the cpu > gpu tube, shorten the 240 rad > res tube a lil, and lengthen the tube from the pump to the cpu so when the tray is pulled out theres enough slack.
ran prime95 for max heat for 2 hours and max load temp was 48*c, hardware below.
intel core i7 920 chipset (stock 2.66ghz)
msi x58 motherboard
GTX460 1gb oc edition card
EK 800lp/h pump
EK basics res
magicool 360 slim rad
black ice GT 240 rad
13/16mm compression fittings throughout and matching masterkleer tube
5x scythe gentle typhoon 1850 RPM fans pulling cold air through the rad
overall im happy with the temps, they're the same as when i had the cpu on the 240 rad without the gpu on the loop using 8/10mm fittings and rad next to the mobo tray. so overall not to bad, new fluid should knock another 2 maybe 3 degrees c off and hopefully the revised loop will help as well.
as for case construction,
i finished up the final horizontal bars on the framework, put the strength bars on the mobo tray at the bottom to stop if from bowing and wrapped up the front panel, stil lwaiting for my lamptron package to arrive to finish that off though.
on the 3rd of feb i will be ordering a few sheets of metal to start work on the rear panel and the divider sheets.
on the 17th of feb im ordering in the red transluscent acrylic panels that will go on the front and sides.
so updates will be a lil slow from this point on but will pick up again soon after the acrylic panels.
to be honest, its nearing the end of the build. still looking into spraying the front panel black though.
wassupdoc
New member
thanks doc.
im getting some mayhems X1 fluid for the loop to replace whats in it atm cause its 8 months old and needs changing. when i do that im going to swap a few fittings around, shorted some of the tube, like at the top between the rads, the cpu > gpu tube, shorten the 240 rad > res tube a lil, and lengthen the tube from the pump to the cpu so when the tray is pulled out theres enough slack.
ran prime95 for max heat for 2 hours and max load temp was 48*c, hardware below.
intel core i7 920 chipset (stock 2.66ghz)
msi x58 motherboard
GTX460 1gb oc edition card
EK 800lp/h pump
EK basics res
magicool 360 slim rad
black ice GT 240 rad
13/16mm compression fittings throughout and matching masterkleer tube
5x scythe gentle typhoon 1850 RPM fans pulling cold air through the rad
overall im happy with the temps, they're the same as when i had the cpu on the 240 rad without the gpu on the loop using 8/10mm fittings and rad next to the mobo tray. so overall not to bad, new fluid should knock another 2 maybe 3 degrees c off and hopefully the revised loop will help as well.
as for case construction,
i finished up the final horizontal bars on the framework, put the strength bars on the mobo tray at the bottom to stop if from bowing and wrapped up the front panel, stil lwaiting for my lamptron package to arrive to finish that off though.
on the 3rd of feb i will be ordering a few sheets of metal to start work on the rear panel and the divider sheets.
on the 17th of feb im ordering in the red transluscent acrylic panels that will go on the front and sides.
so updates will be a lil slow from this point on but will pick up again soon after the acrylic panels.
to be honest, its nearing the end of the build. still looking into spraying the front panel black though.
noice

are you putting metal plates over the acrylic so it looks like that star trek pic posted?
(if it is star trek XD)
secretreeve
New member
startrek?
no no, it;ll have plasticard shapes on the acrtylic with a 5mm gap between each to allow light to shine through.
if i posted a pic it would have been from terra nova
no no, it;ll have plasticard shapes on the acrtylic with a 5mm gap between each to allow light to shine through.
if i posted a pic it would have been from terra nova
secretreeve
New member
I have to take my hats off to lamptron. Gilgamesh and lamptron both bent over backwards to make sure this was dispatched and trackable in the mail.
Thier efforts for this has been truely amazing! so with that i will hold back no longer!
so a huge thank you to -

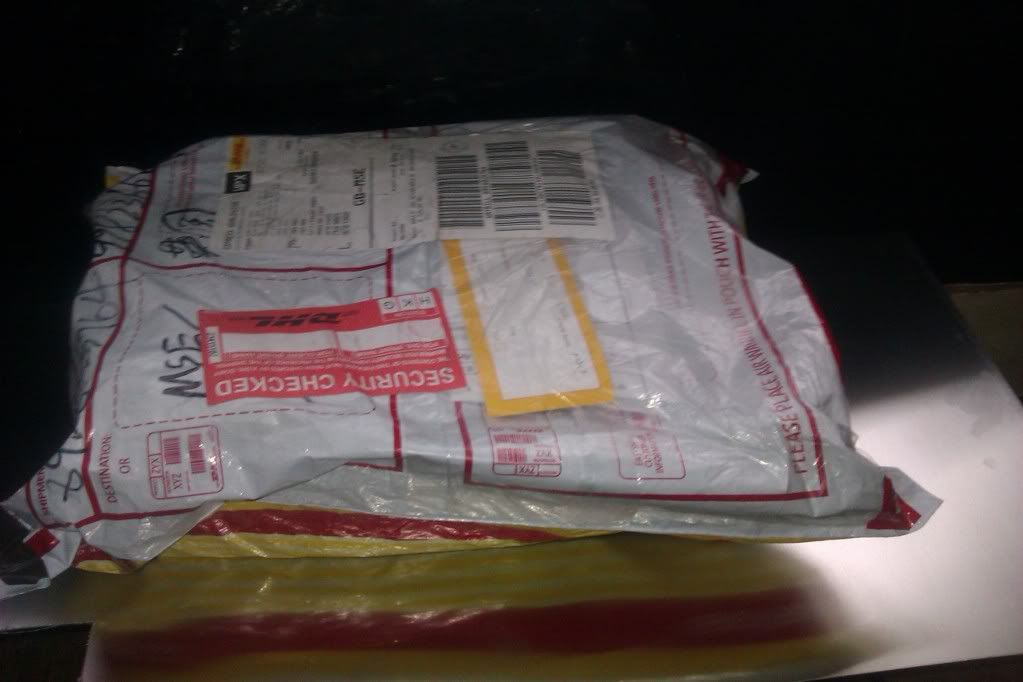
Heres the package that arrived today!
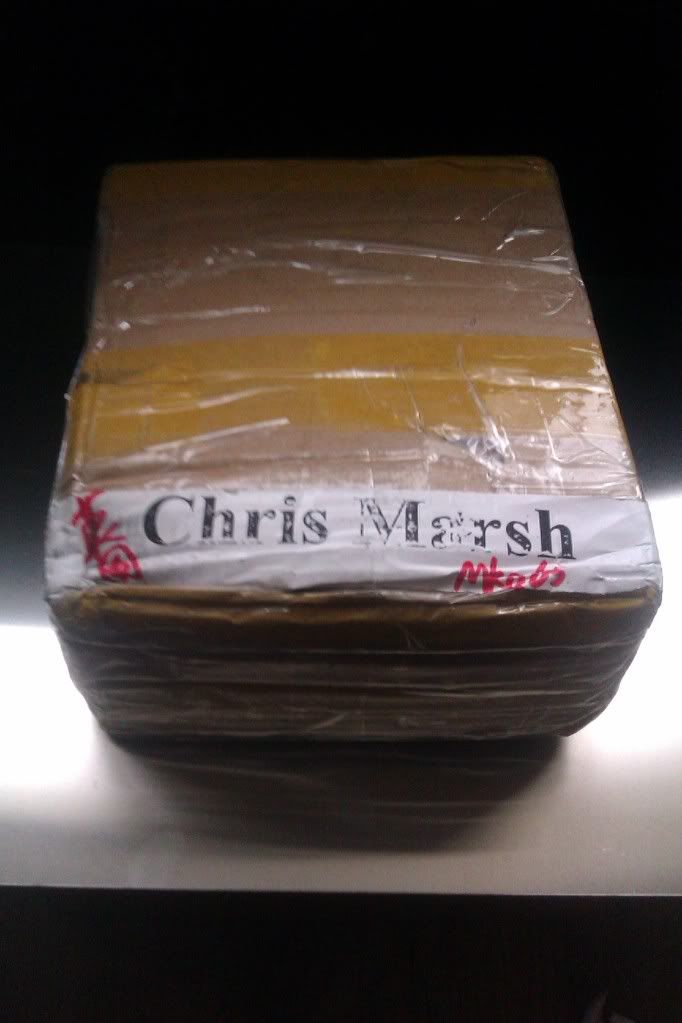
And what is inside that box?
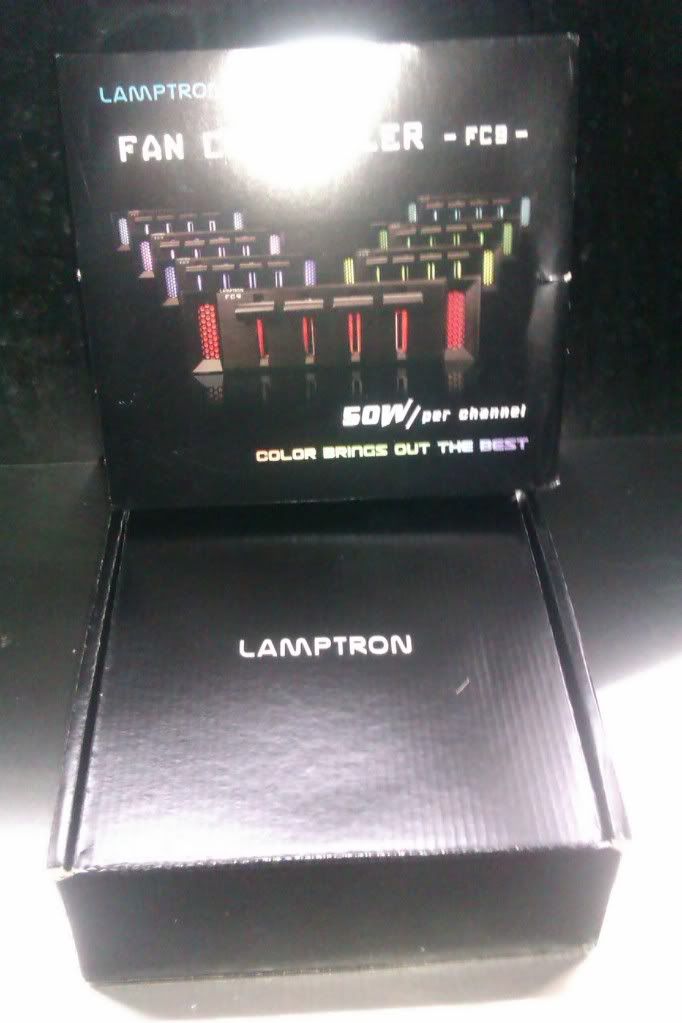
How about this fan controller?
lets speed this up, a shot of them all together lol
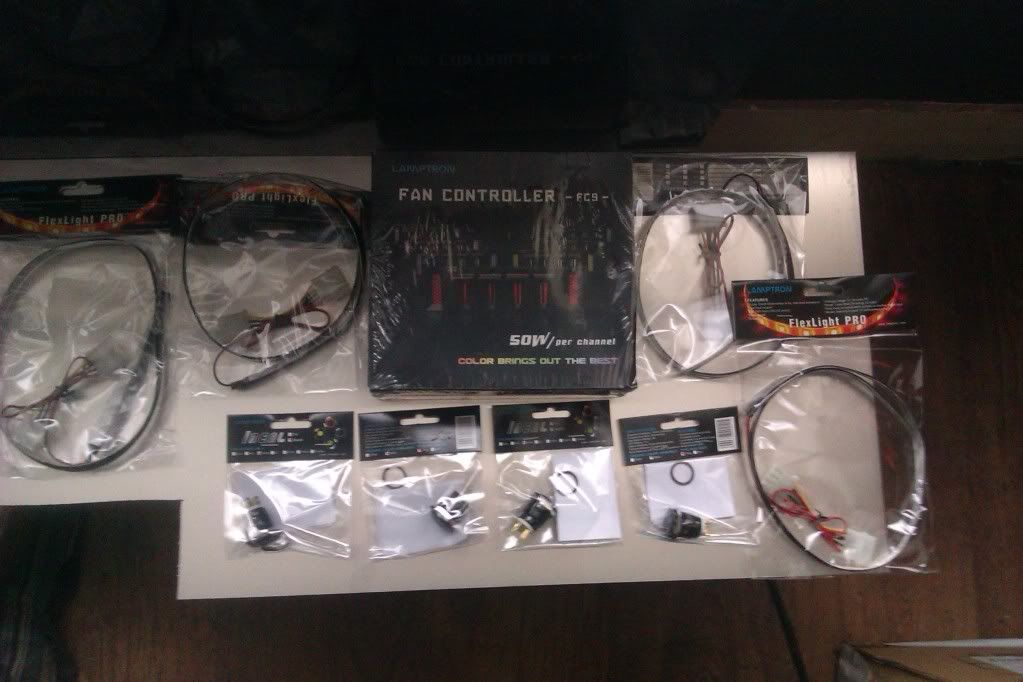
Now then! lets get these out of thier boxes and have a good look shall we?
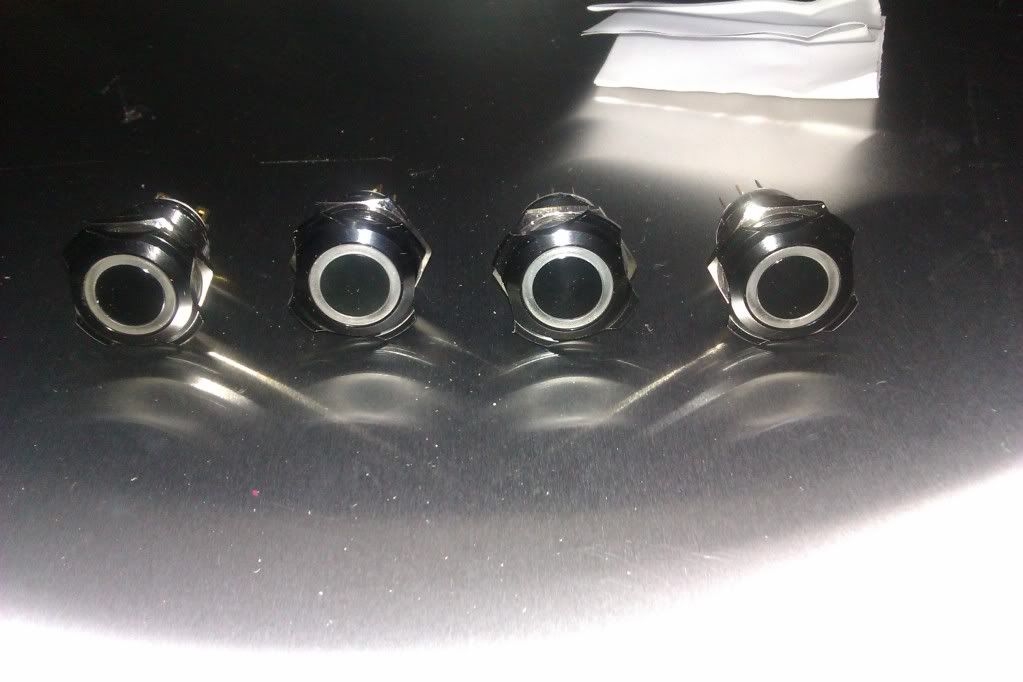
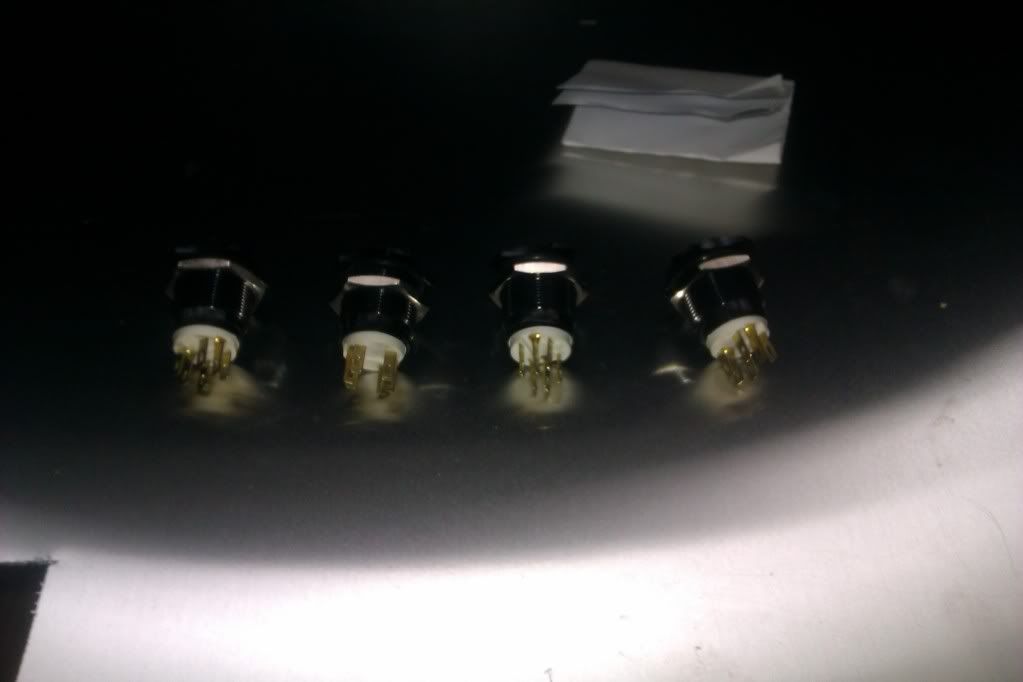
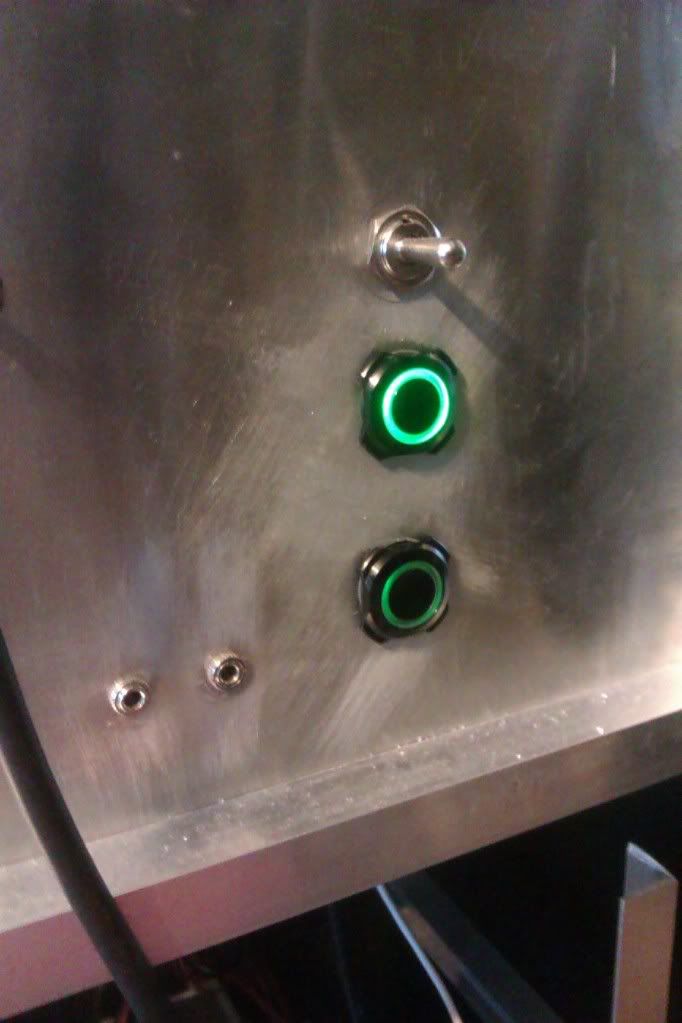
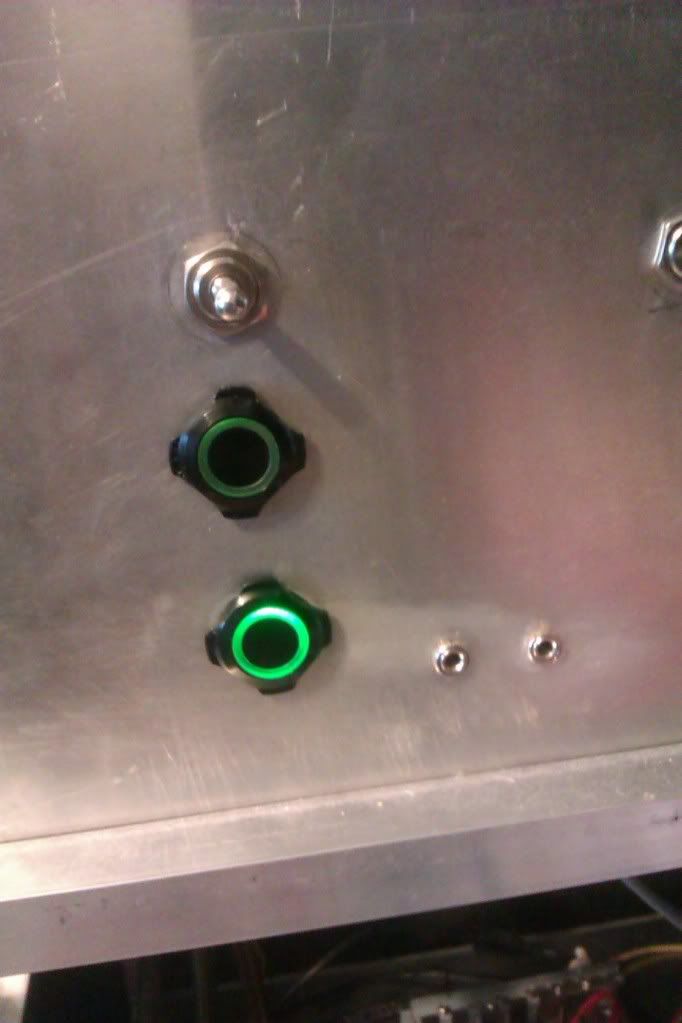
So first of all is the Anti vandal Switches!
Fronts
Backs
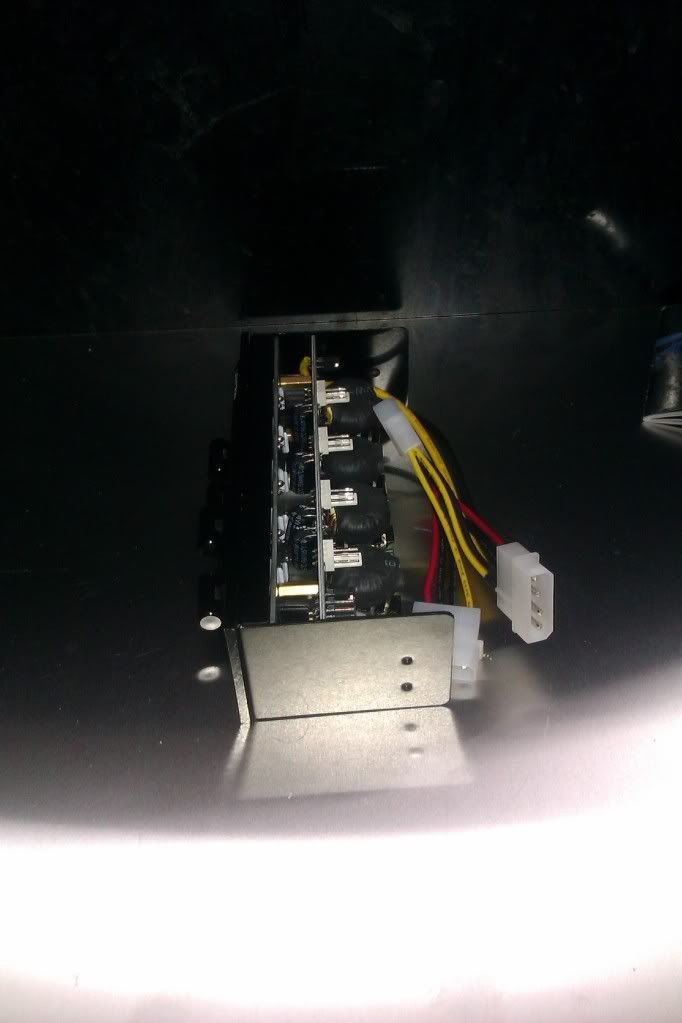
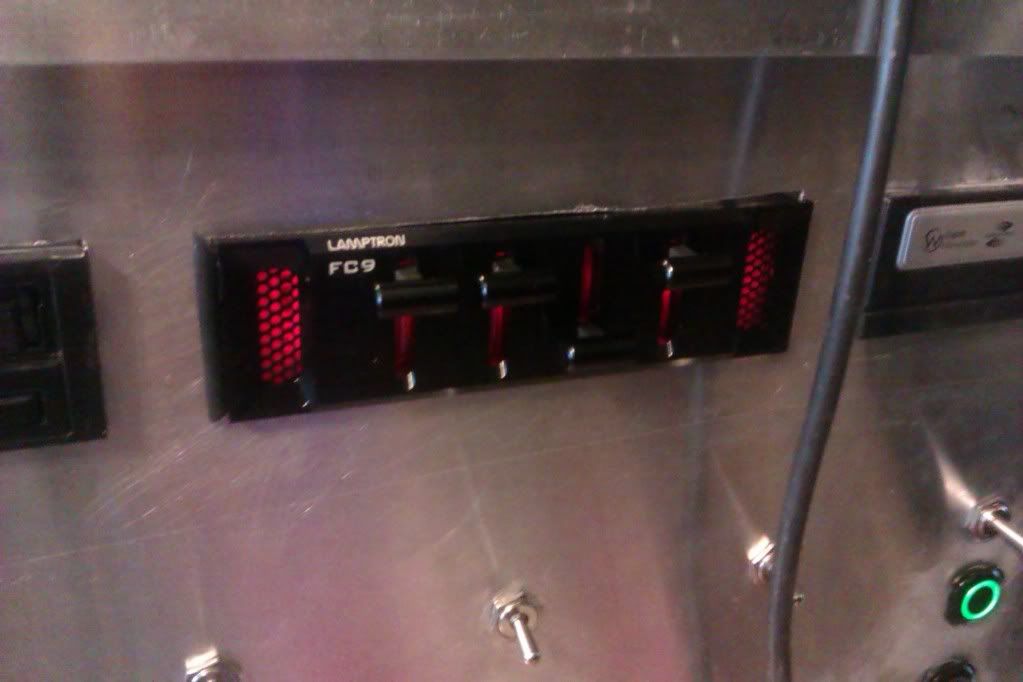
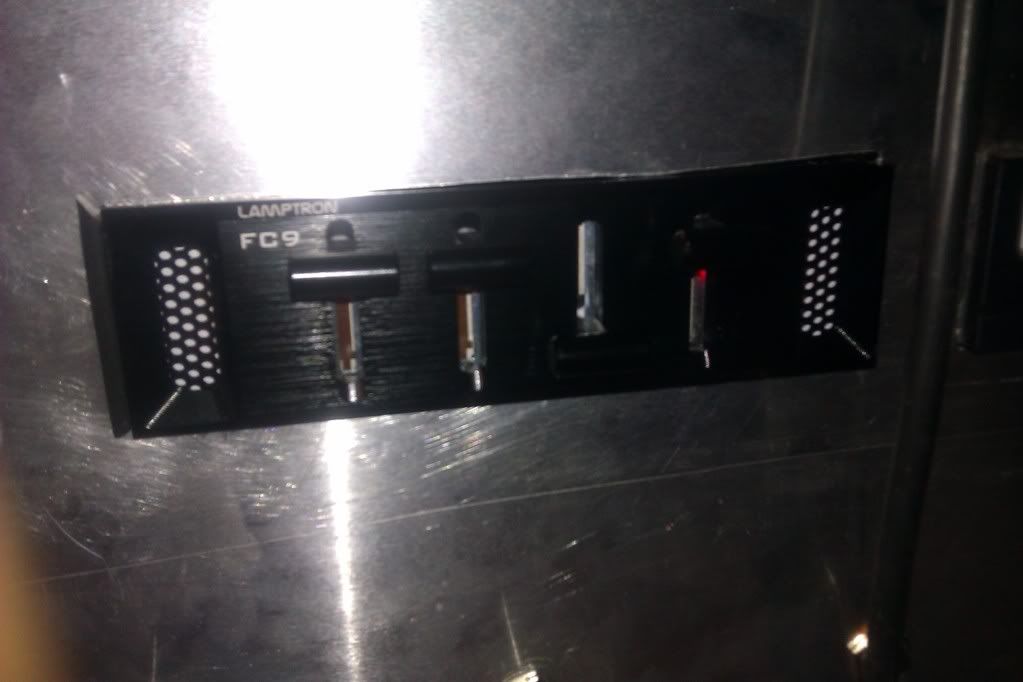
Next we have the Lamptron FC9 fan controller!
Front
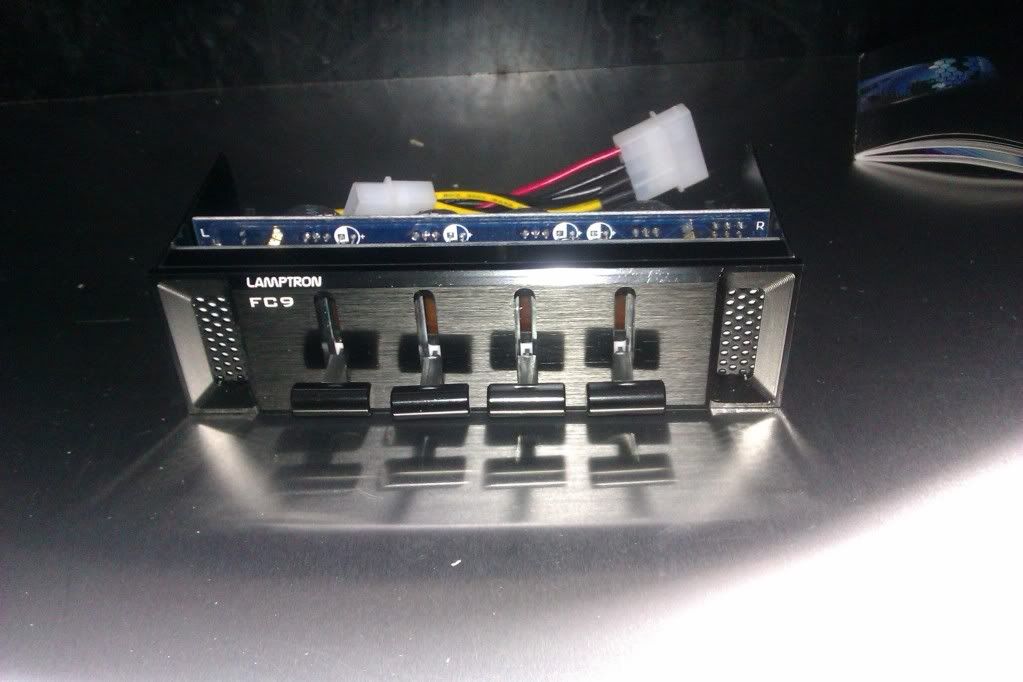
Back
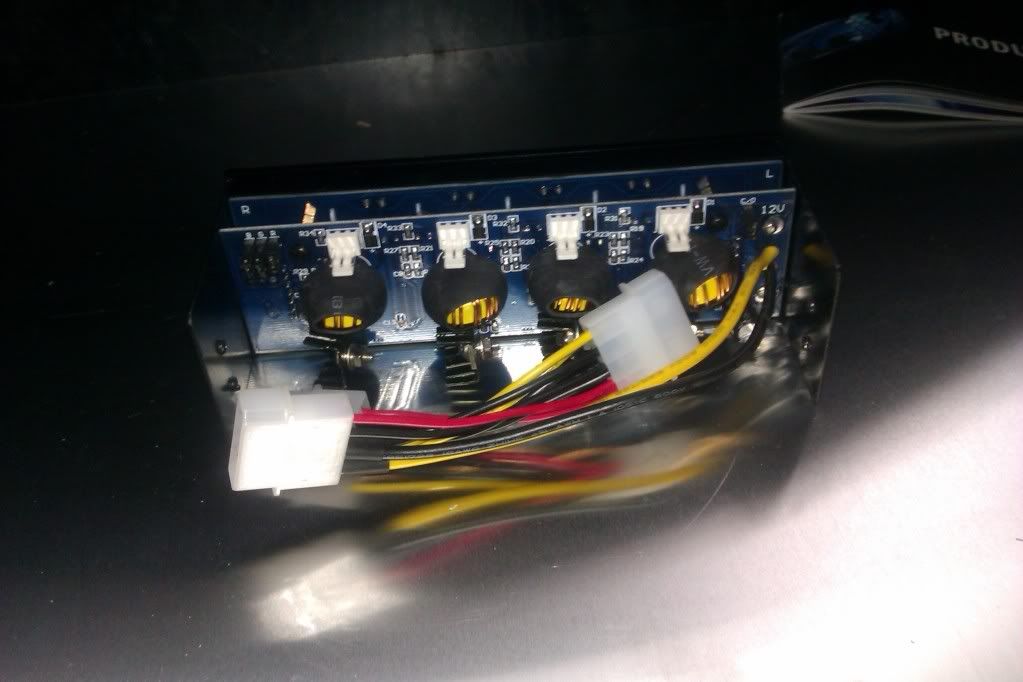
Sides
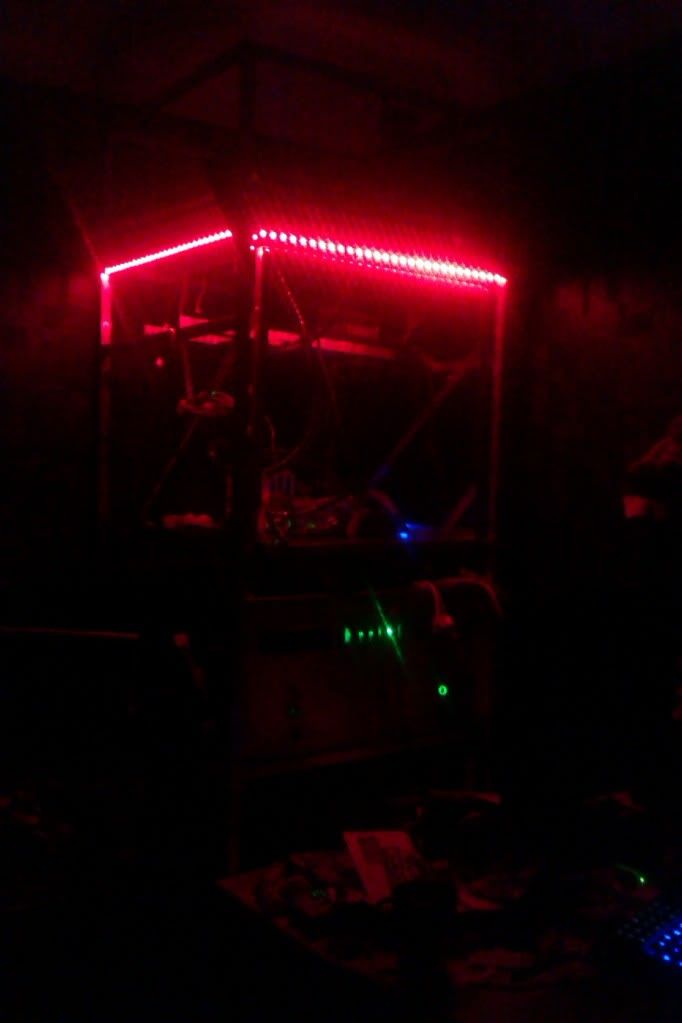
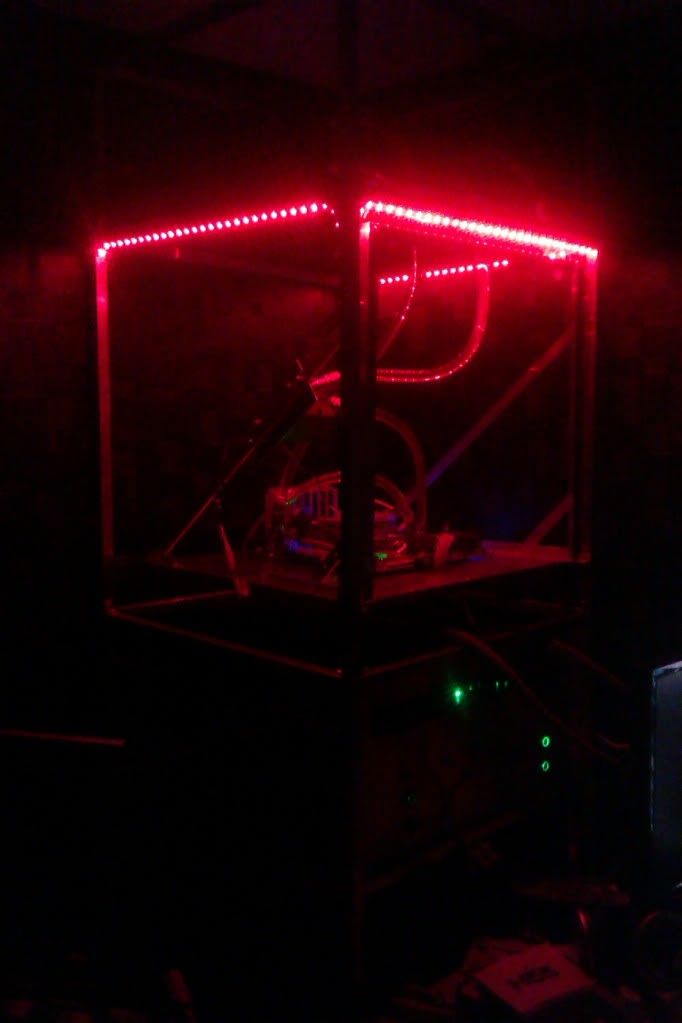
Now we have the Flexlights! 60cm led stacked molex powered lighting for the internals!
Powered OFF
(PICTURE TO COME)
Powered ON
(PICTURE TO COME)
Retail prices for these products
Lamptron FC9 fan controller - £30-£40 (purchase place dependant)
Lamptron Flexlight PRo 60cm - £8 (purchase place dependant)
Lamptron anti vandal switches - £15 (purchase place dependant)
PREPING FOR POST!
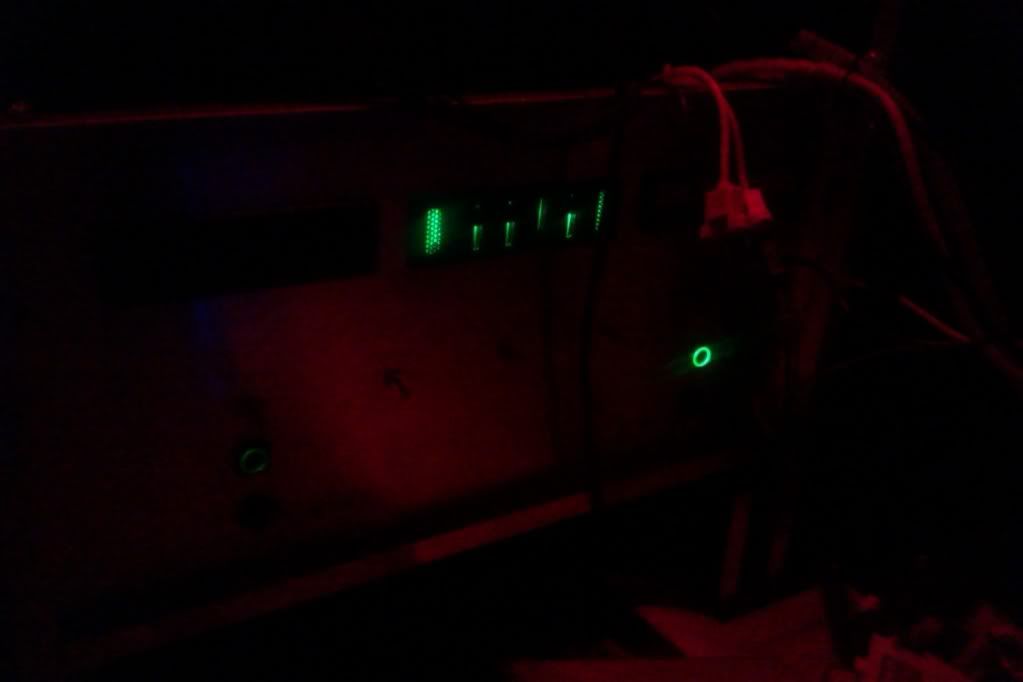
So i have got around to installing the fan controller and the anti vandal switches!
Heres a shot of the front all powered up and shining nicely!
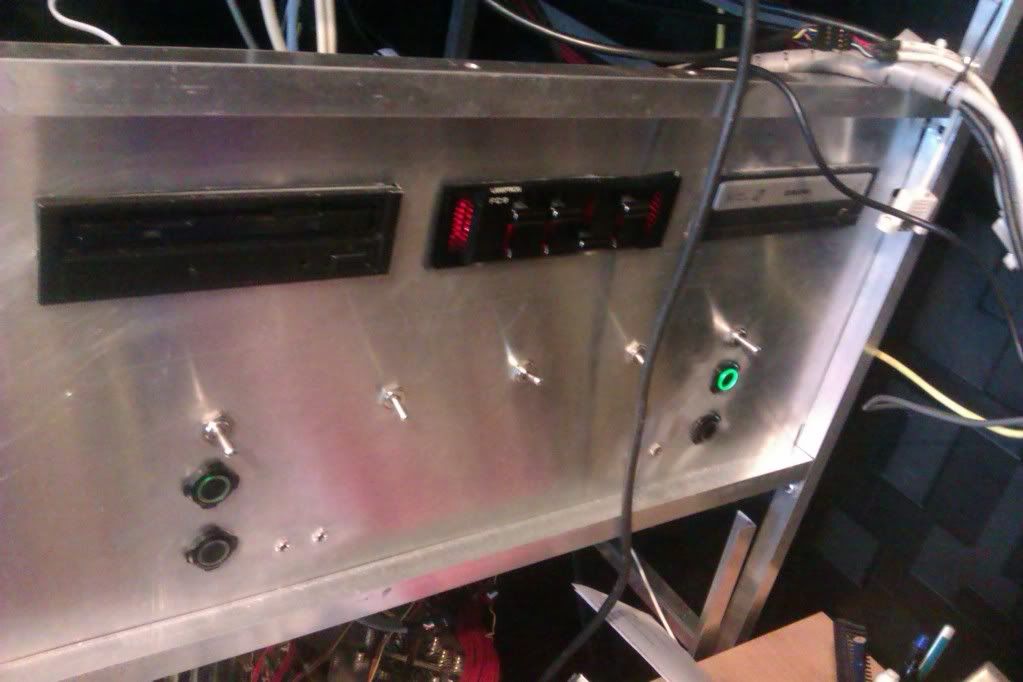
as you can see i chose red for the fan controllers led colour, although it does support other colours via a jumper on the back!
A close up of the switches
A close up of the fan controller
another big thank you goes out to lamptron for the package!
As well as specialtech as im using cables they supplied from sponsorship to get power to all the bits lamptron sent out
Thier efforts for this has been truely amazing! so with that i will hold back no longer!
so a huge thank you to -
Heres the package that arrived today!
And what is inside that box?
How about this fan controller?
lets speed this up, a shot of them all together lol
Now then! lets get these out of thier boxes and have a good look shall we?
So first of all is the Anti vandal Switches!
Fronts
Backs
Next we have the Lamptron FC9 fan controller!
Front
Back
Sides
Now we have the Flexlights! 60cm led stacked molex powered lighting for the internals!
Powered OFF
(PICTURE TO COME)
Powered ON
(PICTURE TO COME)
Retail prices for these products
Lamptron FC9 fan controller - £30-£40 (purchase place dependant)
Lamptron Flexlight PRo 60cm - £8 (purchase place dependant)
Lamptron anti vandal switches - £15 (purchase place dependant)
PREPING FOR POST!
So i have got around to installing the fan controller and the anti vandal switches!
Heres a shot of the front all powered up and shining nicely!
as you can see i chose red for the fan controllers led colour, although it does support other colours via a jumper on the back!
A close up of the switches
A close up of the fan controller
another big thank you goes out to lamptron for the package!
As well as specialtech as im using cables they supplied from sponsorship to get power to all the bits lamptron sent out
secretreeve
New member
work might start to slow down considerably here for about a month as we might be moving in march so need to prep this apartment to get our deposit back.
that said i am looking into relocating the psu for the top rig into the central area and the psu for the bottom rig into the bottom most section and running all the cables through the motherboard. but we'll see how things go for that.
that said i am looking into relocating the psu for the top rig into the central area and the psu for the bottom rig into the bottom most section and running all the cables through the motherboard. but we'll see how things go for that.
secretreeve
New member
bit of an update -
added the flexlights that circle the top of one of the systems and moved the pump and power supply. also punched a hole on the tray for the cpu power cable.
time for a picture flood.
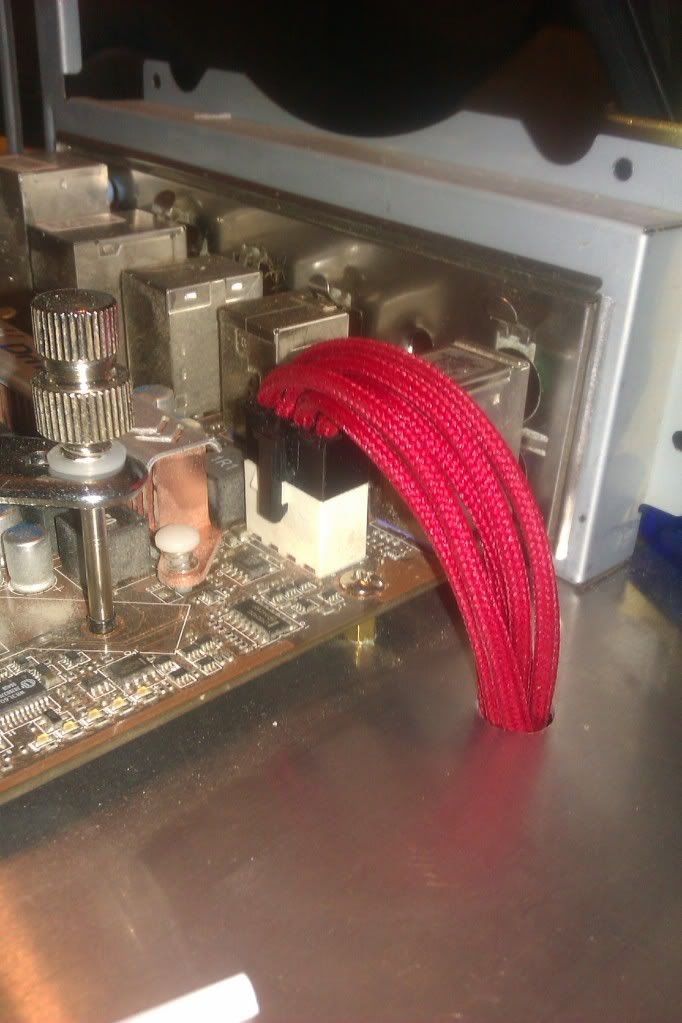
oh and i changed the fluid.
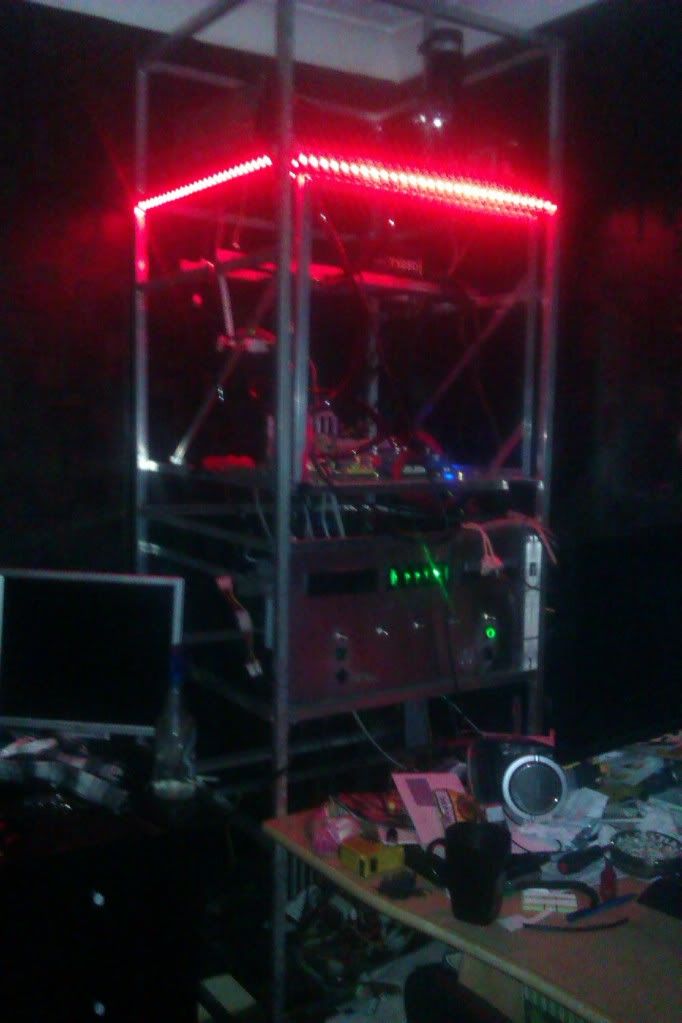
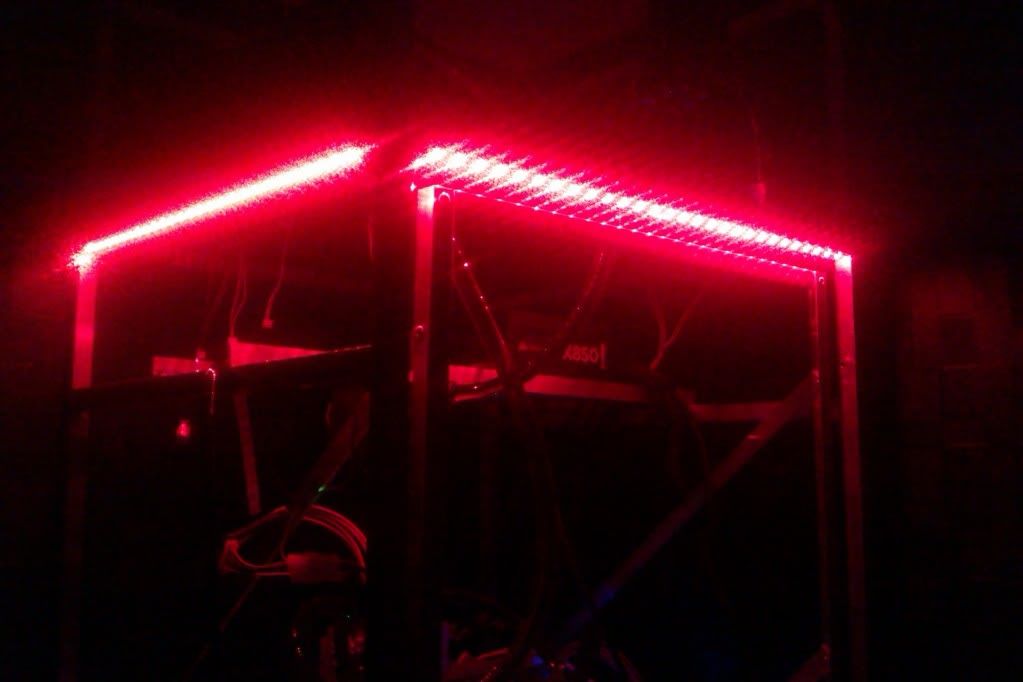
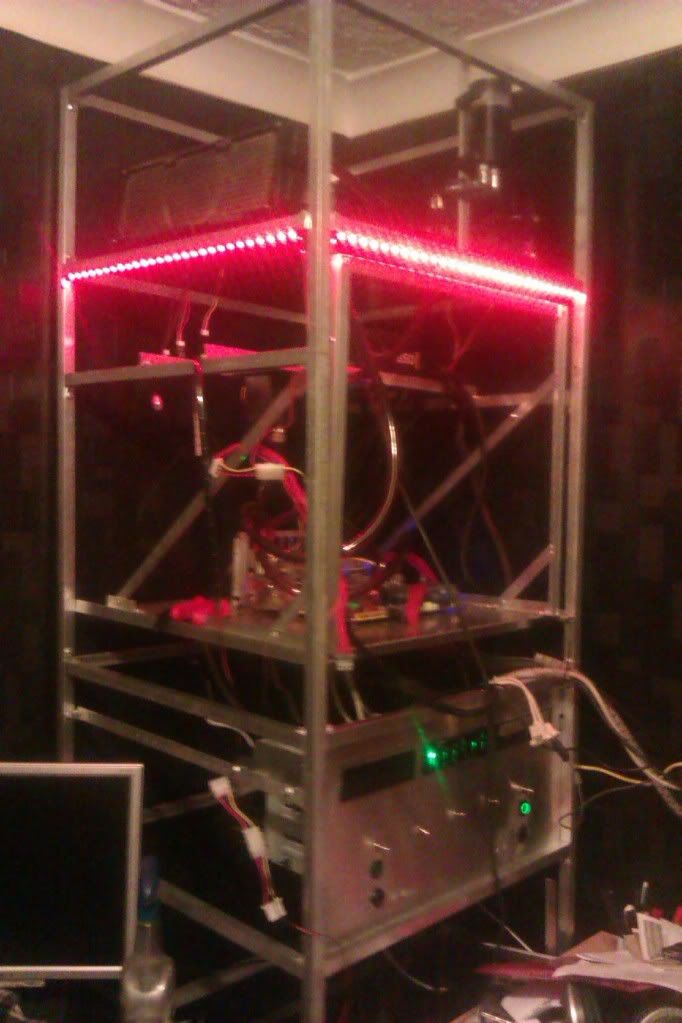
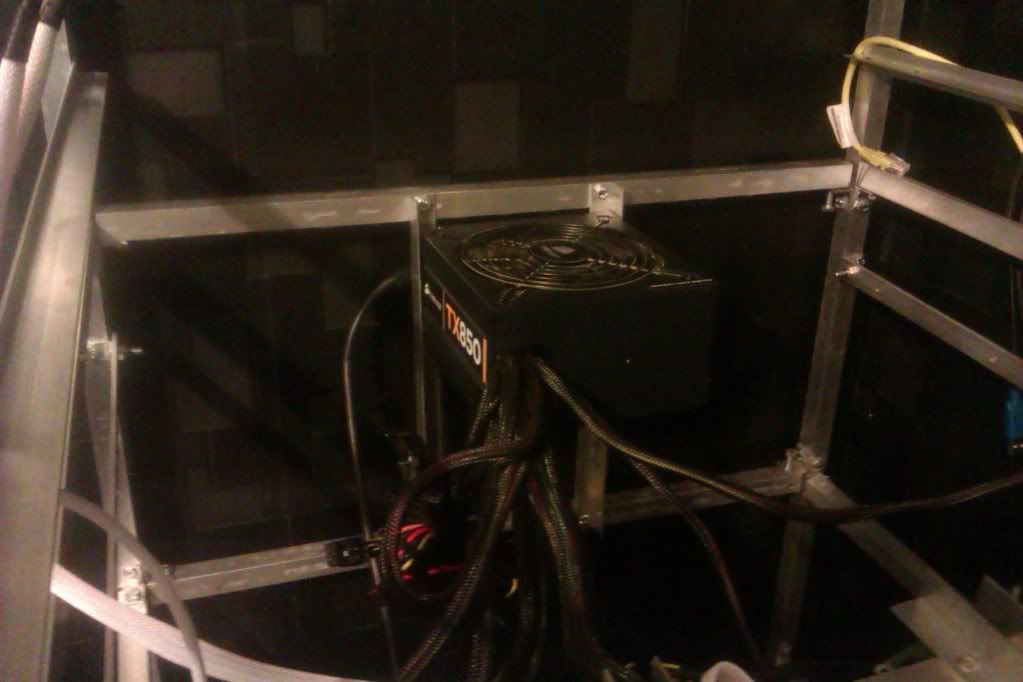
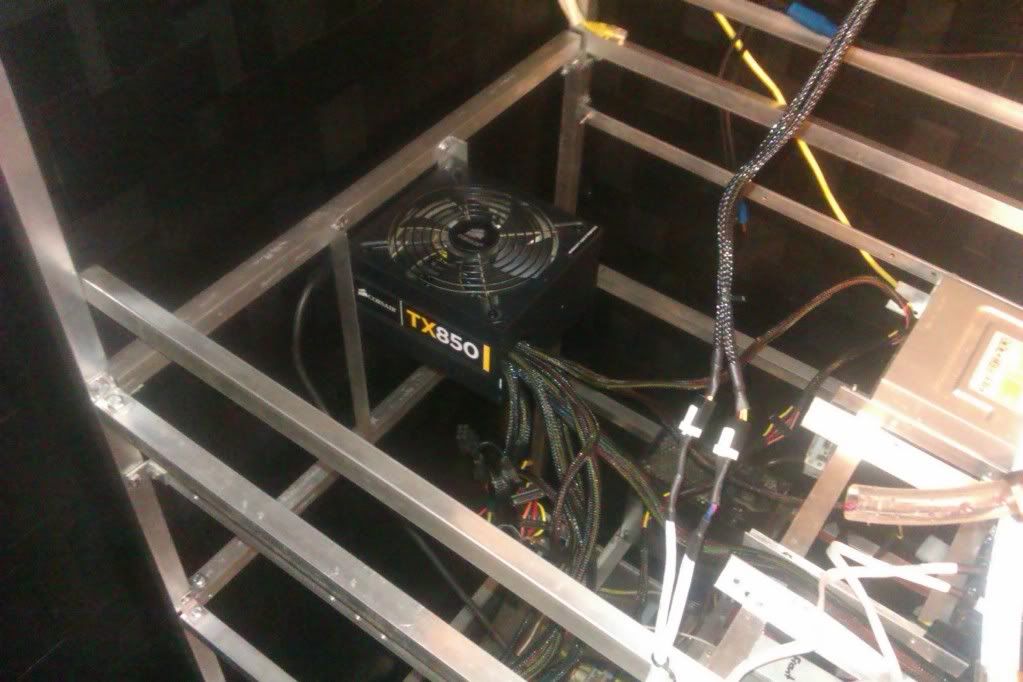
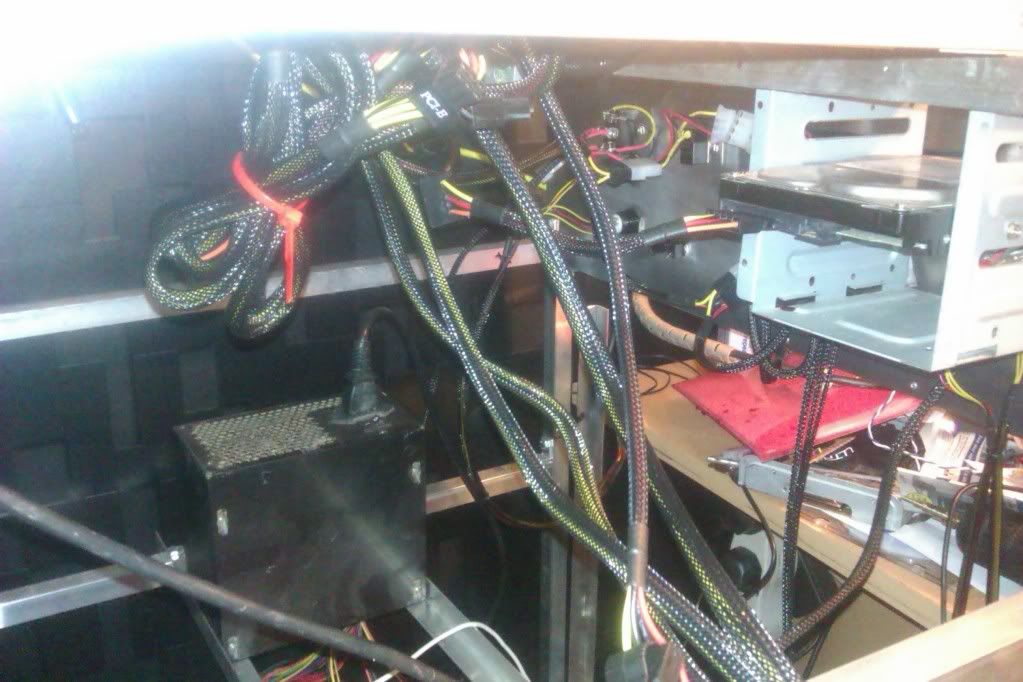
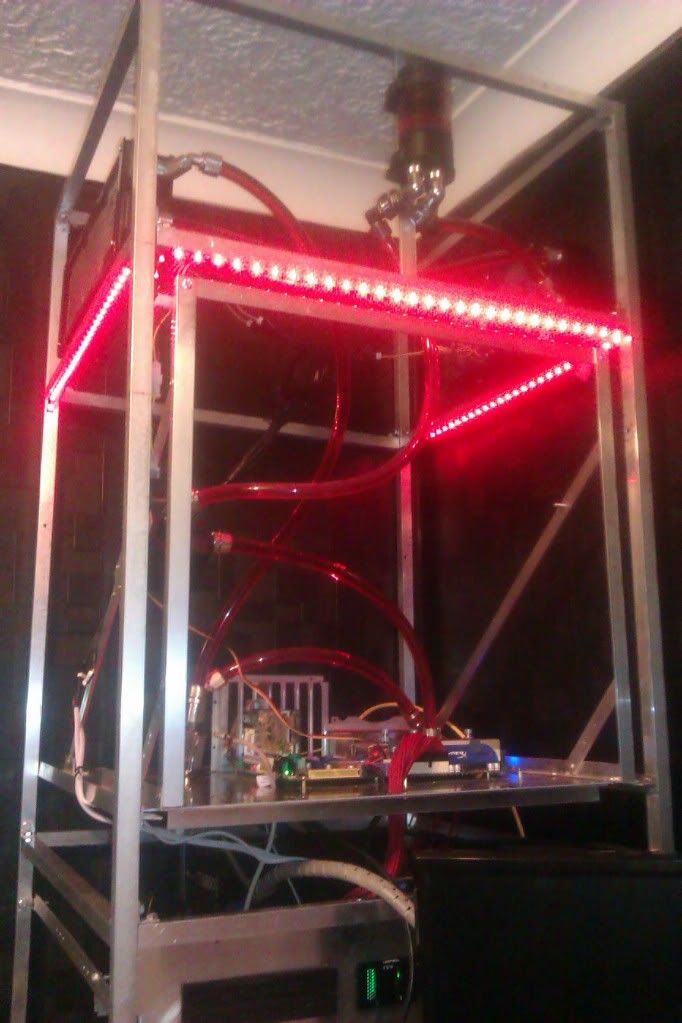
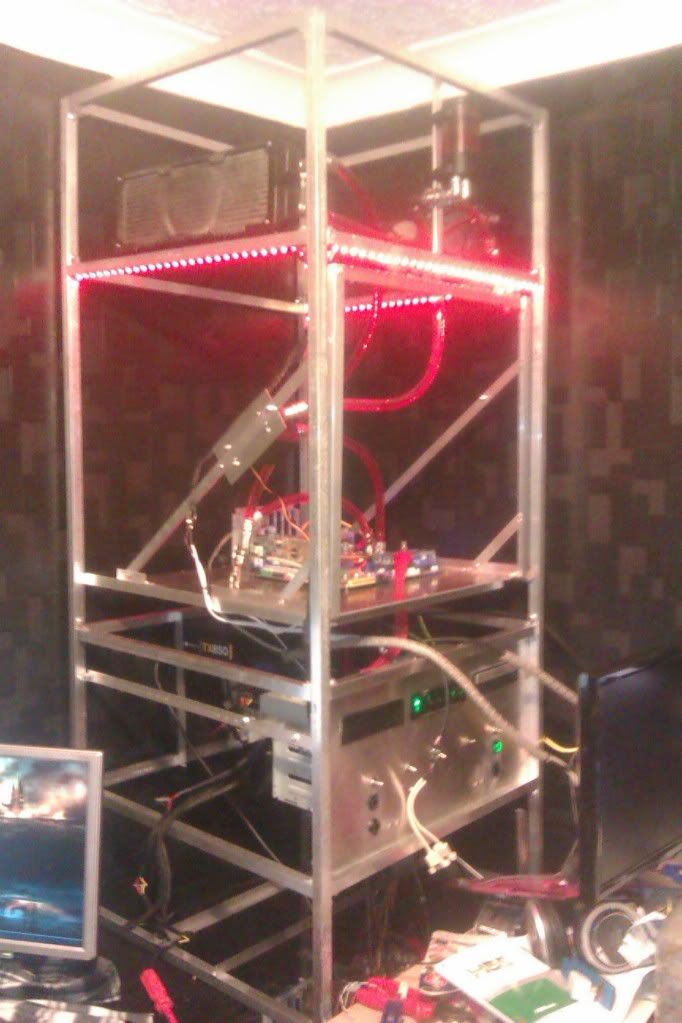
added the flexlights that circle the top of one of the systems and moved the pump and power supply. also punched a hole on the tray for the cpu power cable.
time for a picture flood.
oh and i changed the fluid.
pics offline while photobucket is cleaned up. they'll be back soon
Was wondering why the pics wouldn't load.
secretreeve
New member
pictures are back online with updates!!!!!
SparkleDJackson
New member
Dear goodness. Its so big
secretreeve
New member
lol sod a step ladder, just use the computer chair lol.
i can actually reach the top of the res to top it up so not to bad
i need to order in some more fittings so i can add in a drain line lol
filling its easy but draining its the hard part lol
i can actually reach the top of the res to top it up so not to bad
i need to order in some more fittings so i can add in a drain line lol
filling its easy but draining its the hard part lol
secretreeve
New member
heres the design for the panels that will cover the sides.
theres 6 panels in total, the middle two are the top and bottom front ones, the left for the left and right for the right.
im thinking about having this airbrushed onto the front panel.

the two usb areas represented by the usb will be two rectangular plates with the usb port holes in. these are going to be mirror chromed
the entire panel will also be powder coated in back.
would definatly like some feedback on this please.
theres 6 panels in total, the middle two are the top and bottom front ones, the left for the left and right for the right.
im thinking about having this airbrushed onto the front panel.
the two usb areas represented by the usb will be two rectangular plates with the usb port holes in. these are going to be mirror chromed
the entire panel will also be powder coated in back.
would definatly like some feedback on this please.
secretreeve
New member
cant believe no one can be bothered to take 5 minutes to offer up thier oppinion of the labelling on the front panel
yassarikhan786
New member
Front panel looks good. Don't like the "made by" font though.
secretreeve
New member
thanks for the input. i was hoping to add some kind of logo or something to the front panel but i drew that up at like 5am and kinda have to agree

Similar threads
- Replies
- 1
- Views
- 157