Project : Toxicity - Completed! 13/11

Wow work has been mad busy this past week with me installing 11 UPS's and various other items for work. None on the ground floor (naturally) and of course no lift.. My poor back. :(

Working 8 hours a day with a 4 hour round trip has put Toxicity on the back burner however I did get a bit of time on it before the weekend but not had chance to sort the video out yet.

I'll be sure to post an update soon.
 
So no video's as yet but I do have a little bit of a stock pile of footage which I need to "do my thang with" but work is stopping me big time.

However work on the project has not halted I have been busy beavering away on the res which I know everyone seems to want to see happen (myself included). Finally got the concept sorted and sizes finalised etc.

Res.jpg


And there we go, there is a hole up in the top corner for a fill port of some kind and the two barbs for the various hoses etc. I plan on bending the lower piece of perspex into shape so I've had an extra couple of those sizes made to allow for error.

After getting that sorted it was time to get it into some kind of pattern to be cut by a laser cutter.

Res1.jpg


As you can see everything should slot into place allowing it to be rigid without glue so it will add to the strength of the piece and also make glueing things precisely much easier (I hope).

I exported that to DXF using sketchup and sent it away to my friend with a laser cutter.

I'm still waiting on barbs so I can't put the res together until they come in.

I'm GOING to get a video done this week with an update on progress before I go on yet another holiday.
 
So it's been a long time coming but I finally have a new video for you guys and gals.

As the case is all sprayed up and looking good I figured it was time to put it together.

http://www.youtube.com/watch?v=P_LNPDm_zFo

I picked up my black rivets from Spalding Fasteners and as I said the size is 3.2 x 6mm.

I'm hoping to get some photos of the case done before I go on holiday tomorrow but no promises.

As for the rest of the project here's what I have left to do.

  • - Top case panel to be finished and perspex to be routed or otherwise to fit.
  • - Res to be lasercut, tapped and then glued. Leak tested.
  • - Side panel to be cut for res placement.
  • - PSU to be modded / painted etc.
  • - Windowed panel to be modded.
  • - Acquire black barbs (preferably 45 angles).
  • - Spray 360 rad in Toxic green.

Then it's just a case of swapping hardware from Monolith (unless I decide to upgrade to i7 before then).

Comments etc always welcome :)
 
name='craigr1982' said:

I just had a real flashback looking at that. I remember when i was a kid (about 30 years ago) we used to get these toys full of water and plastic pieces. At the bottom was a squeezey button and you had to swoosh the plastic things into a goal.
 
tinytomlogan - I'm using pinnacle studio HD but although my camera shoots in 1080 I'm only upping the vids at 720.

AlienALX - Yeh I remember them, those sorta things and marble run inspired the res design :)
 
Dude, your vids are awesome, I'm currently modding my own HAF and your guidance has been invaluable. Can't wait to see how your res turns out.
 
Steve-O - Glad you like the colours :)

Runebeard - glad to be of service ;)

I'm back from my hols, bright red from stayin in the sun too long.. ooops.

The custom res will be the next video as I'm having it cut this week :)
 
Oooooh So I've had the res cut this week and took a couple of photos of it cos I can't wait to put this thing together...But I have to cos I have no Barbs yet :(.

I've mocked it together for now just to see what it looks like. All the covering is still on so it looks blue but the perspex is actually clear....Honest. :P

Parts

Image022.jpg


Mocked Up

Image020.jpg


As you can see the lowest section needs to be heated and bent, thankfully I have a few of these cut so I can get some practice in. Plus all the daft little offcuts I've got from the sheet.

Image021.jpg


The black areas are burn marks which are only on the protective covering :)

As I said I have no barbs which means I can't glue it all together until I've drilled and tapped where the barbs are going.

Hope your excited as I am to see this thing hold water.
 
lookin sweet mate really liking this build wish i had the patience to take some project like this onboard im the kinda guy that would pay someone to do it for me :crazy:
 
stepster - it's not patience I need its time to do it, work hours are getting silly recently and I'm having maybe 8 hours at home and most of that I need to sleep. Its the driving thats killing me, a daily commute of over 4 hours and 250 miles round trip on top of my 8 or 9 hour shift..but work's work. Cant turn it down really.

Another update, I've made quite a bit of progress on the res however I'm saving it all for the video, wouldn't want to spoil you too early.

However in other news I've picked up another sponsor.. Yay!

Let me introduce


Thank you very much for agreeing to supply what I required :)

My loop will consist of (although possibly not in this order)

D5 Pump - GPU - CPU - 120x3 Rad - Custom Res - Pump

These will all be fed using 1/2" tubing and I figured, new build, new barbs..Most of the gear has been bought and paid for myself however Specialtech agreed to provide a few items.

To go with my black and green case I figured it was only fitting ( :P ) to match that colour scheme with some Bitspower Matte Black fittings and some 1/2" ID Compression Fittings to lose those pesky Jubilee clips.

My camera is flat so I've had to make do with just the one shot from my better half's camera until I get some better ones taken tomorrow. And as you can see I got a little bored...


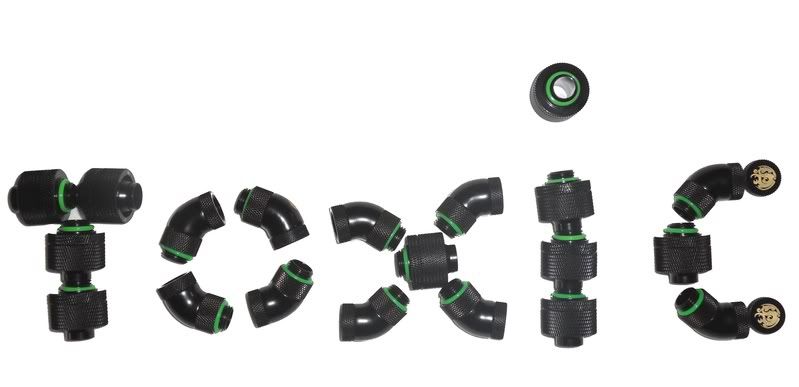
I have 10x 45' Angles with 10x compression fittings to match, also 3 blanking plugs for GPU and Res fillport.

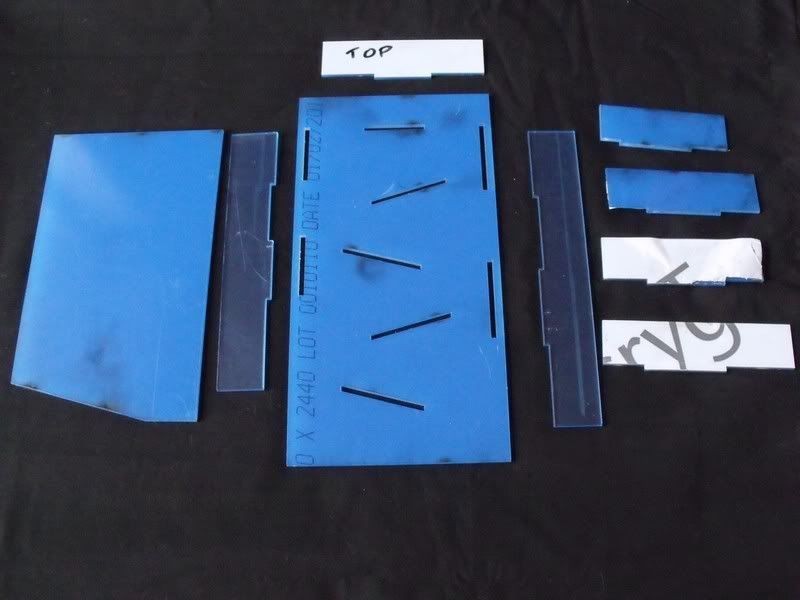
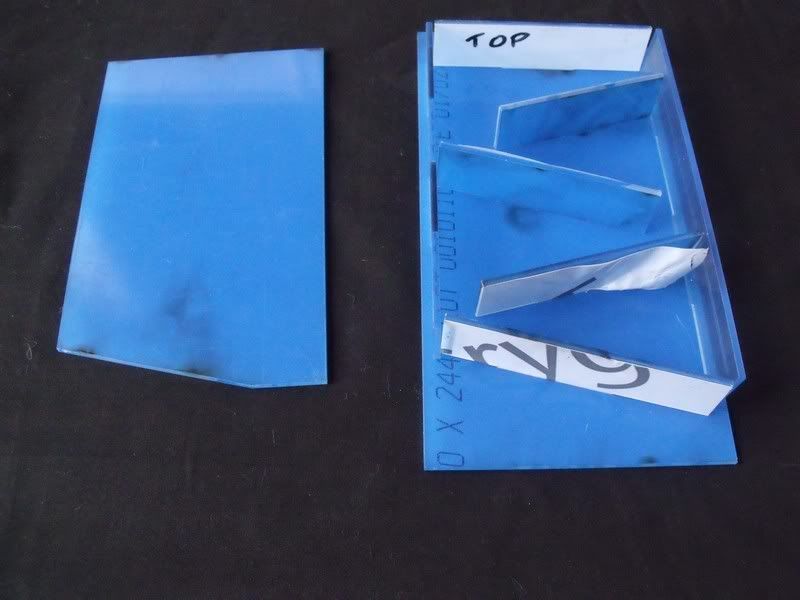
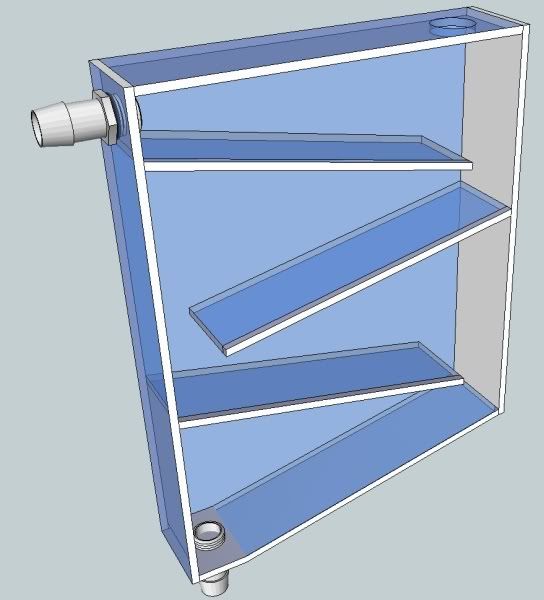
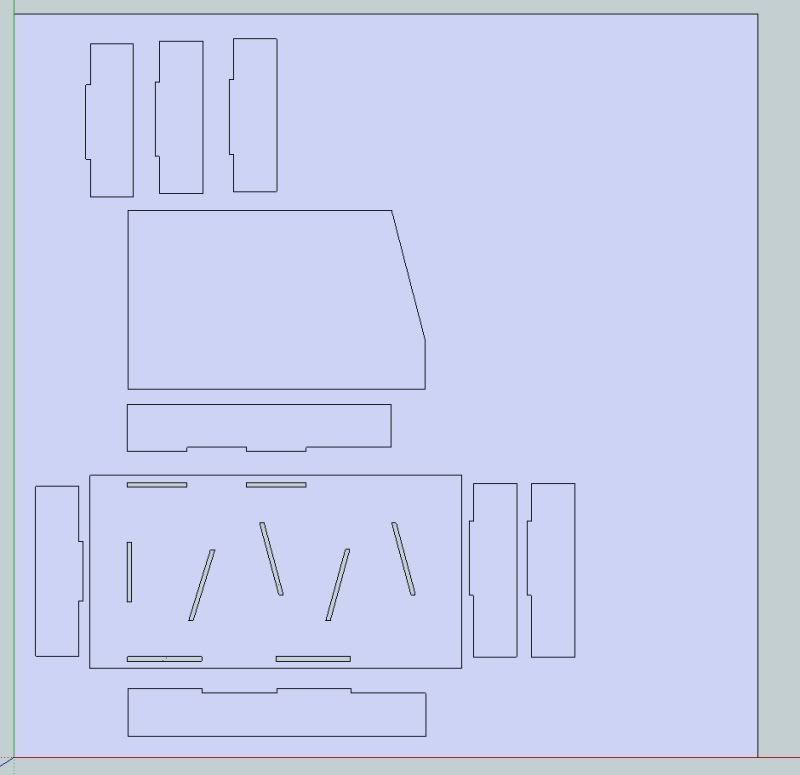
I'm hoping to get the res finished this week but I seem to only get an hour or so free at a time recently, just enough time to get out into the garage and start and then start tidying up again :(

Or I get all night, when I can't use power tools or make noise etc, still it gives me time to edit the hours of footage I already have stockpiled.

Until next time...
 
yeah thats a brutal schedule ur doing man i couldnt cope with that

but man i really cant wait till its done looks like its gonna be sick :)
 
Work has been getting ridiculous, 8 hour shifts with a 4 1/2 hour round trip travel time and 5 days a week, so this mod is taking a real back seat to real life..well sleeping actually. haha

I've not had chance to photograph the Bitspower fittings yet but I have finished my latest video. It's not as far along as I hoped but the res is taking a long time to cure in-between gluing, it's supposed to be over a week before it's under any pressure. In reality it could be another 2 weeks at least before it is actually ready for full leak testing and I couldn't wait that long to release this video. I'm hoping youtube wont take an age processing the video into 720p.

http://www.youtube.com/watch?v=7hdFZB4ZBAU

As I mention in the video this project is on a go slow / hold until work slows down. I am hoping to get some work done during the weekends but it will be slow going, I'll be sure to keep you updated if any work happens.
 
Back
Top