AcuteJungle66
New member
Hi All.
My name is Chris and I am from Scotland. I have been dabbling with tech ever since I got my Commodore 64 back in the '80s, but did not get my first 'proper' PC until I threw together a bunch of other peoples' leftover parts. Oh yes, my Pentium II @ 400Mhz with a Riva TNT2 PCI card was quite the beast; or maybe not .
I served in the military for a total of 8 years, then briefly worked in I.T. before starting a career within the Civil Service. Tech and Gaming have both been passions of mine now for several decades, but it was only recently that I returned to higher education to pursue a tech-related degree. In my spare time I play my fair share of video games, but also enjoy the outdoors as much as I can.
I am very humbled to have been selected as one of the five contestants for the Thermaltake UK 2020 Case Mod Challenge, and hopefully my build progress can at least put a smile on your face during these difficult times. Speaking of progress, it will be a few weeks until I get started building I am afraid; as I am in the final weeks at University. But as soon as my online assessments and dissertation are out of the way, I will post regular updates.
The first shipment of components consisted of:
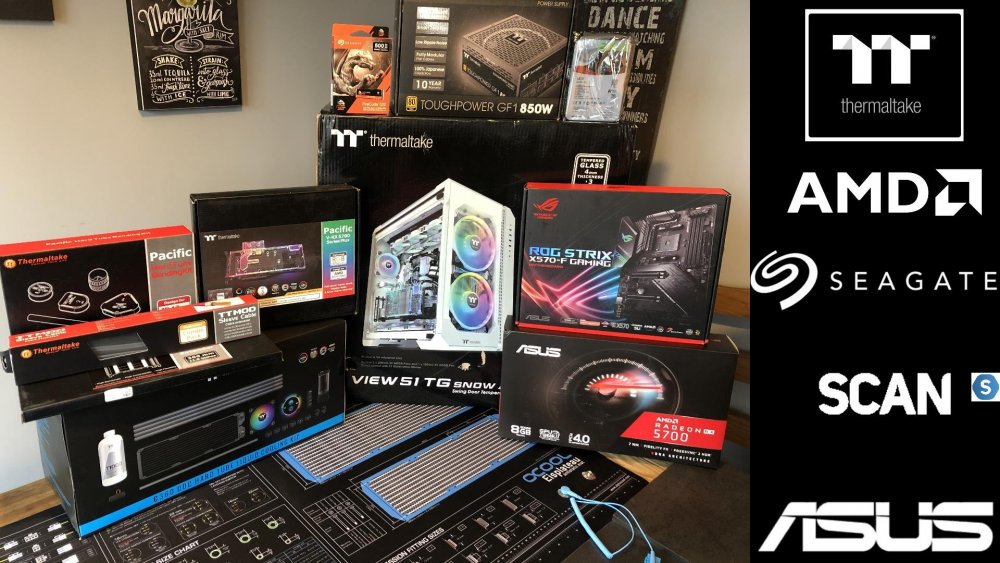
The crew at #scancomputers worked tirelessly to get these parts out to us, so huge thanks to them. I am blown away by #Seagate not only for providing the blistering fast PCIe 4.0 FireCuda, but the huge 14TB Ironwolf Pro; I wonder if it will be possible to install my entire Steam Library?
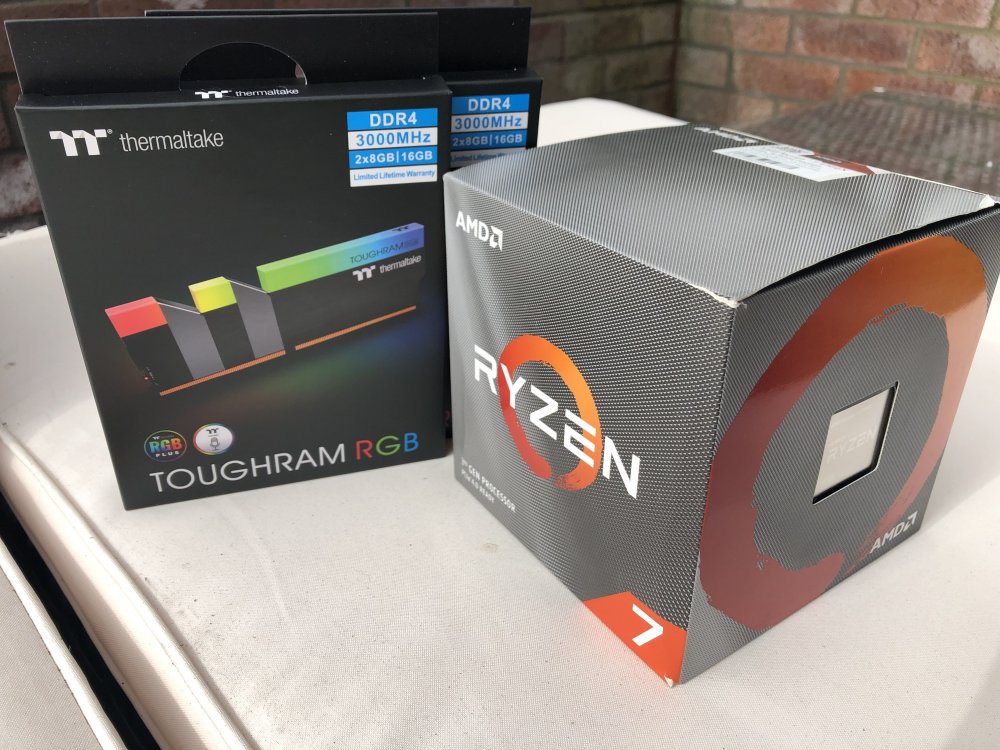
The next package was the CPU and RAM: AMD Ryzen 3700X and 32GB Thermaltake TOUGHRAM RGB
So quickly put the core components together to make sure everything was working alright.
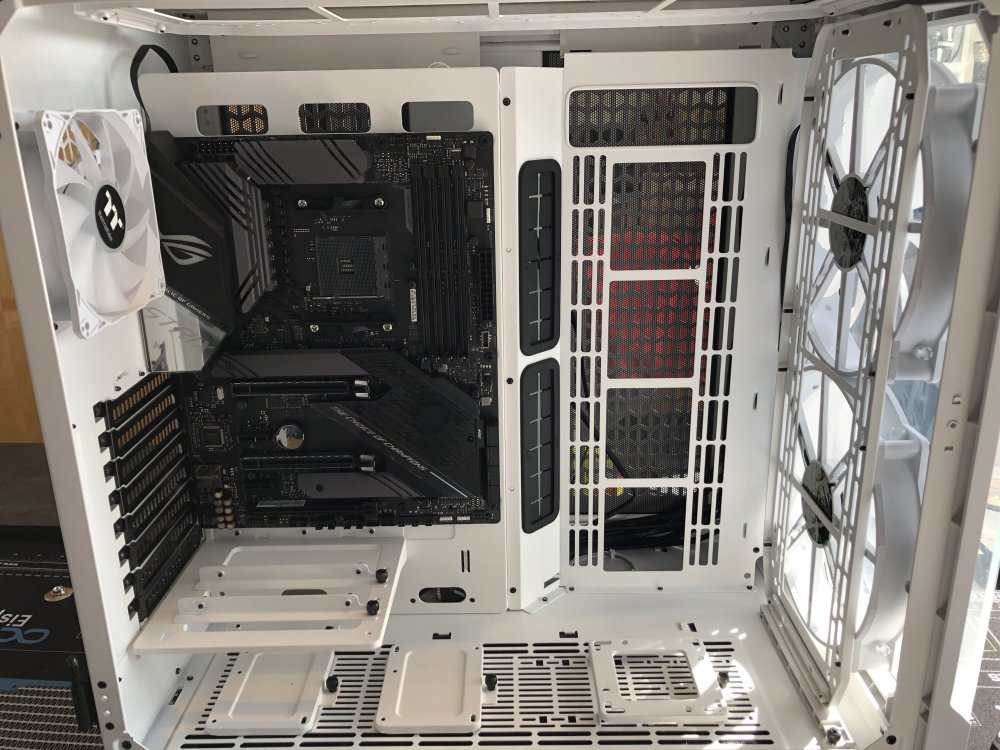
The ROG Strix X570-F Gaming is good looking motherboard, and there is plenty of space in the View 51:
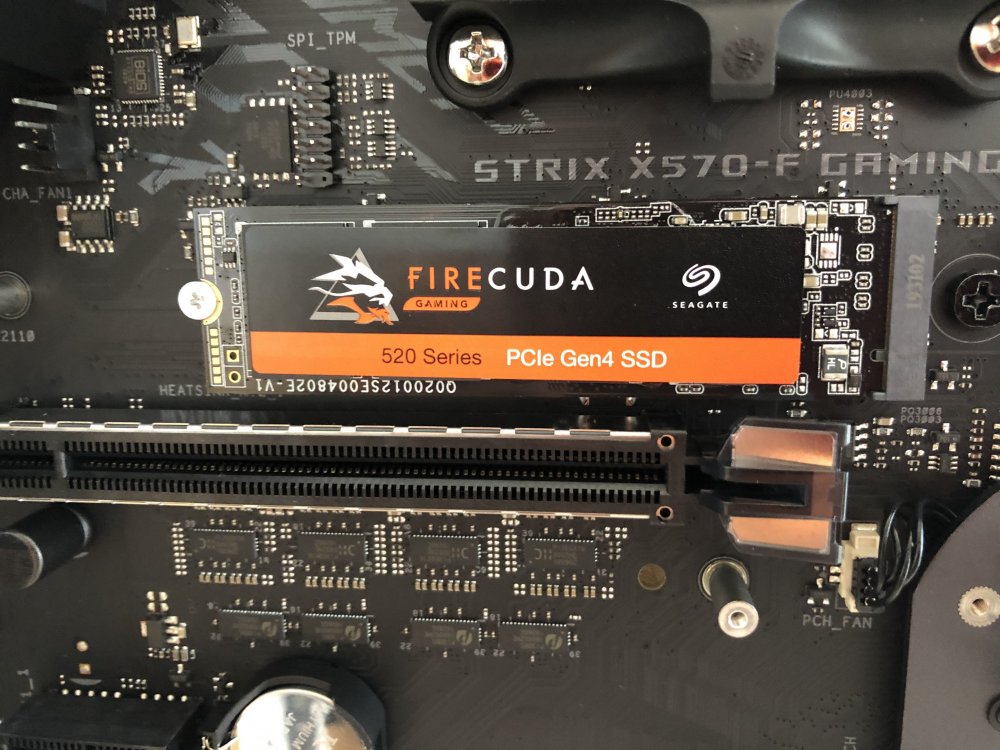
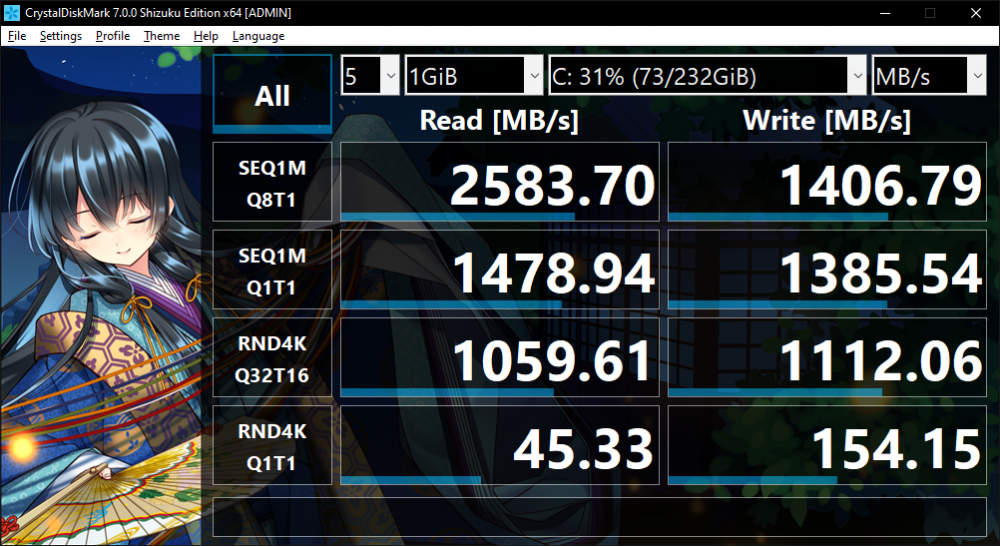
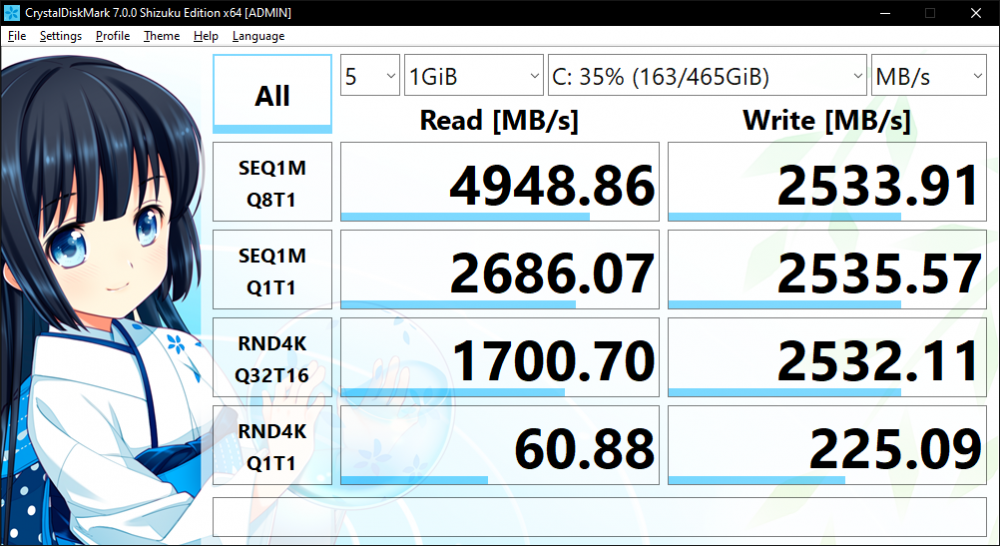
Using PCIE Gen 4, the Firecuda 520 should be blistering fast. Was also nice to see that using the 1st M.2 slot does not cause the X16 slot to bump down to X8 like on previous generations (X470/370).
Whilst I have not installed it just yet (I want to keep it safe and sound), the 14TB Ironwolf Pro is an absolute monster:
.thumb.jpg.cb9ff8ac62c2fbf802f0fffabd77f90c.jpg)
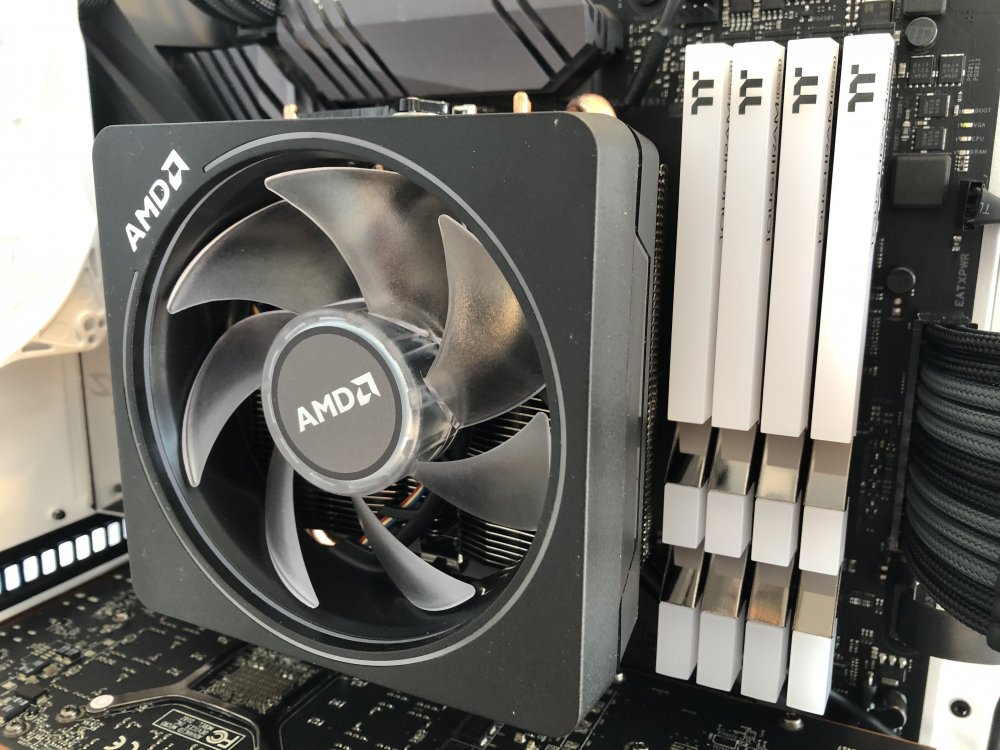
The TOUGHRAM is some good looking memory, and the Ryzen 3700X is sitting underneath the Wraith Max cooler. For a stock cooler it is admittedly pretty decent, but this build is destined for a custom loop.
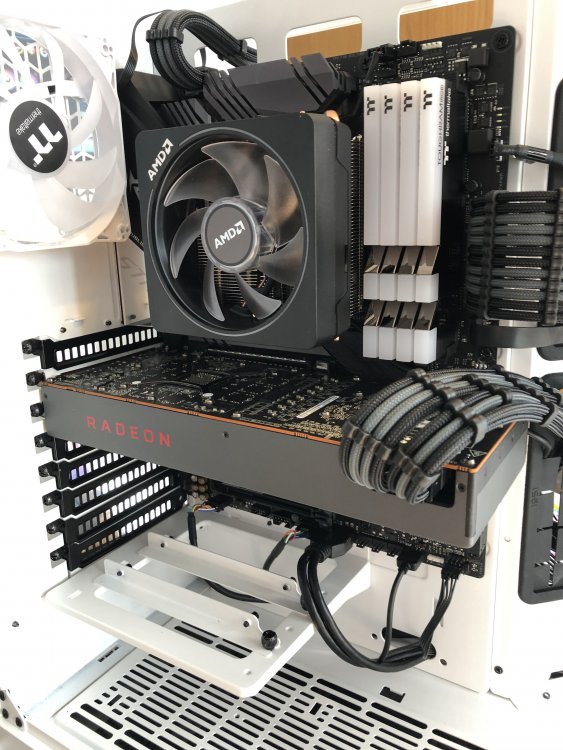
The stock cooler on the AMD Radeon RX 5700 from Asus also functions alright, but gets pretty loud when the fan get up to higher speeds. Another component that will greatly benefit from a water block.
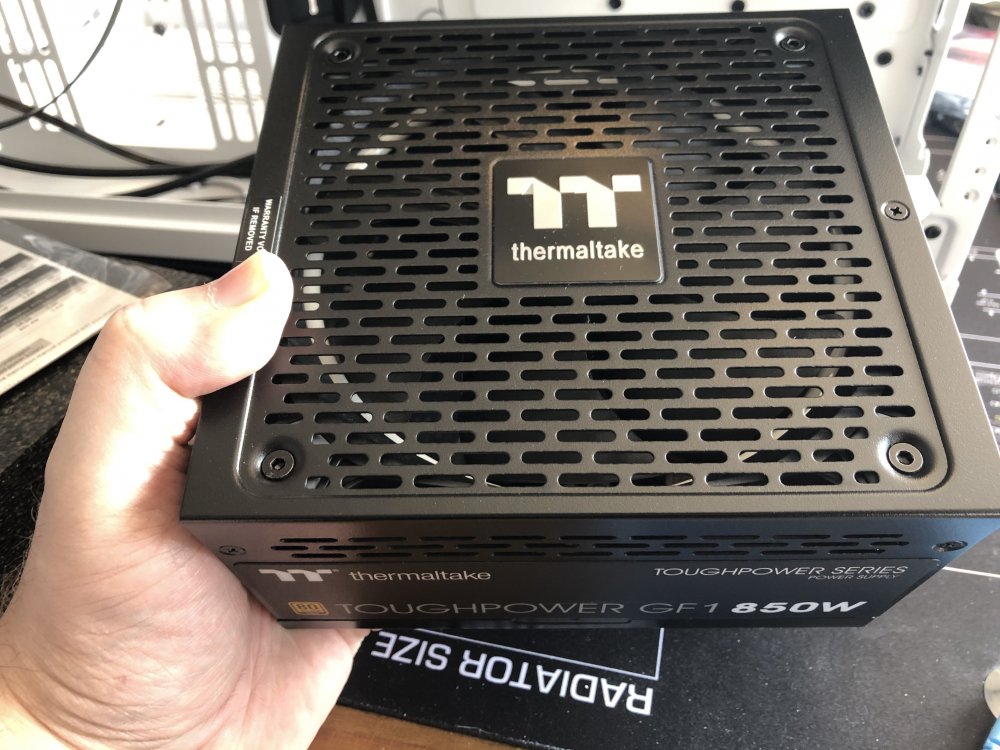
The Toughpower GF1 is an 80 PLUS Gold certified fully modular PSU, 850W is more than enough for the job.
With everything installed fairly quickly (did not put any effort into cable-managment of course, as it will all be coming back out again), it was time to make sure the PC booted alright and everything worked as intended.
.thumb.jpg.eff61ef74b1f67309064eccb8689abda.jpg)
Sure enough, everything worked without any issues. After dialing in a few settings within the BIOS, it was then time to make sure that the PCIE extender also worked.
.thumb.jpg.55c12c4056db9f33167893eb5417a28c.jpg)
Another reason for getting the system together fairly quickly for a test-run was also for the introduction video that was made for ThermaltakeUK:
As you know-given current events-shipping of non-essential items can be fairly delayed these days, so many of my materials are still to get here. I am also still awaiting delivery of more components from Thermaltake, so I am currently in a hold pattern (nevermind the fact I still have exams on the horizon).
Once everything arrives I will be able to properly start the modding. You may not agree with my methodology, but let me break down my plan so you can hopefully see where I am coming from.
Whilst that all sounds simple enough, we all know that things very rarely go exactly to plan. These 4 bullet-points are also a vast oversimplification of the work that will be carried out, but we will get into the full details as they happen.
In the meantime, I hope everyone is staying safe and staying at home; take care folks!
My name is Chris and I am from Scotland. I have been dabbling with tech ever since I got my Commodore 64 back in the '80s, but did not get my first 'proper' PC until I threw together a bunch of other peoples' leftover parts. Oh yes, my Pentium II @ 400Mhz with a Riva TNT2 PCI card was quite the beast; or maybe not .
I served in the military for a total of 8 years, then briefly worked in I.T. before starting a career within the Civil Service. Tech and Gaming have both been passions of mine now for several decades, but it was only recently that I returned to higher education to pursue a tech-related degree. In my spare time I play my fair share of video games, but also enjoy the outdoors as much as I can.
I am very humbled to have been selected as one of the five contestants for the Thermaltake UK 2020 Case Mod Challenge, and hopefully my build progress can at least put a smile on your face during these difficult times. Speaking of progress, it will be a few weeks until I get started building I am afraid; as I am in the final weeks at University. But as soon as my online assessments and dissertation are out of the way, I will post regular updates.
The first shipment of components consisted of:
- ThermalTake View 51 Snow
- ASUS ROG STRIX X570-F Gaming
- ASUS Radeon RX 5700
- 500GB Seagate FireCuda 520
- 14TB Seagate IronWolf Pro
- 850W Thermaltake Toughpower GF1
- Thermaltake Pacific Hard Tube Water Cooling Kit
- Thermaltake Pacific V-RX 5700 Series Plus GPU Waterblock
- Thermaltake Water Cooling Pacific Hard Tube Bending Kit
- 300mm Thermaltake TtMod Sleeved Cables
- 300mm Thermaltake TT Premium PCIe Extender

The crew at #scancomputers worked tirelessly to get these parts out to us, so huge thanks to them. I am blown away by #Seagate not only for providing the blistering fast PCIe 4.0 FireCuda, but the huge 14TB Ironwolf Pro; I wonder if it will be possible to install my entire Steam Library?
The next package was the CPU and RAM: AMD Ryzen 3700X and 32GB Thermaltake TOUGHRAM RGB

So quickly put the core components together to make sure everything was working alright.
The ROG Strix X570-F Gaming is good looking motherboard, and there is plenty of space in the View 51:

Using PCIE Gen 4, the Firecuda 520 should be blistering fast. Was also nice to see that using the 1st M.2 slot does not cause the X16 slot to bump down to X8 like on previous generations (X470/370).

Whilst I have not installed it just yet (I want to keep it safe and sound), the 14TB Ironwolf Pro is an absolute monster:
.thumb.jpg.cb9ff8ac62c2fbf802f0fffabd77f90c.jpg)
The TOUGHRAM is some good looking memory, and the Ryzen 3700X is sitting underneath the Wraith Max cooler. For a stock cooler it is admittedly pretty decent, but this build is destined for a custom loop.

The stock cooler on the AMD Radeon RX 5700 from Asus also functions alright, but gets pretty loud when the fan get up to higher speeds. Another component that will greatly benefit from a water block.

The Toughpower GF1 is an 80 PLUS Gold certified fully modular PSU, 850W is more than enough for the job.

With everything installed fairly quickly (did not put any effort into cable-managment of course, as it will all be coming back out again), it was time to make sure the PC booted alright and everything worked as intended.
.thumb.jpg.eff61ef74b1f67309064eccb8689abda.jpg)
Sure enough, everything worked without any issues. After dialing in a few settings within the BIOS, it was then time to make sure that the PCIE extender also worked.
.thumb.jpg.55c12c4056db9f33167893eb5417a28c.jpg)
Another reason for getting the system together fairly quickly for a test-run was also for the introduction video that was made for ThermaltakeUK:
As you know-given current events-shipping of non-essential items can be fairly delayed these days, so many of my materials are still to get here. I am also still awaiting delivery of more components from Thermaltake, so I am currently in a hold pattern (nevermind the fact I still have exams on the horizon).
Once everything arrives I will be able to properly start the modding. You may not agree with my methodology, but let me break down my plan so you can hopefully see where I am coming from.
- Assemble the full custom loop. I won't spoil what that is going to consist of, but I need to see how/where everything precisely fits in order to decide on how I want my tubing runs.
- Once that is assembled, then I can make some templates for my acrylic. Nothing high-tech here, the only power-tools i have are drill/dremel/jigsaw/heatgun. Then of course I need to construct all of that using a combination of cutting/bending/bonding, to make sure it all fits and looks alright.
- With that out of the way, everything will get dissassembled and the case itself gutted. A combination of cutting bits out and fabricating new bits will then be followed by a complete repaint.
- With everything painted/sealed, as well as some other small details (artwork, glass, etc.), then reassembly can commence. The finishing touches and of course wiring will be the real pain here.
Whilst that all sounds simple enough, we all know that things very rarely go exactly to plan. These 4 bullet-points are also a vast oversimplification of the work that will be carried out, but we will get into the full details as they happen.
In the meantime, I hope everyone is staying safe and staying at home; take care folks!

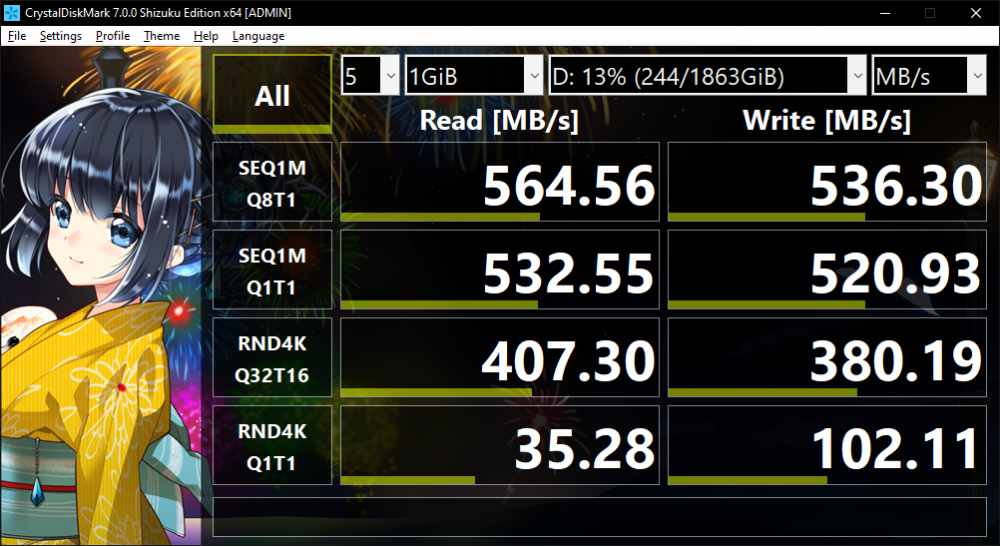
.thumb.jpg.9aeb0f886a627f351c6b566db079fdb1.jpg)
.thumb.jpg.60ea7b4889c8838dfd9eea08d89dd0a1.jpg)
.thumb.jpg.f01e61a7bbfa98873ad84f12ca5c0c3f.jpg)
.thumb.jpg.8908784de106a4cf21bc172eb2f171ce.jpg)
.thumb.jpg.565c6af2bef38b6a0444b23b9f0ceceb.jpg)
.thumb.jpg.4bc4bb3493d307c3fb5c49da23c0f697.jpg)
.thumb.jpg.6de3f324464414b2cb4fdffa884a9aff.jpg)
.thumb.jpg.69ab1b7bf4bfdbac784d0bc9e4ec686f.jpg)
.thumb.jpg.311402370aadadc2c890f3bc0a04abf6.jpg)
.thumb.jpg.34b62198d5dd6d54f728d1923126b0e6.jpg)
.thumb.jpg.9081a92ed122abd8ab5395903536870a.jpg)
.thumb.jpg.948b4f996f1a68c81c87de1e8482621c.jpg)
.thumb.jpg.71e9cb3a2fd11c0a6a4cd042bf6c4e58.jpg)
.thumb.jpg.4e182674a92ef5bcb2b6a55d905a9e46.jpg)
.thumb.jpg.4bca4af490ea5986de78e198ec966116.jpg)
.thumb.jpg.675ca62a55681450b59e8ebc22bfb8af.jpg)
.thumb.jpg.c767c3b27da313c940803788e89d39b1.jpg)
.thumb.jpg.3a72131a32c1a252dc02d869545e5b83.jpg)
.thumb.jpg.501e65fc9595e7bfcf3fcbc2fd8ba22a.jpg)
.thumb.jpg.1e71dbab9d0785a88a4099d78907790c.jpg)
.thumb.jpg.ebaab0c18e352299c8efedad15ab58dd.jpg)
.thumb.jpg.290c1439b7fb7817c8c7cef111bf1545.jpg)
.thumb.jpg.512fee44f986c1d285eec52552e7ecf0.jpg)
.thumb.jpg.5ea0311884c2d9a5cb234bb78bb83fc6.jpg)
.thumb.jpg.f618b3b6ae57e26b018532833fd21dcd.jpg)
.thumb.jpg.c7d2494e12ea704d91d965205c6276d4.jpg)
.thumb.jpg.e235f7974f12aa47daa91893c9536c37.jpg)
.thumb.jpg.337be028c2d0309e970768775df9156c.jpg)
.thumb.jpg.d2bd7b08316677d87f3ef91500bed14b.jpg)
.thumb.jpg.f9d1a72344f6312da3d6a3592f0999ce.jpg)
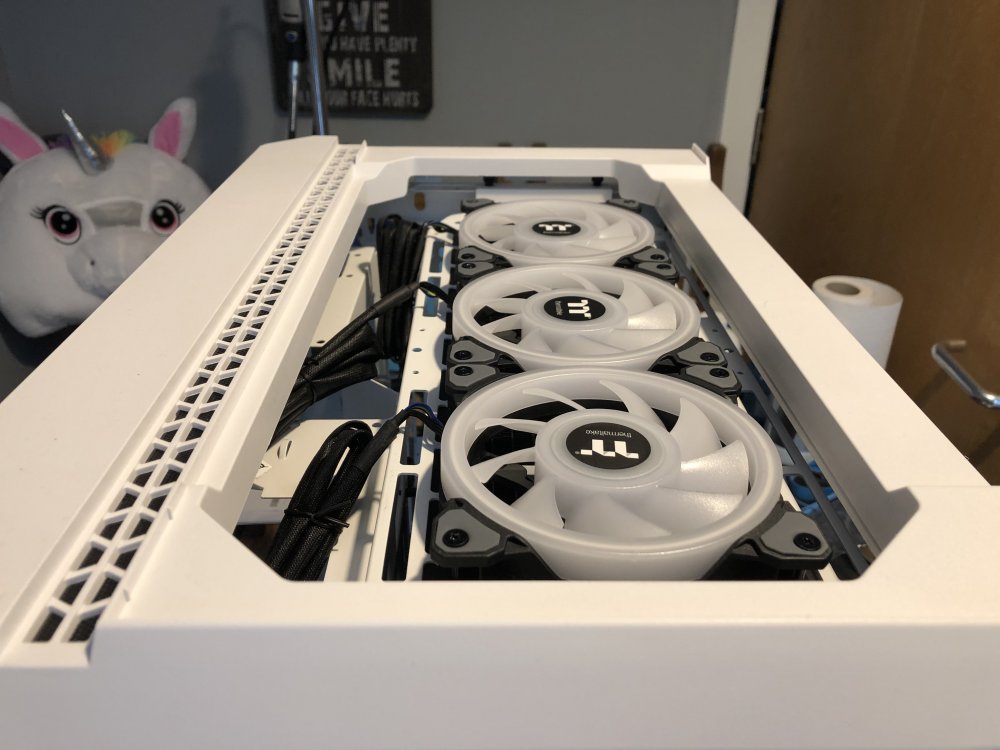
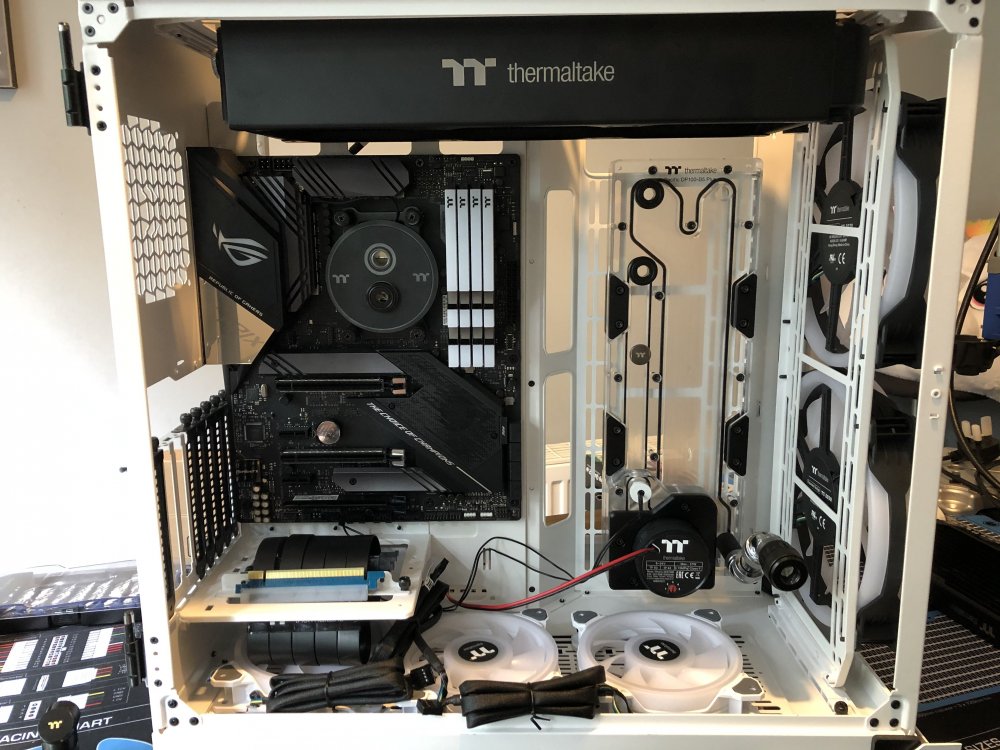
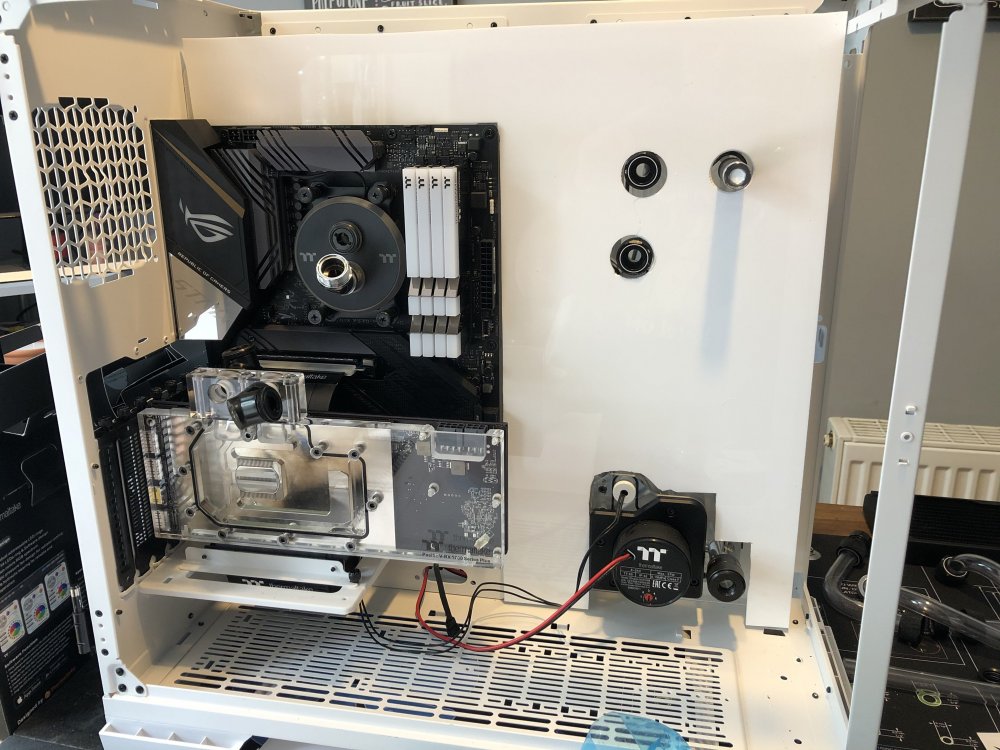
.thumb.jpg.0fe617ec42b8bd1998208da14a64856f.jpg)
.thumb.jpg.d3eea62aeb9b4c3963536af1349580f5.jpg)
.thumb.jpg.9a6ce2376ca19c7acae9d49c5e6332a8.jpg)
.thumb.jpg.e7fd0bf8f78779c258c036ecabcc664f.jpg)
.thumb.jpg.f0a18b67680b22fb034d492811d569a8.jpg)
.thumb.jpg.fcc804fec3c511e55e1cc5d7715cfb1a.jpg)
.thumb.jpg.57f7804a3e064b35097244d21d1d3d95.jpg)
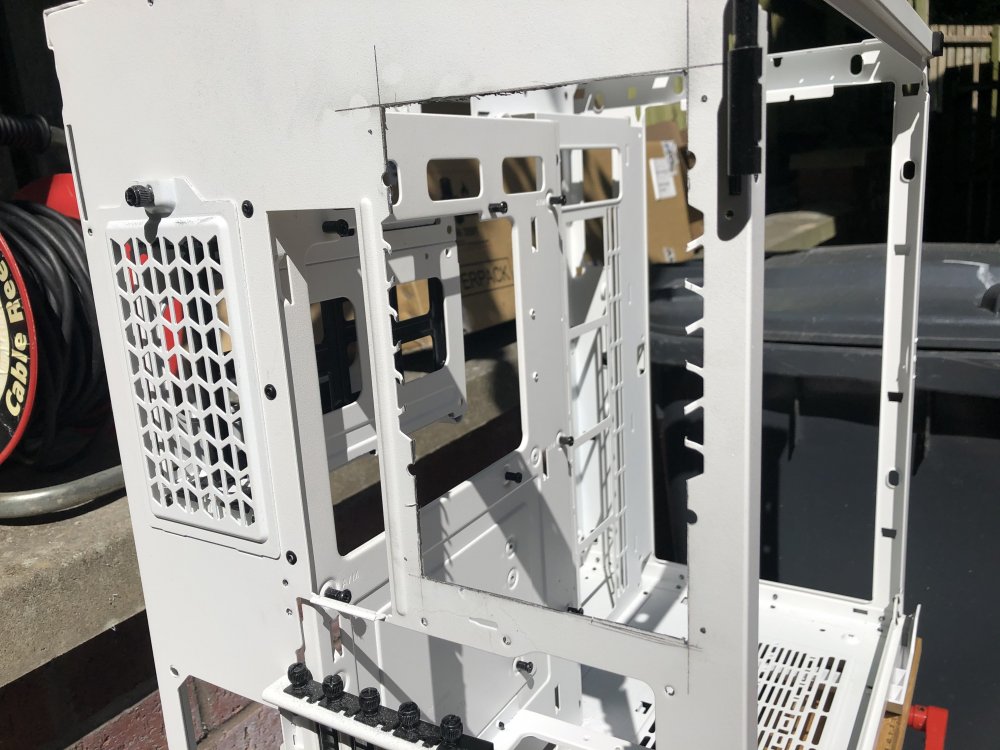
.thumb.jpg.5acd290e3c0e09d646f8a04aad291cd1.jpg)
.thumb.jpg.daa0aabc04eb38f15dd075094980de92.jpg)
.thumb.jpg.e9096bce157bfd12578fc89dd826a3b1.jpg)
.thumb.jpg.9e20eb66a077dc66a93a4bf688267799.jpg)
.thumb.jpg.02af33858ac3a32a9d70ac56417be432.jpg)
.thumb.jpg.0c226273583d1ec31d933e68d79f9393.jpg)
.thumb.jpg.0d8a85ef0dfb1e27b2ad6df81c8ecf80.jpg)
.thumb.jpg.a8bbd35f3613e78e7f3a08aca16e748f.jpg)
.thumb.jpg.f42da03ceb2b78965375b4dd1a4973f0.jpg)
.thumb.jpg.e5b0758b4ad12fb9335990181ce354f9.jpg)
.thumb.jpg.931d4b2504484371c01bd1abf86f9e6d.jpg)
.thumb.jpg.b6361229d2a13bf7e42e97b8395087c2.jpg)
.thumb.jpg.3c6e26f6f4d49d818ea5ae3a3ea1a68e.jpg)
.thumb.jpg.505d8bdac9492cadbdabea0a3bb98de0.jpg)
.thumb.jpg.e6bb1ce0eba01ae2dce60a0443addfe6.jpg)
.thumb.jpg.39bf24dd4958f9c7602c768d96884653.jpg)
.thumb.jpg.090cd8ec4eccf81b1a55fad7757154a7.jpg)