AlienALX
Well-known member
OK so today's job was making the back plate for the GPU. However, again I wanted to up the difficulty a little. In the past I would simply draw around the GPU and cut out a piece of plastic before sticking it on with double sided foam. However, it's gappy and uneven. I mean don't get me wrong it looks 100% better than no back plate but yeah, not exactly what I had in mind for Elvis. This will be made worse by the completely standard and ugly M3 bolts the GPU block comes with. I don't want to see them at all.
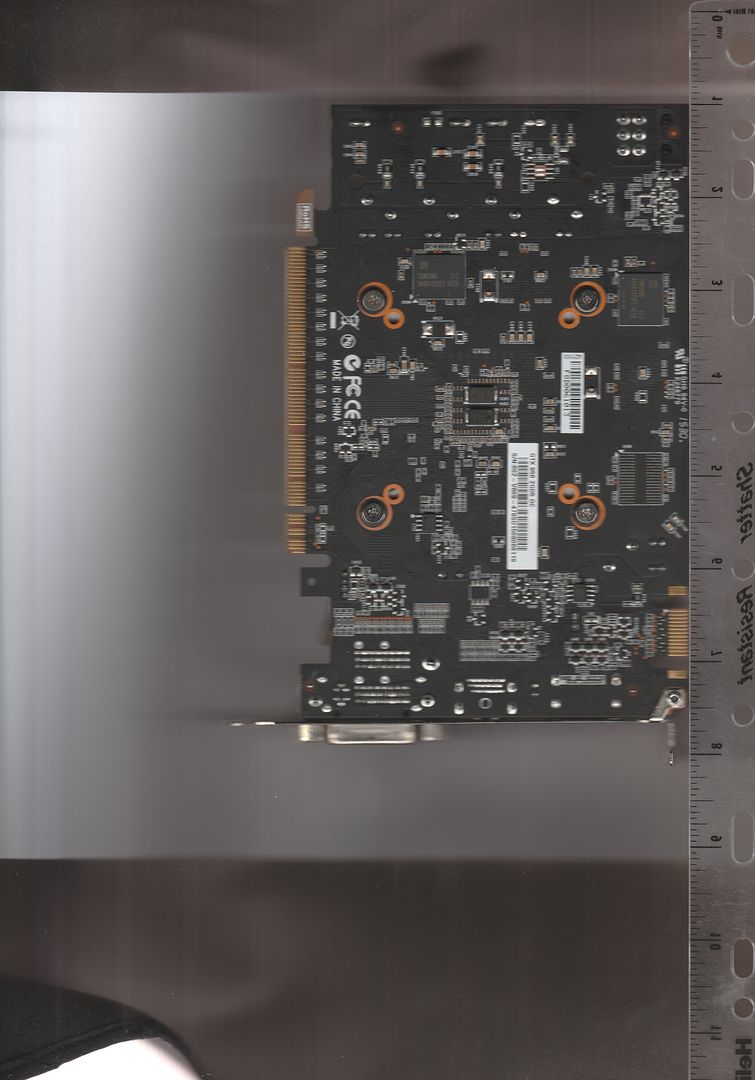
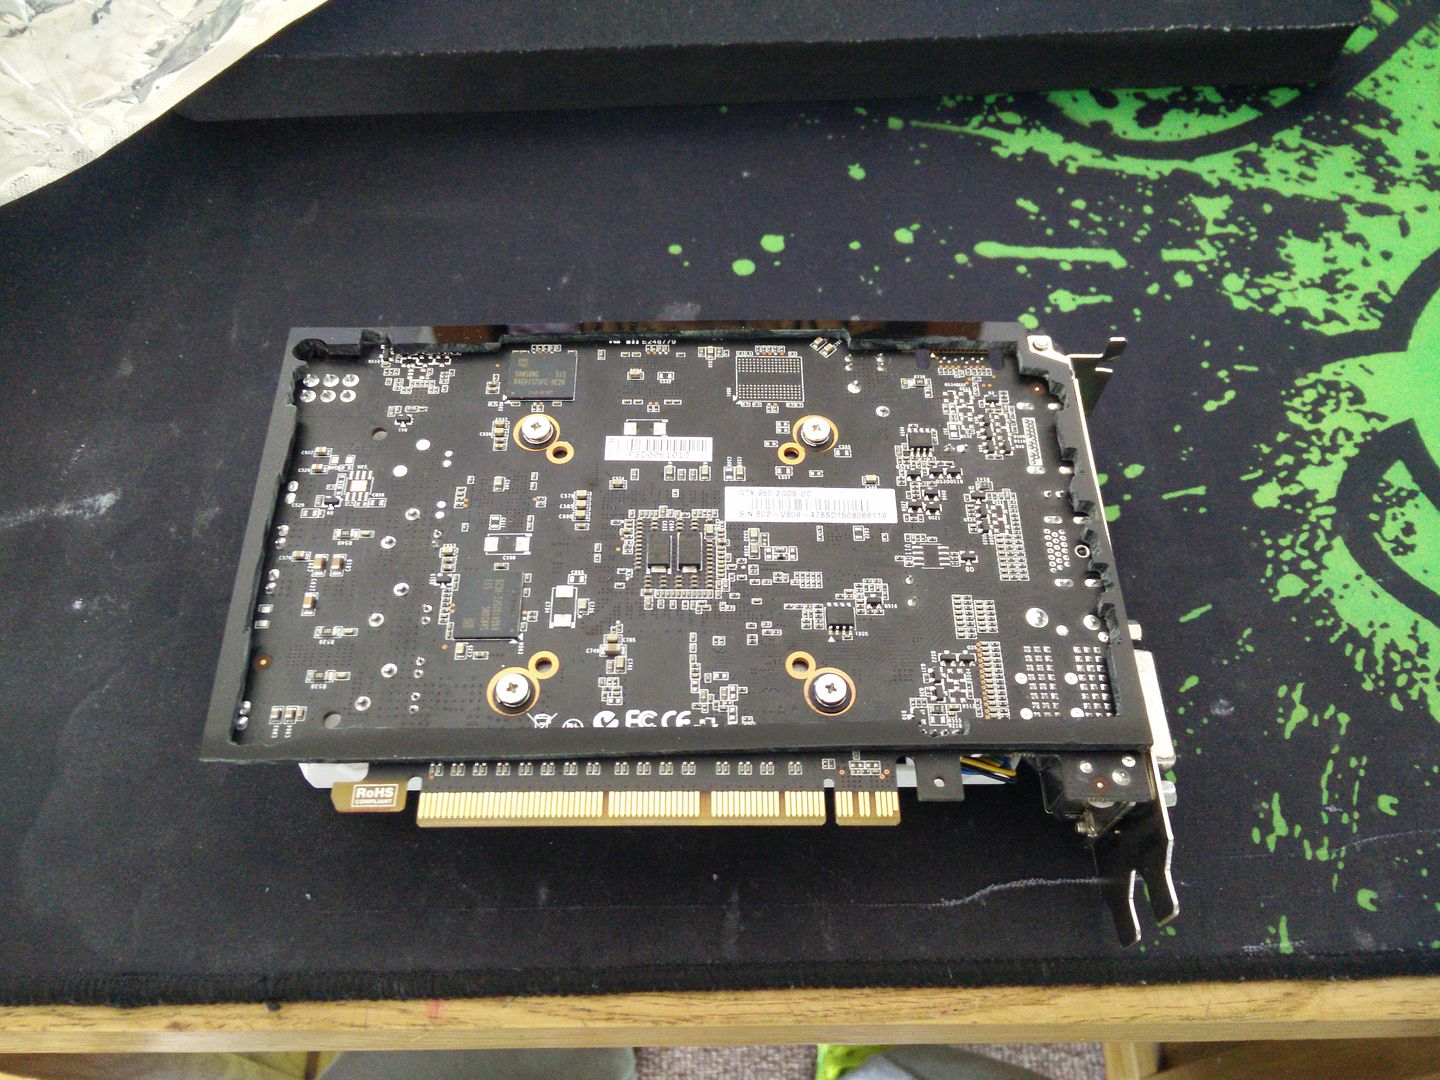
I wanted a two phase design that would go from black to green. So the first thing I did was put the back of the GTX 950 under the scanner, as this card is unique to MSI.
I decided that today I was going to take you guys through about 90% of the process so you can see what goes into this. So here is the GPU with the unimportant parts and scrap area cut off.
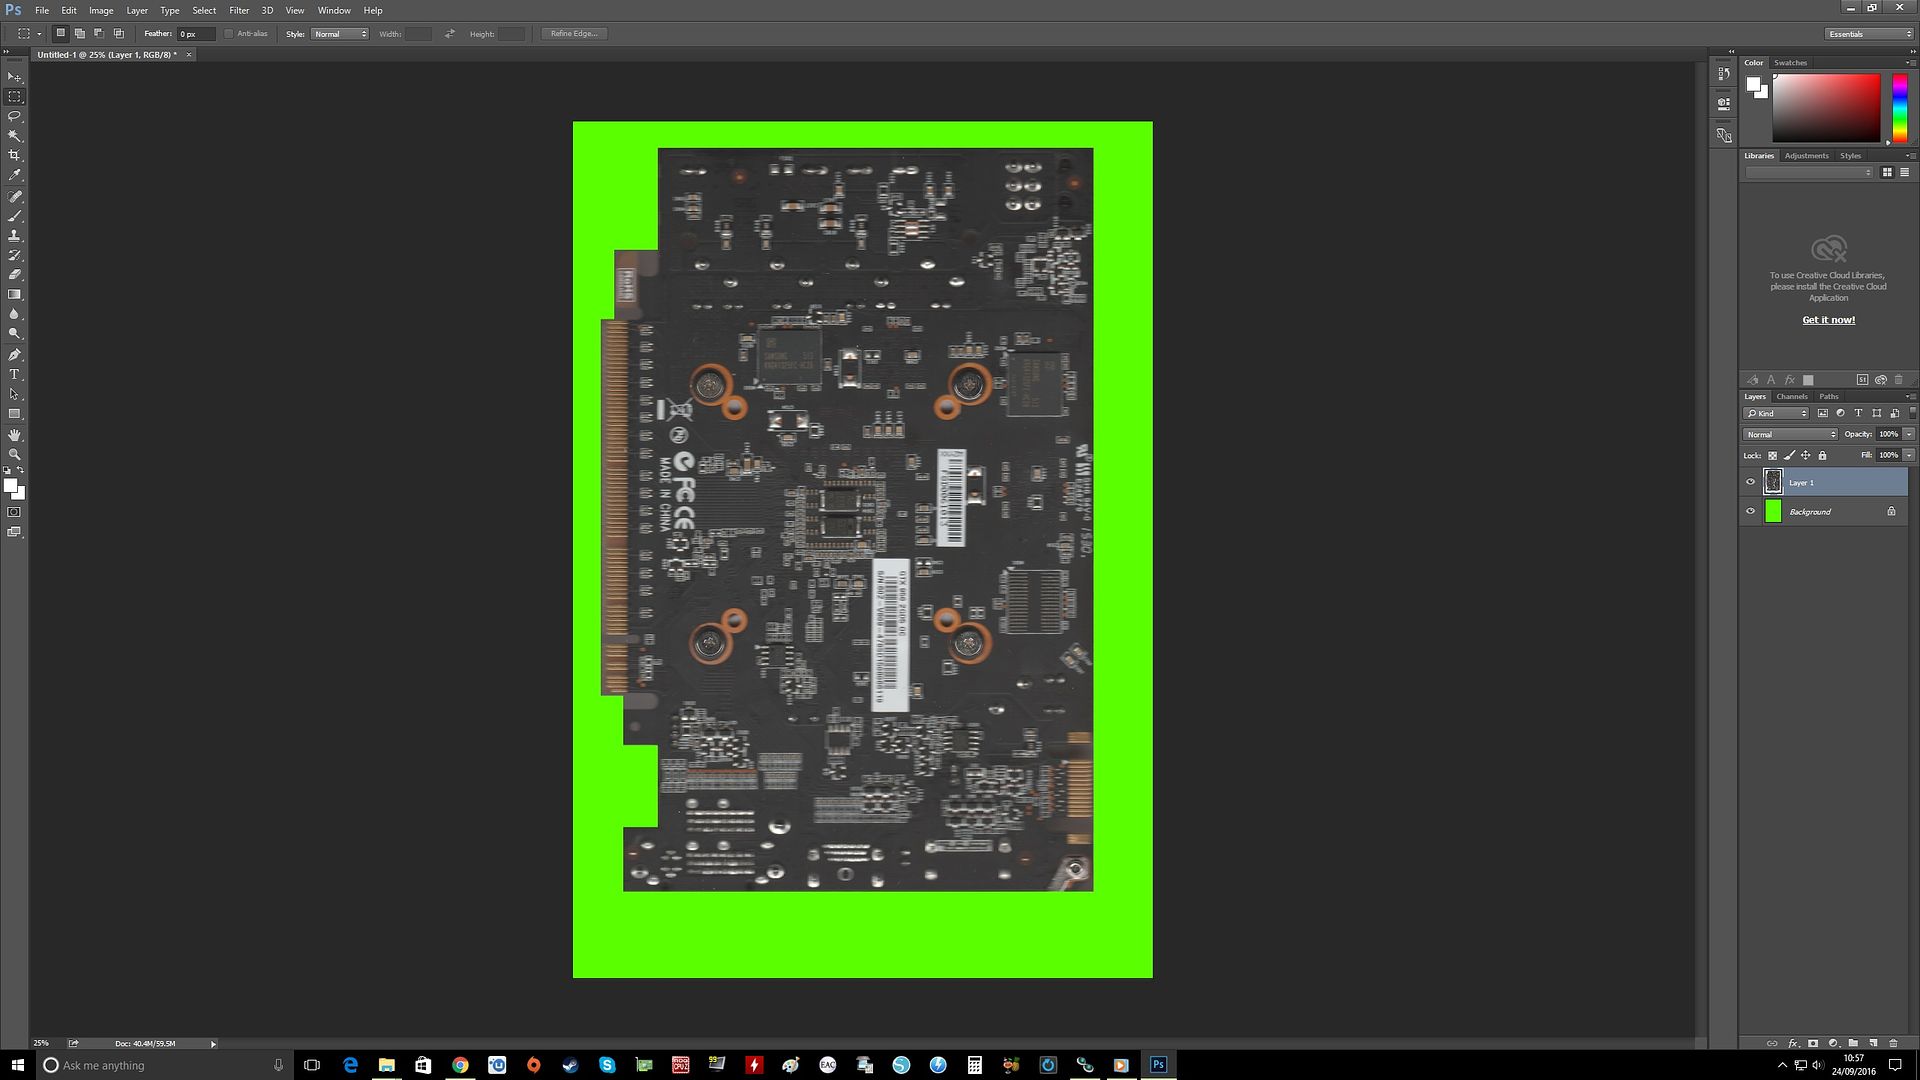
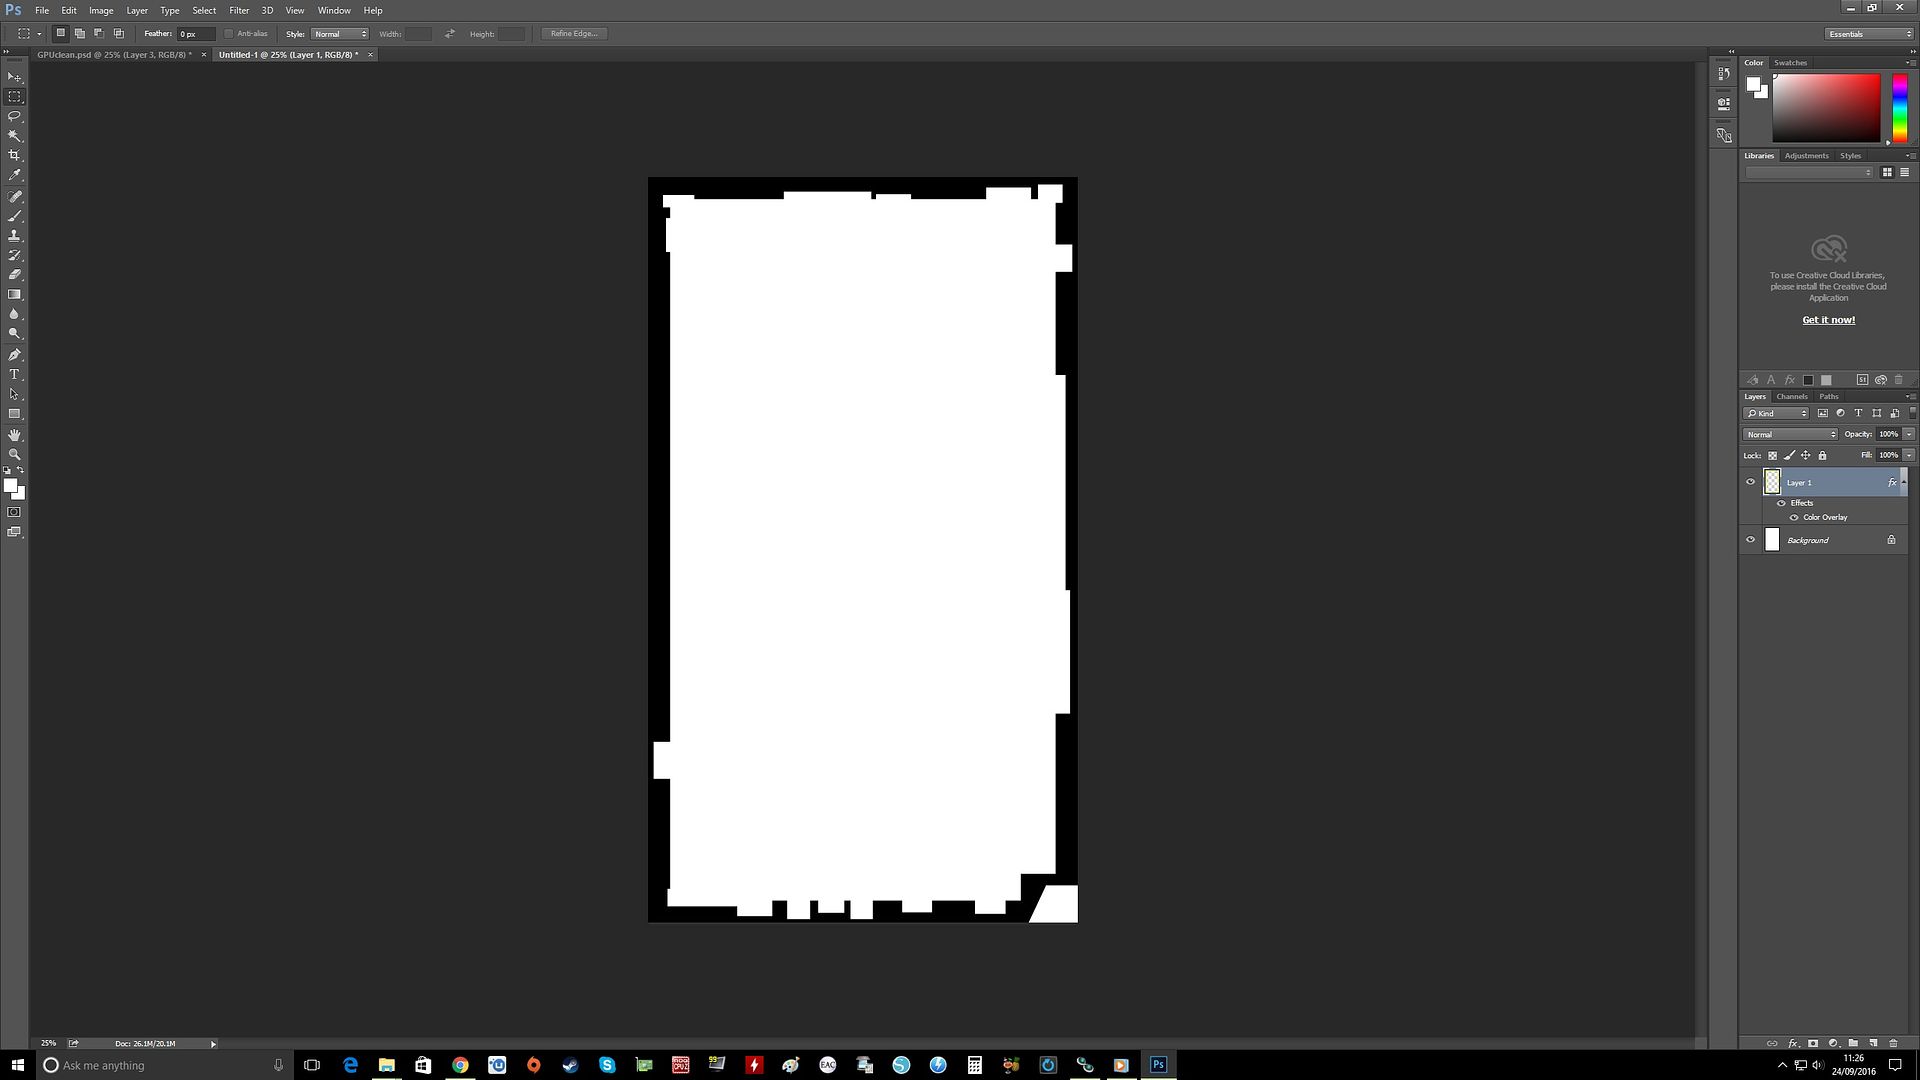
I then created a 5mm frame.
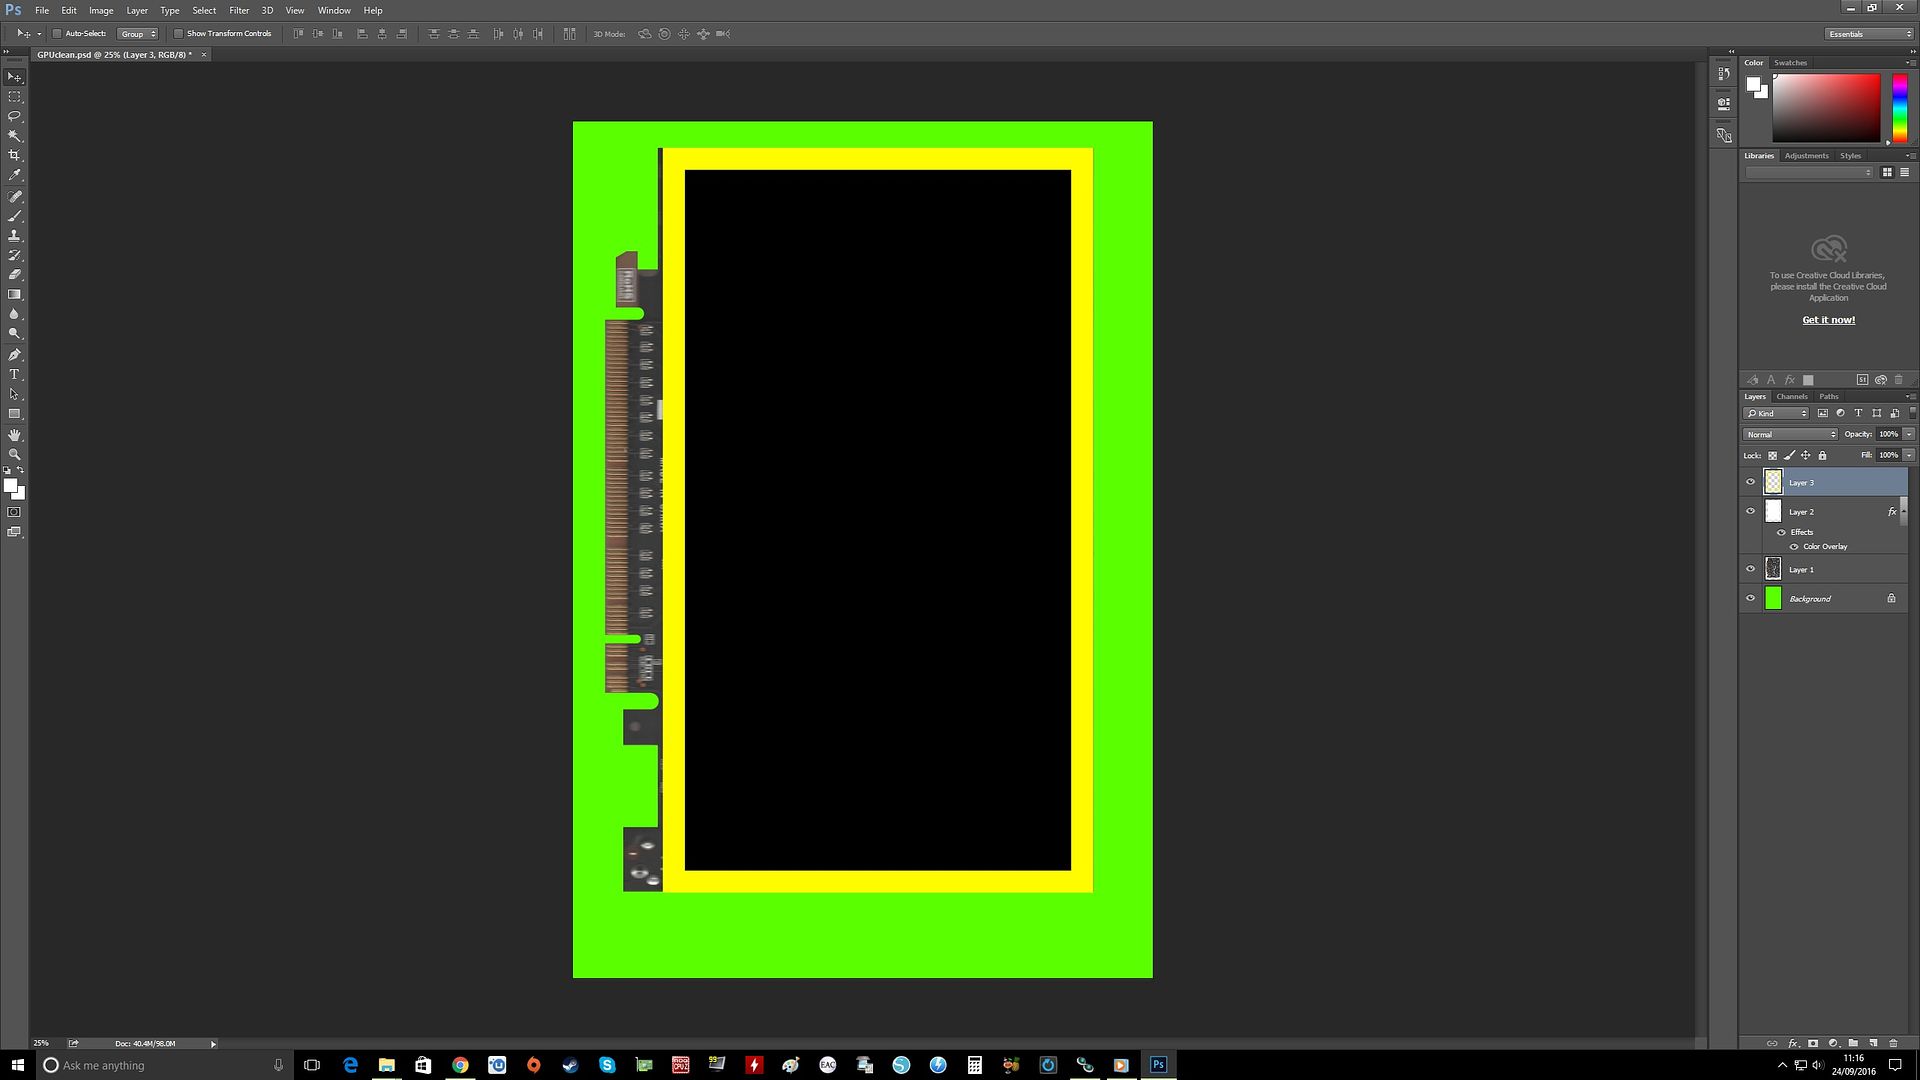
Then with Photoshop I reduced the opacity so I could see what it would hit.
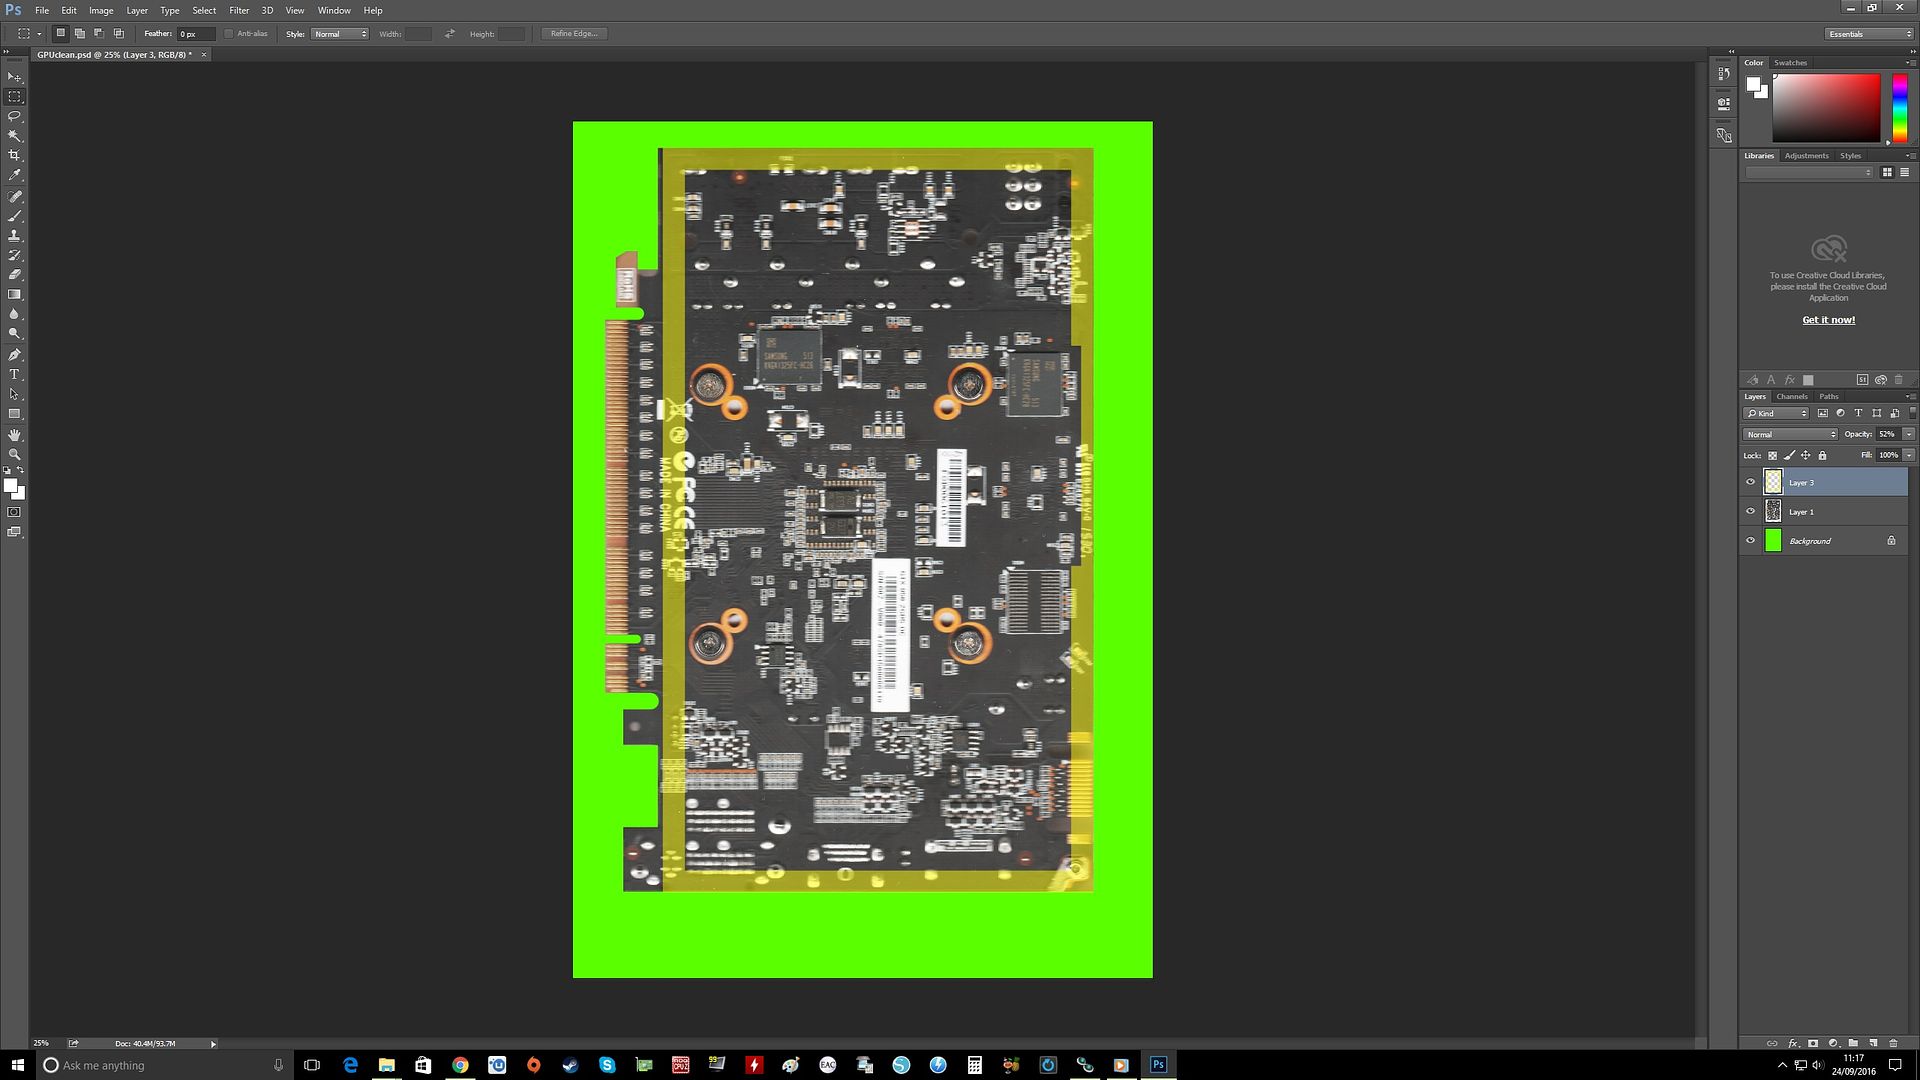
OK, so now everywhere it fouls a resistor or solder pin ETC I had to cut. Here it is with all of the problematic areas removed.

Some of that ends up around 1mm thick lol. Still, nothing ventured nothing gained and failure is always an option
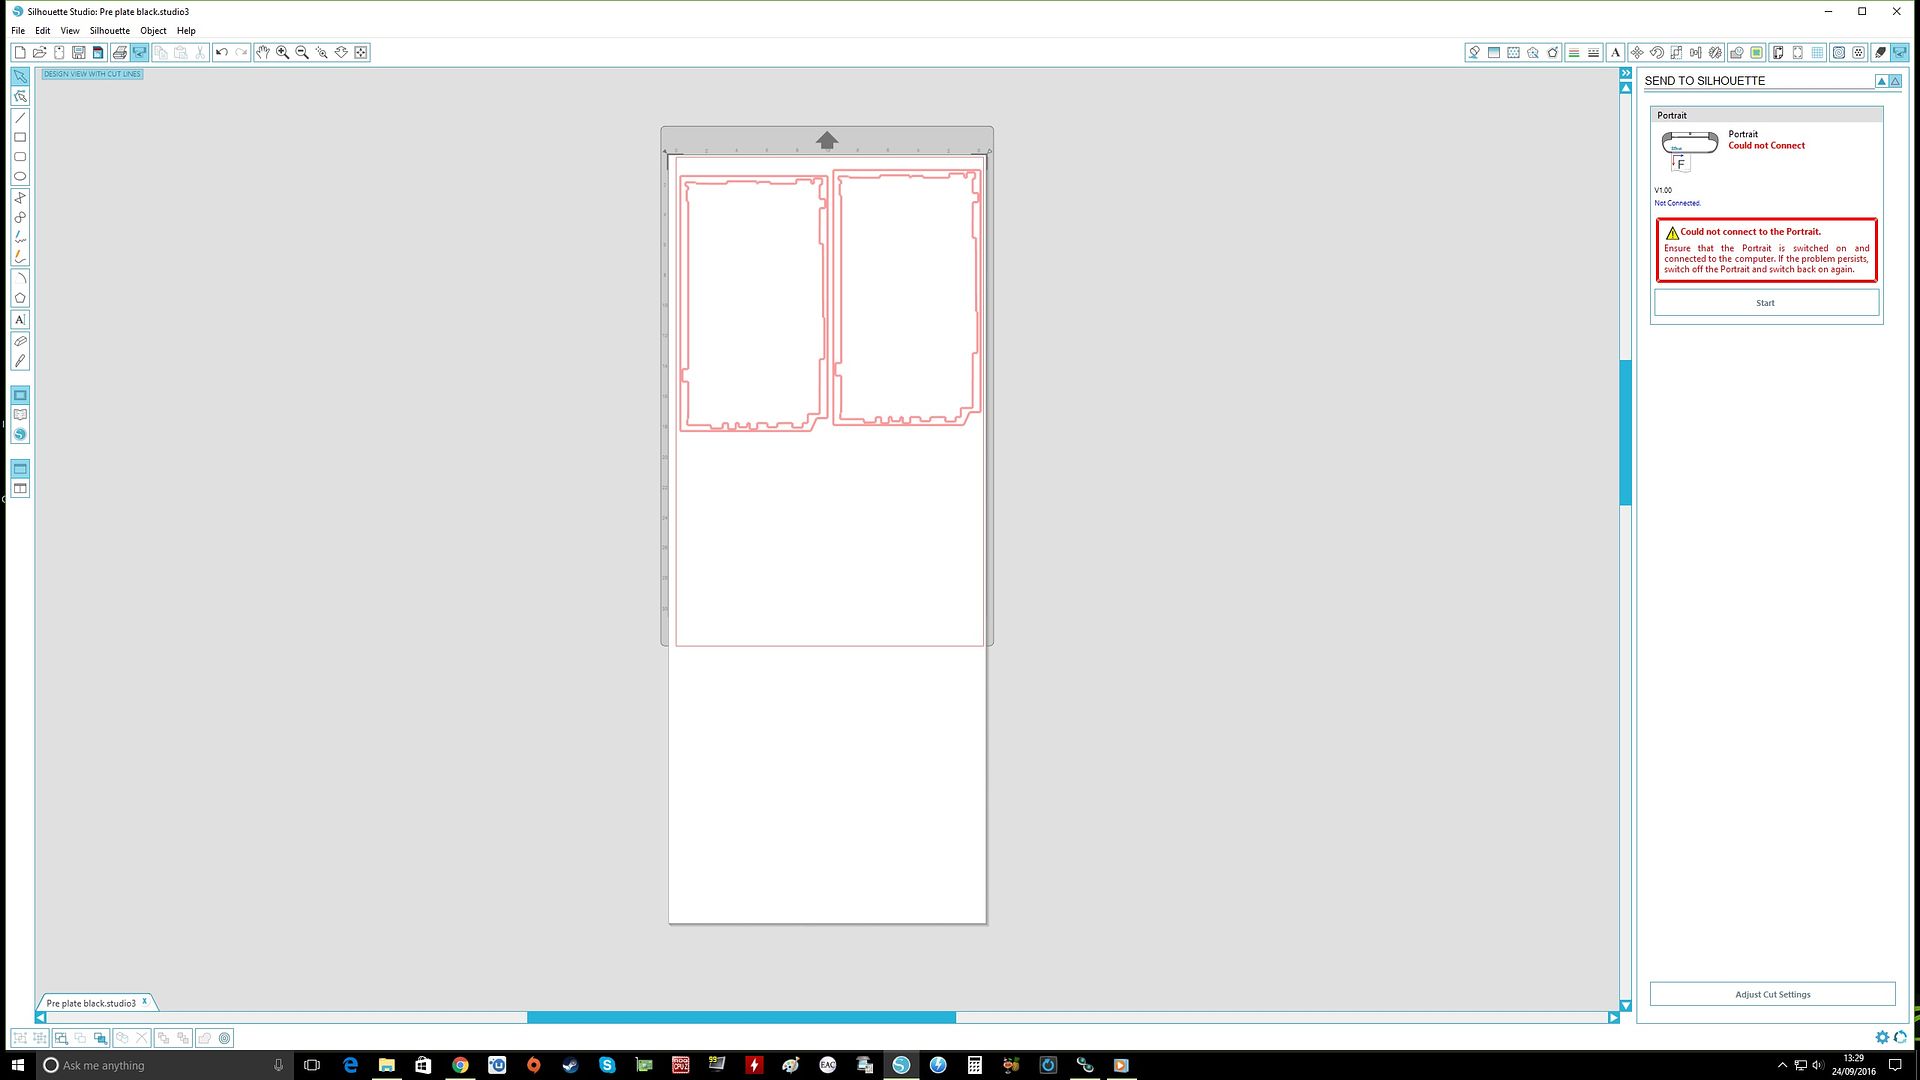
So I changed the colour to black for the plotter.
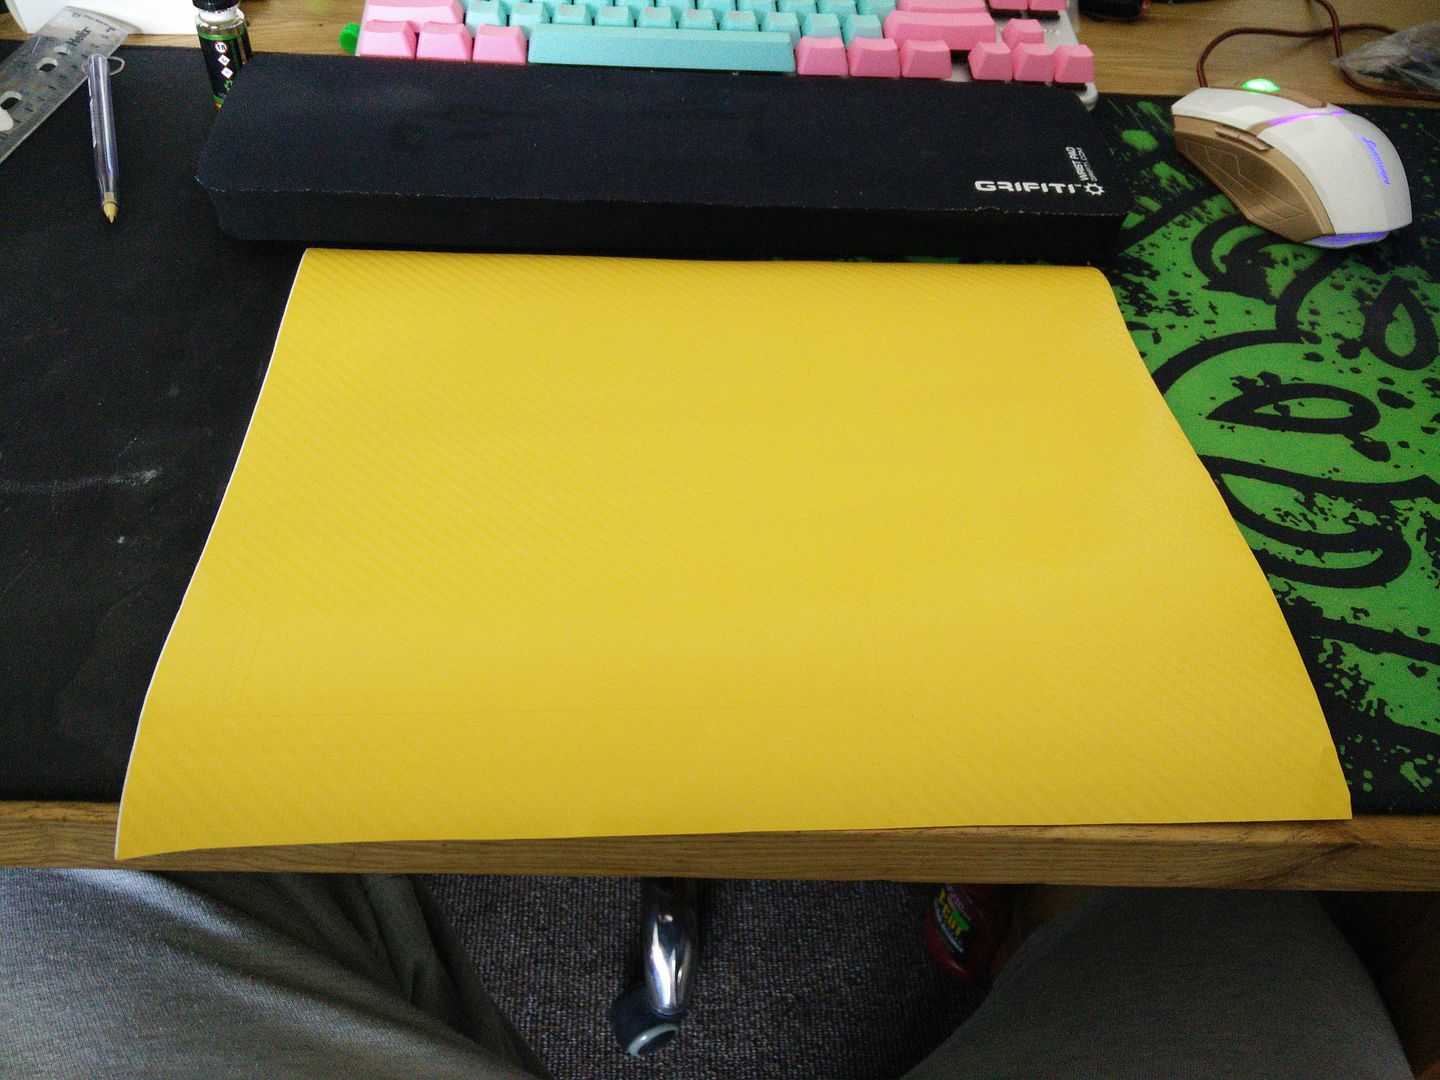
Now I needed some vinyl. I am using leftover scrap that I nearly threw out to cut templates.
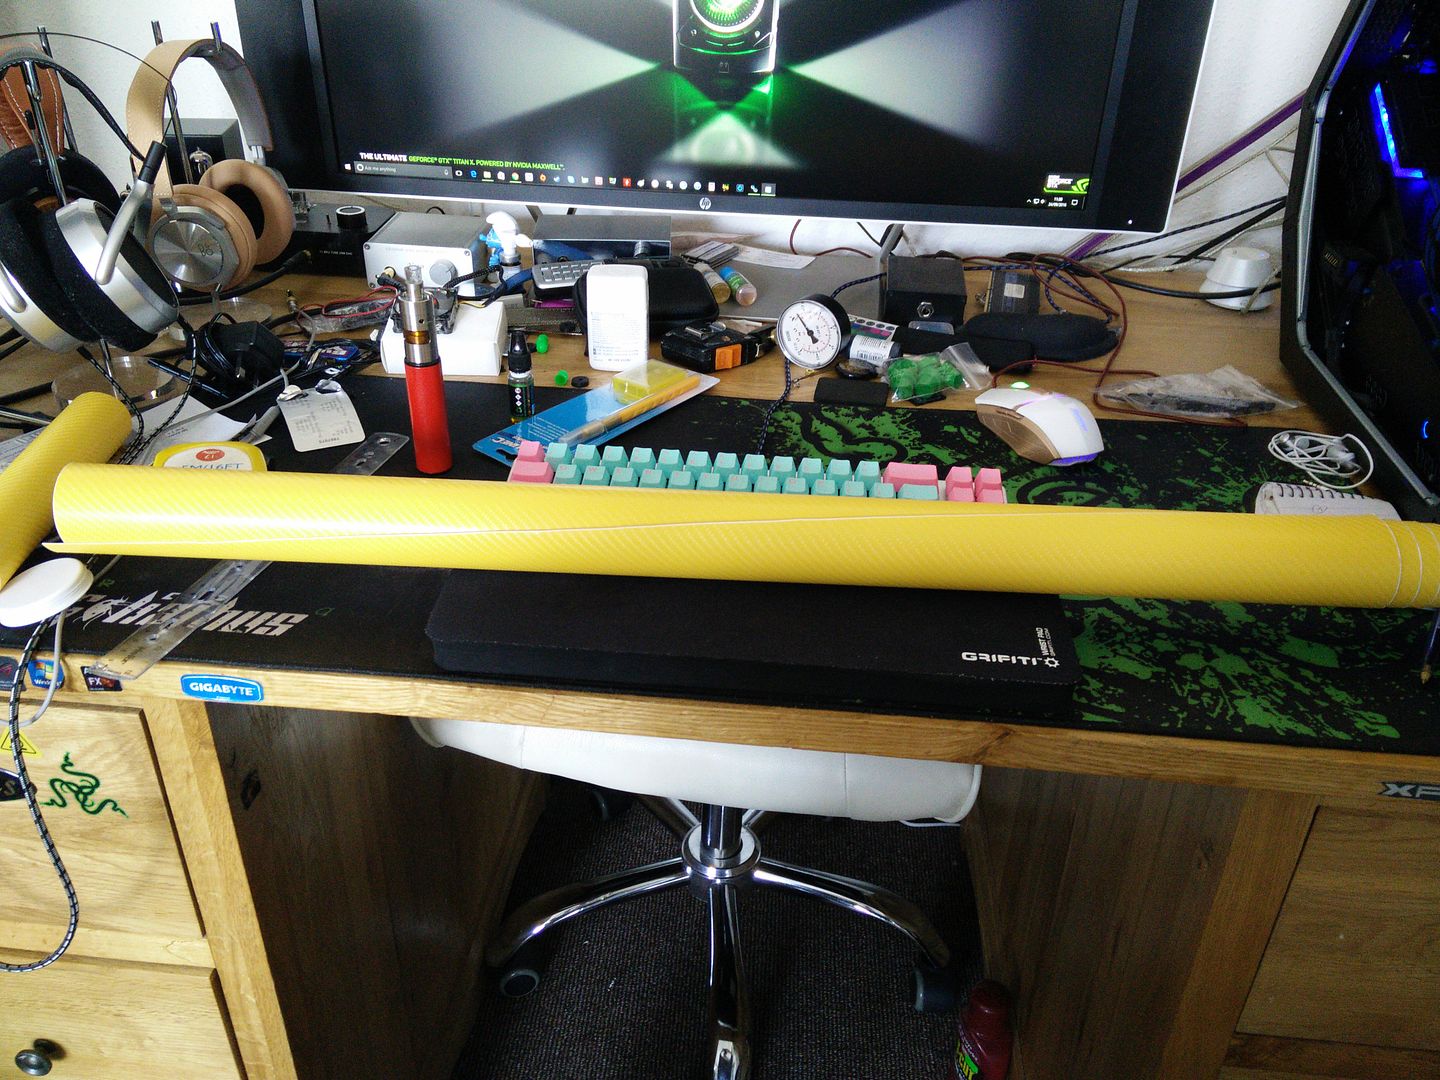
Cut a 10" strip so I can fit it in the plotter width wise.
Cut down to A4 height (around 300mm)
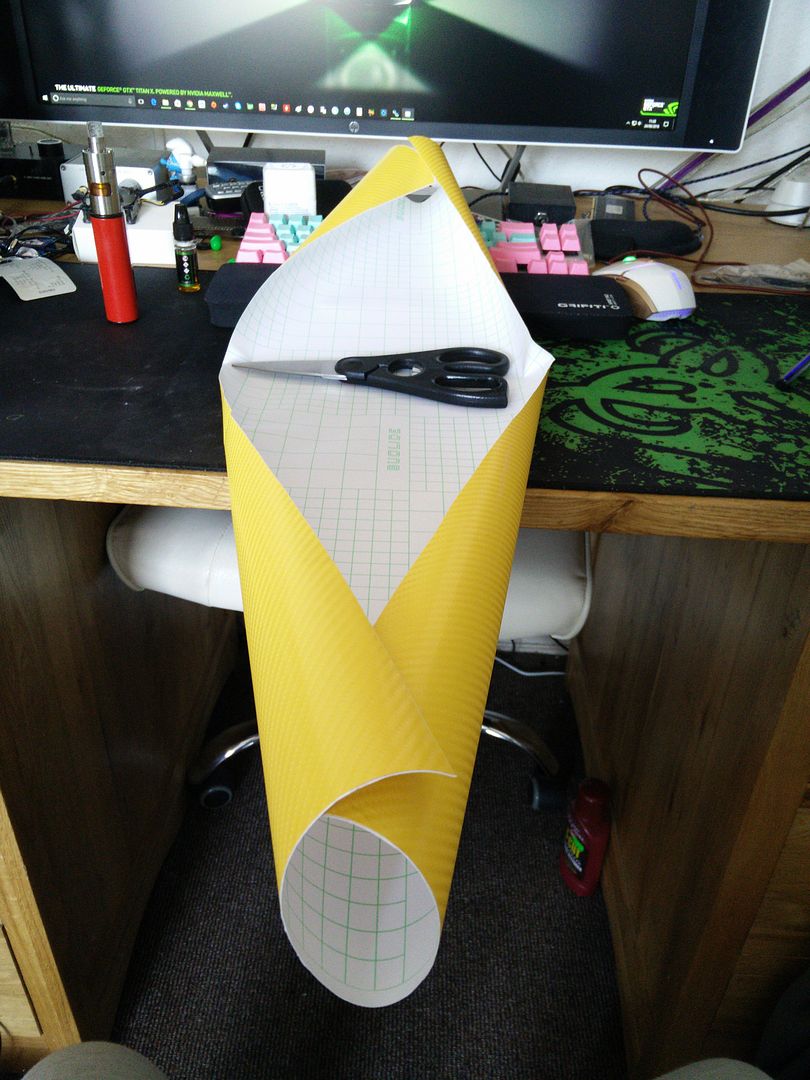
Note, when you take it off of a roll like that you need to squeegee it to get the creases etc out. I have already done that in the pic. OK into the plotter.
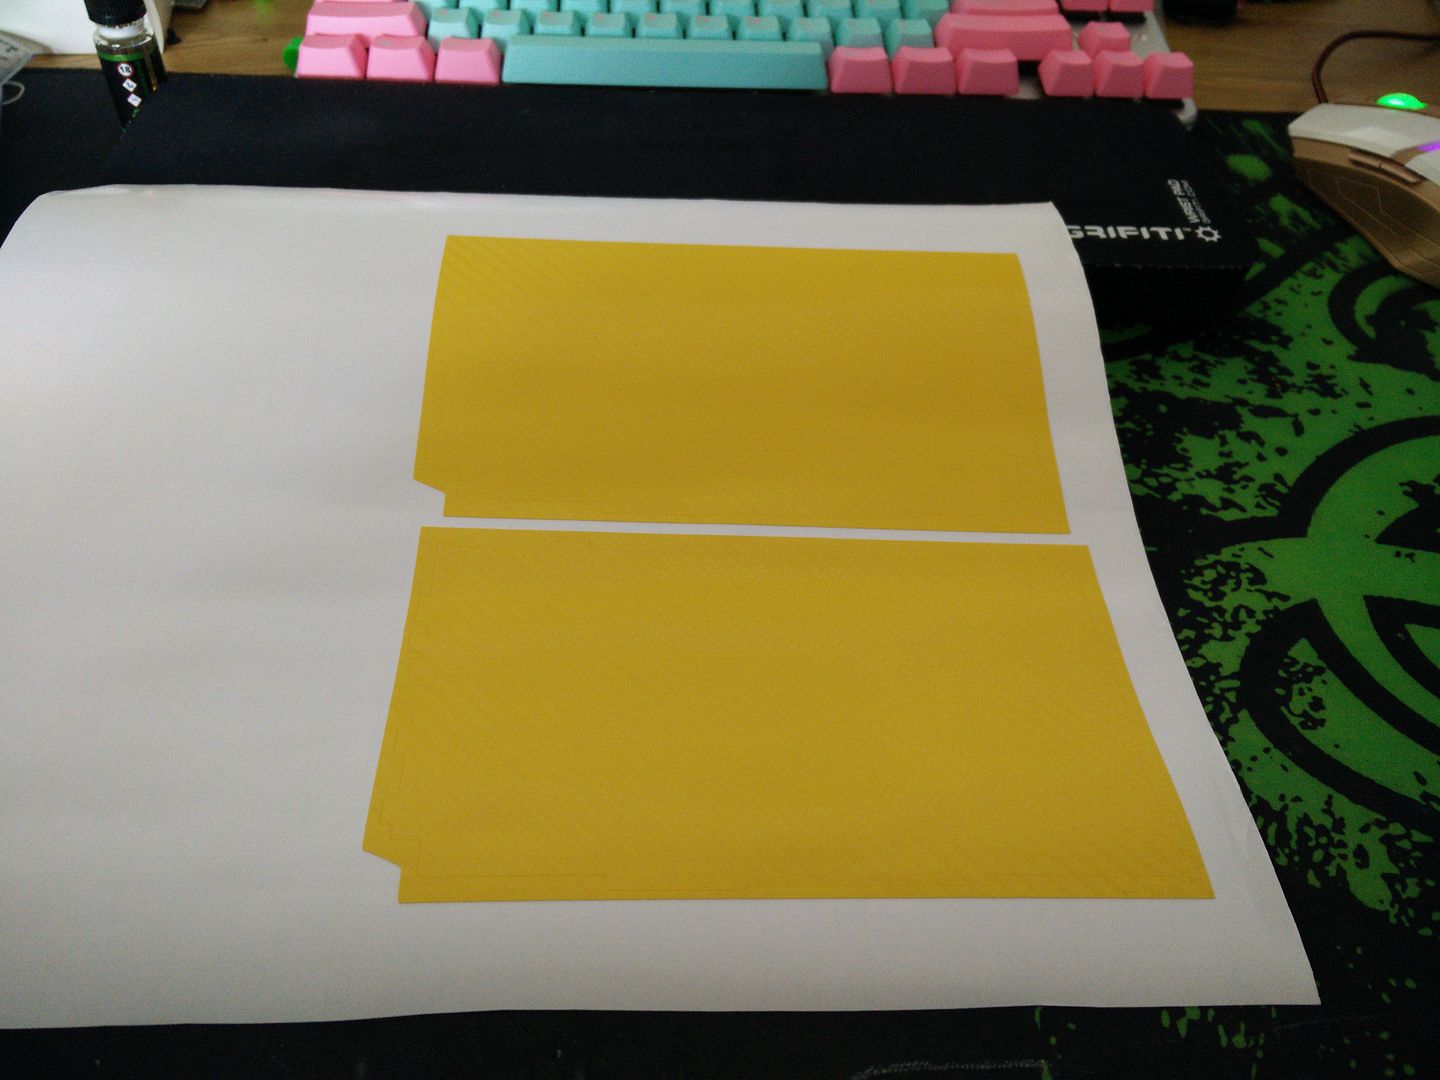
I have marked two for cutting however I will not be using them both. I always cut two of everything in case something gets screwed up or I mess up peeling. The issue is this part may change shape slightly due to heat and stress. Remember, I am really pushing it here with 1mm tolerances with a Dremel. No machines, no CNC, just my hands and a 25mm spinning blade.
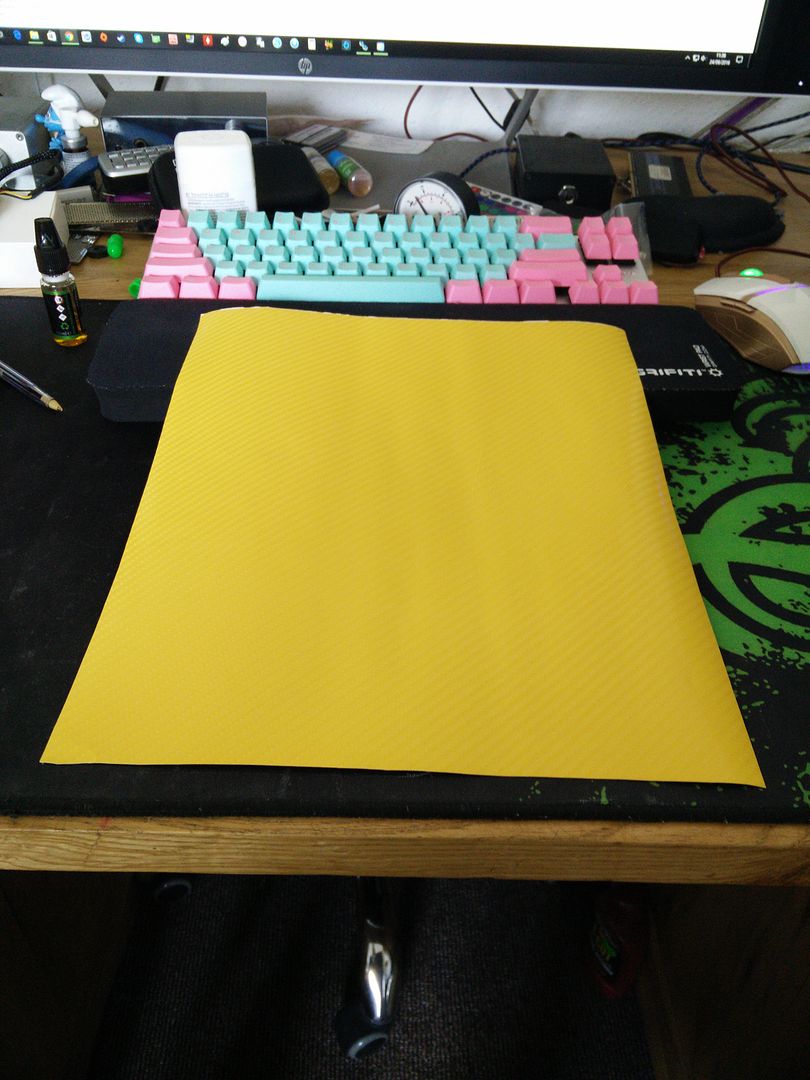
Here they are cut but you can't see it too well due to the yellow.
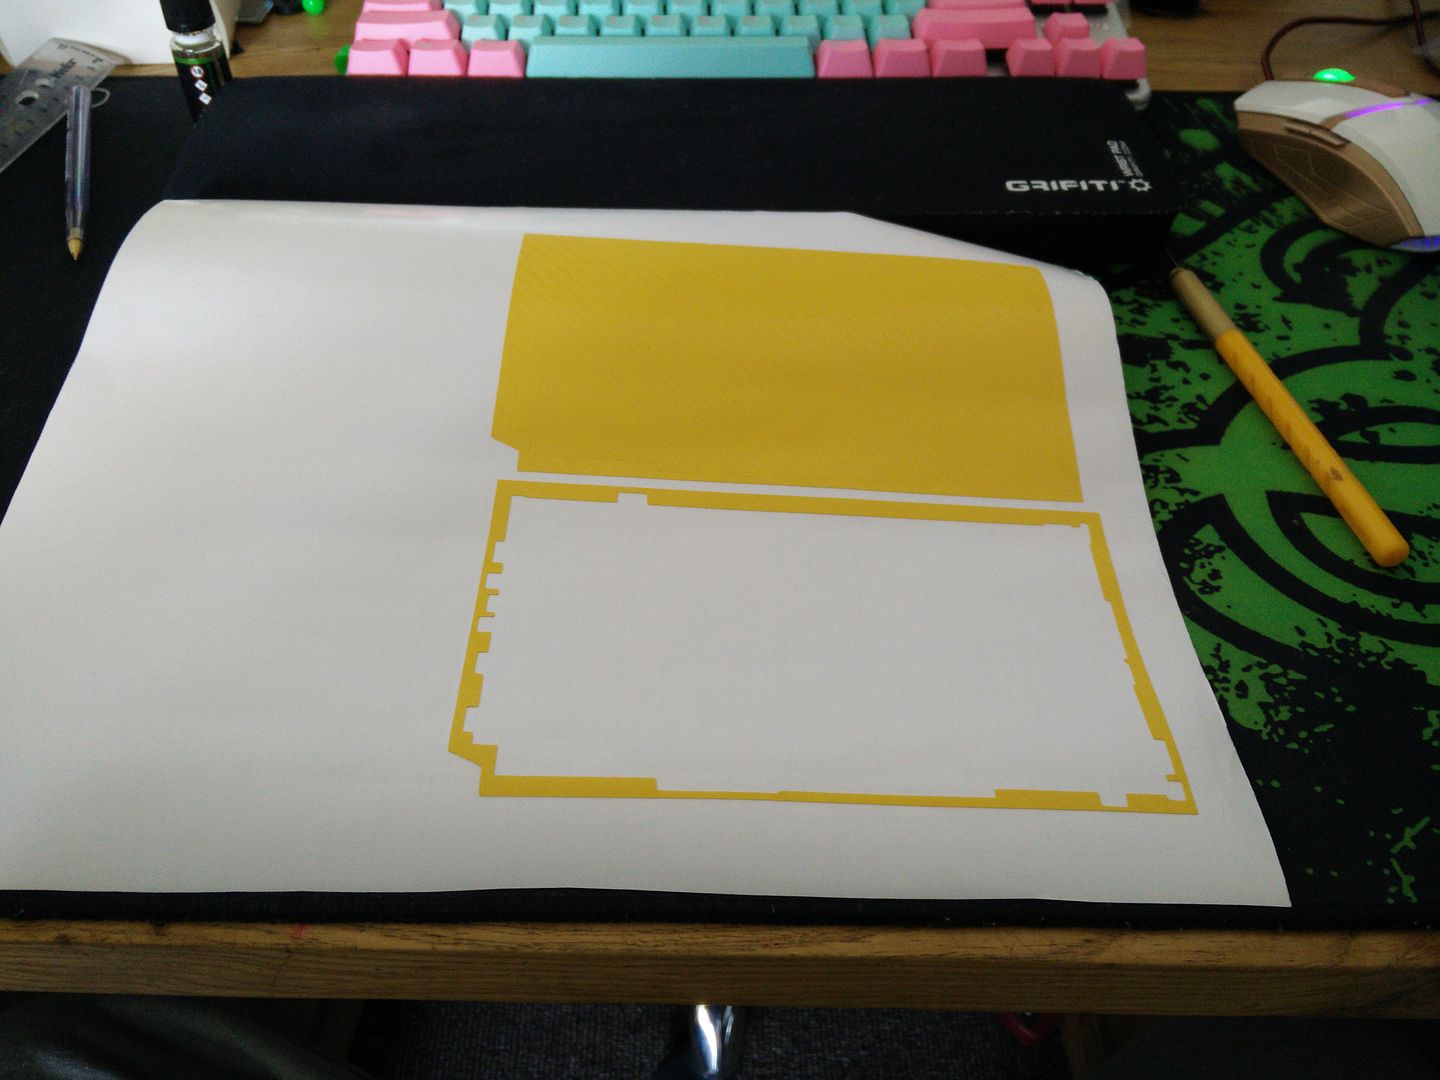
First peel. This is the easy one.
Second peel is considerably more difficult as that very thin frame gets snagged and wants to lift and go out of shape.
Talking of out of shape. Make sure you measure it to make sure it is the correct dimensions. It's easier to pull it around a bit on a slippery piece of backing than it is once you have stuck it down.
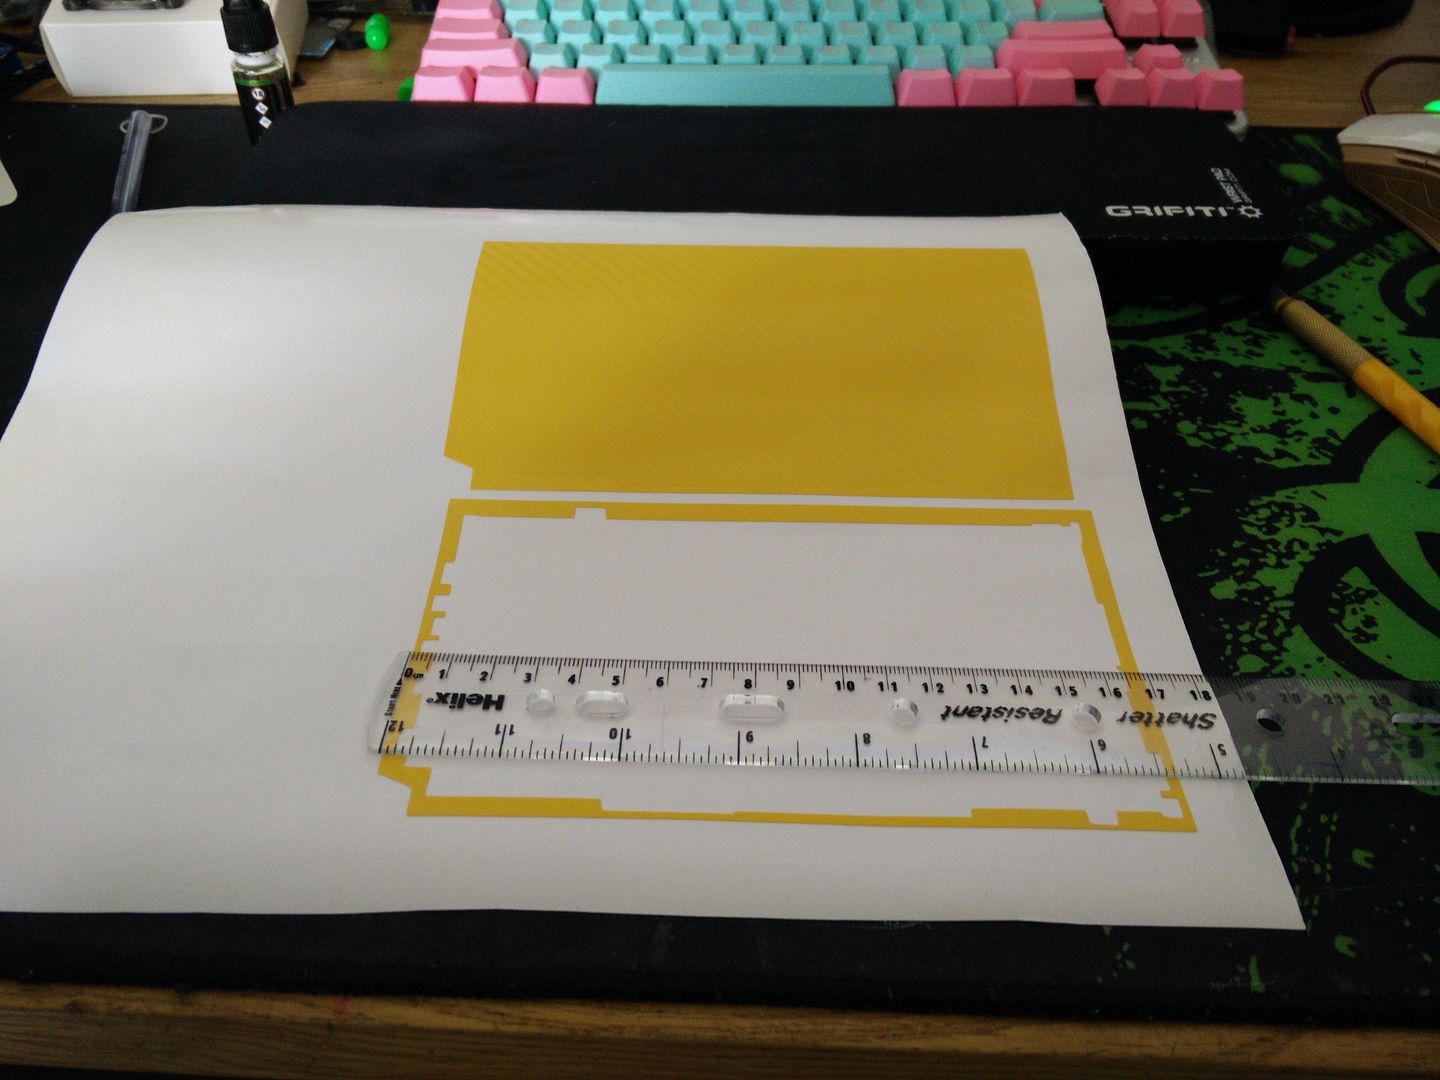
OK so we are within .5mm which is good enough.
Note, I do not photograph the actual work stage. The reason is that my best camera is a part of my phone and I don't want to wreck it. There's not much to see any way, just me wearing a gas mask with a Tshirt over my head pulled down to below my eyes and concentrating.
I will leave Morgan Freeman to explain how the next bit works. This is from The Shawshank Redemption..
Geology is the study of pressure and time. Thats all it takes really... pressure... and time...
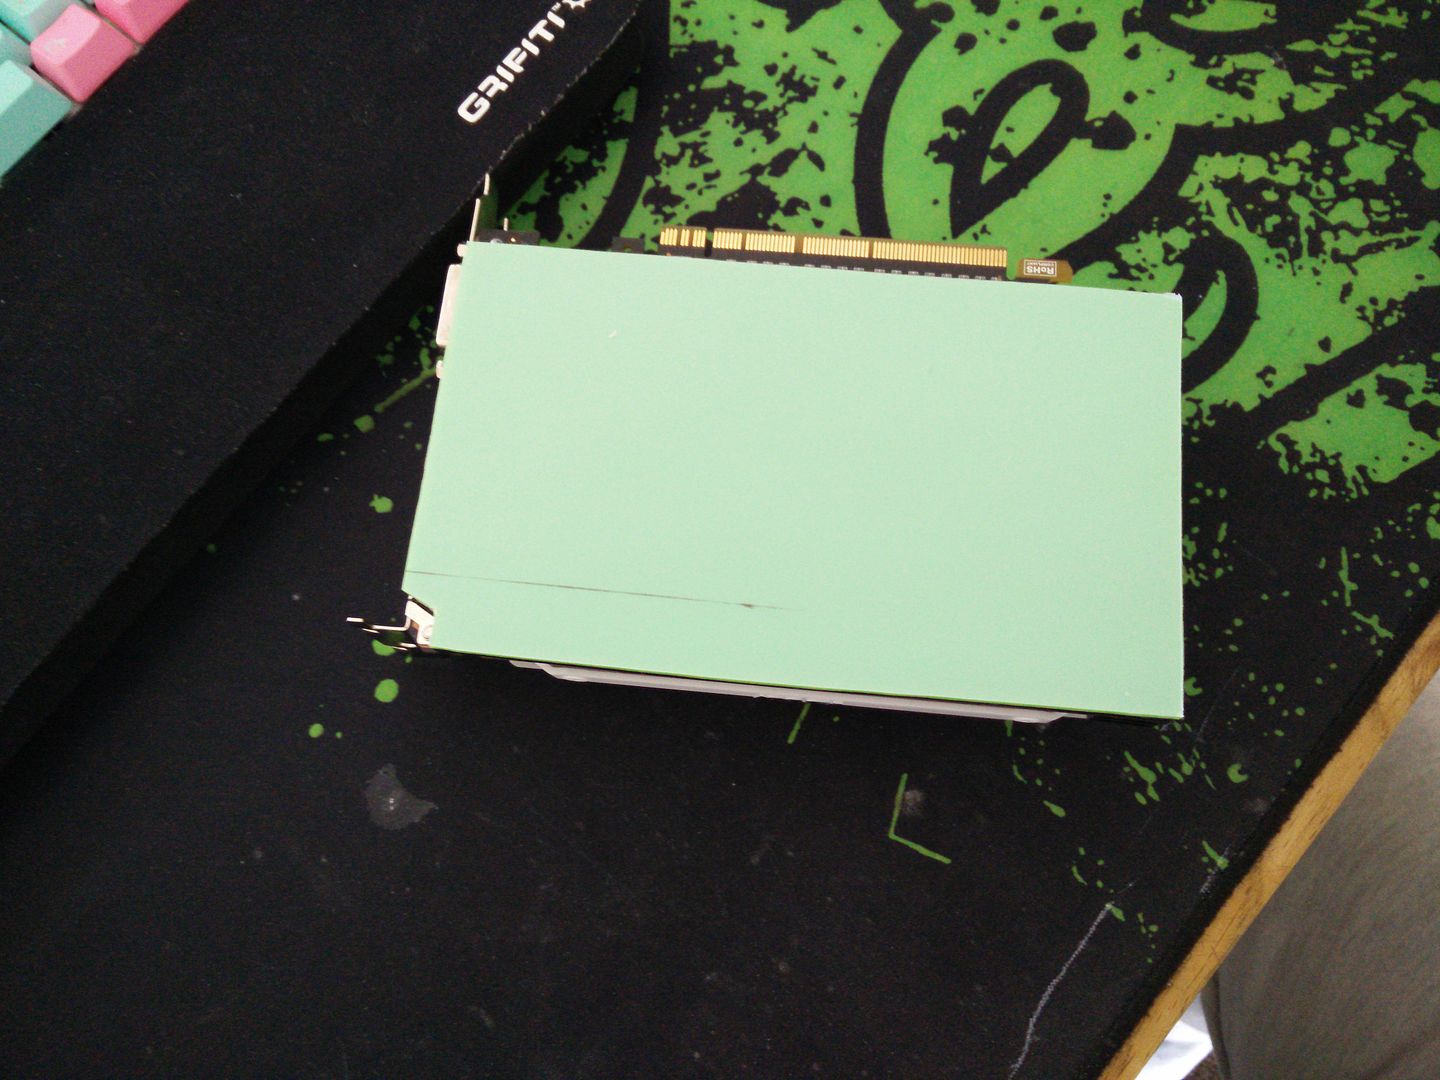
It fits.
Bogey time.
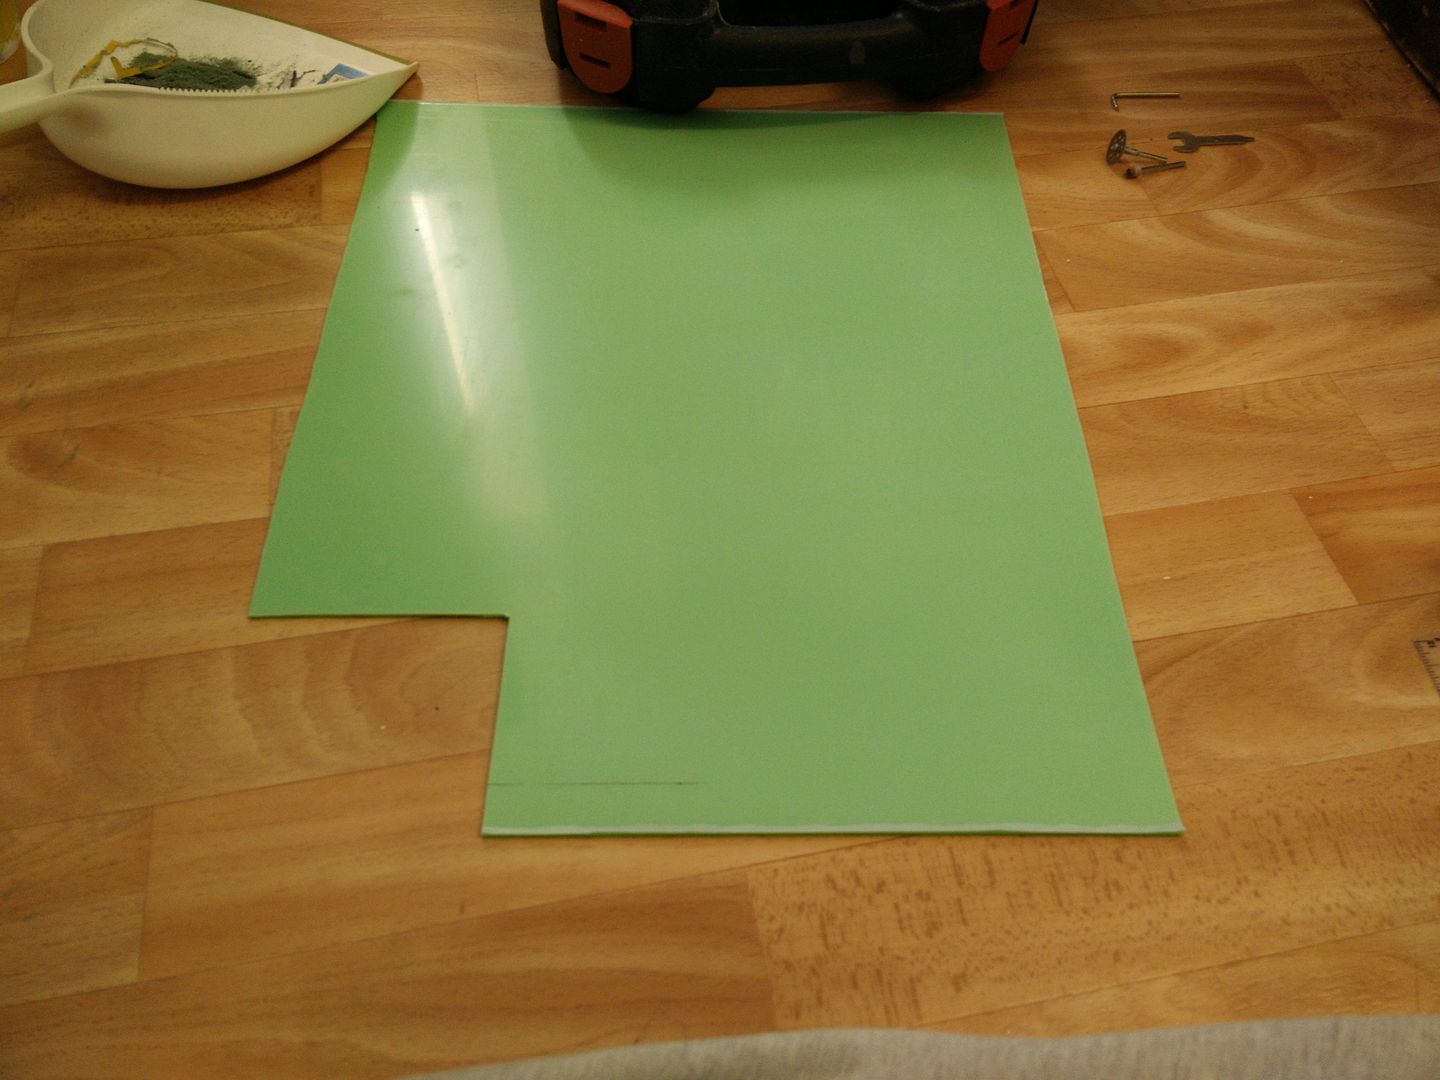
I deliberately over cut this by .5mm so I could sand back. Obviously if I hit the black too hard I will blow through the thin edges, so I made the green slightly larger so that I can sand it into the black rather than the other way around.
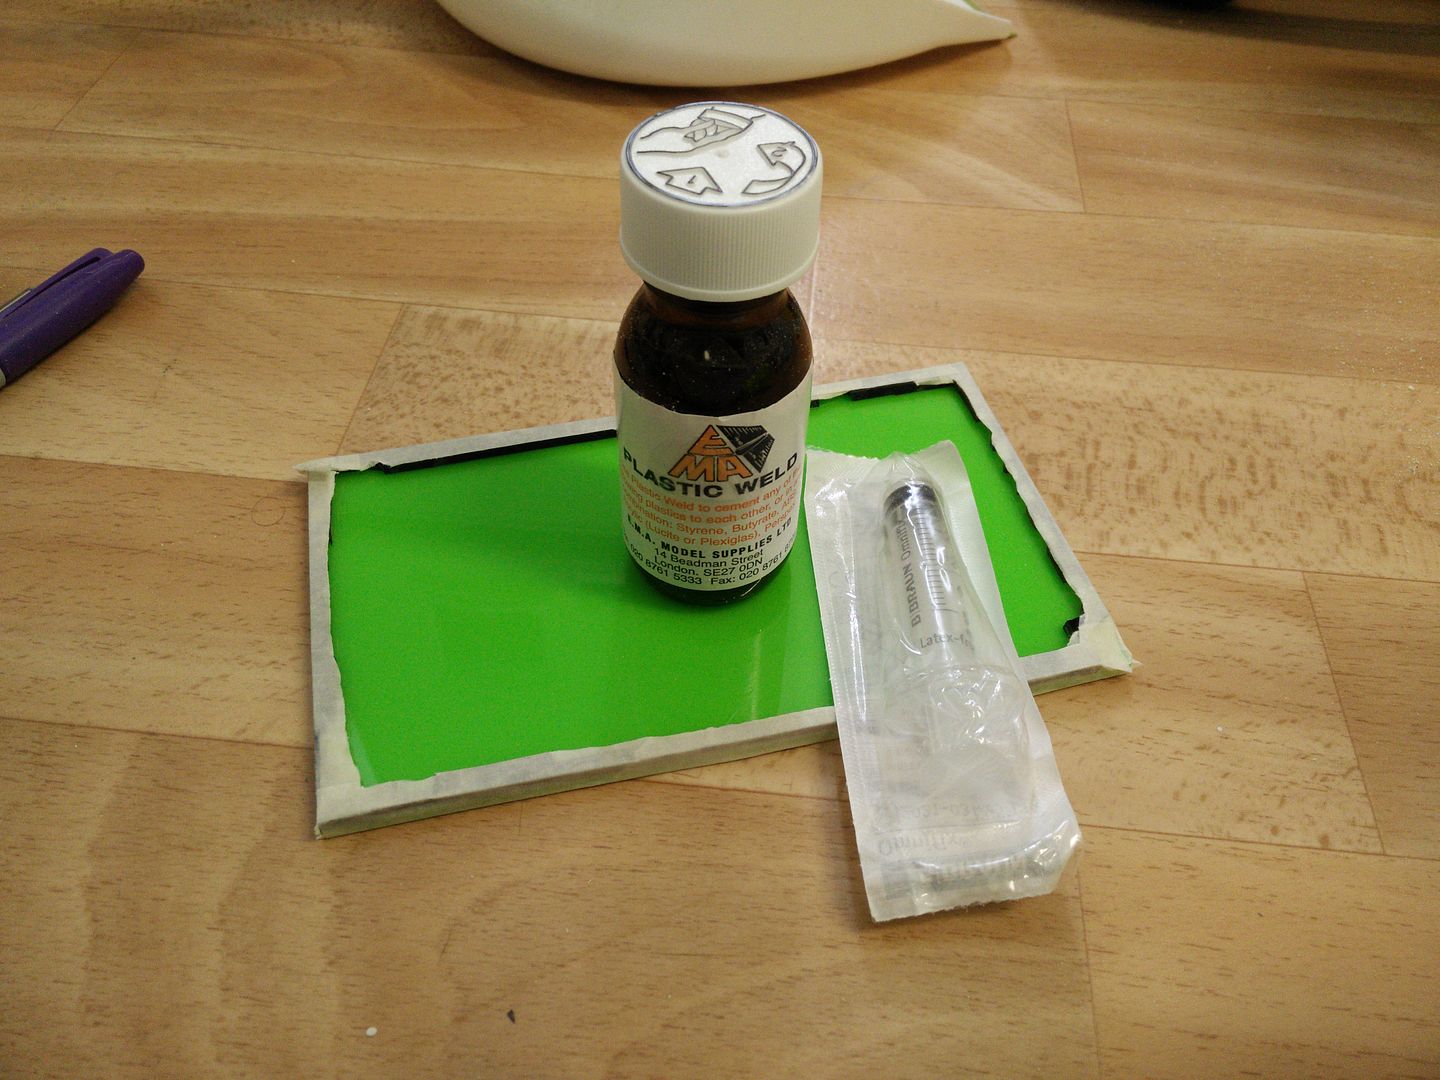
OK so what I have done here is completely tape off the edges and seal them. This is so that the Plastic Weld will not pee out of the edges and wreck the piece.
Talking of which.
About fifteen minutes later after I was sure the reaction had completed and.

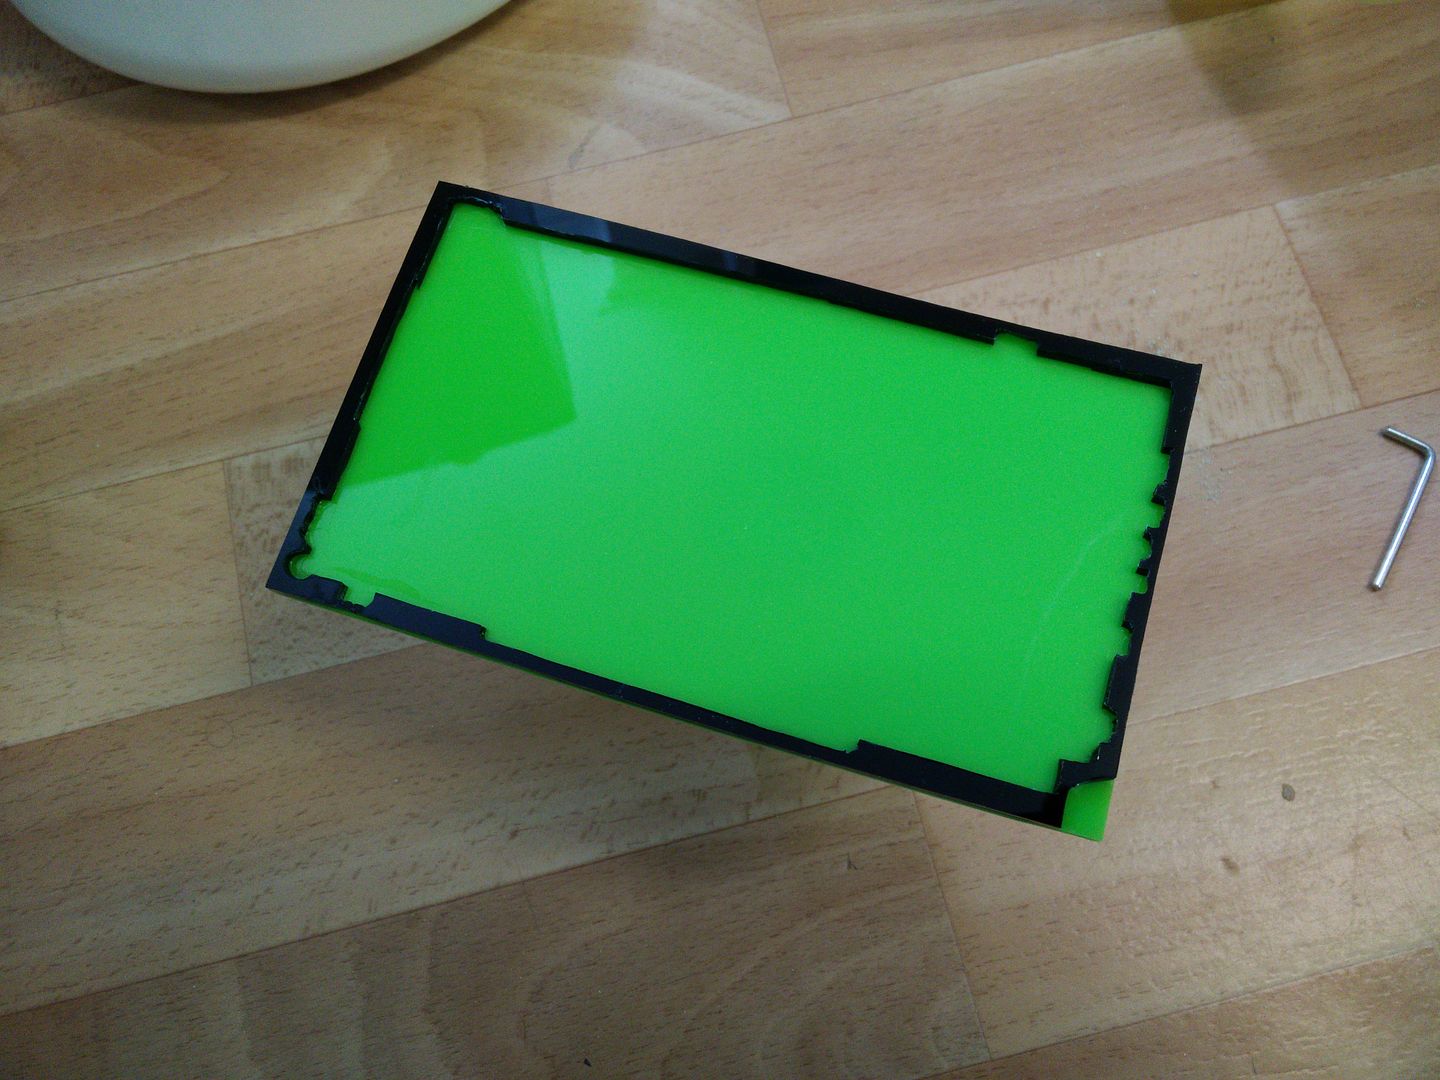
Not bad. I will sand it later, once I am absolutely certain that the process has completely finished. Once it does? you wouldn't get that off with a hammer and chisel.
I bet you are now thinking "hey, he has missed that cut off bit at the end"
I didn't
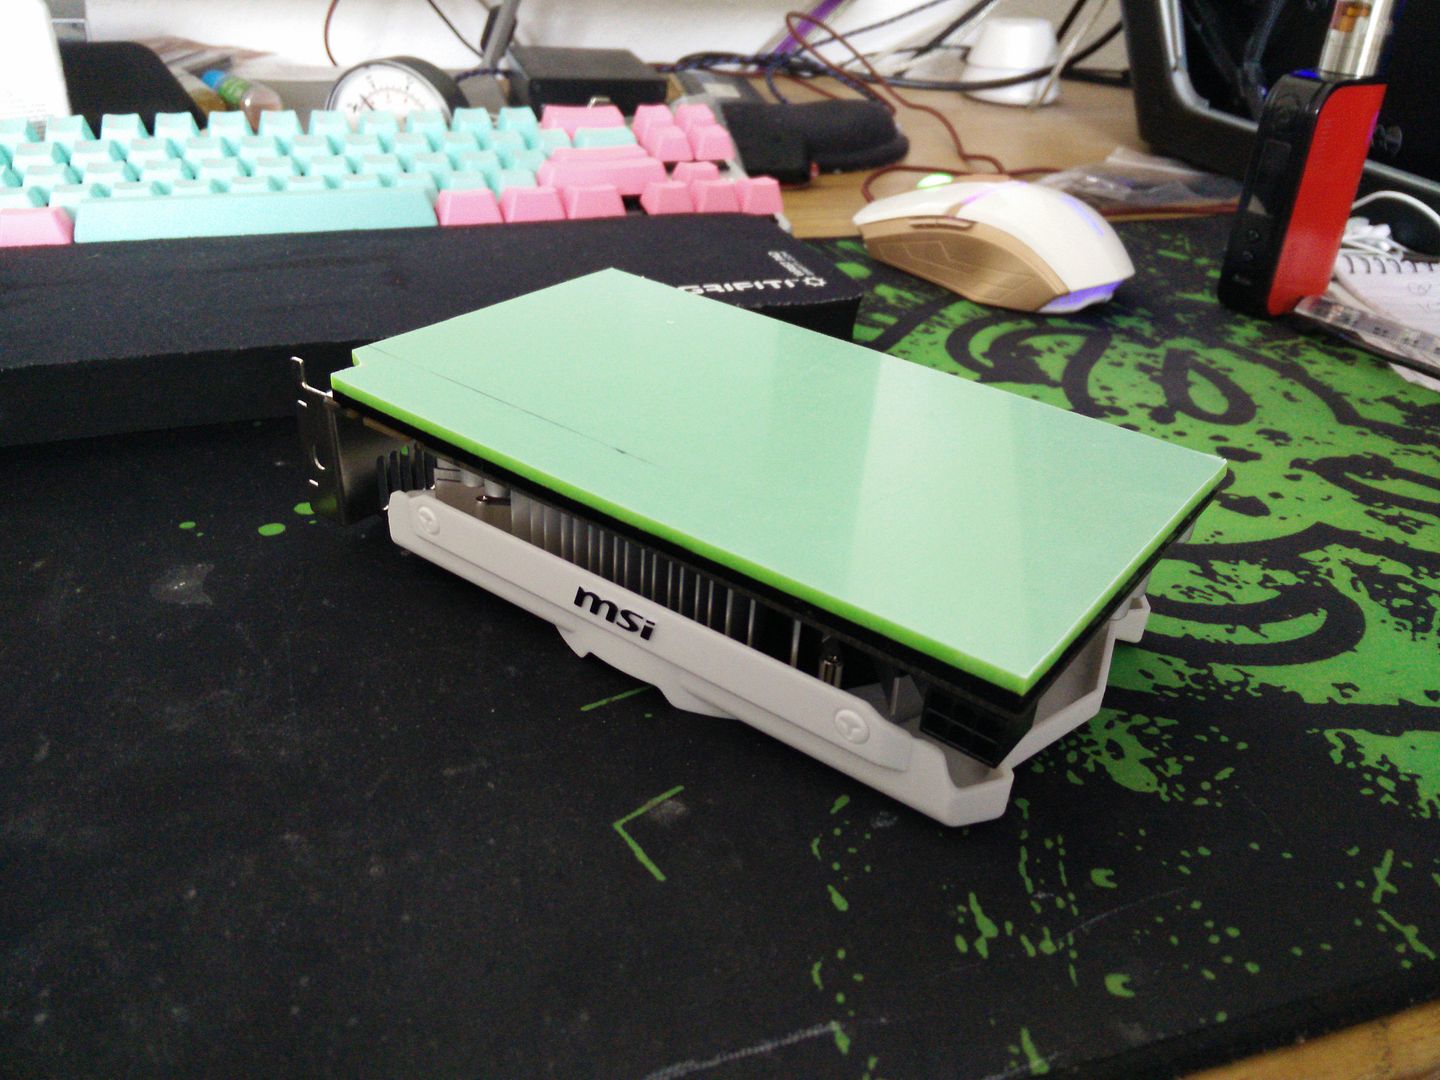
Like a glove.
Once I have done sanding and edge polishing I will design some graphics for it.
I wanted a two phase design that would go from black to green. So the first thing I did was put the back of the GTX 950 under the scanner, as this card is unique to MSI.

I decided that today I was going to take you guys through about 90% of the process so you can see what goes into this. So here is the GPU with the unimportant parts and scrap area cut off.

I then created a 5mm frame.

Then with Photoshop I reduced the opacity so I could see what it would hit.

OK, so now everywhere it fouls a resistor or solder pin ETC I had to cut. Here it is with all of the problematic areas removed.

Some of that ends up around 1mm thick lol. Still, nothing ventured nothing gained and failure is always an option
So I changed the colour to black for the plotter.

Now I needed some vinyl. I am using leftover scrap that I nearly threw out to cut templates.

Cut a 10" strip so I can fit it in the plotter width wise.

Cut down to A4 height (around 300mm)

Note, when you take it off of a roll like that you need to squeegee it to get the creases etc out. I have already done that in the pic. OK into the plotter.

I have marked two for cutting however I will not be using them both. I always cut two of everything in case something gets screwed up or I mess up peeling. The issue is this part may change shape slightly due to heat and stress. Remember, I am really pushing it here with 1mm tolerances with a Dremel. No machines, no CNC, just my hands and a 25mm spinning blade.
Here they are cut but you can't see it too well due to the yellow.

First peel. This is the easy one.

Second peel is considerably more difficult as that very thin frame gets snagged and wants to lift and go out of shape.

Talking of out of shape. Make sure you measure it to make sure it is the correct dimensions. It's easier to pull it around a bit on a slippery piece of backing than it is once you have stuck it down.

OK so we are within .5mm which is good enough.
Note, I do not photograph the actual work stage. The reason is that my best camera is a part of my phone and I don't want to wreck it. There's not much to see any way, just me wearing a gas mask with a Tshirt over my head pulled down to below my eyes and concentrating.
I will leave Morgan Freeman to explain how the next bit works. This is from The Shawshank Redemption..
Geology is the study of pressure and time. Thats all it takes really... pressure... and time...
It fits.

Bogey time.

I deliberately over cut this by .5mm so I could sand back. Obviously if I hit the black too hard I will blow through the thin edges, so I made the green slightly larger so that I can sand it into the black rather than the other way around.
OK so what I have done here is completely tape off the edges and seal them. This is so that the Plastic Weld will not pee out of the edges and wreck the piece.
Talking of which.

About fifteen minutes later after I was sure the reaction had completed and.


Not bad. I will sand it later, once I am absolutely certain that the process has completely finished. Once it does? you wouldn't get that off with a hammer and chisel.
I bet you are now thinking "hey, he has missed that cut off bit at the end"
I didn't

Like a glove.

Once I have done sanding and edge polishing I will design some graphics for it.
Last edited:
")


") "
"


