MASS EFFECT
 ]
]
I'm in love with Mass Effect. There, I said it.

I've been a fan of the series since it's induction, spent hundreds of hours enjoying Bioware's opus. March 6th, it all ends when EA and Bioware release Mass Effect 3.
So I figured, why not do a case mod in honor of the series and the game itself?

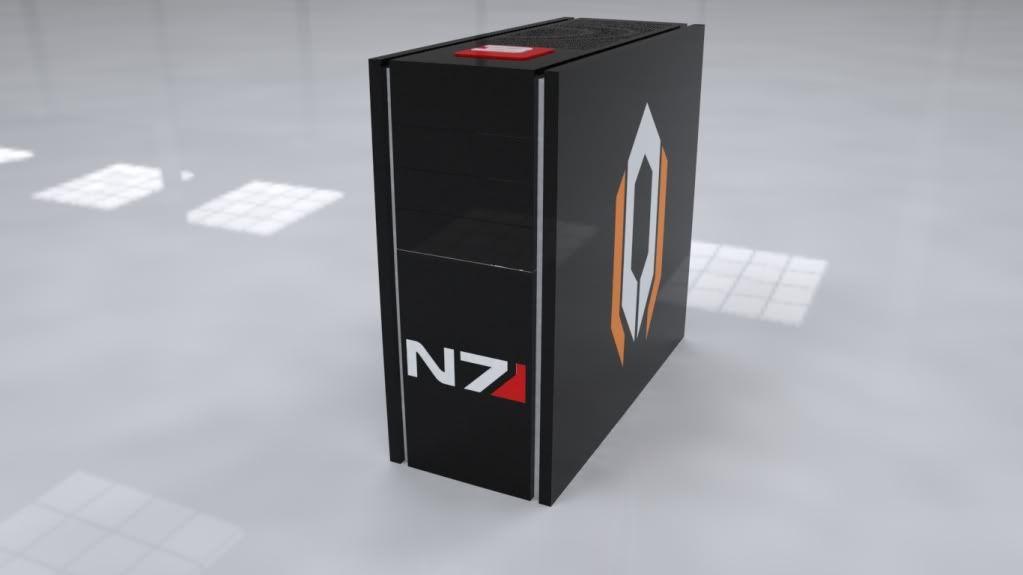

I wanted to incorperate a few different elements and themes from the game, notably Shepard's allegiances throughout the series.
The side window is the Spectres insignia from Mass Effect 1. The right panel will be painted with the Cerberus logo from Mass Effect 2. If I can manage it, the strips of mesh along the front and top bezel will be replaced by white acrylic, which will then be backlit. I'm not entirely sure logistically how I'm going to manage that yet, but I'll figure something out. The front N7 will be backlit as well. Something I did not model but will be present on the front is the inclusion of a large mesh section above and below the N7 insignia. With the removal of the side mesh I did not feel as though there would be enough air flow to the front fans. The top features the signiature red and white "3". Those of you who own or have worked with these cases before know that though the top bezel houses some USB ports and the power button, there's a section about 8-10 cm square with absolutely nothing going on - it's totally blank, nothing under it at all. I intend to make that a lighted power button. Not sure on the logistics yet, but we'll see how it goes.
The downnside is painting. The bezels are coated with a rubberized texture over plastic, which means that in order to paint the case properly (and so the primer coat can actually stick) I will have to sand away that beautiful surface treatment all the way down to the bare plastic. Once done, the case should paint nicely.
Work so far is going slower than I would like, and better than I expected. Alot of work is being done by nothing more than the Dremel I got for Christmas this year. If I could do the side window over again I'd have gotten a proper jigsaw to cut it out with. I'm mostly happy with it, though a couple of the holes need a little more shaping before I quit thinking it looks like rubbish.
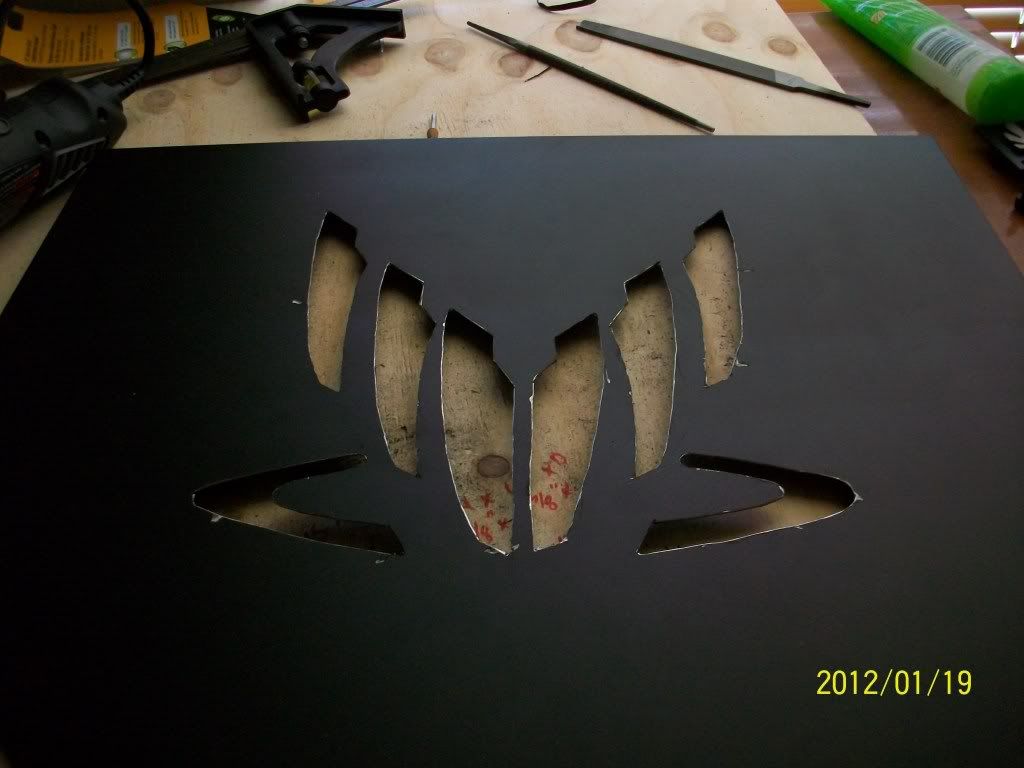
More on the front bezel soon, as soon as I have all the proper holes cut.
I'm in love with Mass Effect. There, I said it.
I've been a fan of the series since it's induction, spent hundreds of hours enjoying Bioware's opus. March 6th, it all ends when EA and Bioware release Mass Effect 3.
So I figured, why not do a case mod in honor of the series and the game itself?
I wanted to incorperate a few different elements and themes from the game, notably Shepard's allegiances throughout the series.
The side window is the Spectres insignia from Mass Effect 1. The right panel will be painted with the Cerberus logo from Mass Effect 2. If I can manage it, the strips of mesh along the front and top bezel will be replaced by white acrylic, which will then be backlit. I'm not entirely sure logistically how I'm going to manage that yet, but I'll figure something out. The front N7 will be backlit as well. Something I did not model but will be present on the front is the inclusion of a large mesh section above and below the N7 insignia. With the removal of the side mesh I did not feel as though there would be enough air flow to the front fans. The top features the signiature red and white "3". Those of you who own or have worked with these cases before know that though the top bezel houses some USB ports and the power button, there's a section about 8-10 cm square with absolutely nothing going on - it's totally blank, nothing under it at all. I intend to make that a lighted power button. Not sure on the logistics yet, but we'll see how it goes.
The downnside is painting. The bezels are coated with a rubberized texture over plastic, which means that in order to paint the case properly (and so the primer coat can actually stick) I will have to sand away that beautiful surface treatment all the way down to the bare plastic. Once done, the case should paint nicely.
Work so far is going slower than I would like, and better than I expected. Alot of work is being done by nothing more than the Dremel I got for Christmas this year. If I could do the side window over again I'd have gotten a proper jigsaw to cut it out with. I'm mostly happy with it, though a couple of the holes need a little more shaping before I quit thinking it looks like rubbish.
More on the front bezel soon, as soon as I have all the proper holes cut.
")


