Hi Guys this guide has been broken up into a couple of posts due to the size, but you'll get the idea-PV
Disclaimer
Elecrified chemicals aren't toys, kids. So be very careful, when undertaking the things shown here. You're on your own if you hurt yourself, SysXtreme will not be held responsible for any injury or damage resulting from this tutorial.

What is anodising and what can be anodised?
The truth is that DIY anodising is that it is surprisingly easy. Sure, there is the matter of highly toxic chemicals such as Sulphuric acid, and the real possibility of experiencing a Hydrogen gas explosion, but the process itself is easily within the realms of most computer modders. When you are aware of them, and take precautions, the dangers just add to the fun of doing something that most people wouldn't attempt.
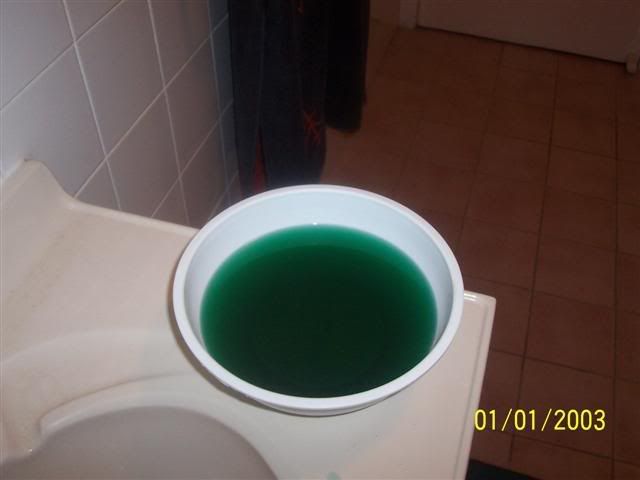
Aluminium is a reactive metal, but it doesn't corrode as quickly as most ferrous products. This is because an oxide layer quickly forms on its surface, protecting the base metal underneath. When Aluminium Oxide forms in air the result is a white powdery layer that can be easily scraped off. Conversely, anodising is an electro-chemical process that forms a structured, chrystalline "surface skin", which is extremely durable. Basically any aluminium can be treated, however this process is most successful with flat-sheet or turned products - so if you have anything Aluminium that you want to change the colour of, this is how to do it!!! Some of my action pics didn't come out as well as I had hoped, so I borrowed a couple from here.
Requirements
* A plastic container-$5 from Big W or Kmart;
*Sulphuric acid (battery acid is fine)-$2/litre from a battery wholesaler;
*Sodium Hydroxide (Drain cleaner)-$6 from your local supermarket:
*Sheet lead-$7/metre available from most hardware stores:
*12V DC power supply (8A battery charger)-$40 from your local auto stockist;
*Anodising dye- free samples should be available from your local anodiser;
*Assorted nuts, bolts, washers and 30A hook-up wire; and
*some thin Aluminium wire-MIG welding wire is perfect.
Safety Rules
The safety rules go something like this:
*Always connect up to the annodising tank before turning on the power supply, to prevent sparking;
*Safety googles, rubber gloves and long sleeves are a must (we are dealing with acid here people, and splashing is a risk);
*No smoking, naked flames or sparks (Hydrogen is a highly explosive gas given off during the process); and
*Plenty of ventilation.
# It is advisable when working with any form of chemical to obtain MSDS (Material Safety Data Sheets), these should be freely available from the manufacturer, via the net or the reseller. These will help you understand and assess any heath risks that the product/s may have, and provide first aid options if the situation should arise.
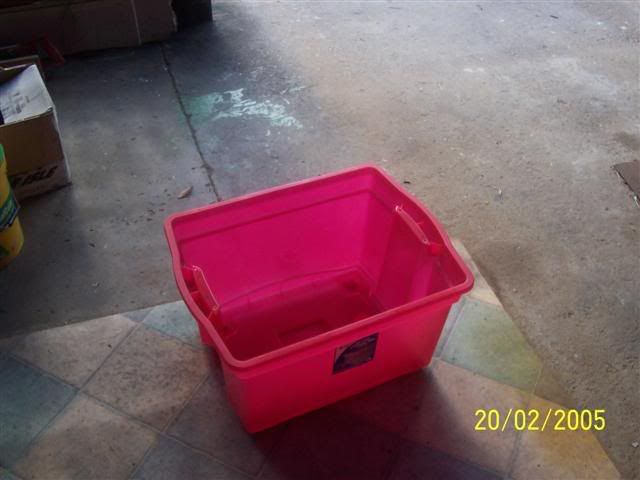
Step 1 Preparing the container
Step one is to prepare the container-turning it into an effective cathode. It is important to note that any metal immersed in the acisd should only consist of lead or aluminium. I would suggest using cathodes, to lessen the volume of aluminium sulphate being released into the acid solution. Cut the sheet lead into shape, drill 3/16" holes through the container and lead and bolt them together with the nuts on the outside so they can be used as the power connectors.
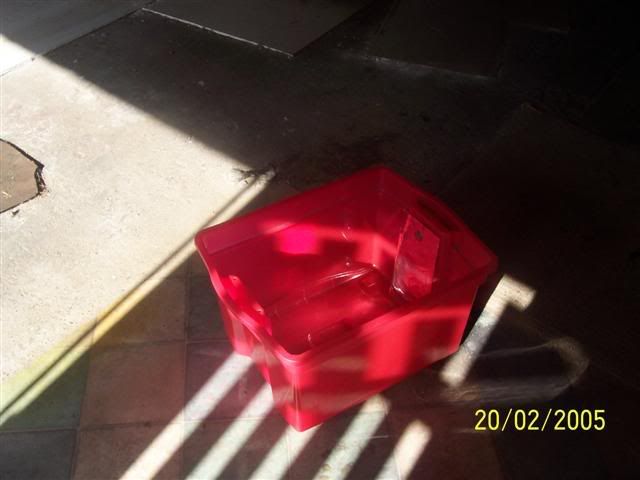
Step 2 Keep the acid solution under 2/3rds capacity
The bolt holes should be kept as high as possible to avoid acid seeping out of them, and the volume of the solution should should be no more than 2/3rds of the containers capacity. The reason for using two cathodes is to ensure that th anodising process occurs more evenly over the surface of the work-piece... a lead lined tank would be perfect, as long as there was no "metal-to-metal" contact resulting in short circuits.
Step 3 Dilute acid slowly to avoid boiling
The most easily procured form of Sulphuric acid is from a battery wholesaler, and will be 35% strength (WW) with a specific gravity (SG) of 1.28. This is overkill, as 10% WW/ 1.2SG is enough to get a good oxide layer, however I have spoken to people using the stronger concentration with good results. If using acid worries you, you can dilute to a ratio of 2:1 water/acid, but add the acid to the water slowly so the resultant thermal reaction doesn't cause the solution to "boil" over.

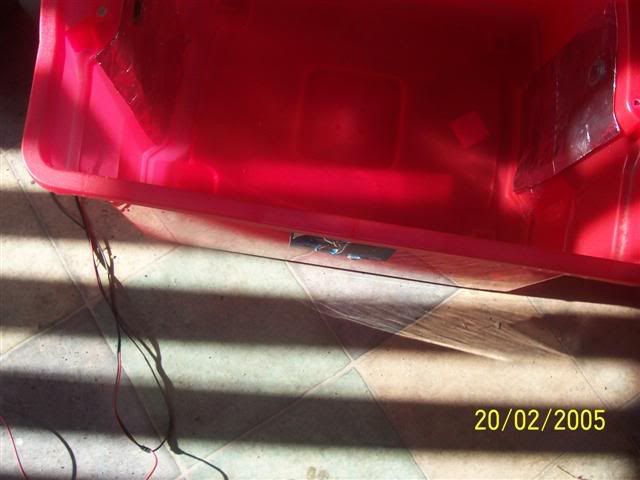
Step 4 Positive and negative connections
Hook up the lead plates with a length of 30A wire, using spade connectors under the external nuts. This is the cathode pole, and will be connected to the battery charger's (or suitable 12V DC power suppliy's) negative lead. The aluminium bar across the tank is the anode pole, and is attached to the positive connection. As mentioned previously, everything in the tank should be either aluminium or lead, and external connections should be copper to avoid sparks from arcing.
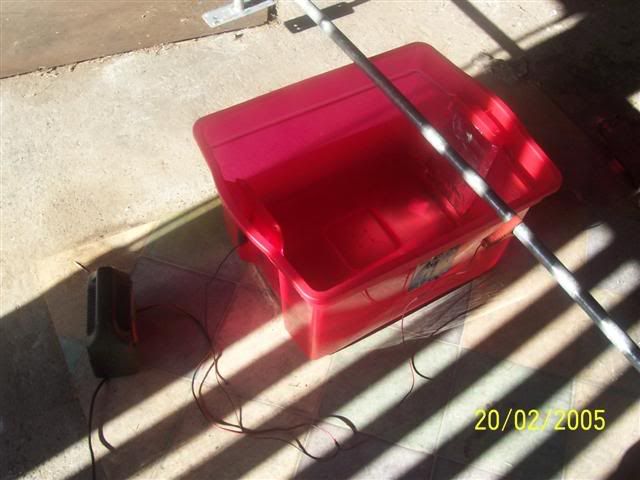
Step 5 A potentially explosive situation
When the tank is connected and working correctly, there will be a "sheet" of hydrogen bubbles generated across the lead sheet by the electrolysis action. With good ventilation this is not a major issue, but if it occurs in a confined space then the build-up of highly flammable hydrogen gas over several hours is an explosive situation. Especially if the explosion then sprays sulphuric acid all over the place...so there are a few rules worth following.
Disclaimer
Elecrified chemicals aren't toys, kids. So be very careful, when undertaking the things shown here. You're on your own if you hurt yourself, SysXtreme will not be held responsible for any injury or damage resulting from this tutorial.
What is anodising and what can be anodised?
The truth is that DIY anodising is that it is surprisingly easy. Sure, there is the matter of highly toxic chemicals such as Sulphuric acid, and the real possibility of experiencing a Hydrogen gas explosion, but the process itself is easily within the realms of most computer modders. When you are aware of them, and take precautions, the dangers just add to the fun of doing something that most people wouldn't attempt.
Aluminium is a reactive metal, but it doesn't corrode as quickly as most ferrous products. This is because an oxide layer quickly forms on its surface, protecting the base metal underneath. When Aluminium Oxide forms in air the result is a white powdery layer that can be easily scraped off. Conversely, anodising is an electro-chemical process that forms a structured, chrystalline "surface skin", which is extremely durable. Basically any aluminium can be treated, however this process is most successful with flat-sheet or turned products - so if you have anything Aluminium that you want to change the colour of, this is how to do it!!! Some of my action pics didn't come out as well as I had hoped, so I borrowed a couple from here.
Requirements
* A plastic container-$5 from Big W or Kmart;
*Sulphuric acid (battery acid is fine)-$2/litre from a battery wholesaler;
*Sodium Hydroxide (Drain cleaner)-$6 from your local supermarket:
*Sheet lead-$7/metre available from most hardware stores:
*12V DC power supply (8A battery charger)-$40 from your local auto stockist;
*Anodising dye- free samples should be available from your local anodiser;
*Assorted nuts, bolts, washers and 30A hook-up wire; and
*some thin Aluminium wire-MIG welding wire is perfect.
Safety Rules
The safety rules go something like this:
*Always connect up to the annodising tank before turning on the power supply, to prevent sparking;
*Safety googles, rubber gloves and long sleeves are a must (we are dealing with acid here people, and splashing is a risk);
*No smoking, naked flames or sparks (Hydrogen is a highly explosive gas given off during the process); and
*Plenty of ventilation.
# It is advisable when working with any form of chemical to obtain MSDS (Material Safety Data Sheets), these should be freely available from the manufacturer, via the net or the reseller. These will help you understand and assess any heath risks that the product/s may have, and provide first aid options if the situation should arise.
Step 1 Preparing the container
Step one is to prepare the container-turning it into an effective cathode. It is important to note that any metal immersed in the acisd should only consist of lead or aluminium. I would suggest using cathodes, to lessen the volume of aluminium sulphate being released into the acid solution. Cut the sheet lead into shape, drill 3/16" holes through the container and lead and bolt them together with the nuts on the outside so they can be used as the power connectors.
Step 2 Keep the acid solution under 2/3rds capacity
The bolt holes should be kept as high as possible to avoid acid seeping out of them, and the volume of the solution should should be no more than 2/3rds of the containers capacity. The reason for using two cathodes is to ensure that th anodising process occurs more evenly over the surface of the work-piece... a lead lined tank would be perfect, as long as there was no "metal-to-metal" contact resulting in short circuits.
Step 3 Dilute acid slowly to avoid boiling
The most easily procured form of Sulphuric acid is from a battery wholesaler, and will be 35% strength (WW) with a specific gravity (SG) of 1.28. This is overkill, as 10% WW/ 1.2SG is enough to get a good oxide layer, however I have spoken to people using the stronger concentration with good results. If using acid worries you, you can dilute to a ratio of 2:1 water/acid, but add the acid to the water slowly so the resultant thermal reaction doesn't cause the solution to "boil" over.
Step 4 Positive and negative connections
Hook up the lead plates with a length of 30A wire, using spade connectors under the external nuts. This is the cathode pole, and will be connected to the battery charger's (or suitable 12V DC power suppliy's) negative lead. The aluminium bar across the tank is the anode pole, and is attached to the positive connection. As mentioned previously, everything in the tank should be either aluminium or lead, and external connections should be copper to avoid sparks from arcing.
Step 5 A potentially explosive situation
When the tank is connected and working correctly, there will be a "sheet" of hydrogen bubbles generated across the lead sheet by the electrolysis action. With good ventilation this is not a major issue, but if it occurs in a confined space then the build-up of highly flammable hydrogen gas over several hours is an explosive situation. Especially if the explosion then sprays sulphuric acid all over the place...so there are a few rules worth following.


") You're talkin' to the master of all things paintball, w00t!
You're talkin' to the master of all things paintball, w00t!")

 Thanks for the feedback raging-savage, and I'm glad you enjoyed the guide