You are using an out of date browser. It may not display this or other websites correctly.
You should upgrade or use an alternative browser.
You should upgrade or use an alternative browser.
CaseLabs STH10
- Thread starter Blade Runner
- Start date
Blade Runner
New member
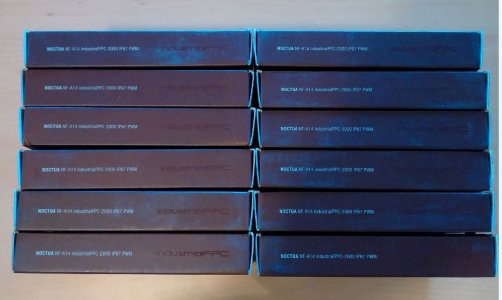
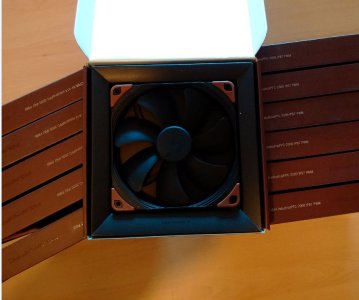
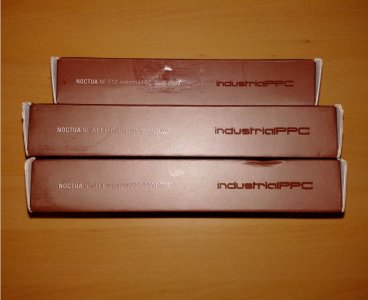
The fans turned up today, really pleased with the quality - thanks JR.
I will wire them together over the next few evenings.
12 x NF-A14 iPPC 2000 IP67 PWM for the Radiators/ exhaust.
2 x NF-A14 iPPC 3000 IP52 PWM & 1 x NF-F12 iPPC 3000 IP52 PWM for the case.
I will wire them together over the next few evenings.
12 x NF-A14 iPPC 2000 IP67 PWM for the Radiators/ exhaust.
2 x NF-A14 iPPC 3000 IP52 PWM & 1 x NF-F12 iPPC 3000 IP52 PWM for the case.
Attachments
Blade Runner
New member
Started shortening and putting white LC sleeve on some of the fans today.
I had already daisy chained the 4 exhaust fans together, (making sure to only have the RPM signal wire on one fan out of the 4) but I don't like either the look or the fact that if one fan went wonky, unlikely I know but its possible, I would have to start take all of them off and try and splice in a new one.
I am therefore going to make some daisy chain cables with male fan connectors that these short fan cables will plug into. The daisy chain cable will be missing the RPM wire/ pin on 3 of the 4 connectors. I hope that this will be more practical and look better too.
Attachments

The_Governour
New member
Nice, With those rads and that set up I am curious what kind of temps you could achieve, especially with those exact fans. I was thinking of getting a MONSTA 560 rad in push/pull with the Noctua fans - only thing stopping me is I cant find any kind of review of the Monsta 560...
Will come back to this and see what you achieve with this overkill setup, I am all for overkill!
Will come back to this and see what you achieve with this overkill setup, I am all for overkill!
Blade Runner
New member
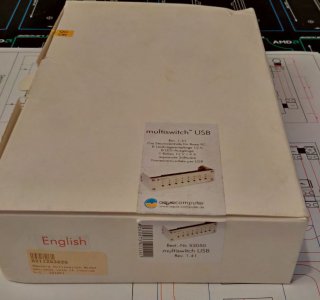
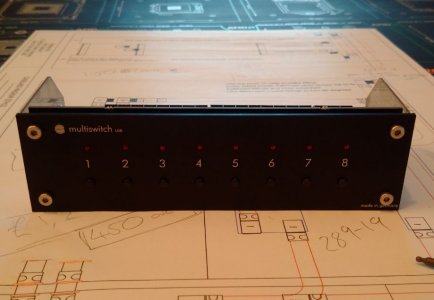
Been away for a few days and the postman has been busy again. The Multiswitch is a discontinued item now but I really wanted it for the option of switching things like LED's on with a physical button rather than just software.
Attachments

Blade Runner
New member
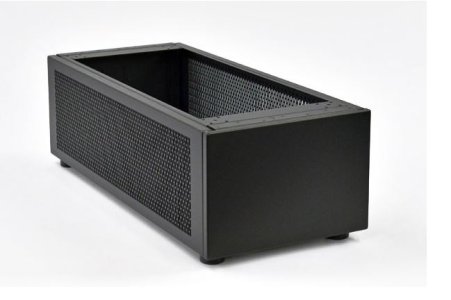
I have been thinking about the Pedestal for the STH10 while I was away and asked CaseLabs how much extra the postage would be for it to be shipped with my main order.
They came back straight away and said as it would not change the size of the package and the weight would be within the original charge band, so no extra shipping cost. This was too good to miss so I ordered it.
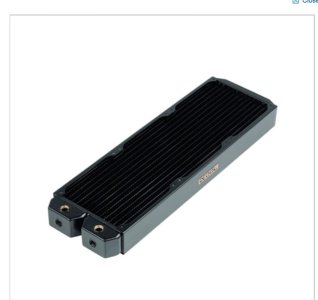
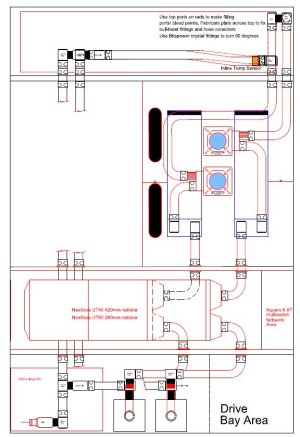
I have also now ordered a couple of things to fill it with; a NexXxos UT60 280 and a NexXxos UT45 420
Never mind "We are going to need a bigger boat" I am going to need a bigger desk and higher ceiling :huh:.........................
Also pictured is the revised general layout with the pedestal and extra radiators.
They came back straight away and said as it would not change the size of the package and the weight would be within the original charge band, so no extra shipping cost. This was too good to miss so I ordered it.
I have also now ordered a couple of things to fill it with; a NexXxos UT60 280 and a NexXxos UT45 420
Never mind "We are going to need a bigger boat" I am going to need a bigger desk and higher ceiling :huh:.........................
Also pictured is the revised general layout with the pedestal and extra radiators.
Attachments

Last edited:
Blade Runner
New member
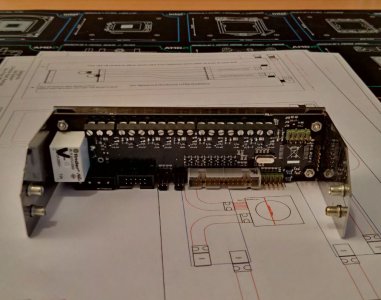
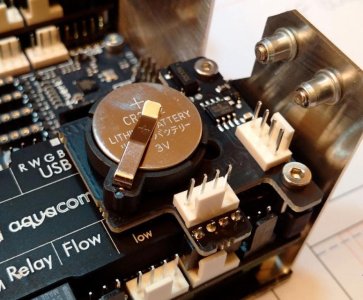
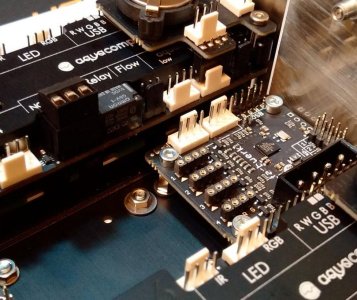
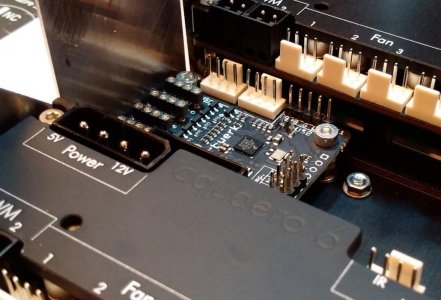
I forgot to order female 4 pin fan connectors with the 4 pin male connectors I got from E22. So while I was waiting for my order to turn up, I thought I would get some of the Aquabus custom cable sorted on the back of the Aquero, Farbwerk and Multiswitch.
I had some Phobya 3 and 4 pin male fan connectors and terminals lying around so I used them up. The E22 type are much heavier duty and would have been a very tight fit on the Aquabus terminals anyway.
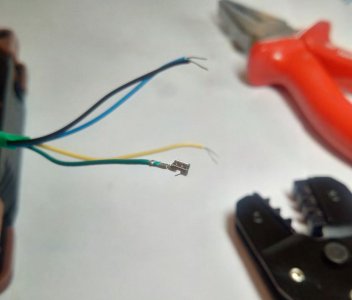
This is the first time I have done pairs of fan cable wires into the fan terminals and I really struggled with the double Aquabus fast connection on the back of the Aquero.
The crimp on the 2 bare wires, twisted together, was not a problem, it was trying to get the crimp on 2 insulated cables.
I have to make up in the region of 20 of these type of connections for the 5 daisy chained wiring looms for the main rad fans so I could do with some advice on how to do these double connections if anyone can help or point me in the direction of a good guide?
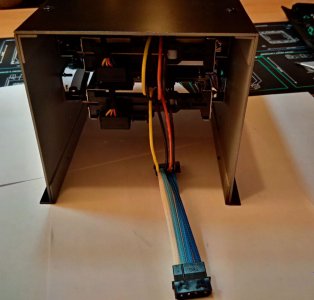
Here is what I have done so far; the wire disappearing out of shot will have a female 4 pin fan connector on its end.
The two Aquastream pumps Aquabus terminal's will then be connected to that via a splitter in the lower case. The main supply cable will then run between the splitter and this in the rear of the case.
ETA. I had made the double connections with the connectors/ terminals I had lying around.
I just tried to make another using the E22 fan terminals and it was a lot better, the crimp grabbed both wires a lot better due, I think, to the larger size of the "wings" that you crimp; E22 sleeve stuff is top notch")
I had some Phobya 3 and 4 pin male fan connectors and terminals lying around so I used them up. The E22 type are much heavier duty and would have been a very tight fit on the Aquabus terminals anyway.
This is the first time I have done pairs of fan cable wires into the fan terminals and I really struggled with the double Aquabus fast connection on the back of the Aquero.
The crimp on the 2 bare wires, twisted together, was not a problem, it was trying to get the crimp on 2 insulated cables.
I have to make up in the region of 20 of these type of connections for the 5 daisy chained wiring looms for the main rad fans so I could do with some advice on how to do these double connections if anyone can help or point me in the direction of a good guide?
Here is what I have done so far; the wire disappearing out of shot will have a female 4 pin fan connector on its end.
The two Aquastream pumps Aquabus terminal's will then be connected to that via a splitter in the lower case. The main supply cable will then run between the splitter and this in the rear of the case.
ETA. I had made the double connections with the connectors/ terminals I had lying around.
I just tried to make another using the E22 fan terminals and it was a lot better, the crimp grabbed both wires a lot better due, I think, to the larger size of the "wings" that you crimp; E22 sleeve stuff is top notch
Attachments
Last edited:
Blade Runner
New member
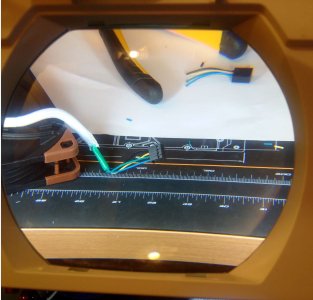
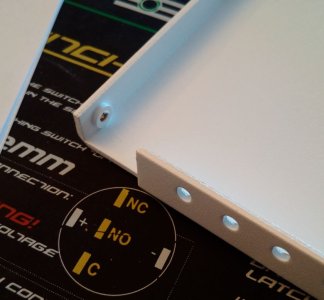
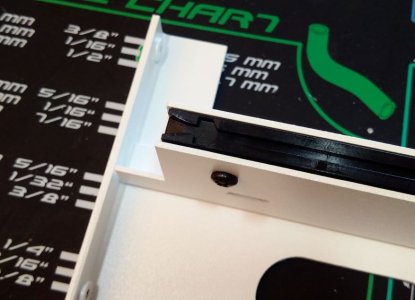
Fan guard made for trial fitting when the case gets here.
If this fits OK I will need to get another 4 made up the same.
I forgot to draw the 4 outside corners with a radius this one will get a bit of TLC with a file, the others will be cut that shape.
The white acrylic should, I hope, stop the black fans showing through the white side & top vents too much.
If this fits OK I will need to get another 4 made up the same.
I forgot to draw the 4 outside corners with a radius
this one will get a bit of TLC with a file, the others will be cut that shape.The white acrylic should, I hope, stop the black fans showing through the white side & top vents too much.
Attachments

Blade Runner
New member
Change of plan with the fan wiring :mellow:
When I started making the first daisy chain for one set of 4 fans I could see no way to neatly run the sleeving behind the radiators.
The wire/ sleeve would have also been in the air flow but what finally made up my mind was the amount of 4 pin fan connectors that would have been on show.
Not to mention the double wire crimps; I was not really comfortable with their integrity due to the problems I had making them and getting a crimp on two sleeves, one on top of each other.
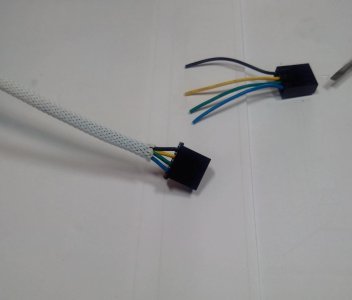
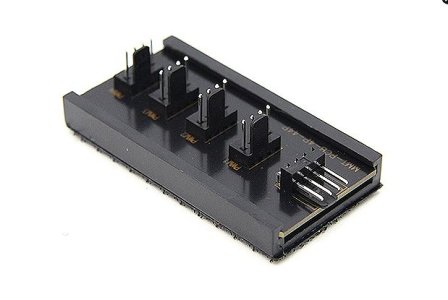
So...... I have stripped off all of the short sleeves, the fan connectors and extended all the wires on each fan to an overall length of approx. 800mm (Long on purpose to give me maximum possibilities when the case gets here and I start fitting them properly)
Lots of solder and heat shrink later I have got 15 out of the total 20 sleeved - I ran out of sleeve/ fan wire but more is on the way.
I am going to attach each set of 4 fans to one of the pictured ModMyToys 4 way PWM splitters and then run just the one cable from each fan set, through the case to the Aqueros, in the lower fan chamber.
PS The 25th March is 30 working days since I placed the order for the case so fingers crossed one day next week I might log in to see "shipped" instead of the usual "Awaiting Fulfilment"
When I started making the first daisy chain for one set of 4 fans I could see no way to neatly run the sleeving behind the radiators.
The wire/ sleeve would have also been in the air flow but what finally made up my mind was the amount of 4 pin fan connectors that would have been on show.
Not to mention the double wire crimps; I was not really comfortable with their integrity due to the problems I had making them and getting a crimp on two sleeves, one on top of each other.
So...... I have stripped off all of the short sleeves, the fan connectors and extended all the wires on each fan to an overall length of approx. 800mm (Long on purpose to give me maximum possibilities when the case gets here and I start fitting them properly)
Lots of solder and heat shrink later I have got 15 out of the total 20 sleeved - I ran out of sleeve/ fan wire but more is on the way.
I am going to attach each set of 4 fans to one of the pictured ModMyToys 4 way PWM splitters and then run just the one cable from each fan set, through the case to the Aqueros, in the lower fan chamber.
PS The 25th March is 30 working days since I placed the order for the case so fingers crossed one day next week I might log in to see "shipped" instead of the usual "Awaiting Fulfilment"
Attachments

Last edited:
Blade Runner
New member
Update: The case is delayed due to a large amount of orders at Caselabs
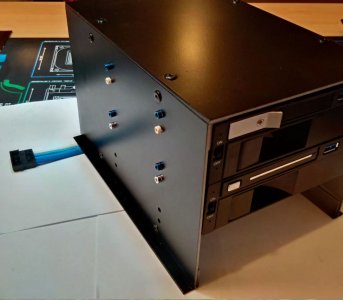
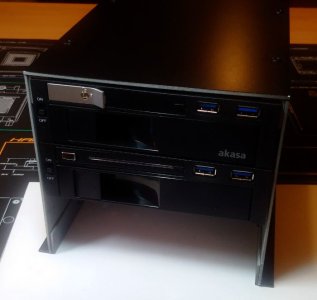
I am making good use of the time though, I have fabricated a drive bay cage for the bottom pedestal that will hold 3 sharkoon/ Akasa multi HDD and SSD mounts. I have fitted two so I could make up the SATA Power cables (One is out of my current rig but was not being used, the third one is also in my current rig but being used so it will be fitted when I swap)
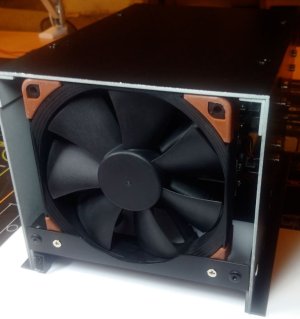
The rear of the cage will have a 120 fan attached which will be run from the Aquero with a temp sensor attached to the middle mount.
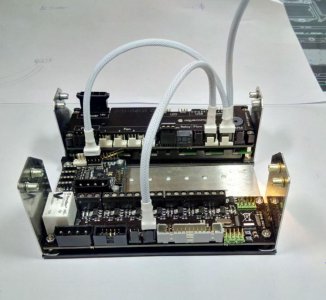
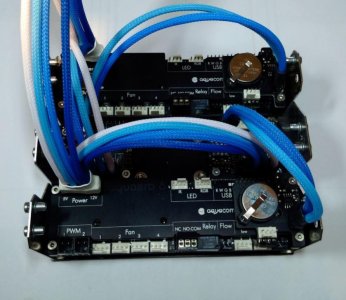
I have also bought a second Aquero 6; I wanted both loops to be lit with heat sensitive RGB LEDs, (cold loop = blue light & hot loop = red light etc) the Aquero will only run one RGB Led so I needed another to get the lighting effect I wanted with each loop able to show its individual temp.
2 JEAK AMPs have been ordered to allow the individual RGB LEDs output of each Aquero to run several RGB LEDs.
The RGB LEDs will be put into the reservoirs, filters, Raystorm CPU/ GPU blocks and in the light ports that will be fitted to parts of the loop.
I also needed the second Aquero because it turns out I am going to need either 6 or 7 separate fan channels, again to get the rig running how I want.
The 2 Farbwerk's attached to the Aquero's will take care of the RGB LED strips for general lighting in the rig and below, for that floating look, plus some effects behind and below my desk.
Anyway here is the cage that will be in the pedestal, it will be accessed by clipping off the side panel of the pedestal. (The mounting screws are what I had to hand, they will match when fitted!)
I am making good use of the time though, I have fabricated a drive bay cage for the bottom pedestal that will hold 3 sharkoon/ Akasa multi HDD and SSD mounts. I have fitted two so I could make up the SATA Power cables (One is out of my current rig but was not being used, the third one is also in my current rig but being used so it will be fitted when I swap)
The rear of the cage will have a 120 fan attached which will be run from the Aquero with a temp sensor attached to the middle mount.
I have also bought a second Aquero 6; I wanted both loops to be lit with heat sensitive RGB LEDs, (cold loop = blue light & hot loop = red light etc) the Aquero will only run one RGB Led so I needed another to get the lighting effect I wanted with each loop able to show its individual temp.
2 JEAK AMPs have been ordered to allow the individual RGB LEDs output of each Aquero to run several RGB LEDs.
The RGB LEDs will be put into the reservoirs, filters, Raystorm CPU/ GPU blocks and in the light ports that will be fitted to parts of the loop.
I also needed the second Aquero because it turns out I am going to need either 6 or 7 separate fan channels, again to get the rig running how I want.
The 2 Farbwerk's attached to the Aquero's will take care of the RGB LED strips for general lighting in the rig and below, for that floating look, plus some effects behind and below my desk.
Anyway here is the cage that will be in the pedestal, it will be accessed by clipping off the side panel of the pedestal. (The mounting screws are what I had to hand, they will match when fitted!)
Attachments
Last edited:
Blade Runner
New member
Update Edit at 11:48PM....
I have just had an email from CaseLabs...............................................
"Order Status is now SHIPPED"
I have just had an email from CaseLabs...............................................
"Order Status is now SHIPPED"
Blade Runner
New member

Blade Runner
New member
Delivery of the case update:It was all going so well....... left Caselabs last Wednesday and overland to Memphis, where it waited over the weekend and was then flown to Stansted on Monday evening.
The tracking info then said it was "in transport" which sounded good but then it was "Available for Clearance" which after I did a search on Google means Customs :mellow:
A quick call to the carrier let me pay the VAT and duty and she is on her way again. The holiday weekend is messing it up a little but they think it should be here next Tue/ Wed... Fingers crossed.
Blade Runner
New member
It is a bit frustrating but it will be worth the wait, I'm sure
I am keeping busy though, I have made the bracket and fitted the fan to the rear of the drive cage I made to house the Sharkoon and Akasa quick port multis for 2.5 and 3.5 inch drives.
I am keeping busy though, I have made the bracket and fitted the fan to the rear of the drive cage I made to house the Sharkoon and Akasa quick port multis for 2.5 and 3.5 inch drives.
Attachments
Blade Runner
New member
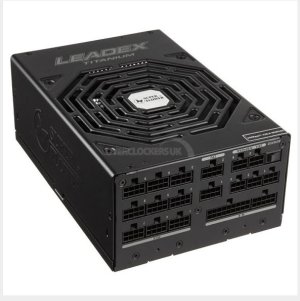
In my very first post of this thread I said I was trying to make up my mind which PSU to buy.
The Superflower 8Pack 2000W was tempting, just for the house wiring melting ability") and the AX1500i for the quality but what I have ended up with is the Superflower 1600W Titanium.
and the AX1500i for the quality but what I have ended up with is the Superflower 1600W Titanium.
It had been retailing for £299.99 but this week it has dropped to a much more reasonable £229.99 which I think is a bargain for a Titanium rated 1600W PSU.(The other 2 are £349.99)
When the case gets here next week it will allow me to start making up the power cables which I am really looking forward to as they are much nicer to work on than fan cables which I find very fiddly with my sausage fingers!
Here is the PSU in question, not sure if I should paint it white to match the case or leave it as is to contrast the case but match the rads, flexbays and the fans, what do you think?
The Superflower 8Pack 2000W was tempting, just for the house wiring melting ability
and the AX1500i for the quality but what I have ended up with is the Superflower 1600W Titanium.It had been retailing for £299.99 but this week it has dropped to a much more reasonable £229.99 which I think is a bargain for a Titanium rated 1600W PSU.(The other 2 are £349.99)
When the case gets here next week it will allow me to start making up the power cables which I am really looking forward to as they are much nicer to work on than fan cables which I find very fiddly with my sausage fingers!
Here is the PSU in question, not sure if I should paint it white to match the case or leave it as is to contrast the case but match the rads, flexbays and the fans, what do you think?
Attachments
Blade Runner
New member

Blade Runner
New member
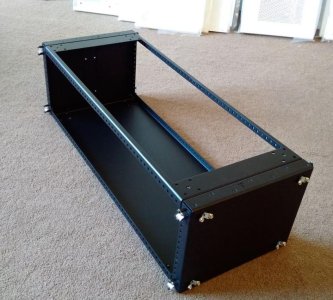
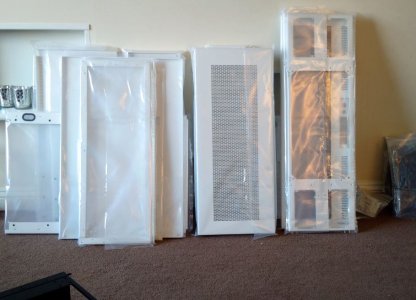
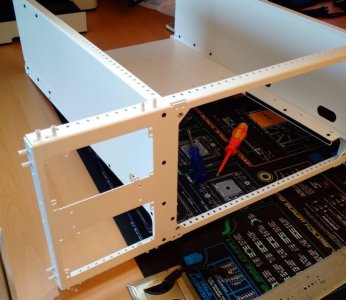
All present and correct
The wait was worth it, the quality is just staggering, the packaging too, not a single scuff or bend.
I have a very critical eye and I cant find anything that is not 100%.
Here are a few pics of the pedestal and the start of the chassis assembly.
The wait was worth it, the quality is just staggering, the packaging too, not a single scuff or bend.
I have a very critical eye and I cant find anything that is not 100%.
Here are a few pics of the pedestal and the start of the chassis assembly.
Attachments
-
 PedastalCorner.JPG79.9 KB · Views: 127
 -
 PedastalBare.jpg93.8 KB · Views: 134
 -
 Unpacked&Stacked.JPG87.7 KB · Views: 126
 -
 LowerMidPlate.JPG63.8 KB · Views: 134
 -
 UpperMidPlate.JPG62.9 KB · Views: 127
 -
 MoBoRunner.JPG64.9 KB · Views: 121
 -
 RearChassisAttached.jpg85.3 KB · Views: 118
 -
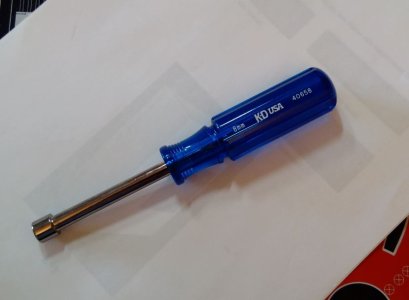 FreeNutDriver.JPG38.1 KB · Views: 125
voodoografix
New member
Case Labs what more can you say . looking forward to seeing more of this build . So far its looking pretty epic .
Case labs cases ............I first saw TTL reviewing them I think it was the magnum , but back then I thought man that this huge Does it have it's own orbit ?
Case labs cases ............I first saw TTL reviewing them I think it was the magnum , but back then I thought man that this huge Does it have it's own orbit ?
Similar threads
- Replies
- 2
- Views
- 199