You are using an out of date browser. It may not display this or other websites correctly.
You should upgrade or use an alternative browser.
You should upgrade or use an alternative browser.
CaseLabs STH10
- Thread starter Blade Runner
- Start date

Blade Runner
New member
Put an ITX board in there just for fun.
LOL, funny you should say that.......
I was thinking about saving the planet
by putting a NUC in the pedestal for surfing in the evening.I need to see if it is possible to and if so, get my head around, how to have one monitor and the keyboard/ mouse on some type of switch - Anyone?
Not top of my list TBH at the moment but something to think about.
Blade Runner
New member
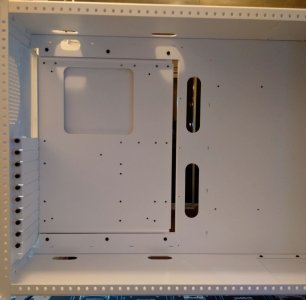
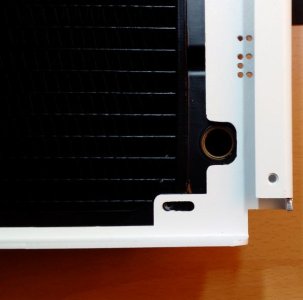
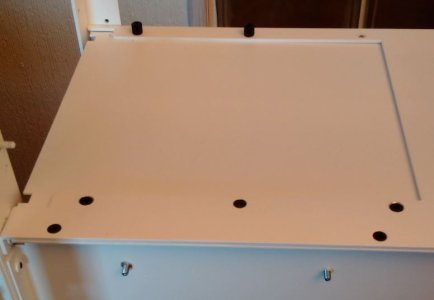
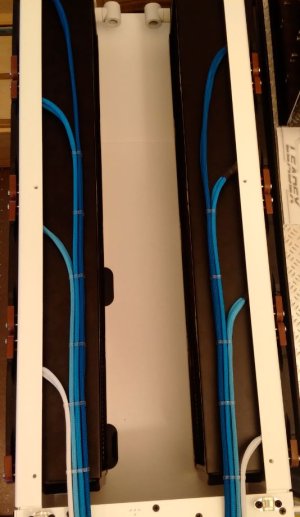
Started to trial fit the upper 560s in the top chamber. Caselabs say on their site that the 140.4 drop in side rad mounts don't fit the upper chamber without modification and they don't.
Not a big job though, the first pic shows one of the 4 cutbacks I had to make on both the top chamber rad mounts. After that it was a case of trying the rads insitu.
I was not sure they would fit, well the pipework really but I have managed to find a way to do it without having to offset the rear radiator.
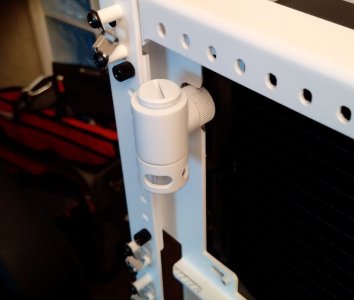
I had to make a cut-out for the Monsoon rotary and I will also have to make a similar one for the blanking plug below the rotary so that the rad sits flush with the mount.
I checked the clearance by clipping on the outer vent panel and with a couple of washers to space the mount back into the case, it fits.
The window side top rad is much easier, it is fed from the lower inside port and flows out of the top inside port so no modifications required.
Not a big job though, the first pic shows one of the 4 cutbacks I had to make on both the top chamber rad mounts. After that it was a case of trying the rads insitu.
I was not sure they would fit, well the pipework really but I have managed to find a way to do it without having to offset the rear radiator.
I had to make a cut-out for the Monsoon rotary and I will also have to make a similar one for the blanking plug below the rotary so that the rad sits flush with the mount.
I checked the clearance by clipping on the outer vent panel and with a couple of washers to space the mount back into the case, it fits.
The window side top rad is much easier, it is fed from the lower inside port and flows out of the top inside port so no modifications required.
Attachments

Last edited:
Blade Runner
New member
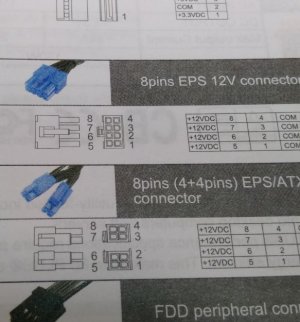
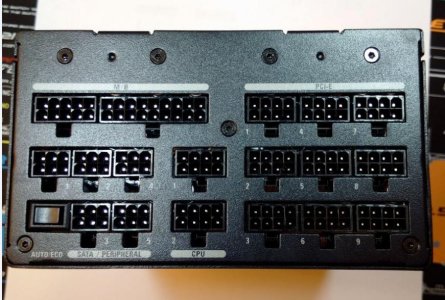
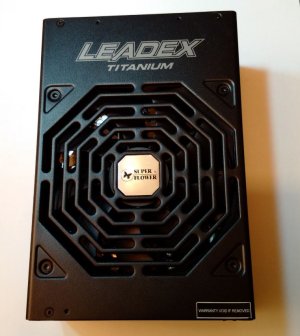
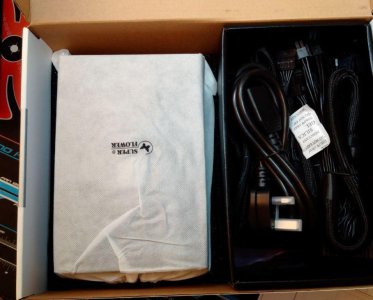
The PSU turned up today and I am very pleased with the quality, especially considering the price. The manual even has a full page with detailed pin outs for all the connectors/ outlets which I have not seen before.
Attachments

Last edited:
Blade Runner
New member
Stunning dude, I love the over engineered style of Caselabs cases, those guys rock!
They do
")
If Carlsberg made computer cases they would not be as good as CaseLabs
Last edited:
Blade Runner
New member
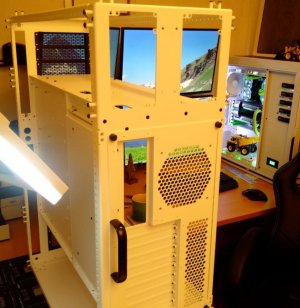
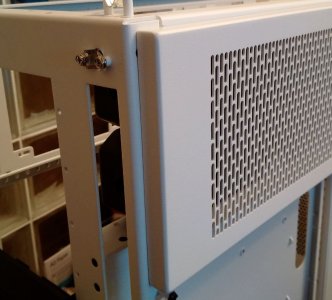
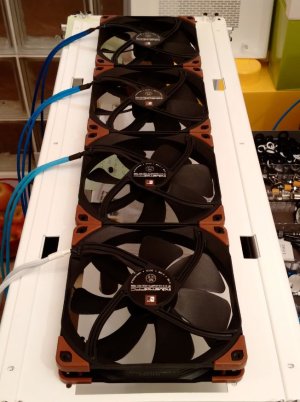
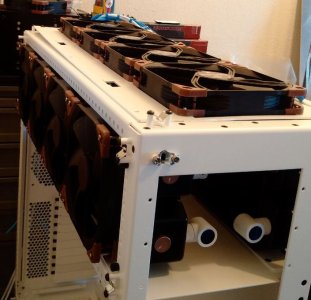
Got the rad and fans fitted to the rear top chamber tonight. It was a little fiddly and a tight fit but the main thing is it does fit.
I had to countersink the 6 screws holding the blank plate as the rads would have fouled them, it is that tight.
It would have been a lot easier to have bought 120.4 mounts in place of the 140.4 mounts but the cases I have seen with 4 120 rads in the top are not symmetrical; the rads are all up one end and I could not look at that long term
Attachments

Last edited:
The_Governour
New member
Looking good, cant wait to see the temps with those 140 rads. Will you do 2 different loops? for the cpu and gpu?
Blade Runner
New member
Looking good, cant wait to see the temps with those 140 rads. Will you do 2 different loops? for the cpu and gpu?
Yes, the CPU will have one of the top 60mm x 560s and a 60mm x 280 in the lower chamber.
The GPUs will have the other 60 x 560 in the top and a 45 x 420 in the lower chamber.
If the CPU is running cool and the GPU loop a little hot when I get it all set up I have laid it out so that it will be pretty straight forward to swap the 280 from the CPU loop onto the GPUs loop.
Last edited:
Blade Runner
New member
Got the top chamber exhaust fans wired up tonight with the Stealth Combs from E22.
Parts to be delivered is just about done now; some more wire turned up today and that should be the last I need.
I got a good deal on a "Grade B" OCUK GTX 970 to match the other two I have already.
A bit of a bargain really especially as the few scratches it has will be removed when the case comes off for the water block.
Talking of GPUs, can someone explain how they work when in SLI?
I mean if each GPU has 3.5GB! of ram does a 3 way SLI mean that you have 3 x 3.5 =10.5GB? Same with the CUDA cores do they add up together or how does it work; why is SLI better?
Parts to be delivered is just about done now; some more wire turned up today and that should be the last I need.
I got a good deal on a "Grade B" OCUK GTX 970 to match the other two I have already.
A bit of a bargain really especially as the few scratches it has will be removed when the case comes off for the water block.
Talking of GPUs, can someone explain how they work when in SLI?
I mean if each GPU has 3.5GB! of ram
does a 3 way SLI mean that you have 3 x 3.5 =10.5GB? Same with the CUDA cores do they add up together or how does it work; why is SLI better?Attachments


Blade Runner
New member
3 way SLI means you have 3.5GB of GPU RAM. It's not a "collective pool" of memory. The same info gets written to all GPU RAM, so you basically get 3 copies of the same stuff. Cores are different though, but I'm not sure how the cores are pooled and used.
Thanks, so the 3 sets of RAM will work better because its like having the ram in RAID 1 - sort of?
Exactly. No benefit at all. SLI / Crossfire have been around for years, but it's still rather "immature" to me for this reason. Well that and AMDs micro-stutter.Nope, not at all. Memory wise, you don't gain anything.
AlienALX
Well-known member
Exactly. No benefit at all. SLI / Crossfire have been around for years, but it's still rather "immature" to me for this reason. Well that and AMDs micro-stutter.
It's not the technology at fault it's the shirty APIs and poor support from game devs.
I don't believe that at all. APIs maybe, but I don't think you can blame developers for that. It's just too bad they couldn't come up with some kind of virtualization layer for SLI / Xfire that would lump all the GPU resources into one large "pool" a la VM stuff. Of course that would eliminate direct calls to the hardware, but I'm not sure how critical that direct hardware chatter is. I think multiple GPUs *could* be virtualized with a proper driver/API framework IF done properly. Of course, I'm also a drunk who doesn't code for a living, so I'm probably just dreaming. Everyone from hardware makers to OS programmers to game devs would have to be all on board, and all on the same page, which is impossible.It's not the technology at fault it's the shirty APIs and poor support from game devs.
Blade Runner
New member
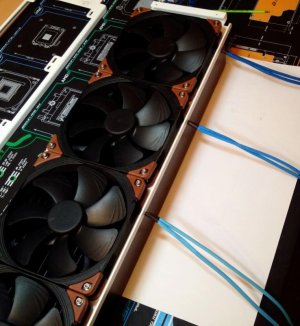
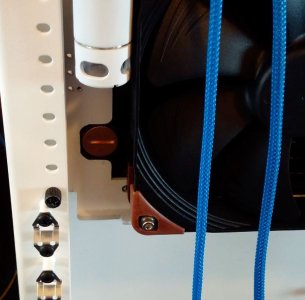
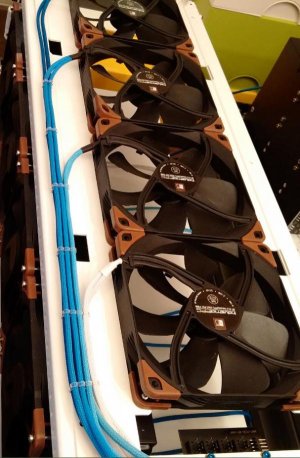
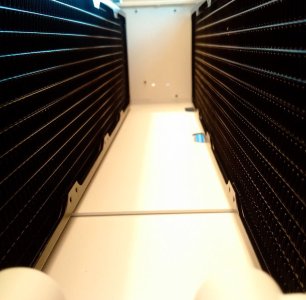
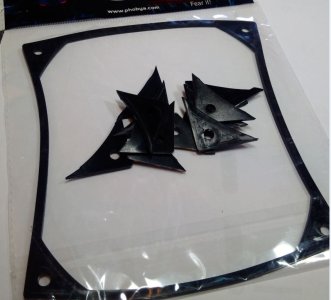
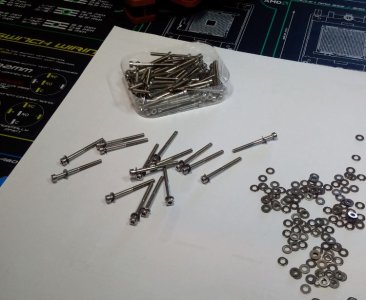
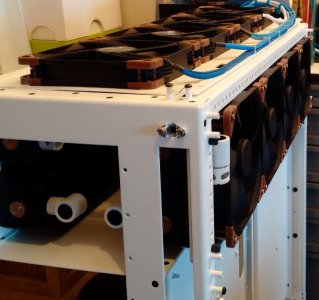
I have fitted both of the top 560s now with their fans attached using Phobya fan gaskets, well the corners anyway.
The gaskets did not really work with the CaseLabs fan mounts as bought so I cut off the corners to use. (They need a solid surface so that the fan can squash them against it and hold the sides in place)
I needed the thickness of the gasket still to space the rad so that the Stainless steel allen cap head screws would not foul the rad fin protector plates on the Alphacool rads.
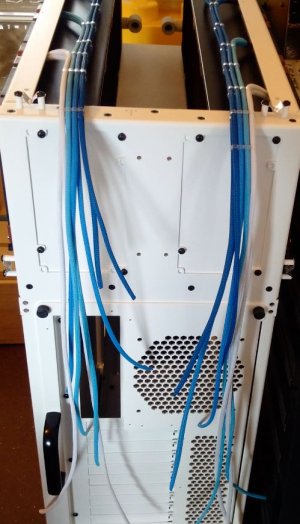
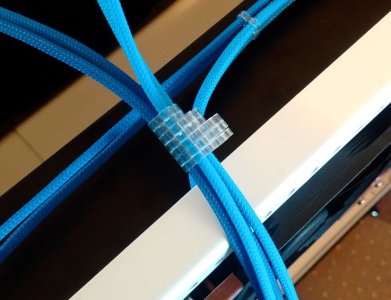
That job done I threaded the wires through the E22 stealth combs and discovered that it is much quicker and easier to group all your combs tight together to thread your cables through. It saves any mistakes with cables being in the wrong hole too.
I just have to cut them all to length so that they connect to the two, 4 way splitters but I cant do that yet as I am not sure where the splitters will fit.
That end of the top chamber will have the GPU and CPU pipes coming through the floor with bulkhead fittings and then some valves and temp sensors.
I will only know where the 2 pipes will enter the chamber when I have fitted a water block to one of the GPUs to get an accurate dimension. (The CPU Pipe is known as it is plumb with the centre of the CPU)
I have not fitted a water block to a GPU before so I have a bit of reading up to do.......
The gaskets did not really work with the CaseLabs fan mounts as bought so I cut off the corners to use. (They need a solid surface so that the fan can squash them against it and hold the sides in place)
I needed the thickness of the gasket still to space the rad so that the Stainless steel allen cap head screws would not foul the rad fin protector plates on the Alphacool rads.
That job done I threaded the wires through the E22 stealth combs and discovered that it is much quicker and easier to group all your combs tight together to thread your cables through. It saves any mistakes with cables being in the wrong hole too.
I just have to cut them all to length so that they connect to the two, 4 way splitters but I cant do that yet as I am not sure where the splitters will fit.
That end of the top chamber will have the GPU and CPU pipes coming through the floor with bulkhead fittings and then some valves and temp sensors.
I will only know where the 2 pipes will enter the chamber when I have fitted a water block to one of the GPUs to get an accurate dimension. (The CPU Pipe is known as it is plumb with the centre of the CPU)
I have not fitted a water block to a GPU before so I have a bit of reading up to do.......
Attachments
-
 CorridorOf560s.JPG91.6 KB · Views: 73
 -
 AsFarAsPoss.JPG81.1 KB · Views: 66
 -
 EasyStealthCombFitting.JPG62.1 KB · Views: 70
 -
 PhobyaGasketsCutDown.JPG68 KB · Views: 61
 -
 SS_AllenHeadCapScrewsWashers.JPG72.7 KB · Views: 71
 -
 FrontTopChamberFanMountCutouts.JPG87.7 KB · Views: 67
 -
 TopViewTopChamber.JPG65.1 KB · Views: 62
 -
 Test1.JPG73.8 KB · Views: 82
 -
 Test2.JPG58.2 KB · Views: 68
Last edited:
Blade Runner
New member
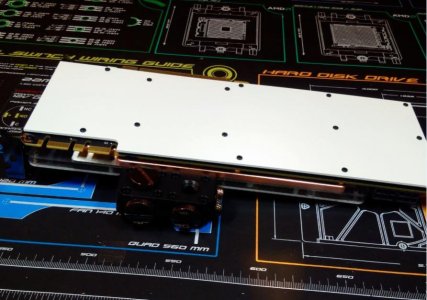
I got the water block and back-plate fitted this evening so tomorrow I will be able to fix it into the case PCI slots to get an accurate measurement of the location of the outlet and inlet pipes.
That will allow me drill the holes for the bulkhead fittings from the upper chamber into the main chamber and also the main chamber into the lower chamber.
That will allow me drill the holes for the bulkhead fittings from the upper chamber into the main chamber and also the main chamber into the lower chamber.
Attachments

Similar threads
- Replies
- 2
- Views
- 199