You are using an out of date browser. It may not display this or other websites correctly.
You should upgrade or use an alternative browser.
You should upgrade or use an alternative browser.
Build log: OTD - 1000D
- Thread starter Warchild
- Start date
My changes seem a little scattered and all over the place right now, and thats because I am still unpacking from moving, and all my Watercooling stuff is boxed at the back of the storage unit.
Until I get to it, im just making the minor adjustments I planned to make. Continuing with this one.
I am going to return to a D5 and give it a go again. That means dropping from 2x MCP35x and switching to 1 D5. It is going to be pushed hard through alot of components, but since I don't do SLI anymore, it should be ok.
Now the issue I have is that my old Pump is housed in a Bitspower mod top, but the pump mount places the pump itself, horizontally. I have purchased a threaded shim that allows the pump to be attached directly to the reservoir, but this means that I need to change orientation of the pump and make it vertical.

I could buy the mount but I thought it would be more fun to make one.")
So here is my basic design. I might make a few tweaks to it, but see you in 6 hours and we can see how it turns out!

Until I get to it, im just making the minor adjustments I planned to make. Continuing with this one.
I am going to return to a D5 and give it a go again. That means dropping from 2x MCP35x and switching to 1 D5. It is going to be pushed hard through alot of components, but since I don't do SLI anymore, it should be ok.
Now the issue I have is that my old Pump is housed in a Bitspower mod top, but the pump mount places the pump itself, horizontally. I have purchased a threaded shim that allows the pump to be attached directly to the reservoir, but this means that I need to change orientation of the pump and make it vertical.
I could buy the mount but I thought it would be more fun to make one.
So here is my basic design. I might make a few tweaks to it, but see you in 6 hours and we can see how it turns out!
The_Crapman
New member
God I want a 3D printer. lol D5 should be fine, there's not really much difference to component or coolant temps from flow rate, that's more from rad size and airflow. as long as you've not using a pressurised coffee basket somewhere you have any problems ")
Vertical Pump mount complete. Also made an attempt at printing the bitspower logo for the infill now I have a smaller nozzle.

Not a perfect fit, but it certainly popped in easy enough

Unfortunatey I miscalculated the front support so there is a 0.05mm drop where the pump sags ever so slightly. I'll check how it looks with the tube. If its noticeable, I will just redo the pump mount with an extra 0.05 or 0.1mm raise in the front lip

Not a perfect fit, but it certainly popped in easy enough
Unfortunatey I miscalculated the front support so there is a 0.05mm drop where the pump sags ever so slightly. I'll check how it looks with the tube. If its noticeable, I will just redo the pump mount with an extra 0.05 or 0.1mm raise in the front lip


And the overhaul begins.
Due to the unfortunate death of my Maximus Extreme IX R.I.P i had to upgrade. Not the greatest time but why hold back.

I'm not going to spam a hundred photos of the same thing from different angles. I will just get straight into the install. I have to make sure it works.
And the chrome CNC cut section that is on the PCIe slots while beautiful is an easily scratchable surface sadly. I managed to make a small mark with my nail.

Old tube was tarnished, scratched and stained. Plus was too long. Ordered a new one from BP


Shortened from 300 to 200mm. Also sprayed the pump housing for my D5 with my trusted little Iwata air brush.
Found an old offcut and coincidentally was the perfect fit. Behold the first tube run.

I discovered a problem though which was a little concerning. Looks like the GPU while mounted veritcal has sagged. Possibly from force due to the tube run in my old build pulling it down. (maybe...)

Nothing a 3D printer wont fix. Made these little bits to solve the problem.

Perfectly slots in at the back

And the issue is fixed.

While I throw a loop together for testing, I tried to make some QoL improvements. Starting with my hatred of visible cables.

Printed a cover which also acted as tube supported. Since the BP Q block weight pulled the tube down slightly.

My old "shelf" covers are not suitable with the tube run here so switched to low profile with a little recess for some Gorilla glue to attach


And last updated for now
8 fans lead to messy cables. The swiftech hub is a nice little connector but not the most pleasant to see.
Designed a little box to help with hiding what I can.


It hides the unit quite well. I just need to clean up the 8 pwm cables now. The pump cables will be sleeved at some point. And im personally happy with the glossy finish on the pump hose considering I had to do it with a 0.2mm airbrush nozzle.

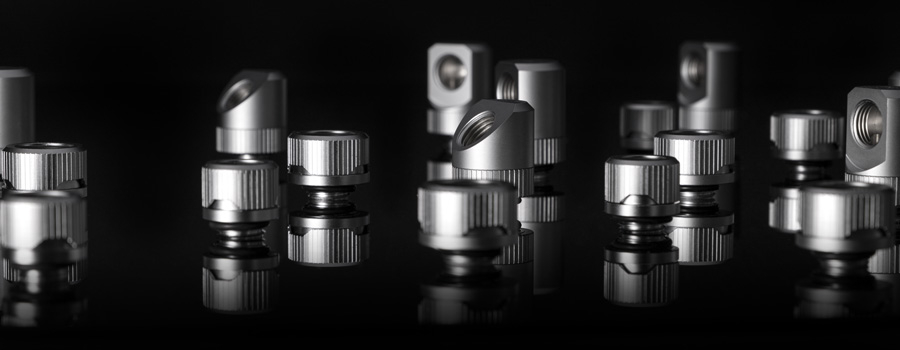
My plan is to drop the bitspower fittings and switch to the new EK Torque HDC. These are some nice looking brass parts with a beautiful satin finish.
Due to the unfortunate death of my Maximus Extreme IX R.I.P i had to upgrade. Not the greatest time but why hold back.
I'm not going to spam a hundred photos of the same thing from different angles. I will just get straight into the install. I have to make sure it works.
And the chrome CNC cut section that is on the PCIe slots while beautiful is an easily scratchable surface sadly. I managed to make a small mark with my nail.
Old tube was tarnished, scratched and stained. Plus was too long. Ordered a new one from BP
Shortened from 300 to 200mm. Also sprayed the pump housing for my D5 with my trusted little Iwata air brush.
Found an old offcut and coincidentally was the perfect fit. Behold the first tube run.
I discovered a problem though which was a little concerning. Looks like the GPU while mounted veritcal has sagged. Possibly from force due to the tube run in my old build pulling it down. (maybe...)
Nothing a 3D printer wont fix. Made these little bits to solve the problem.
Perfectly slots in at the back
And the issue is fixed.
While I throw a loop together for testing, I tried to make some QoL improvements. Starting with my hatred of visible cables.
Printed a cover which also acted as tube supported. Since the BP Q block weight pulled the tube down slightly.
My old "shelf" covers are not suitable with the tube run here so switched to low profile with a little recess for some Gorilla glue to attach
And last updated for now
8 fans lead to messy cables. The swiftech hub is a nice little connector but not the most pleasant to see.
Designed a little box to help with hiding what I can.
It hides the unit quite well. I just need to clean up the 8 pwm cables now. The pump cables will be sleeved at some point. And im personally happy with the glossy finish on the pump hose considering I had to do it with a 0.2mm airbrush nozzle.
My plan is to drop the bitspower fittings and switch to the new EK Torque HDC. These are some nice looking brass parts with a beautiful satin finish.
Last edited:
Dude you are KILLING it! Loving this build! Oh and a word of warning on those Torque fittings, I bought about $400 worth of em, still not used. Mainly because they're so fat that they don't fit in too many places well. They're so thicc I couldn't fit them in a lot of places. Hope you have better luck than I did!
Dude you are KILLING it! Loving this build! Oh and a word of warning on those Torque fittings, I bought about $400 worth of em, still not used. Mainly because they're so fat that they don't fit in too many places well. They're so thicc I couldn't fit them in a lot of places. Hope you have better luck than I did!
yeah i noticed. Luckily the only problematic place is on the pump top so I have a mini 7mm extender for it.
I'm actually going to mix fittings. I always like minimalistic. Having Silver fittings on a black Radiator looks odd. So I am going to keep my old BP matt black fittings on the Radiator sections of the loop. That way you cant see them and its blended in with the radiator.
edit* little tube test done on one fitting. The compression is pretty weak compared to BP C47s. Makes me a little worried.
Last edited:
NeverBackDown
AMD Enthusiast
Damn this is awesome. I love how your solution to everything is just a 3D printer 
Damn this is awesome. I love how your solution to everything is just a 3D printer
hehe I would love to have more access to things but limited resources and lack of a workshop makes it difficult.
So I have to be creative and find a solution with the tools that I have.
NeverBackDown
AMD Enthusiast
Gotta do what you gotta do as the saying goes. Not many people have a 3D printer so in some perspective you have some of those limited resources
Either way it's creative and it's shaping up to be a great build. Far better than anything I could conjure up!
Either way it's creative and it's shaping up to be a great build. Far better than anything I could conjure up!
More additions to the update. Excuse the poor quality. Bad lighting 
I loved the look on my old predators so much I had to get updated ones. These are 4000Mhz CL19, XMP 2.0.

And some sweet Titanium looking goodness

Really do look beautiful. But im a little concerned on the compression fitting. Its no where near as strong as my BP fittings.

I loved the look on my old predators so much I had to get updated ones. These are 4000Mhz CL19, XMP 2.0.
And some sweet Titanium looking goodness
Really do look beautiful. But im a little concerned on the compression fitting. Its no where near as strong as my BP fittings.
Small progress but its moving forward.
Another loop change due to PSU issues, and the fact that I think its time to ditch the Riser and return to PCIE_1 default position.
Besides, Showing a waterblock with no lighting isnt exactly fancy. That said, It was time to give the 2080ti a little clean. Block is as good as new. Thermal pads replaced, new liquid TIM on the Die and a good amount of polish


Also on the table is a new PSU. Picked this up mostly because of the fact there was little others available without waiting a month or paying through the roof prices for a 1200W that I dont need.
Quick test made to verify my previous power issues were true. This one handled it all nicely.

And the most fun part begins.
Surprising how difficult it can be to cut straight line tubing accurately sometimes when you want everything to line up perfectly.
The velcro strap on the tubes was to keep the alignment while I measure the remaining distances accurately. Plus I want to use the tightness of the tube run to try and alleviate the GPU sag without the need to use any kind of GPU support bar or bracket.

And the matching tube run

The horizontal tube running from the GPU is a placeholder so I can measure the vertical distance.
You probably already noticed the black fittings on the radiator in the background. I kept these Bitspower as I want the attention on the front side of the loop. And if you didnt notice the fittings in the background then im glad because that was the plan
Another loop change due to PSU issues, and the fact that I think its time to ditch the Riser and return to PCIE_1 default position.
Besides, Showing a waterblock with no lighting isnt exactly fancy. That said, It was time to give the 2080ti a little clean. Block is as good as new. Thermal pads replaced, new liquid TIM on the Die and a good amount of polish
Also on the table is a new PSU. Picked this up mostly because of the fact there was little others available without waiting a month or paying through the roof prices for a 1200W that I dont need.
Quick test made to verify my previous power issues were true. This one handled it all nicely.
And the most fun part begins.
Surprising how difficult it can be to cut straight line tubing accurately sometimes when you want everything to line up perfectly.
The velcro strap on the tubes was to keep the alignment while I measure the remaining distances accurately. Plus I want to use the tightness of the tube run to try and alleviate the GPU sag without the need to use any kind of GPU support bar or bracket.
And the matching tube run
The horizontal tube running from the GPU is a placeholder so I can measure the vertical distance.
You probably already noticed the black fittings on the radiator in the background. I kept these Bitspower as I want the attention on the front side of the loop. And if you didnt notice the fittings in the background then im glad because that was the plan
Last edited:
Loving this build. it looks great.
Thanks.
Last piece of this run looks like an asthma pump or some detination device

Similar threads
- Replies
- 2
- Views
- 222