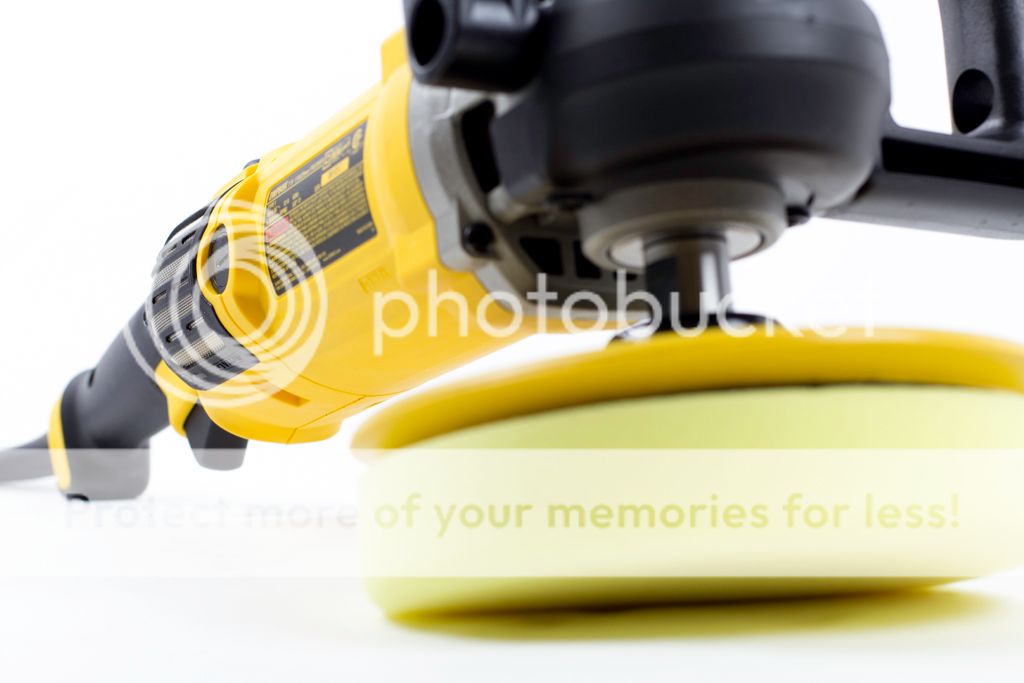
The Green Manalishi

Announcement! I would like to Welcome EKWB to The Green Manalishi Project.


Very Happy to have their support with this project and look forward to parts arriving soon.

Many thanks EK! :)
 
damn that computer is freaken sick enter it in quake con or somthing unless you were i didnt read all the pages.
 
As long as I stay away from edges wet sanding usually goes pretty smoothly.;)
I use 3M Compound to remove sanding marks and Machine Polish to Shine.

thats where you need to do it by hand and with a sanding block mate and not the sander.

ahh right yer ive used Farecla g3 and 3m's fast cut compound. have to say they are both good but the 3m fast cut is better imo as you dont need to use water with it so a lot less mess and it cuts really well.
 
damn that computer is freaken sick enter it in quake con or somthing unless you were i didnt read all the pages.
Its far from completion..Not really ready for anything yet.

thats where you need to do it by hand and with a sanding block mate and not the sander.

ahh right yer ive used Farecla g3 and 3m's fast cut compound. have to say they are both good but the 3m fast cut is better imo as you dont need to use water with it so a lot less mess and it cuts really well.

I wet sand everything by hand ;) Ok.. Maybe not everything :p


My little helper ;)
 
I wet sand everything by hand ;) Ok.. Maybe not everything :p


My little helper ;)

when you say by hand do you mean with a sanding block or just your hands? maybe your doing it wrong :D

hmm im only gonna say that i dont like the dewalt brand of tools. i normally only buy Makita, Bosch, Trend or Festools

i used to own 3 sander/polishers but two of them got stolen with my van :( so ive now just got a 3m polisher but used to also own a makita 110v one and also a makita DA polisher for smaller jobs
 
I use a hard block on large panels and soft for uneven small parts. Using only your fingers might yeild some unhappy results..:)

when you say hard block do you mean a one you would for work around the home or an automotive one (by hard i guess you mean a rubber sanding block). as for soft block i guess you mean a thin piece of rubber or a foam block.
 
did you take those pictures you're self?

Yes. I took those photographs.:)

when you say hard block do you mean a one you would for work around the home or an automotive one (by hard i guess you mean a rubber sanding block). as for soft block i guess you mean a thin piece of rubber or a foam block.
Hard rubber block for auto use. My soft block is flexible foam pad. Contours nicely around funky curves, fan grills, etc..
 
Hard rubber block for auto use. My soft block is flexible foam pad. Contours nicely around funky curves, fan grills, etc..

i just thought i would ask as ive seen quite a few rubber sanding block that were rock hard where as the automotive ones are a little softer (little bit more flex to them but not much). you can get thin rubber block down to about 3 or 5 mm
thick which are great for curved surfaces.

things like these


also a tip for when using a sanding block which you may already know/do but ill share anyways

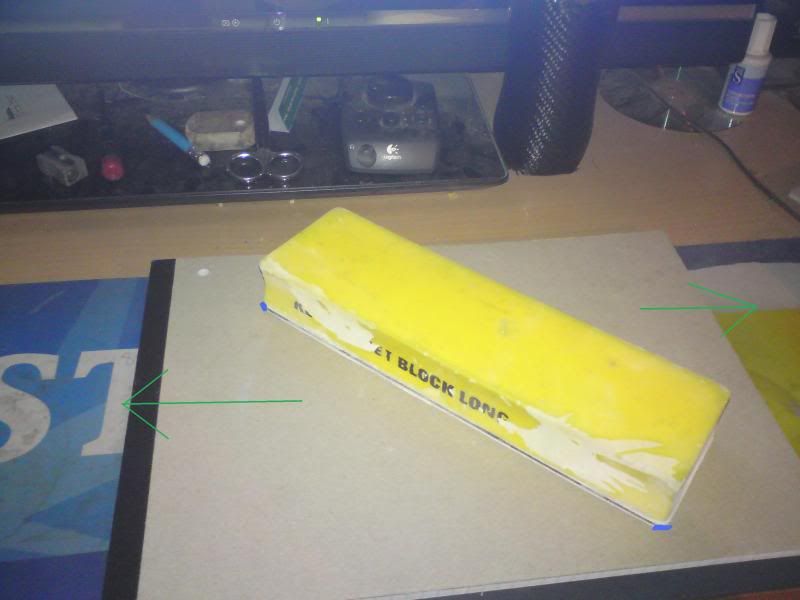
most people use a sanding block in this fashion which can cause tram lines if you apply uneven or heavy pressure

the green arrows are the direction of movement and the blue line is to highlight the amount of edge area there is which is a lot when using the block this way.

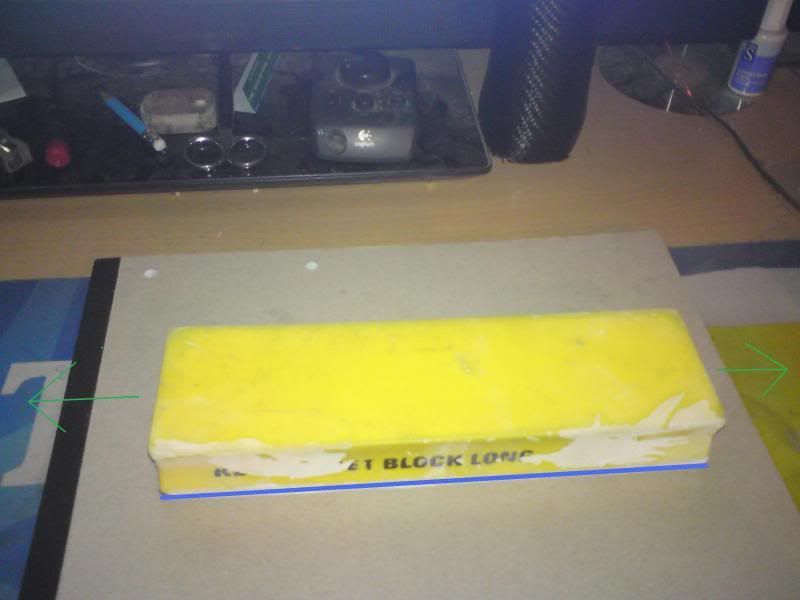
if you use the block in way below you have a lot less chance of tram lining things and also its easier to flat/sand edges of panels as you dont tend to have to much of the block hanging over the edge at one time causing you to rub throw the edges faster than the rest of the panel.

the green arrows are the direction of movement and the blue lines highlight the amount of edge area. so if you hold the sanding block at an angle like in the photo you remove a lot of the edge area from the sanding block meaning less chance of tram lines in the event of uneven pressure or to much pressure.

also if you want to hand sand thing smaller part etc. if you place your hand flat with your finger pointing away from you and move your hand from left to right with light even pressure you wont get any tram lines caused by your fingers. when handing tho make sure you only use your fingers as this from your fingers back to your wrist is quite uneven
 
I will need to buy an airbrush kit... I just paint with cans yet but now seeing the difference between them i have no choice in the future...:) I also prefer Makita and Dremmel tools for this kind of jobs. I also use sanding pads with 500-1000 paper.
 
Just had a thought, if you and Snef got together to build a rig.... you'd probably break the internet with absolute awesomeness!

Thanks, just spat water all over my monitor ;).

I remember seeing this log right before I took a break ;) I never imagined it would be so awesome, I don't even like green but it just looks, well amazing!

Awesome work as always, keep going!!

-Joe
 
How far away are you from completion? I know having all that gear sitting round and it not being ready to run would drive me nuts haha!

A+ for idea A+ for effort A+ for workmanship. Shall be one of the DIY greatest rigs ever! I don't think I've ever seen a DIY build with so much effort, time and care put into all aspects of the build.
 
Congrats on the sponsor matey. Well deserved ;)
Thanks Dude...good to see you.:)

I will need to buy an airbrush kit... I just paint with cans yet but now seeing the difference between them i have no choice in the future...:) I also prefer Makita and Dremmel tools for this kind of jobs. I also use sanding pads with 500-1000 paper.
You won't be disappointed with a brush.

Thanks, just spat water all over my monitor ;).

I remember seeing this log right before I took a break ;) I never imagined it would be so awesome, I don't even like green but it just looks, well amazing!

Awesome work as always, keep going!!

-Joe
Thanks dude. Thanks for coming back and posting a comment.:cool:

How far away are you from completion? I know having all that gear sitting round and it not being ready to run would drive me nuts haha!

A+ for idea A+ for effort A+ for workmanship. Shall be one of the DIY greatest rigs ever! I don't think I've ever seen a DIY build with so much effort, time and care put into all aspects of the build.
I imagine 3 months to complete. And thanks for the positive comment. ;)
 
After patiently waiting ... I was rewarded with these.. The mill work from T1K Custom is First Class..

Thank you Toby

Lots to do now that they have arrived.


Back
Top