voodoografix
New member
Congrats a lovely tidy build there Mr wraith . You really have done yourself proud .
")


Nice! You can make the panels out of .04 styrene sheets if you want them thinner. I found that by not 'wrapping' the edges, the covering will lay flatter and not tend to form bubbles along the edges. Just apply it with a small amount of overhang and carefully cut it flush with the edge instead of wrapping it back on itself. (that's why a thinner stock works a little better from a building standpoint.)
http://www.amazon.com/gp/product/B000BRPL1K/ref=oh_aui_detailpage_o03_s00?ie=UTF8&psc=1
This is US Amazon, but you can find it on UK as well I think.
And use regular model cement to glue it up.
I like where this is going.
 , as was raised in TTLs review of this case the front dust filter is a touch on the weak side with the openings in the stock mesh being quite open, and since I've had her I have noticed I tend to dust quite a lot, while it's good at stopping large particles like pet hair, twigs and budgies the internals do get a nice coating of a finer powdered dusty badness.. so with my idea this should be a thing of the past.
Thanks fella, don't forget to share with us your work.You have done a nice job there Wraith, I'm going to look into doing a PSU cover but i have found a place that makes a PSU cover & 5.25" Bay Covers so hopefully my rig will look good after i have finished


Thanks fella, don't forget to share with us your work.
Well that's the new filter in, easier than I thought, much easier actually.
Step 1 Cut Netting to size.
Step 2 Lay in place.
Step 3 Cut 2 strips of foam board.
Step 4 Slide/squeeze strips into place.
It holds extremely tightly and air flow continues as normal, now the waiting game, hopefully longer than 1 month before getting the dusting gear out.
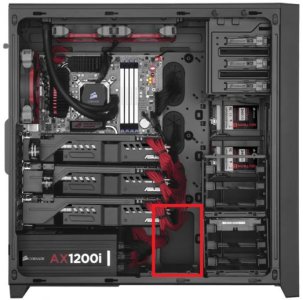
Not sure I get what you mean.. is it the plastic stand-offs that the cages stand on? Or do you mean the blanking plates for the optical bays..Nice, The only thing that is going to piss me off is the 2nd hole for the hard drive cage for the 750D i just don't understand why Corsair didn't give the people who brought this case like a plastic cover, I think TTL even said something like this back on his 600T video ages ago.
Not sure I get what you mean.. is it the plastic stand-offs that the cages stand on? Or do you mean the blanking plates for the optical bays..
I removed my cages and plastic stand in favour of 25mm brass stand-offs (same as motherboard mounts just longer), so I could panel the whole base, and SSDs are mounted behind the motherboard panel.
Be interesting to see it after a few months dust, both on the filter and inside
to see how well it performs.Oh the grommet holes, is there no way you could blank it with some stiff foam sheet..Na, In this picture with the red box, I'm talking about the metal cutout for the hard drive cages so you can put the cables through
I'll be keeping record of it now, in 1 month increments
Edit also if it works well then there is an option for Parvum fans, laying a piece between the panels.
Oh the grommet holes, is there no way you could blank it with some stiff foam sheet..
I've even had the idea to get the missus to sew some channels along each edge so I can slide some magnetic strips into them for a top filterNice idea to use curtain as a dust filter. I was looking for way to build a filter for my case and this should work quite well
also going to play with some clothe dyes later to see how well they colour.")
I've even had the idea to get the missus to sew some channels along each edge so I can slide some magnetic strips into them for a top filter
Also I must point out as a filter material it was only .90p for 1 x 1.2Mtr, the postage actually cost more than the fabric