Project Gypsy Danger

renaire33

New member
Hi OC3D my first post here, posting my on going project called "Gypsy Danger", well you know the name came from the movie Pacific Rim, i so love the movie so why not give it a shot?

lets start, heres my system now, it a modded NZXT Switch 810, 90deg mobo tray orientation, I did this around 3 months ago.

1383697_10200938905980148_161464902_n.jpg

1402940_10200938910900271_490780359_o.jpg

1398339_10200938883779593_1670709243_o.jpg


specs are

Asrock Z77 Extreme 6
i5 3570k
Powercolor 7950 pcs +
Gskill Ripjaws Z 2133mhz 2x4gb
Intel 320 SSD
Seagate 1TB HDD
Seasonic X850 850w 80+Gold
NZXT Switch 810


my goal is to get as close as possible how gypsy danger looks

pacific_rim_gypsy_danger_by_darkmousyr-d6e0dkr.jpg

3172175-gypsy_danger_by_slence-d65jn56.jpg


First added some custom motherboard armor for my asrock z77 extreme 6

1501524_719047404787060_1728915047_o.jpg


for me i named this Asrock Z77 TUF extreme 6 :) i hoped i did not violate anything

1506086_719047484787052_768087461_o.jpg


painted my radiators white so this would add to a clean look inside

1487775_719047511453716_1907528389_o.jpg

1039553_719047524787048_157616998_o.jpg


more photos...


1531707_720053564686444_560057357_o.jpg


made a custom psu shroud frame, out of aluminum. as you can see also in the picture, i remade the motherboard tray cover using a much more thinner acrylic, in my previous build i used 3.0mm acrylic, in this i used 1.5mm

155871_720053618019772_1485766666_n.jpg

1598743_720053608019773_297564021_o.jpg


.....photos

883855_720053664686434_531266379_o.jpg


1507413_720053764686424_1525643467_o.jpg


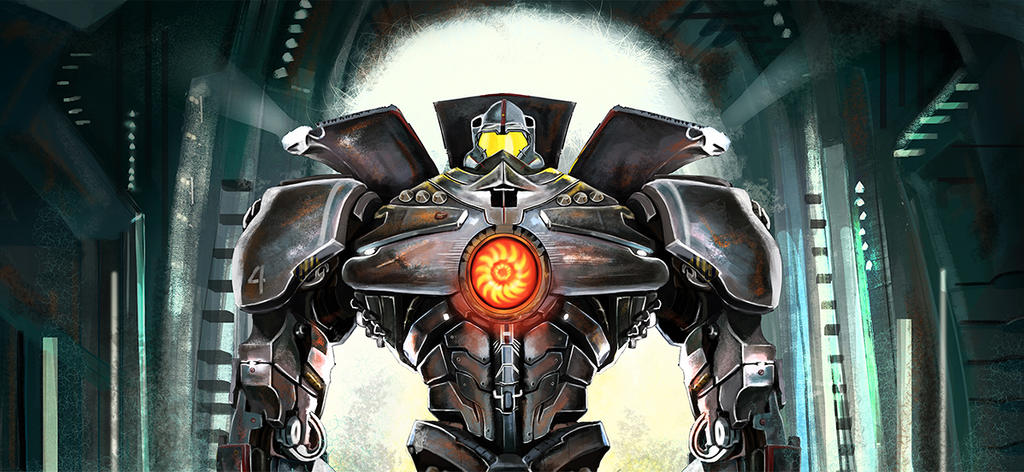
gypsy dangers head and it nuclear vortex turbine and some details

ill be using this for its "nuclear vortex turbine" attempt
1501762_10201327892544569_1805825379_n.jpg


that will be for now

i will be updating this thread as soon as i can

thank you :)
 
Last edited:

Sweet, I've never seen an inverted Switch 810 mod before, nice idea. It's looking really good so far.

The attention to detail here is wonderful... individually drilled holes for your cables.. brilliant :D

Welcome to the forums mate.
 
loving your idea for the nuclear engine. looks already like this build may be better than the movie lol

thanks mate :) i'd love this to be better than the movie and fire plasma cannons lol

Sweet, I've never seen an inverted Switch 810 mod before, nice idea. It's looking really good so far.

The attention to detail here is wonderful... individually drilled holes for your cables.. brilliant :D

Welcome to the forums mate.


This should turn out to be incredibly cool.

thanks mates :)
 
hello again!!

back with some minor updates!
been busy lately with other walkin projects at my shop

as promised!

building the shroud
1075372_720847014607099_1579596842_o.jpg

placing the acrylic that will be used to pass through the wires
1617865_720846971273770_207673242_o.jpg

1614290_720846997940434_1401712111_o.jpg

1560774_720847084607092_598819890_n.jpg


testing the shroud lighting
1495928_720847174607083_760648163_o.jpg

1504214_720847301273737_55405475_o.jpg


test fit! :)
1597826_720847501273717_485774090_o.jpg


TO MUCH LED!!
1556447_720847537940380_1776617084_o.jpg

202702_720847514607049_682902205_o.jpg
 
Last edited by a moderator:
Looking good, I actually thought the movie was okay too, which surprised me because I'm not into robots and droids and all that.
 
Yeah this is absolute pornography.

The separates holes for each cable.. damn. That's dedication.
 
Love the work you have done to this build I just have one quirk that has my OCD senses tingling its the Carbon Vinyl on the mobo they run in different directions.. other than that Kudos on a very clean install and attention to cable management. :)
 
You do know that you have created porn ^_^

Yeah this is absolute pornography.

but wait, theres no boobies :)

thanks

Looking good, I actually thought the movie was okay too, which surprised me because I'm not into robots and droids and all that.

the movie was bad, but i love robots

[qoute]The separates holes for each cable.. damn. That's dedication.

awesome build man!

Love the work you have done to this build I just have one quirk that has my OCD senses tingling its the Carbon Vinyl on the mobo they run in different directions.. other than that Kudos on a very clean install and attention to cable management. :)

thanks for your positive replies :) very much appreciated
 
Hello again!! sorry for the late updates. ive been waiting for some parts to arrive and as promised, here it is

vandal switch

1622270_10201551726180270_751911133_n.jpg


some acrylic tubes

1661969_10201571516275010_1753169381_n.jpg


so in my previous pictures, i made the PSU cover that has a backlight in it but some thing came up to my mind, i want to make a water channel, but the problem is i dont have a drill press or someone near to my place that has. in the end I found a aluminum sheet about 2mm thick and cut it the same as the plexi one,

1920127_10201627347470755_1553240134_n.jpg


made some measurements that would fit the acrylic tube fittings, G 1/4 painted white

1920508_10201653831612842_889264544_n.jpg


the water channel is ready but another thing cape up again, I want the case to have a "metal" / "iron" touch, so i knocked it down again and started repainting the interior white and parts of the exterior silver, to give it "metal" look :)

15130_10201658555810944_1327418999_n.jpg

1601348_10201658170361308_732984655_n.jpg


i dont have the things to have a perfect bend on the acrylic tubes so i made my self a DIY bending jig from a srap 3/4 inch plywood, PVC tubes,wood, nails
i made this to support 90,45,30,60 deg bends

1497538_10201398621512749_387970856_n.jpg


then i started bending in the afternoon, finished around early evening

892320_723335497691584_1762241199_o.jpg

1655760_723335507691583_527377694_o.jpg

1077574_723335491024918_646327716_o.jpg

1500792_723335604358240_581347916_o.jpg


OT : found my dog sleeping this way so i took a picture of him ^_^

1779703_10201641815752453_12141854_n.jpg


back to topic :
EK Universal GPU block on my GPU (BTW my 7950 was damage and underwarranty but sadly the supplier couldn't find any replacement so they send me a credit memo worth the price of my card so i bought a new one and added some cash the good news is i got the warranty of the new card reset ^_^. i bought i VTX 3D r9 280x )

heres the card:

1525012_10201408989091932_1813449664_n.jpg


Card + GPU Block

1617600_720847934607007_1151813110_o.jpg

1557241_720847947940339_2122301354_o.jpg


thats it for now! :)
 
Back
Top