Project Dianoga (Previously: Project Elvis)

Fancy giving it to me? :P Mine's wrecked :D

Yeah I have the filter thing I took it out because of the odd barb arrangement and flipped the plate over (the top plate). Sadly the arse end has a hole in it so is about as much use as a perforated condom.

I'll dig it out and take a look, last loop had purple in it and it probably picked up some residue, that and it's been hanging in my Lian Li for years with no activity, so I doubt the copper is in any fit state, I'm pretty sure the plexi top is for 775 socket as well, so won't fit yours.

The bit I'm on about is the 'accelerator' plate, tiny bit of vented plexi that goes under the intake to agitate over the 'fins' (can't really call those lumps of copper fins compared to what's available these days).
 
Hey man don't worry about the state of it. Mine was awful but white vinegar and soft tooth brush worked miracles.
 
So today I have started sorting out the front panel. It's a mountain of a thing, full to the brim with wires and circuit boards. However, as I only want the three heads on the rig to light green I decided to remove all of the RGB stuff in order to allow me more space to hide wiring. The loom on this thing took up considerable space. So here is the front stripped down.


I had to remove the main connector and remove the LED wiring leaving the power button wires in place.


Here is what was in there before.


Better.


Two LEDs fitted into the face and braided the power switch cable.


Assembled the face panel and hinge assembly.


Braided about 25cm of the USB and Firewire cables (the parts that come into the case)


And done.


I might look into some touch up paint but once it's assembled the rubs are not as apparent. Either way it's something to look into. Now I just need to strip down both side panels and perform a similar procedure :S
 
It's funny really. Every time I tell myself I am having a day off I usually do more.

So tonight I cut the inner front panel cover (dust filter) and the outer front cover (mesh) and then cut and painted the mesh silver before letting it flash up and gluing it to the panel. It should be dry tomorrow with any luck.

I also forgot that I had converted the front panel to green LED so tested that.


Works good. I was worried they may not be bright enough but they're pretty sweet.
 
All looking good fella, what's with "Dianoga" what does it mean?

Cast your mind back to the very first Star Wars. Luke and I *think* Chewy? (it's been a long time) get dumped into the water waste system on the death star.

Then they find out there's something in there, hence the "There's something alive in here" quote from Luke.

It's an alien that resides in water :D

And the other half. For this I am using fly screen mesh as it's open but not too much so. The last thing I want to do is choke the fans. This will catch anything apart from the finest dust which with airflow is inevitable.


I am using Power Glue. It's similar to hot glue only runnier but sets up sort of the same. I will trim and tidy it once it has dried :)
 
Ditto, the geek brigade just paid me a visit and revoked my card.. :(

Indeed, that should definitely be on my list of "well did you know" :( it is now, but yeah.. feel bad about that. I do know the garbage compactor's number off by heart though.

3263827
 
I didn't know what a Dianoga was either :D

I Googled for alien names, then went through the list looking for ones that live in water.

So don't be too hard on yourselves guys :D
 
OK so now we are entering the final phase of work and modding. The last two pieces needed to be painted. Remember this? it's been a while...

5ZkR4Fi.jpg


Painted.

RFzVR9m.jpg


And some ram sinks.

O6zhsQy.jpg


And tbh I think that is all of the modding done. The case is ripped and stripped so the next task is giving it a ruddy good clean and drying it.
 
This is the part where everything does a 180' turn. I now have to work backwards. So I took the entire case back down to a bare shell and put it in the bath and gave it a ruddy good clean.

NyV27mY.jpg


You can see the four "mounds" in that pic, that is where the SSD platform will live :)

So I peeled and cleaned the back plate.

B1SHkKI.jpg


Fitted the Corsair grommets.

9zR4h1O.jpg


And fitted it back in.

poS4sPo.jpg


I also got out all of my fittings and pretty much prepared them for the build. It goes -

Rad-barrow extender-chrome fitting-90' fitting on res- 90' fitting out of res - 45' fitting CPU block-45' fitting out of CPU block - 90' fitting (black and XSPC) into GPU - 90' fitting out of GPU - XSPC ball valve - 90' fitting (black and XSPC) - 90' fitting (black and chrome) - Chrome fitting - Barrow extender - Rad return.

MUlLFqU.jpg


More fun tomorrow :D

Oh yes, forgot to add. Two new Orings for the res.

TU1s9AS.jpg


A valve remover/rethread tap/ valves to repair the flaky Dr Drop.

9Sm7W7B.jpg


And lots of heatshrink in various sizes. All black, BTW.

Wah1Rx4.jpg
 
Last edited:
Tap washers..

Last night due to the TV being crap I decided I was going to start the build. I decided I wanted to fit the radiator and the res, which meant that I needed to do the hoses for the rad as the rad is not accessible once the res goes in. This meant it was going to be tricky...

So I fitted the rad and fitted a small curved hose (so I could cut it once the res was in) and a pre straightened hose that I had heated with the heat gun earlier. So I fitted the rad in and went to mount up the res bay. Disaster ! Like a complete noob when I measured it all up and pre fitted it I did so without the fittings. And because the tolerances were so unbelievably tight the res bay and indeed res would not fit with the fittings in the rad. I panicked, reasoning "if this doesn't fit then absolutely nothing else will because it was all designed around this !". Thankfully in the end it wasn't so dramatic.

Around exactly a month ago before I started the build I was digging around in my spares bins for stuff to use on the build. I came across a padded envelope full of these.


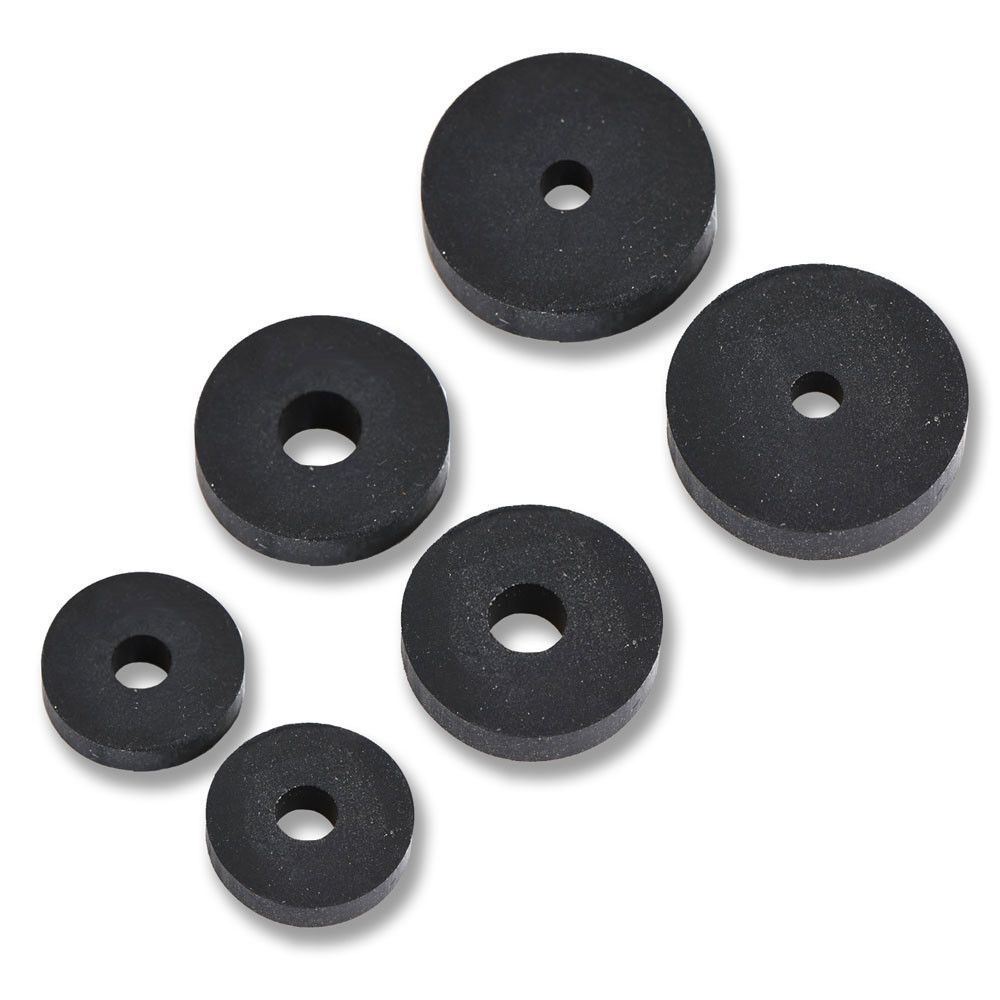
I remember saying to myself "Eee, these may come in handy you never know !". What I was thinking god only knows, but they completely saved my life. I had to stack two together to drop the res bay by 6mm. Only dropping it (and not moving it horizontally) meant that the shroud panel I took two days to make would still fit, and because I had made it to go all the way to the roof of the case I had some breathing room left in. PHEW.

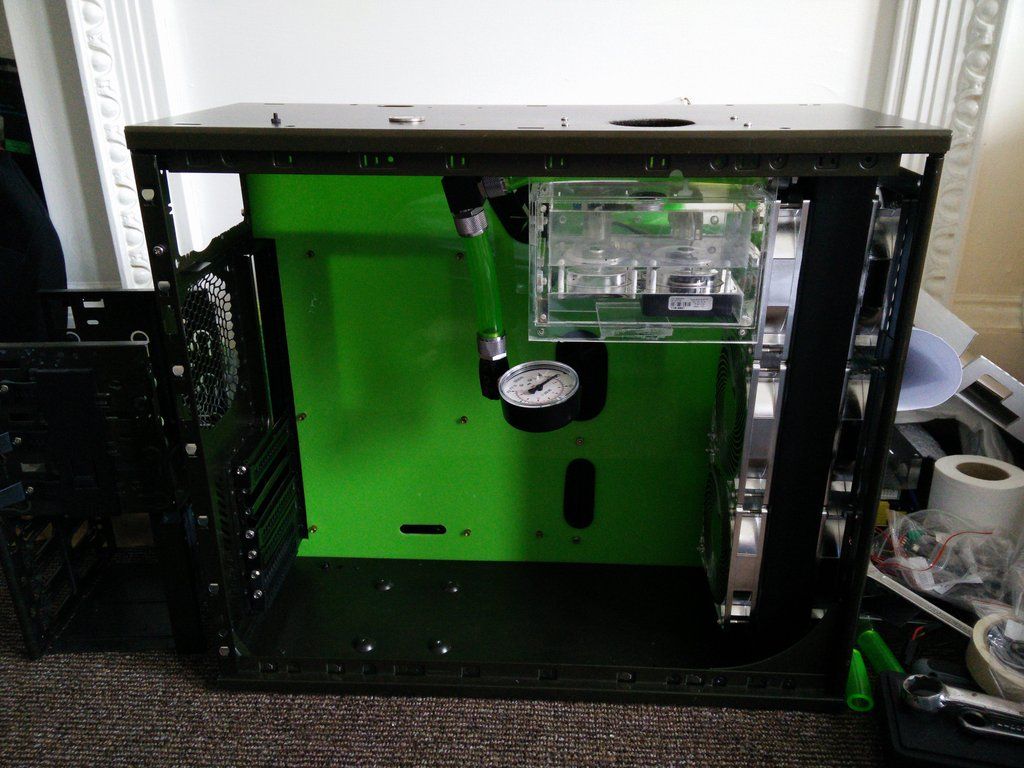
So I set to work. Here is how it looks right now, ignore the Dr Drop I am paranoid with it being my first ever water build so I am pressure testing at every stage.


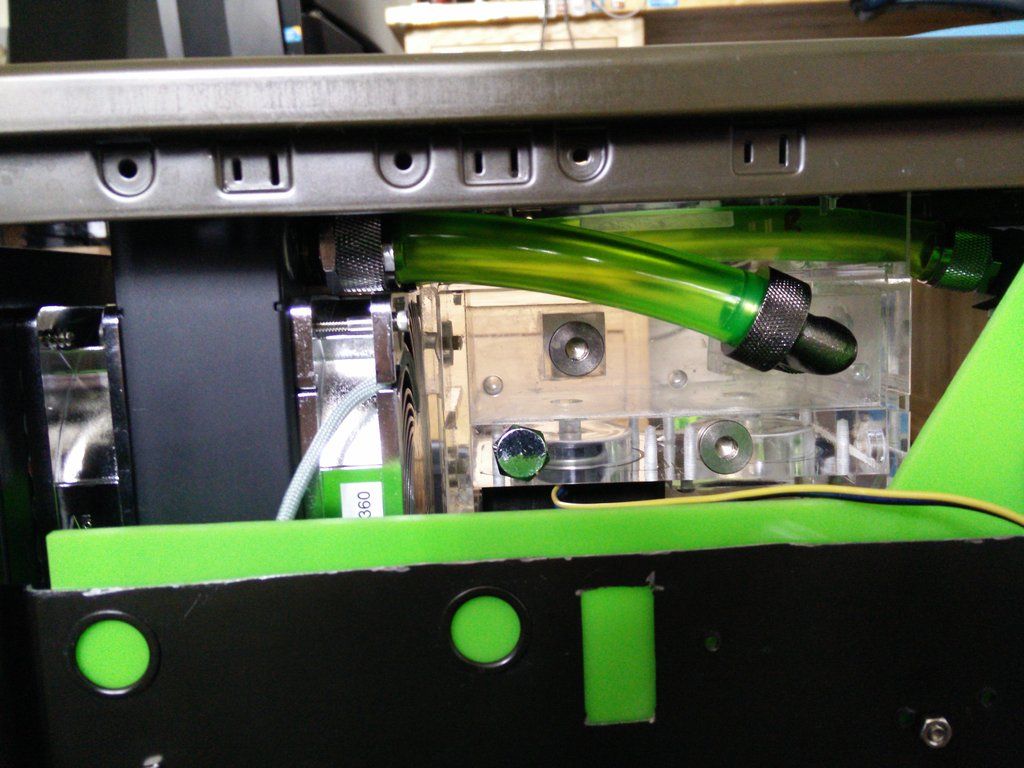
And here is how it looks from the back.


Those were the two hardest, and the ones I needed to do at the beginning. Typical me :D

In other news I was digging around on the bay last night looking for something to use as feet. Long story short, I sprained my wrist on the very first day of the build cutting a hole in the res bay and ever since I have been in agony. I've been wearing a wrist strap for the most part, but absolutely cannot wear that when I am working. So I won't be cutting any feet. I wanted something billet, but billet = funds. So I found these.


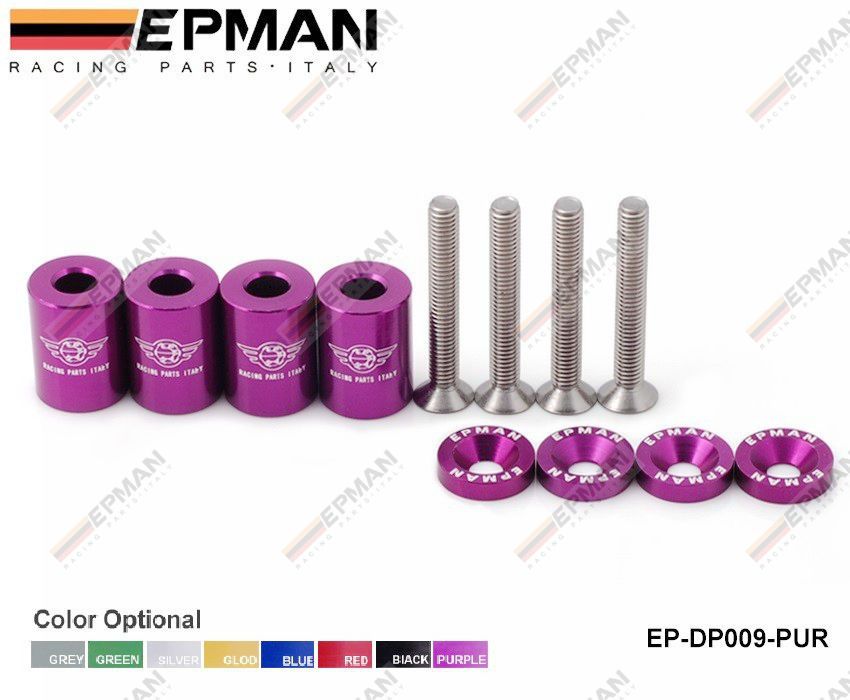
They are billet. They are 1" hood spacers that go between your car's bonnet and the plate to offer cooling to the turbo etc. They come with everything you see in the pic, though I got mine in green.


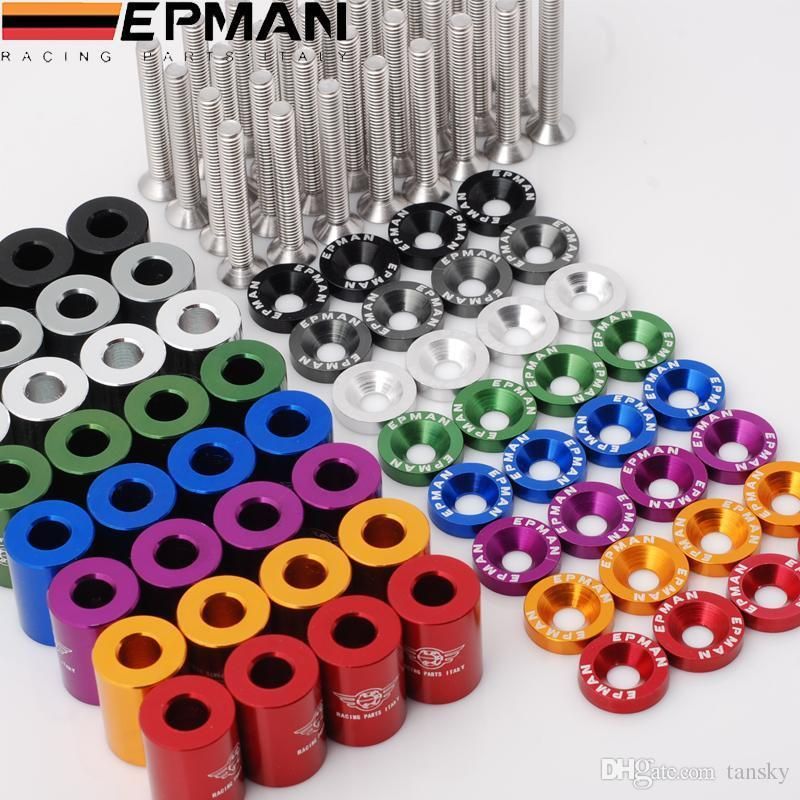
There isn't a pic of green ones showing exactly what you get, hence the purple.

£8, and even include the M6 bolts (will need cutting down).
 
So today I fitted the fan hub. The switch is a little proud, so, from KBW's "The Builder" I will have to shave a nicky whisker off the door to close the see you next tuesday".


Then I took off the fitting (swear words in abundance) and fitted the anti kink coil that I had completely forgotten about last night. There will be quite a bit of weight pulling on this area of the hose and it sits on a 5mm piece of acrylic (on the top) so whilst it would not outright kink it was bending a little.


I then decided to fit all of the lighting. I started with the "under board" strips.


OK, so these LEDs are amazing for the money they cost. All in I spent about three pounds on 8 strips. The only thing that has always let them down is that the adhesive on them (3M my chocolate tea towel holder !) always seemed to fail a few weeks in. Especially at the point where the wire comes out (it tends to pull on them). So the solution was one I discovered when making my paint booth, duct tape.


So for all of the ghetto pedants out there, this one has duct tape in it. It's just like, completely clear duct tape that you will never see. I then used the same method for cable management.


Sadly my test PSU only has two Molex connectors and I can't seem to find the second splitter I made, so I was only able to light up the mobo strips, 3 LEDs in the res and the fans. There is another strip behind the radiator's left side.


I also ordered this. Bitfenix Alchemy USB extension cable.

 
Back
Top