Project - Alternate (Custom PC Desk Build)

Deblow

New member


Project Alternate: PC in a desk scratch build & MODs

Hi all,
After what feels like a very long year I have decided to start work on my new desk build.
The idea for this desk came to me when i was working on my last desk & at one point I almost started the project
again, but I'm glad i didn't

Most people liked the desk & I learned a great deal during the build.

The Project Alternate design slightly changed month by month & I will show some of the other plans & explain why the changes was made.
This time I'm hoping to outdo my last desk & hopefully help others in the process.

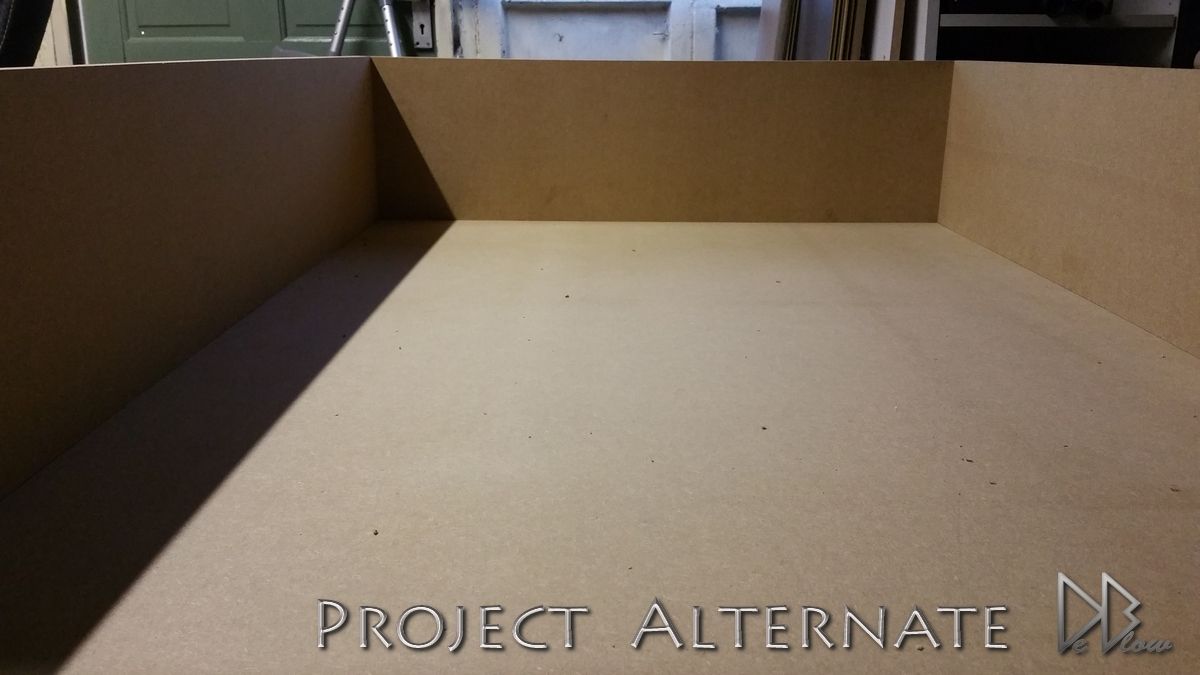
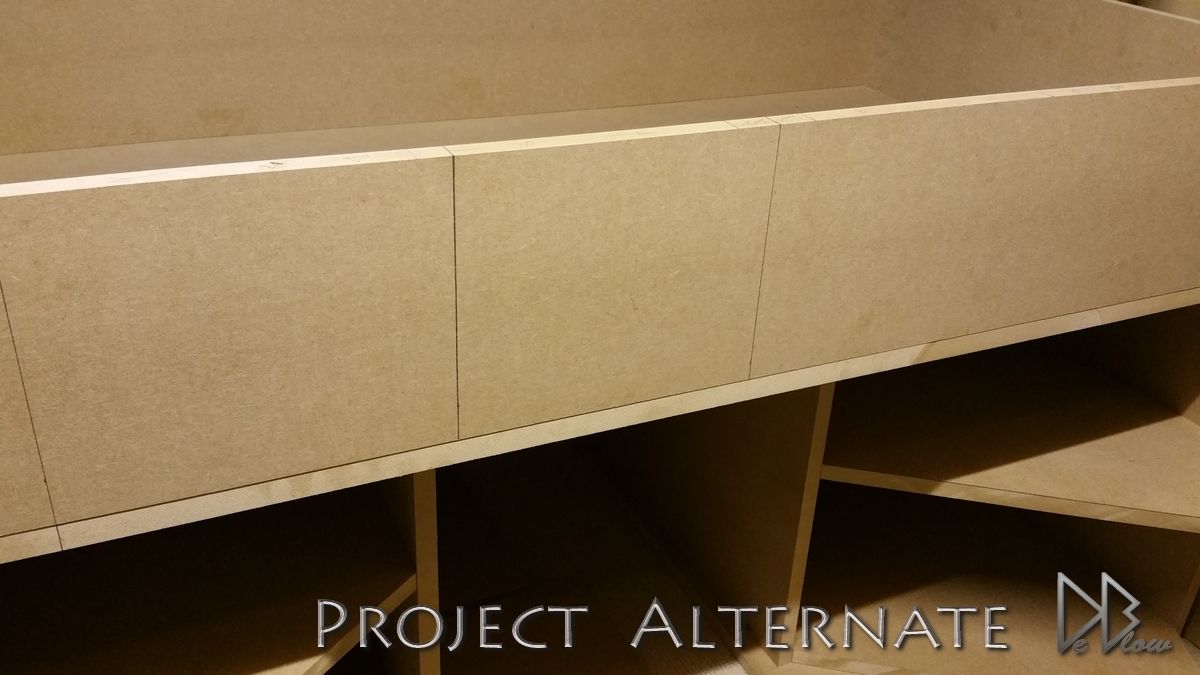
The desk work is about to start, using mostly MDF, Perspex, clay, metal & glass I plan to build the desk in 3 parts,
starting from the bottom, then middle followed by the top section.
the tricky parts will be the sharp corners & angles on the edges.

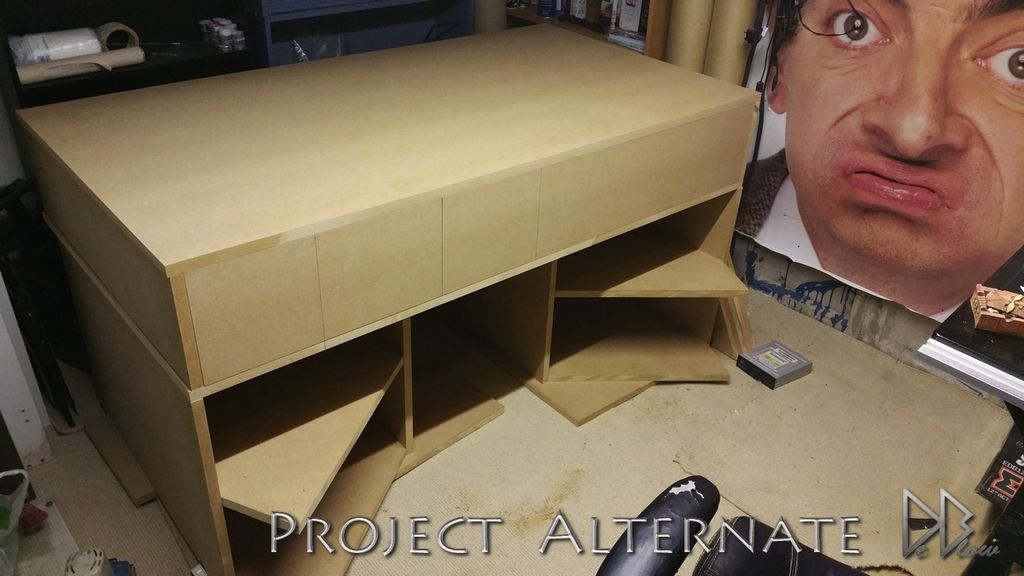
In making the desk in 3 parts it will allow for easy transport from my garden shed to my
very small room/office.

I plan to have the 2 reservoirs just under the top shelf so i can see the water flowing by :)

have a couple of different layouts for the internal components,
but want to wait until the top compartment is built so I can see IRL what looks & works best.

For the specs, I'm upgrading from my trusty i5-2500k to a i7-5820K, due to the CPU upgread I will also be using the new ASUS X99 TUF
motherboard & DDR4

This time I will also go with 3 screens at 1440p if possible, or 1X 4K screen, so my HD7970s will also need upgrading to a R9-295x2.

The desk is going to take months to complete, so rushing out for parts now is not necessary unless it's something on sale I can't pass on :D

**UPDATE 25/4/15: some Specs**

CPU - i7-5820k
MB - ASUS Sabertooth X99
RAM - 32GB Avexir Blitz 1.1 (DDR4)
GPU - ASUS R9-295x2
PSU - Cooler Master: V1200 Platinum
Desk fans - Cooler Master: Jet flow 120's (red)

"Will update this again later in the build"


Thanks to the sponsors.
Cooler Master UK, CM Storm, ASUS ROG, Phobya, OCOOL/Alphacool Mayhems GT Omega Racing & Avexir


For past & present MODs/Builds please check my Facebook & Youtube pages.
"MegaDeblow"

Thanks!
 
Last edited:
I guess someone just had to come in and trump my desk mod ;)

Welcome Deblow and good luck, we're pretty excited about this one!
 
Once summer hits I will be redoing my desk. This design makes me want to get real creative too. Maybe ill do an Angry Ferrari haha
 
here is one of the many 1st designs i did, had to change it due to the size :(

Image00001_zpseckg2cwi.jpg


After the wife told me to move all my model cars from the living room, this cabinet ended up in the garden, I was planing to use the glass from this
on the next build & was one of the main reasons the desk is so angled, I also love the Honda CBR600RR due to its sharp looking design & ofc Lambos have the same sharp designs that i love,
now due to the design changes I cant use the glass so will be using fresh cut glass or thick perspex.

Image00002_zpsbtg1jnor.jpg


The MDF for the 2 bottom sections along with most of the MDF for the middle have now been cut to size & I have started to assemble.

Image00003_zpspyj2jd3j.jpg


I was told to kit myself out with a face-mask & glasses when cutting MDF,
but the normal size face-mask was causing my glasses to steam up lol
So had to dig out my airsoft mask to use in conjunction with the small face-mask

Image00004_zpsczyvlncy.jpg


Some of the bolts/screws I will be using to fasten the main parts together, they will make it more easy to remove with standard alan keys & should last longer.

Image00005_zps1sqcgie0.jpg


Image00006_zps9rsztkan.jpg


Image00007_zpseblvxsfj.jpg


Sides ready to be fasten to the bottom & back, soon as the miter edges are done

Image00008_zpsq2j5uyoa.jpg


The hardest part so far, miter edges, very tricky & most the time i have to use scrap wood before doing the final peace or risk wasting some MDF

Image00019_zpsktcmnmwi.jpg


My 1st set of angled corners cut ready to use as shelf's/frame

Image00009_zpshobfpfwv.jpg


Bottom left assembled

Image00010_zpsvaoaajo2.jpg
 
Last edited:
I guess someone just had to come in and trump my desk mod ;)
Welcome Deblow and good luck, we're pretty excited about this one!

haha, sorry mate, Im sure yours is perfect for your room, will try find it soon ;)
Thanks


Very interesting concept. Will watch this one with great interest.

Thanks for your interest :)

Once summer hits I will be redoing my desk. This design makes me want to get real creative too. Maybe ill do an Angry Ferrari haha

lol, I would love to see that, especially if you go with ferrari red :cool:
 
A bit later than planed but finally got time now to update the log :)

Both bottom left & right shelf's/frames are completed, no permanent fittings just encase i have any problems moving the desk to the house,
This was by far the easiest part so far

01_zps1bnhyp2b.jpg


The main compartment that will act as a frame for the top & hold the fans & other components - the RADs

02_zpsdi3fwcv6.jpg


03_zpsb1lhgibq.jpg


04_zps8ebrmklo.jpg


05_zpstx4y8uf7.jpg


06_zpsgplqlc8i.jpg


07_zps5hwq04ca.jpg


Here im making some slots for the front panels that will be resting on the left & right side shelf's, doing so will help hold them im place as I screw them down

09_zpst5qlrf7m.jpg


10_zpsuo22osth.jpg
 
Over the past week some build items have arrived so I will cover them along with the case mod im doing
Moving the MEGA desk build (2013) in to the case to make room for the new desk & to ensure I have a working
computer during the build so I can keep you all updated :)


My 1st package had some Cooler Master bit n bobs that I will cover later in the build
along with my replacement tea cup & cap :D


Image00001_zpsfnkfb384.jpg


Image00002_zpslpzijj1c.jpg


2nd package had the heart of the new build, A v1200 PSU along with Jet Flow 120mm RED fans & some
very nice Resonar in-ear buds so I can have some decent music as I'm working in the shed :)


Image00003_zpsazl1hpf3.jpg


Image00004_zpsjvwxdzch.jpg


Image00005_zps7oaoxyec.jpg


Image00006_zps8t3ezgsq.jpg


Image00007_zpsz3tvwooa.jpg


Image00008_zpsartdfwxw.jpg


Image00009_zpst9zxrc0l.jpg


Image00010_zps0vac7z9y.jpg


Image00011_zpshny3kref.jpg


Image00012_zpsxvtkq8wx.jpg


And last thing I received this week was my new CPU, Intel i7-5820k witch will be a nice upgrade for me
the last CPU I was using was the i5-2500k.


Image00013_zpsjbedb3qa.jpg
 
Moving the old desk build to a cooler master silencio 652s case..
Wrapping with some 3M vinyl wrap (brushed silver)

Image00001_zpsn9bzbtrl.jpg


Image00004_zpsuoqgacfh.jpg


Case broken down ready for the wrap, fairly easy to do

Image00014_zpskym4ccl3.jpg


Image00020_zpsjeckbw0m.jpg


Image00022_zps9gcuwxki.jpg


Image00023_zpslrkdbptv.jpg
 
Building from bottom to top, the sides are cut and attached with screws & glue,
decided to use some old wood for this part to test out the new saw & my skills with mitering

In the end I was so happy with the results I kept the old wood & didn't bother redoing them with MDF :)

01_zpsuc90bmjs.jpg


02_zps8duxv1qb.jpg


03_zpshjz7bf3i.jpg


This bit was tricky, wood too deep for the dremel, design to narrow for the multi tool :(
Ended up having to use a bit of everything including a hand saw & blade.

05_zps9ebblrrr.jpg


06_zpsukqnkkp0.jpg


07_zps01pu1o2p.jpg


Now time to cut the part that will allow my legs to go under the desk, then for the 1st time I can sit at the desk to get a feel for how it
will be when completed.


08_zpsamvco6ui.jpg


09_zps0dmjwors.jpg


10_zpsgcgvwem1.jpg


This is one of the drive bay holder cutouts, again with the older wood

11_zps58nqqbbr.jpg


12_zpsptkhkgbm.jpg


13_zpsomroa30i.jpg


The final update for this weekend is the start of the two shelf ends that will also act as speaker boxes

14_zps3imtj1um.jpg


15_zpsgpgey7jy.jpg


Hope you enjoyed the updates, please let me know your thoughts as I progress, good or bad, still time to change things if needed :D

Have a nice weekend
Rob
 
Looking great. I can't wait to see more.

Thanks Kong ;)
Funny you have the name Kong & I happen to have found my Kong cinema poster today when in the shed :D
I will sneak it in to a build log photo at a later date, if it fits as its about 3 meters long lol
 
Last edited:
Back
Top