You are using an out of date browser. It may not display this or other websites correctly.
You should upgrade or use an alternative browser.
You should upgrade or use an alternative browser.
Draining my loop
- Thread starter Mullet
- Start date
FarFarAway
New member
Yep that's what I'd do too. Make sure you have lots of towels/tissues around just in case. If all the H²O doesn't come out in one go, start disassembling it bit by bit but try to keep it away from other components. If I'm doing a total loop re-route I take the mobo and GPU's out
From the looks of it he's drained out all the old blue fluid & swapped it for the black Feser stuff. Ordinarily it would'nt be my thing but it works in your setup & I really like it.
I see you swapped out the ugly blue 90 deg. bend for the delrin block... very nice touch mate!
I see you swapped out the ugly blue 90 deg. bend for the delrin block... very nice touch mate!
FarFarAway
New member
Very sexy, can't believe what a positive difference those black joints make, awesome ")
Thanks guys,
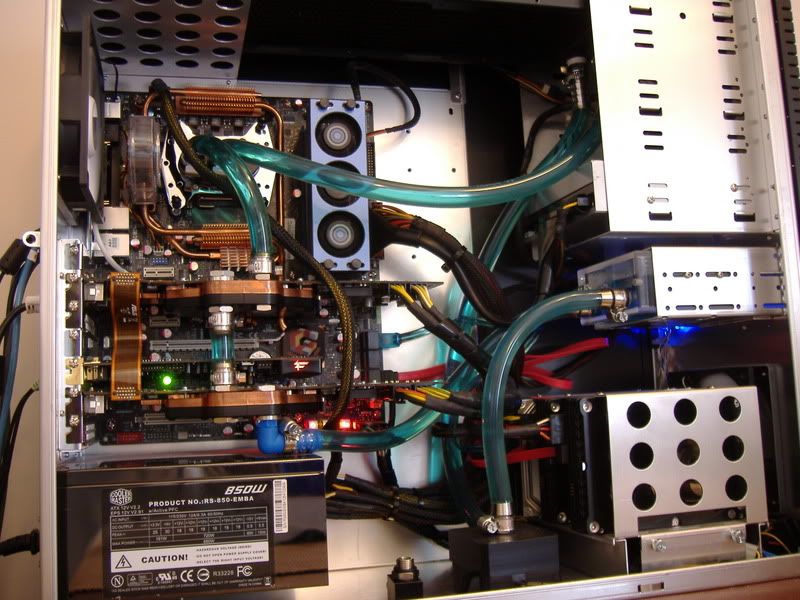
The whole drain and re-fit loop too me ages. I started at 7.30pm and finished at just gone 3am!! Mind you, I had to clean everything....got the vacuum cleaner on the rad core...pretty dusty, cleaned all of the fans, clean out res and rad...etc...
I've re-filled the loop with black fluid-XP...I was a little unsure about the look of black coolant but having seen pics of Mr Smith's rig that swung it for me.
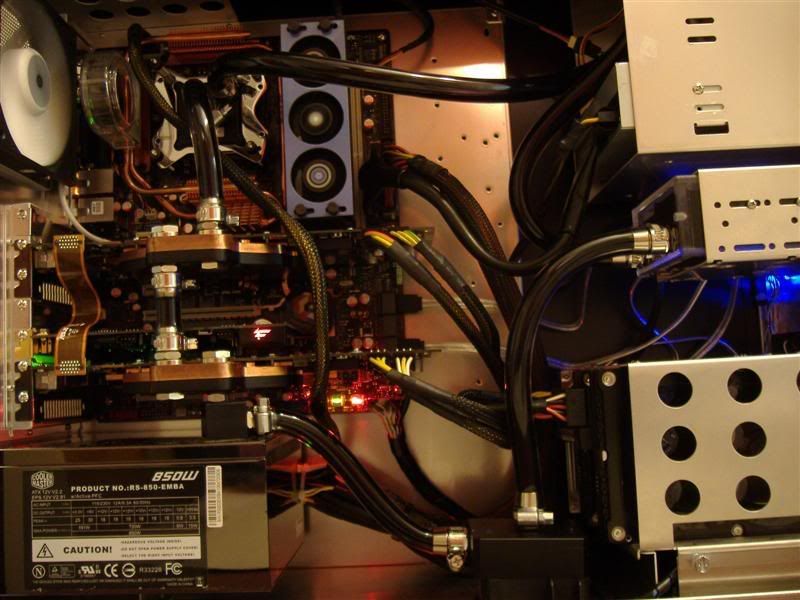
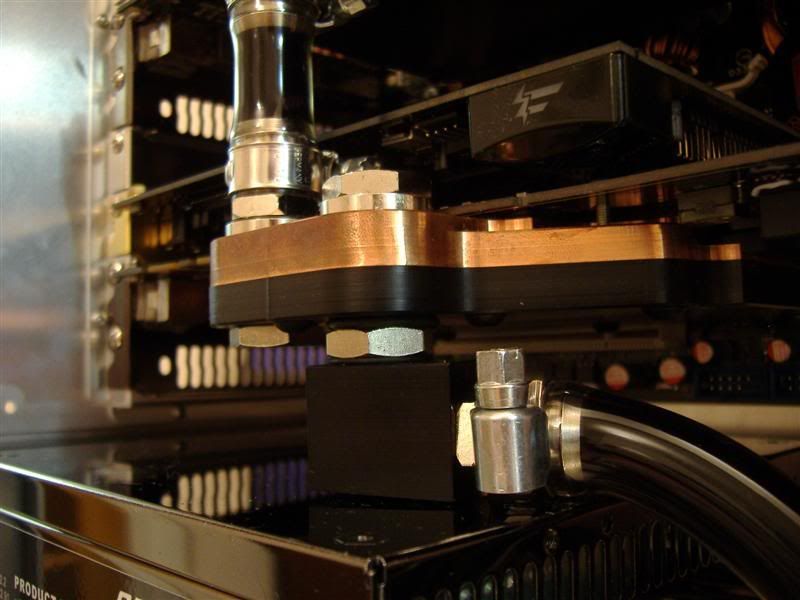
Matt - yup, the black elbow makes such a difference, I have also added the spacers on the copper side of the GTX blocks. It seems that this coupled with shorter pipe runs, less restrictive elbow has increased flow rate...the coolant was flying into the res at a rate of knots when I was filling it up!
Agreed re the EPS 12v cable....I tried to route it under the GTXs, but it wasn't long enough.
I think the rig is pretty much complete now unless anyone has any suggestions??
OC details to follow..
Thanks again
The whole drain and re-fit loop too me ages. I started at 7.30pm and finished at just gone 3am!! Mind you, I had to clean everything....got the vacuum cleaner on the rad core...pretty dusty, cleaned all of the fans, clean out res and rad...etc...
I've re-filled the loop with black fluid-XP...I was a little unsure about the look of black coolant but having seen pics of Mr Smith's rig that swung it for me.
Matt - yup, the black elbow makes such a difference, I have also added the spacers on the copper side of the GTX blocks. It seems that this coupled with shorter pipe runs, less restrictive elbow has increased flow rate...the coolant was flying into the res at a rate of knots when I was filling it up!
Agreed re the EPS 12v cable....I tried to route it under the GTXs, but it wasn't long enough.
I think the rig is pretty much complete now unless anyone has any suggestions??
OC details to follow..
Thanks again
one other thing tho you not thought of taking the cpu power cable under the mobo itself has it short instead of haveing it going over the board just a thought has that would then realy make a diffrence
Should have enough length to route it up the gap under each graphics card, right up to the backplate... ie: run the cable up the lefthand edge of the slots on the mobo. All the cards should have a cutout for component clearance there making it ideal for cable routing. S'how I've always done it...
name='Marci' said:Should have enough length to route it up the gap under each graphics card, right up to the backplate... ie: run the cable up the lefthand edge of the slots on the mobo. All the cards should have a cutout for component clearance there making it ideal for cable routing. S'how I've always done it...
Thanks Marci,
Will have a go...any idea how I can do this now that all my kit has been fitted? I don't want to have to drain the darned loop again, that was enough of a headache in itself.
Cheers

Similar threads
- Replies
- 0
- Views
- 3K
- Replies
- 5
- Views
- 431