Getting there
Here are some pictures of the setup. I was hoping to get a proper insight into the process, however having only two hands doesn't make for an easy task to both solder the connections and take pictures at the same time

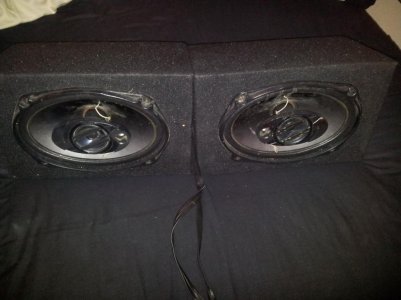
So a while back I bought some 6x9 speakers for my car. A pair of lovely 350W Pioneers that I mounted in wooden enclosures as I didn't want to make cutouts in my car.
http://forum.overclock3d.net/attachment.php?attachmentid=4088&stc=1&d=1351049088
These set me back 30 quid and they were well worth the investment.
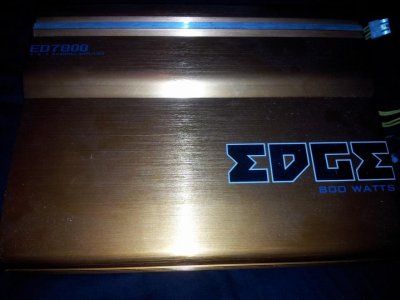
At the time I had a Sony player inside the car and its little amp was nowhere near powerful enough to drive these, so I saved up a few quid and bought this lovely Edge 800W quad channel amplifier
http://forum.overclock3d.net/attachment.php?attachmentid=4089&stc=1&d=1351049088
Lovely thing this is. I was quite happy with it in my car, blasting away down a dual carriageway or more fun road.
Fast forward 6 months - I'm in Sheffield studying. Bringing the car with me was not a viable option due to cost constraints. Plus, I'd noticed some rust on the brake lines - not exactly the ideal location for rust, so I ended up having to scrap the car. It was getting really old anyway, so its time had come a long time ago.
This had me facing 2 options - sell all this equipment to someone on ebay, OR - keep it, find a suitable power source and have a good option for when loud music is necessary.
As it is, option 2 seemed the best choice to me, so I started thinking and looking.
After considering some options, I arrived at the conclusion that a PC power supply would be the best option for the following reasons:
1. It will deliver a steady regulated +12V
2. Good brands have excellent OVP, OCP and PFC
3. It's considerably cheaper than designated 12VDC power supplies of this rating
4. It will be much easier to sell if I don't need it any longer
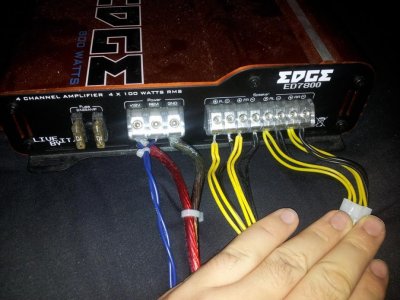
Once I'd decided on the type of power supply, I needed to work out the power ratings I needed it to run at, so I took another look at the amp.
http://forum.overclock3d.net/attachment.php?attachmentid=4090&stc=1&d=1351049088
It comes with 2 25A fuses, suggesting a maximum allowable current of 50A, which works out roughly to 600W total power draw, so I knew that's the number I'm looking for.
Then I started scouting ebay for PSUs that meet the requirement. I quickly ran across this:
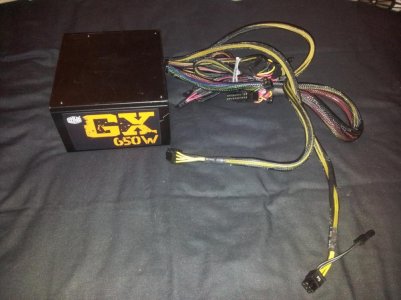
http://forum.overclock3d.net/attachment.php?attachmentid=4092&stc=1&d=1351049088
After looking up a couple of technical reviews I decided that if I can get it for the right price it will do perfectly, and sure enough - it did.
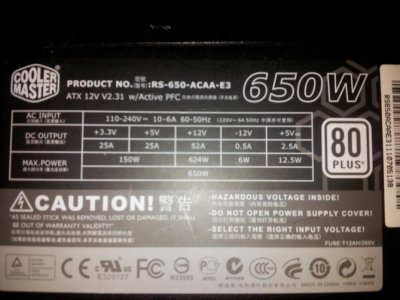
Upon closer inspection, this PSU has a maximum rated +12V supply of 52A as shown below:
http://forum.overclock3d.net/attachment.php?attachmentid=4091&stc=1&d=1351049088
It also has 25A rated +3.3V and +5V rails, which means that I can easily add LEDs and more power output options.
So once I had all the parts together it was time to consider how to connect it all together. Then I took a closer look at the main power cables I'd used for the amp. They come in twisted strands of 7 cores. Once untwisted, the separate strands can be treated as separate wires and can be soldered onto anything.
I wasn't sure exactly which power lines to use, so I spent a while on google searching for diagrams and power specifications. I found a really good website, which outlined the design spec on all ATX and pre-ATX connectors.
In the end I decided that 6-pin PCI Express' 75W power rating is a big lie, since all the extra 2 pins do is add ground. Beyond that - it's considered to deliver 150W.
I was surprised to find out that the 8-pin EPS power was rated at over 200W.
Further research on the topic pointed out that all the +12V wires are the same, and since 4-pin MOLEX leads are rated at 10A, it's possible to carry 30A over a 6-pin PCIE and 40A over an 8-pin EPS. I didn't need to worry about separating the power lines, since this is a single rail PSU, so it was decided.
At this point, I ordered a 6-pin PCIE and 8-pin EPS +12V extension leads off amazon.
I figured - don't f--- with the power supply, just get the input connectors right and it'll do it fine.
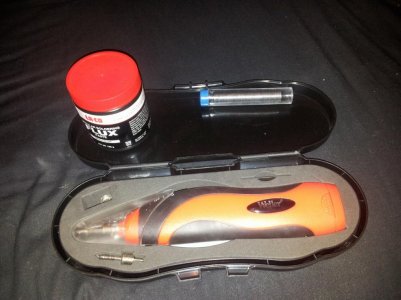
At the same time, I bought a battery powered soldering iron. I went with batteries because I needed mobility more than prolonged usage. This Weller has served me nicely since
http://forum.overclock3d.net/attachment.php?attachmentid=4097&stc=1&d=1351049088
Needless to say, It goes through batteries like a hot knife through butter :dammit:
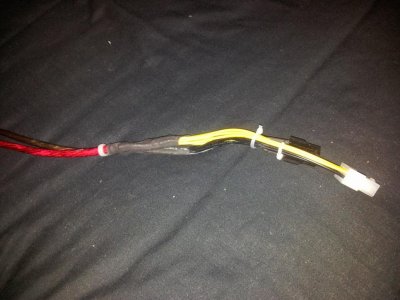
After stockpiling some Duracell AAs I got started. The end result are these connectors:
http://forum.overclock3d.net/attachment.php?attachmentid=4095&stc=1&d=1351049088
I was really happy with how the heatshrink turned out, especially since I'd not even needed a lighter to do it right.
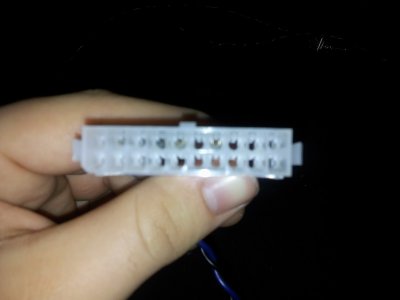
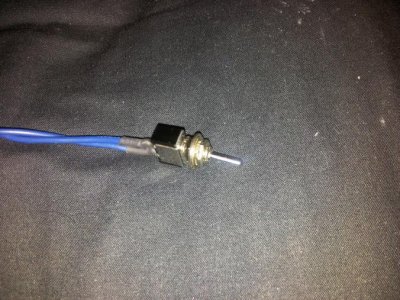
For a while after that, I was running a little wire to force the PSU on via 24-pin bridge, but that did have a slight tendency to fall out for no reason *cough* bass *cough* :rock:
A permanent solution was needed, so I went to Maplin and picked up a 20-pin connector. Soldered a switch to 2 pins and plugged them in the right place.
http://forum.overclock3d.net/attachment.php?attachmentid=4093&stc=1&d=1351049088
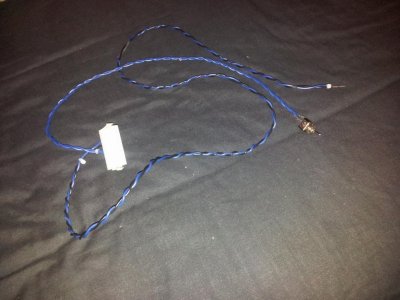
At the same time I decided to kill 2 birds with 1 stone, so I picked up a USB3 solder on connector to run as a high current power source at 5V. That however was too flimsy and fell off 2 days after I soldered it on.
This was the end result:
http://forum.overclock3d.net/attachment.php?attachmentid=4094&stc=1&d=1351049088
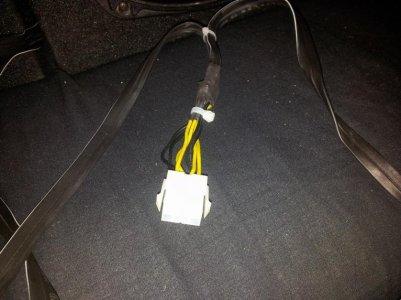
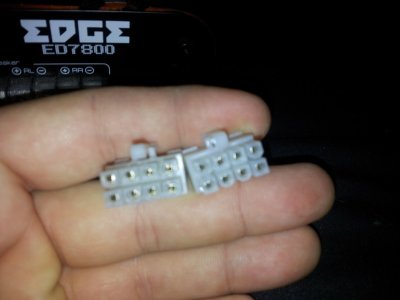
At right about this time I was moving the sound system from my room to the kitchen and back. Then I noticed that it does take a long time to connect the speakers up when everything has been moved. I had some 8-pin EPS extensions (and bits of extensions) lying around. The leftovers from what I'd ordered for the power system setup on the amp I managed to salvage and turn into a dual speaker output for the amp.
I had also just replaced an extension for my HAF X with some BitFenix Alchemy Black, so that was cut in half and used for an extra dual speaker output and for the speaker input, with the end result being this:
Amp side
http://forum.overclock3d.net/attachment.php?attachmentid=4099&stc=1&d=1351052378
Speaker side
http://forum.overclock3d.net/attachment.php?attachmentid=4096&stc=1&d=1351052378
Right now this is a fully modular system, based on PC connectors, however it is not complete.
Further development will eventually include an MDF enclosure, as well as a PSU power light and various USB charging docks (i.e. 1A, 2A, 5A and 25A)
I hope this makes for an interesting read
")