HCP
New member
Cray supercomputers are probably not a new name for anyone.
As on my other builds i make something strange or odd, so will this be
I´m not sure yet if i´m going with a ITX motherboard for it or taking a NAS and remove the case from it. The future will tell
I have eight 2TB S-ata drives waiting for a housing, dont know if all will fit but atleast 6 of them.
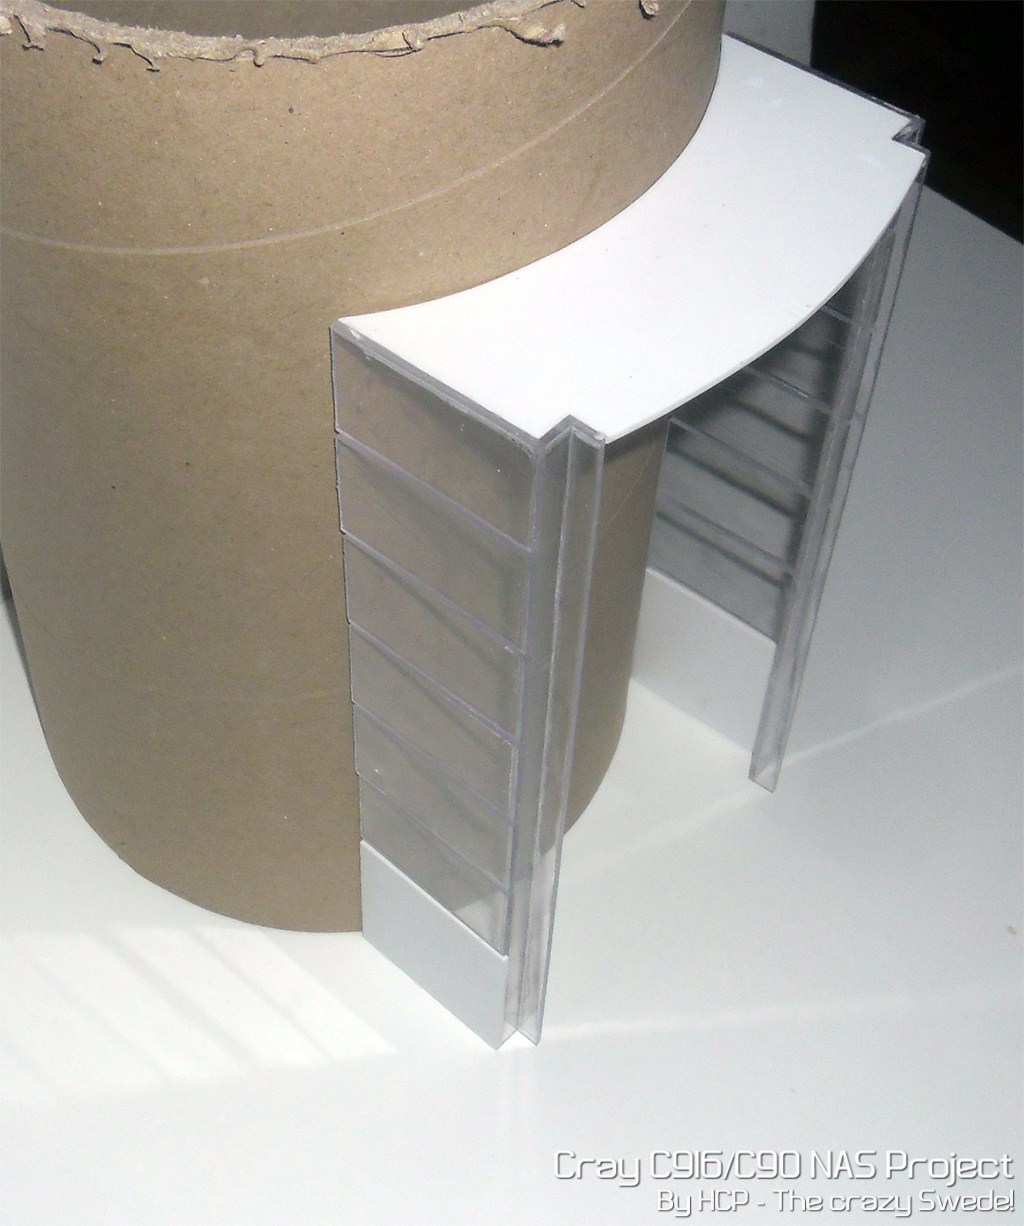
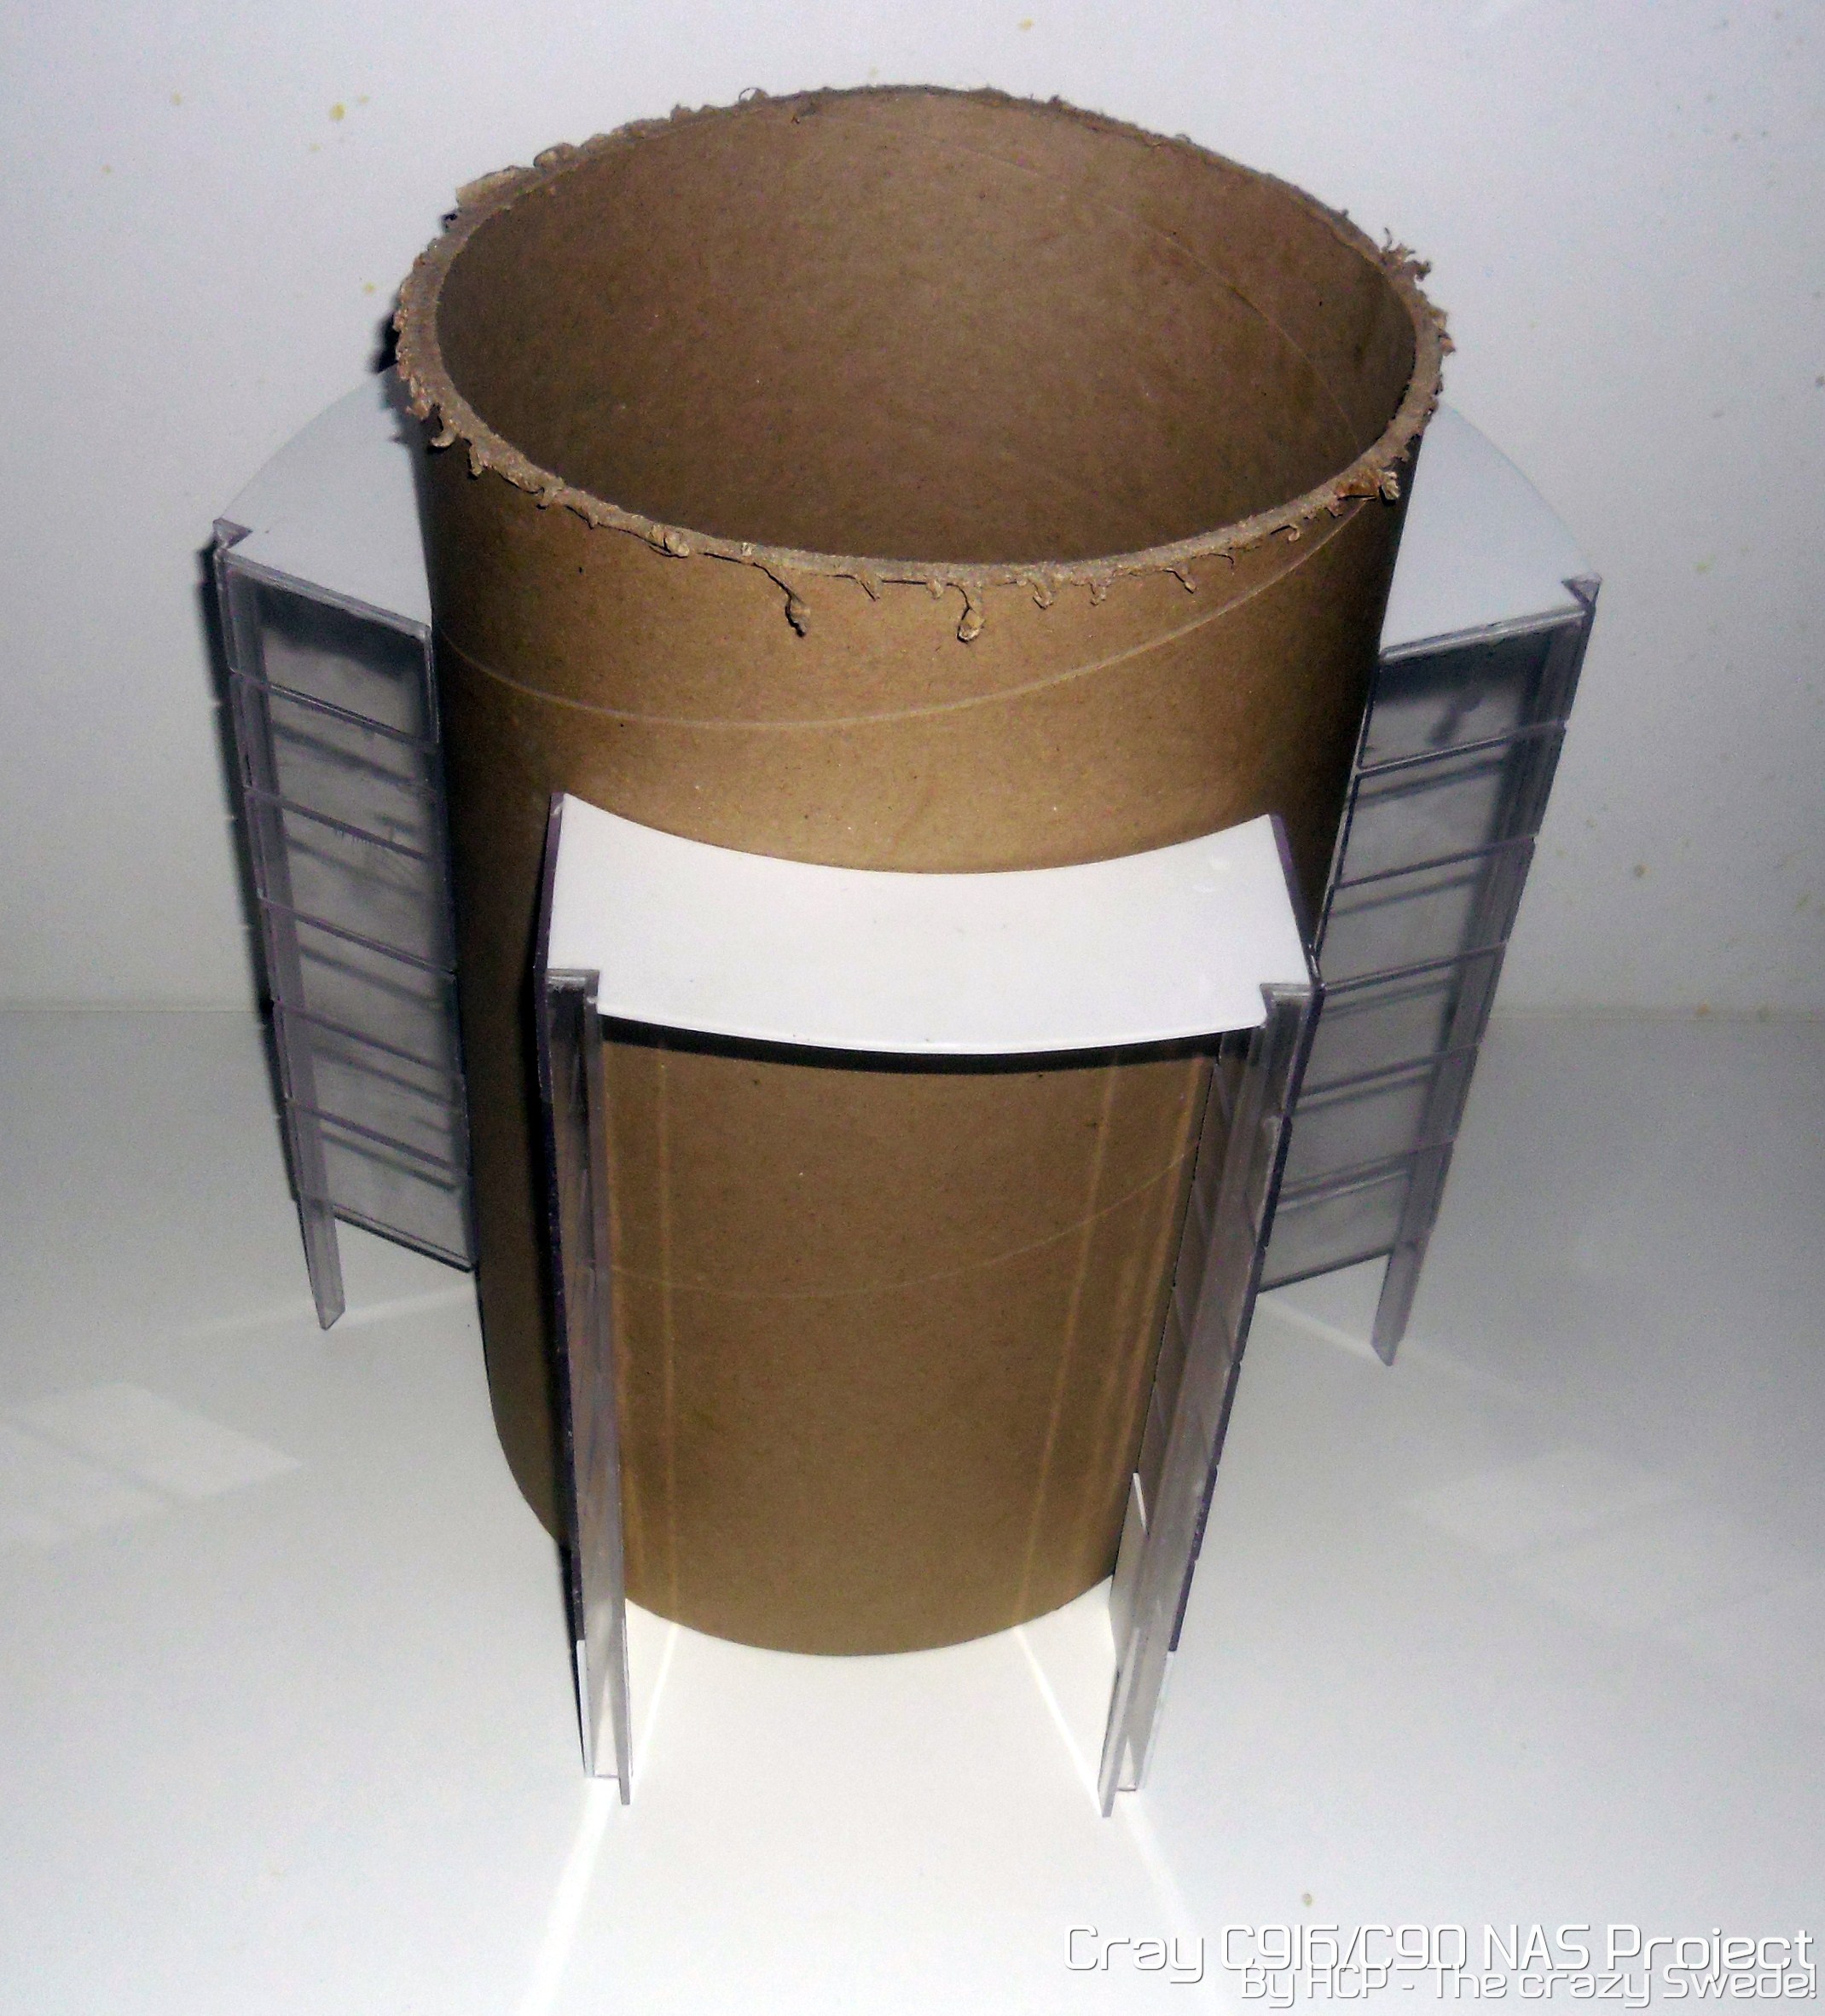
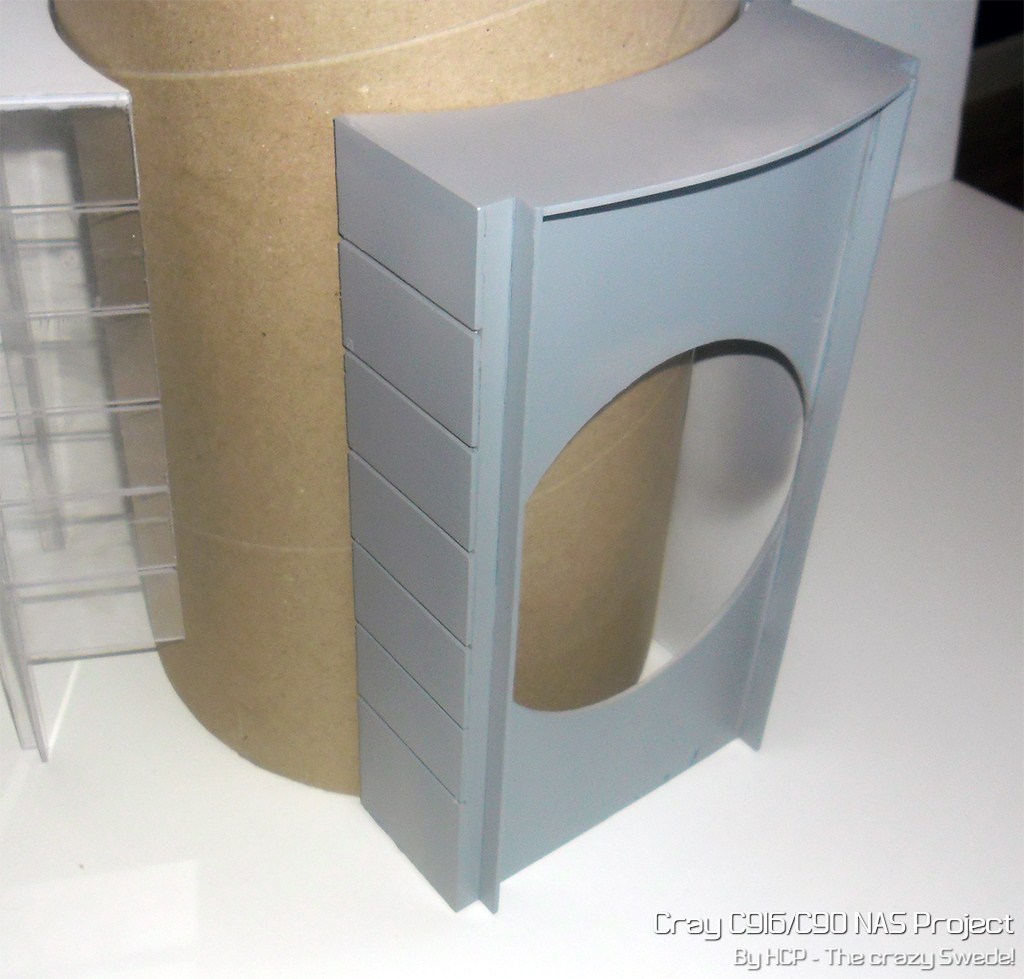
It all started with a email to CRAY asking for measurements for their old computers and casings
Then i told the story, im a fan of older big computers with some soul in the case and wanted to make a working scale version of it.
I get alot of questions why and how i can manage to keep all this projects alive, and why i dont make one done before starting another.
So here it is, before i get the same question again")
I do not have a job after a heart attack and a back injury, im at home with my 4 y.o. kids and the hours when they are on kindergarten and late night i need to fill with something to do (except for my company i spend some hours on), and there it is. I have probably 10 times more time for this than other modders.
Enough of the text, here my first sketch of the C916 based on information i got.
I still need to put into some more changes and details for it.
Rough rendering

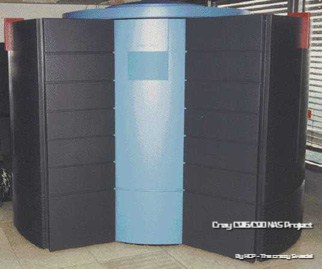
Cray systems picture of it.

As on my other builds i make something strange or odd, so will this be
I´m not sure yet if i´m going with a ITX motherboard for it or taking a NAS and remove the case from it. The future will tell
I have eight 2TB S-ata drives waiting for a housing, dont know if all will fit but atleast 6 of them.
It all started with a email to CRAY asking for measurements for their old computers and casings
Then i told the story, im a fan of older big computers with some soul in the case and wanted to make a working scale version of it.
I get alot of questions why and how i can manage to keep all this projects alive, and why i dont make one done before starting another.
So here it is, before i get the same question again
I do not have a job after a heart attack and a back injury, im at home with my 4 y.o. kids and the hours when they are on kindergarten and late night i need to fill with something to do (except for my company i spend some hours on), and there it is. I have probably 10 times more time for this than other modders.
Enough of the text, here my first sketch of the C916 based on information i got.
I still need to put into some more changes and details for it.
Rough rendering
Cray systems picture of it.
Last edited: