Silverstone-Z
New member
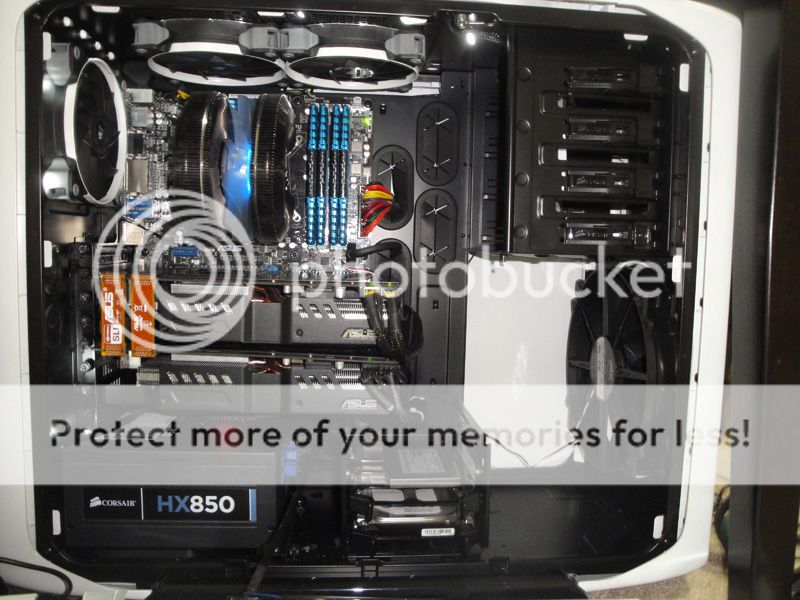
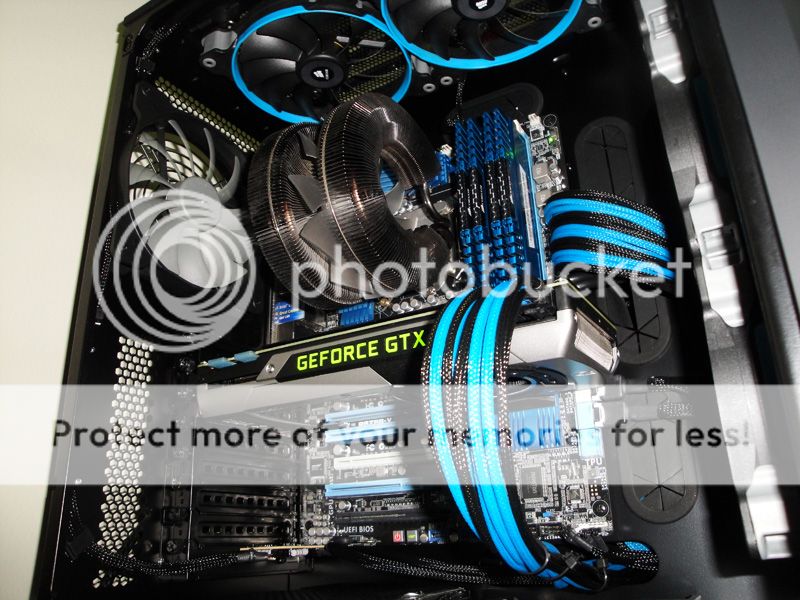
I've had this build for a while, built it at the end of 2011. It was originally put inside a Corsair 600T white case, and I thought the aesthetics were okay, since it worked. Back when it was built, it was equipped with a single ASUS GTX570 DCII, but it's come a long way to become what it has. Quickly, I started to realize the 570 wasn't enough for the games that were coming out. I hopped on eBay and picked up another DCII 570. This is where things got interesting. I started having heat issues with my top card and noticed my PC sounded like a mini leaf blower. I made a frowny face and looked into the different paths I could go. Way back, I looked into liquid cooling, but I didn't feel it was mature enough to be reliable. I stayed away. It was now, however, a very real option. I decided I was gonna do it. After a bunch of research, I opted to go full XSPC for cooling components.
For some reason, I then decided to sell my GPUs and upgrade to a stronger single card. Any questions are welcome on how working with this case is and how working with acrylic tubing was. In the end, I wouldn't choose any other option. Somewhere in the mix, I decided to pull the trigger on some MDPC sleeving. That was fun... :huh:
The system is aging rapidly, and I have a good amount of things to do to it when I return from my current deployment. I feel a refresh is due. Plans are to replace the motherboard (2011?), CPU (6-core), PSU (AX1200+), add another GPU (SLI), possibly set up a second loop, grab a couple more hard drives/SSDs, ditch the fan controller for an all-contained unit (EK or CorsairLink) and stuff it all in a Corsair 900D that I'm gonna take the time to refinish inside so as to hide all cable routing holes, etc, behind a false backplate. Not sure on the color change, yet. I also plan on ripping out the subpar NZXT LED strip that's half-assed and doing my own custom hidden LED lighting via lots of pcb, SMDs, and soldering. :lol:
Main Components
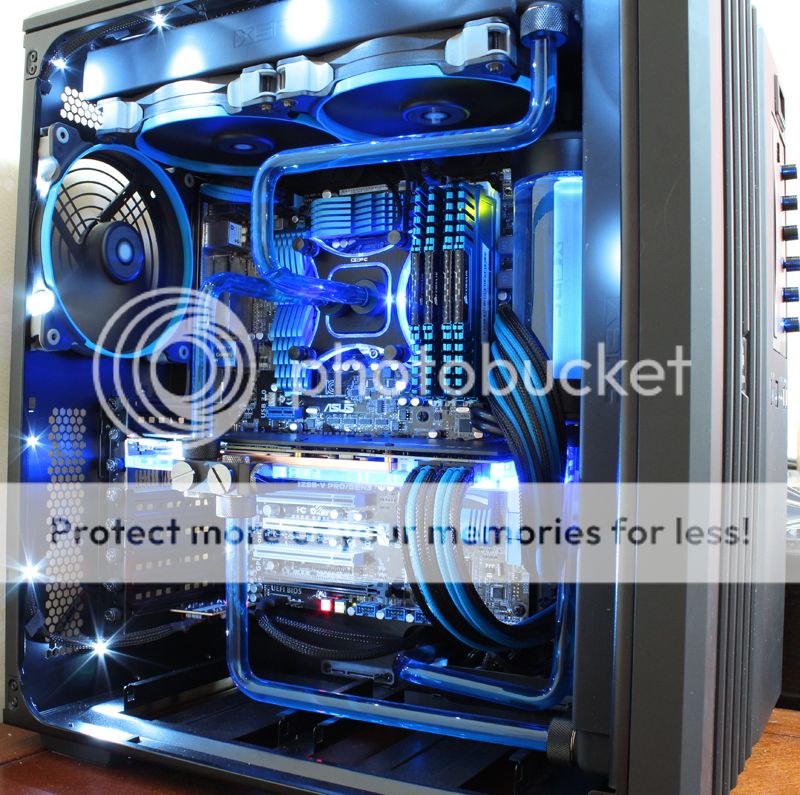
Case: Corsair Air 540
Motherboard: ASUS P8Z68-V Pro/Gen3
CPU: Intel Core i5 2500K @ 4.6ghz
RAM: Corsair Vengeance 16gb (4x4gb) DDR3-1600
GPU: ASUS Nvidia GTX780
PSU: Corsair HX850 - MDPC black/aqua blue
HDD1: Crucial M4 128gb
HDD2: Seagate 1tb 3.5" 7200rpm
HDD3: Seagate 500gb 2.5" 7200rpm (Photography drive)
Cooling
XSPC Raystorm CPU Waterblock
XSPC Raystorm 780/Titan Waterblock
Swiftech MCP655-PWM G1/4-Threaded
XSPC Photon 170mm Reservoir Glass/Aluminum
XSPC EX360 Radiator
XSPC EX280 Radiator
XSPC In-Line LCD Temperature Sensor
Primochill Rigid Ghost Fittings
Primochill Rigid Acrylic Tubing
Corsair SP120 Fans x3
Corsair AF140 Fans x3
Original build
Air Cooled
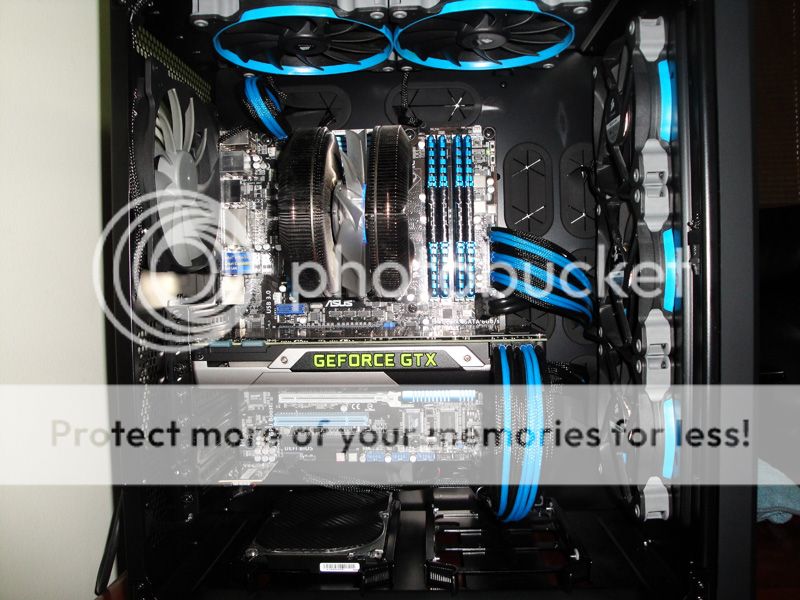
Process


Current
For some reason, I then decided to sell my GPUs and upgrade to a stronger single card. Any questions are welcome on how working with this case is and how working with acrylic tubing was. In the end, I wouldn't choose any other option. Somewhere in the mix, I decided to pull the trigger on some MDPC sleeving. That was fun... :huh:
The system is aging rapidly, and I have a good amount of things to do to it when I return from my current deployment. I feel a refresh is due. Plans are to replace the motherboard (2011?), CPU (6-core), PSU (AX1200+), add another GPU (SLI), possibly set up a second loop, grab a couple more hard drives/SSDs, ditch the fan controller for an all-contained unit (EK or CorsairLink) and stuff it all in a Corsair 900D that I'm gonna take the time to refinish inside so as to hide all cable routing holes, etc, behind a false backplate. Not sure on the color change, yet. I also plan on ripping out the subpar NZXT LED strip that's half-assed and doing my own custom hidden LED lighting via lots of pcb, SMDs, and soldering. :lol:
Main Components
Case: Corsair Air 540
Motherboard: ASUS P8Z68-V Pro/Gen3
CPU: Intel Core i5 2500K @ 4.6ghz
RAM: Corsair Vengeance 16gb (4x4gb) DDR3-1600
GPU: ASUS Nvidia GTX780
PSU: Corsair HX850 - MDPC black/aqua blue
HDD1: Crucial M4 128gb
HDD2: Seagate 1tb 3.5" 7200rpm
HDD3: Seagate 500gb 2.5" 7200rpm (Photography drive)
Cooling
XSPC Raystorm CPU Waterblock
XSPC Raystorm 780/Titan Waterblock
Swiftech MCP655-PWM G1/4-Threaded
XSPC Photon 170mm Reservoir Glass/Aluminum
XSPC EX360 Radiator
XSPC EX280 Radiator
XSPC In-Line LCD Temperature Sensor
Primochill Rigid Ghost Fittings
Primochill Rigid Acrylic Tubing
Corsair SP120 Fans x3
Corsair AF140 Fans x3
Original build
Air Cooled
Process
Current
Last edited:
")


