[Build Log] Nyssa

Asperatis

New member
Hi all!

At long last the time has come for me to start my own build log!

For the past ten months I've been lurking on many forums, done a lot of research on the webs and seen loads of tech videos. I've been a console player ever since I was a kid, but last year I decided I wanted to build a killer pc for gaming and shift my attention towards the pcmr. So yes, this will be my very first build ever, and I have to say I'm quite stoked :D

I'm not a complete nub when it comes to hardware and tech, since my job involves quite a lot of it (work IT in the Belgian Defence). So before people start yelling I have no clue what I got myself into and that this build is way too much for a first time builder, I know what I got myself into and I like a nice challenge. I'm absolutely sure the end result will be worth it.

I'll be going with a black&red theme, which is a pretty common theme, but I really like stealthy black with a touch of red. Hence also the name of this build: Nyssa. I was looking for things that have the same colour scheme when looking for a name, and it just so happens I was watching Arrow and Nyssa Al Ghul appeared in a stealthy black outfit with red accents. that's when I knew :p

sHxuxP5.jpg4413346-4391763-4294443-4215838-7071557824-e8aef.jpg

Enough text, let's show you guys the spec list:

Case: Corsair 900D
MoBo: Rampage V Extreme
CPU: 5930K
RAM: 32GB 4x8GB Corsair 2666 DDR4 red
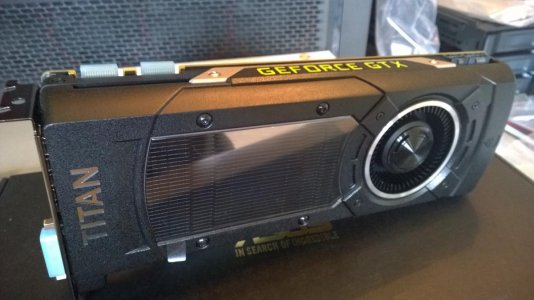
GPU: 2x Titan X
PSU: AX860i
Sound: Xonar Phoebus
SSD: Samsung 850PRO 256GB
HDD: WD Red 2TB
Fans: a whole lot of Corsair fans
And a CableMod C series black&red cable set

Watercooling parts:
2x AlphaCool UT60 480mm rads
EK Supremacy Evo
2x EKFC titan X blocks + backplates
EK D5 pump
FrozenQ LF Reaction 250mm res with a blood red double helix
Black PrimoChill revolver fittings
Red PrimoChill 10/13 acrylic tubing

I also got a whole bunch of ColdZero acrylic plates to go for this ultra clean look and a xonar phoebus backplate. I also have a few neat ideas for the lighting, but these will become clear once the build progresses.

I'll start building in a little under two weeks from now, sorry for the teaser :D
Can't wait to get my hands on all these goodies and transform them in an epic rig!

Cheers!
Asper

EDIT: final pictures!

IMG_7387.jpg


IMG_7348.jpg


IMG_7346.jpg


IMG_7345.jpg


IMG_7331.jpg


IMG_7376.jpg


IMG_7323.jpg
 
Last edited:
Will keep an eye on this thread, can't wait to see how you do with your first build. Welcome, welcome to the PCMR.

What monitor are you looking at getting?
 
Going to be sweet build there mate

Thanks, if all goes well it should be quite the machine!

Will keep an eye on this thread, can't wait to see how you do with your first build. Welcome, welcome to the PCMR.

What monitor are you looking at getting?

I've ordered a Swift, really hoping it won't have any of the problems like Dice has encountered though :(
All of my other peripherals are from Razer
 
Today I spent most of my time unboxing, it felt just like Christmas :D Tomorrow I'm going to pick up all of the hardware in the store.

WP_20150518_15_48_51_Pro.jpg

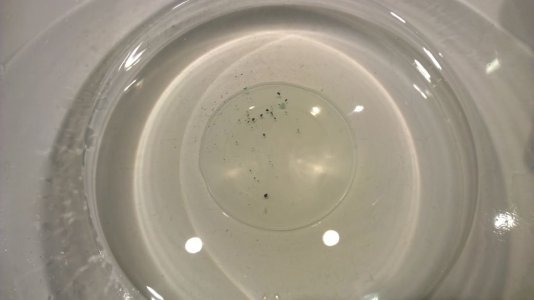
Starting cleaning my first rad as well as the res. Doing the rad dance sure takes some time. I was surprised too to see how much gunk came out of it after the first flush.

WP_20150518_15_16_19_Pro.jpg WP_20150518_15_36_55_Pro.jpg

The first one has been flushed 7 times by now, and I can't see any gunk coming out anymore. For safety I'll do it 3 more times and then 2 more times with distilled.

Had some fun with the fittings already as well :p Love the look and feel of those revolver fittings.

WP_20150518_15_26_53_Pro.jpg WP_20150518_15_43_28_Pro.jpg
 
This looks interesting! Good luck, seeing as though it is your first build.

Thanks! I'm going to have a very good time this week that's for sure.

One thing I saw though was that my small E22 cable combs are still too large for the small CableMod C Series cable set, so I won't be able to do very neat cable management :( In the future I'll order a custom sleeved cable set though from IceModz, because I'll go crazy every time I'll see those 'sloppy' cables in the front :D

Well you can't do everything perfectly the first time because you need something to improve for the next time you build a rig :p:p
 
Well I can say that the actress that plays Nyssa in Arrow is quite hot to be honest here :wub:...

And being a fellow Arrow follower myself, I am subbed on this one. The ending of season 3 was just brilliant, but kinda sucked in a way as well... I hate cliffhangers, but can't wait for season 4 :)

Also being in the Belgium Defense?, oooh.... you guys have tanks that can fly? :p

And this will be a odd one, even coming from me (:lol:), but the layout of the pics and how you taken them has actually got me interested. Those shots of the fittings really caught my eye ;)

Looking forward seeing the progress of this build! :)
 
Big update coming tonight!

I do have one question though:

Out of the 40 screws that had to be unscrewed from both graphics cards, one was like 'NOPE I'm not coming out, f*ck you' resulting in a stripped screw head :mad: I tried using a rubber band for extra grip too but to no avail.

So I called the store where I picked up my hardware and they were like 'DOUBLE NOPE, as soon as you even think about touching that ref cooler we're out of the picture. Thanks for your moneypile though, kkthxbai..' :mellow: Not a single warranty sticker has been touched and the card hasn't even been powered yet, it could be used on air cooling no probs whatsoever. Superb customer support there if you ask me.

So here's the question: Has anybody here ever had a screw on a gfx fail on you that just had to come out? I'm feeling 'quite' scared having to drill on a screw on a €1.2k card tbh :eek:any hints, tips, tricks, suggestions are highly appreciated here!

EDIT: Here's a picture of the culprit:
WP_20150521_16_37_03_Pro.jpg
 
Last edited:
Big update coming tonight!

I do have one question though:

Out of the 40 screws that had to be unscrewed from both graphics cards, one was like 'NOPE I'm not coming out, f*ck you' resulting in a stripped screw head :mad: I tried using a rubber band for extra grip too but to no avail.

So I called the store where I picked up my hardware and they were like 'DOUBLE NOPE, as soon as you even think about touching that ref cooler we're out of the picture. Thanks for your moneypile though, kkthxbai..' :mellow: Not a single warranty sticker has been touched and the card hasn't even been powered yet, it could be used on air cooling no probs whatsoever. Superb customer support there if you ask me.

So here's the question: Has anybody here ever had a screw on a gfx fail on you that just had to come out? I'm feeling 'quite' scared having to drill on a screw on a €1.2k card tbh :eek:any hints, tips, tricks, suggestions are highly appreciated here!

EDIT: Here's a picture of the culprit:
View attachment 10124

my 680 had two of these. Here is something that might help you.

http://www.todayifoundout.com/index.php/2010/02/the-12-best-ways-to-remove-stripped-screws/

I actually did it by filliing mine with superglue and leaving the screwdriver inserted into the hole allowing the glue to dry. The wide rubber band trick has helped me out alot too.
 
Tomorrow there's a store stocking on screw extractors, I'm hoping there will be one small enough for screws like these.

UPDATE!! :D
Let's start with what happened this Tuesday: collecting hardware! I've read many times in several 900D build logs that the case is big, really big. Now I know what they mean, I expected a big case, but this baby is ginormous! Here's how the trunk of our car looked like when we got home from the store:

Dat case
WP_20150519_11_27_13_Pro.jpg

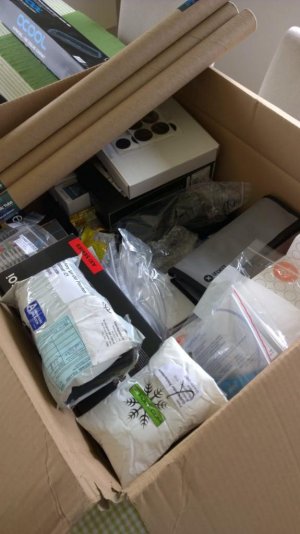
Here's all of the newly acquired hardware:
WP_20150519_12_49_49_Pro.jpg

Some techporn is mandatory ofc :p

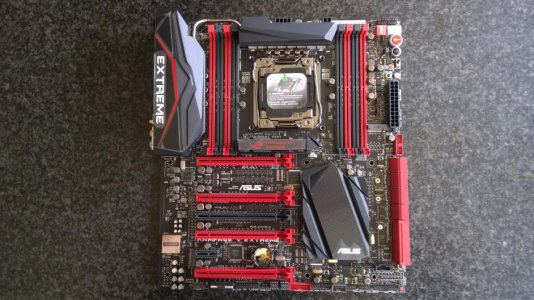
Here's the sweet mobo
WP_20150519_13_01_25_Pro.jpg WP_20150519_13_01_38_Pro.jpg WP_20150519_13_01_57_Pro.jpg

First things first, time to give Nyssa some brains
WP_20150519_13_09_33_Pro.jpg WP_20150519_13_09_46_Pro.jpg

The brain also needs something to work with, so I gave her 32GB of 2666 memory
WP_20150519_13_11_30_Pro.jpg WP_20150519_13_16_30_Pro.jpg

Those brains can get quite hot, so here's how to keep them cool
WP_20150519_13_49_57_Pro.jpg WP_20150519_13_53_03_Pro.jpg WP_20150519_13_54_07_Pro.jpg

Here's a piece I just had to unbox and see with my own eyes
WP_20150519_14_04_44_Pro.jpg

And it got even better, way better
WP_20150519_14_09_06_Pro.jpg


More incoming :D
 
UPDATE CONTINUED!

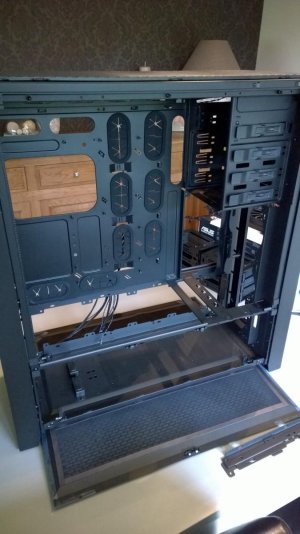
Before we could do some actual work there were some things that had to go. So I stripped her completely (faint of heart, please cover your eyes, I am not responsible for the consequences ;))

WP_20150519_14_50_38_Pro.jpg

When this was done, the rebuilding process could begin. First things first though, those Corsair fan stickers give me the creeps when they spin. Begone if I can see you!

Looking much cleaner right now
WP_20150519_15_12_08_Pro.jpg WP_20150519_15_13_37_Pro.jpg

First fans are installed! Oh and while I was working on the front, I also hid a few LED strips down there too. Just wait for the results, it's worth it

WP_20150519_15_47_04_Pro.jpg WP_20150519_15_47_11_Pro.jpg

Then it was time to insert the PSU and a coldzero cover for the second PSU cutout. The mobo also got inserted with a coldzero mobo tray panel for cleaner looks
I do have to give it to coldzero for their excellent packaging. It is, however, a serious pain to unwrap all those panels :lol:

WP_20150520_10_28_52_Pro.jpg WP_20150519_19_54_49_Pro.jpg

Next up I gave my first rad its last flushes with distilled prior to installation. The basement compartment is going to be very tight but, imo, manageable
I also made sure there was a drain port. It's upside down and on the upper part of the rad because it was impossible to do it the other way around, there just wasn't enough clearing for it
WP_20150520_13_34_24_Pro.jpg WP_20150520_13_34_54_Pro.jpg WP_20150520_13_35_59_Pro.jpg

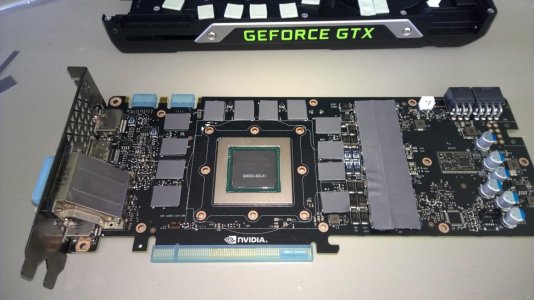
The next step involved Nyssas muscles known as the Titans. Card one saw a smooth disassembly and got blocked. The looks of that block and the backplate are off the chart! :o
WP_20150520_13_53_10_Pro.jpg WP_20150520_14_52_53_Pro.jpg WP_20150520_14_54_03_Pro.jpg
WP_20150520_15_09_27_Pro.jpg WP_20150520_15_31_19_Pro.jpg WP_20150520_16_56_04_Pro.jpg
WP_20150520_17_00_15_Pro.jpg

The second card decided to go its own way though and 'screw' me over. As seen in my previous post, one of the screws told me to go f*ck myself. If anyone still has any suggestions after reading through all of this, please share them, I'd love to install my second card too! :(
WP_20150521_16_37_21_Pro.jpg

Cheers guys, the rest is for another day! :p
 
Yoy they're some beast specs mate, an those titan x's should put some great numbers out underwater
 
Would that shroud fit on a 980Ti presumably? :p...

It might, but you'd have a wannabe titan 980Ti :D I could send you one if you'd like once you have your Ti and don't feel like painting it, those shrouds will most likely just sit somewhere hidden in a drawer anyway.

UPDATE!

Shoutout to a very good mate of mine who has a lot more experience in building rigs, as he wanted to assist me during an entire afternoon + evening last week! ^_^

At this moment I'm bending tubes! This certainly is not easy, getting everything measured properly etc. Some tubes even have to get routed differently than I had planned because the bends would be too tight and impossible to make them look nice.

There have also been a few changes in the plans. The basement compartment will be done with flex tubing, otherwise it would be too tight or perhaps even impossible to route. I've also mailed Pexon to have some cables custom made, as the CableMod cableset's sleeving is too thin to my liking and is not compatible with E22 cable combs, not even the small ones.

Good news: that bloody screw on the titan came out without much of a fight when using a screw extractor bit. That moment made my day for sure!!

Here's a little sneak peak of how she looks like right now. I've tested my LED strips many times by now, the way everything looks like that, it's just unbelievable :o

IMG_7203.jpg
 
Back
Top