Project White Knight : Air Cooling at it's Best..

naveen58

New member
Hey all,i'm Naveen from India.

This thread is of my First ever modding project,it's been around a year since i've started this project & it's about to end in a few days.

i'm simply pasting my modding post from other forum wrt it's date.

ENJOY..

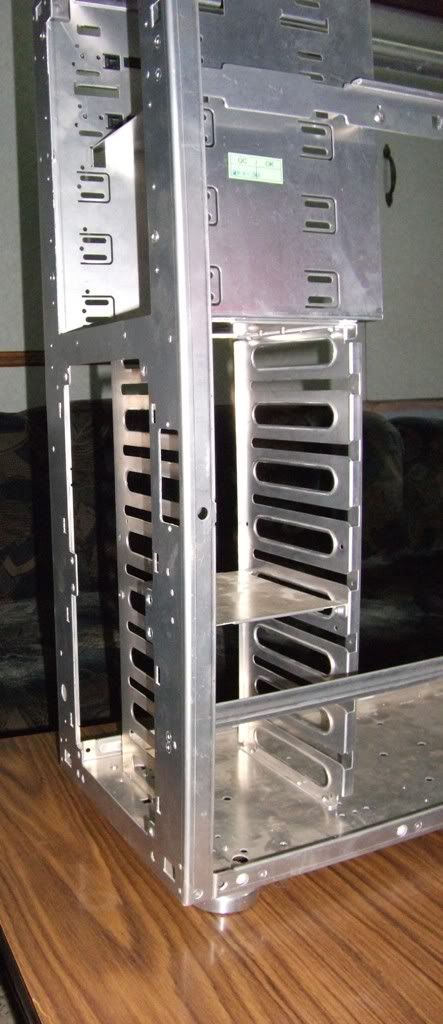
my search for a good air cooled full tower case was going on for a long time,until i found this

DSCF0020.jpg


DSCF0019.jpg


i'll be upgrading from my CM690 to this case,but i've decided to make this case one of a kind.

so,here's a list of mods that i've planned to do on this case.

1) Mod the side panel to fit the Lian Li Window.

2) Add support for 2 x 140mm top fans.

3) Add support for 2 x 120mm fans behind HDD Bay.

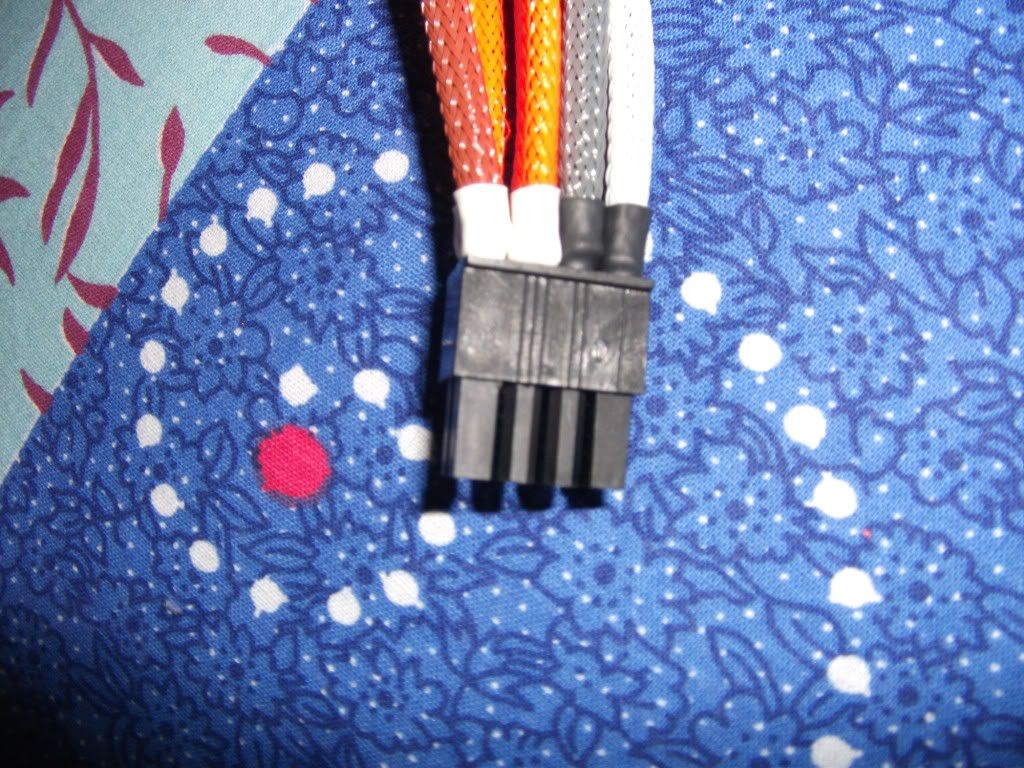
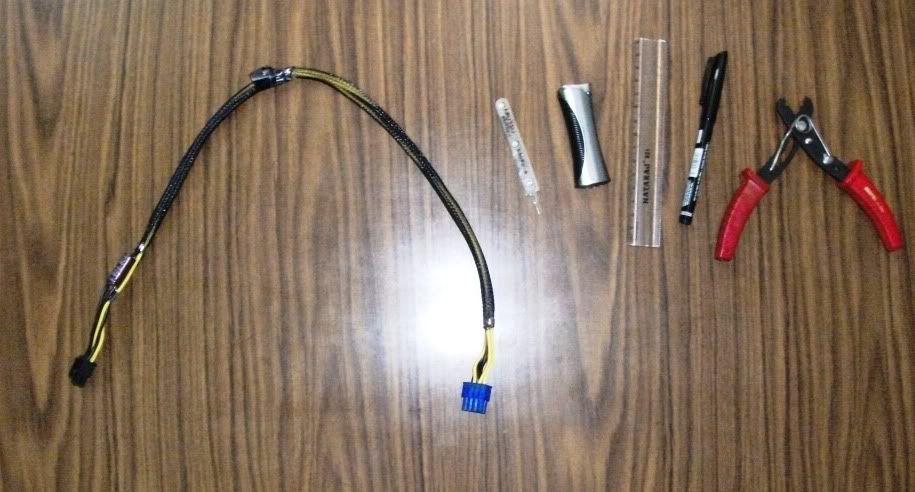
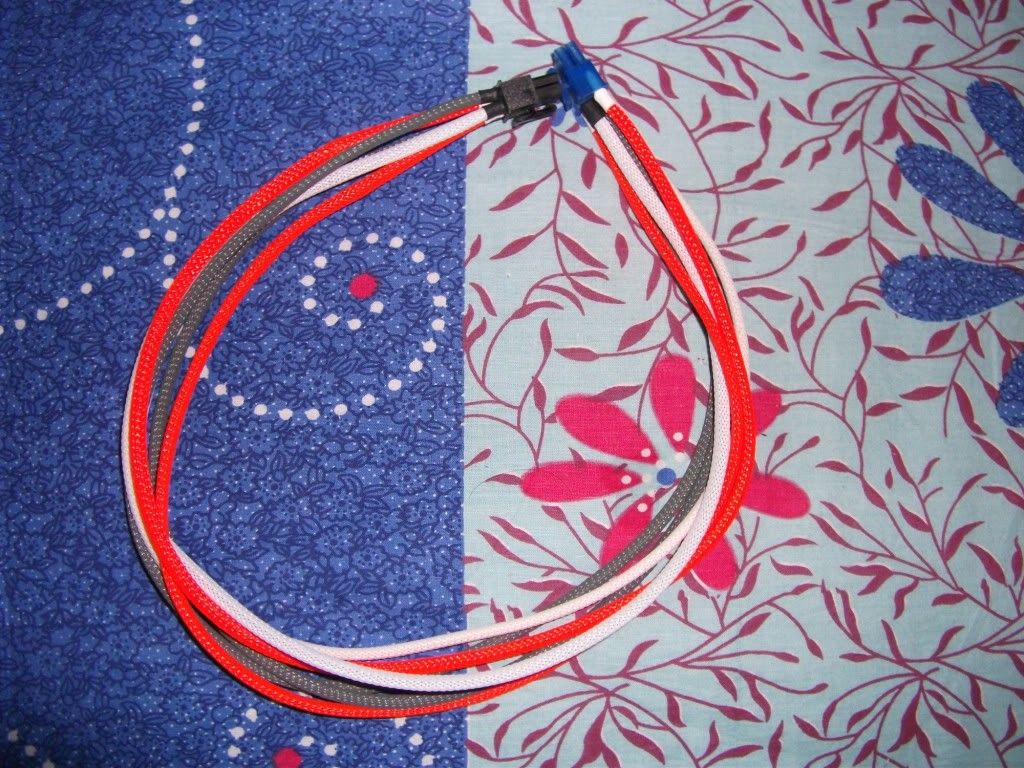
4) Sleeve every damn Cable.

5) Change all the fans to Xigmatek white LED Fans.

6) Tint Side Window.

7) Paint the case from black from inside & white from outside with some designs using other colors.

8) Cut some holes on the motherboard tray from better cable management.

9) Make the motherboard tray removable.

10)Add support for 2x120mm fans on the back side like antec 1200.

11)Mod the front fan support to house 2x120mm Fans.
 
List of Tasks already Performed

UPDATE - 18/11/2010

Something arrived at the door today.

Lemme See,it's something from our Lian Li Dealer

DSCF0023.jpg


hmm,it's Plexi Glass for the side panel
smile.gif


DSCF0024.jpg


i liked that it comes with it's own protective skin.

got something from US as well

DSCF0027.jpg


Techflex 1/8" Clean Cut sleeve + 1/8" heatshrink (for those who can't afford MDPC Sleeves
tongue.gif
)

So,i had a some free time & so i started to strip the case down

some pics.

DSCF0036.jpg


DSCF0032.jpg


DSCF0034.jpg


DSCF0033.jpg


DSCF0037.jpg


DSCF0038.jpg


DSCF0039.jpg


while taking the case apart i found out that the motherboard tray is not removable,i thought it was
sad.gif


so,added that to my modding list.
cool.png


also planned to something with the tool less PCI Card Holder

DSCF0045.jpg


stripping it down.

DSCF0044.jpg


DSCF0046.jpg


you'll have to remove 2 screws to take it apart

DSCF0047.jpg


DSCF0049.jpg


DSCF0050.jpg


DSCF0051.jpg


then i moved on to the side panel,i used a 0.75" wide painters masking tape & covered entire panel with that.

here's how it looks

DSCF0041.jpg


then i used the glass & marked the outline with a pencil.

DSCF0042.jpg


DSCF0043.jpg


then i draw marked another sketch of the glass 1.5cm inwards of the line,this is where actual cut is to be made.

DSCF0053.jpg


DSCF0052.jpg
 
UPDATE - 20/12/2010

first of all i deriveted some rivets & made the motherboard tray removable.

DSCF0184.jpg


here's the motherboard tray

DSCF0057.jpg


some unnecessary stuff
tongue.gif
,removed that as well.

DSCF0058.jpg


so,the motherboard tray is now removable. yipee. :clap:

since there was too much space on the back so, i thought that it would be better to make the back of the case look like antec 1200.

two exhaust fans one above the other.
cool.png


did some markings.

DSCF0187.jpg


then used a A4 paper & made a template of it.

DSCF0059.jpg


tada,here's the end result

DSCF0203.jpg


DSCF0201.jpg


i was searching for 140mm xiggy orange fans but noone not even Xigmatek India Importer was able to source them & icc quote was like 1.5k per fan :@

so,i decided to mod it so that it can be installed with 2x120mm fans.

here's the end result

DSCF0199.jpg


DSCF0197.jpg


all good so far.
smile.gif


FEW STUFFS THAT I ORDERED FROM ARRIVED..
tongue.gif


first up mediahome..

DSCF0054.jpg


DSCF0055.jpg


DSCF0056.jpg


my products from HK Arrived.
smile.gif


DSCF0060.jpg


DSCF0063.jpg


here's what's inside the package.

DSCF0209.jpg


DSCF0211.jpg


then i marked wrt to size of air filter on the top panel so that i can cut 2x140mm holes

DSCF0195.jpg


then comes the package from ebay seller boltbase

DSCF0061.jpg


DSCF0062.jpg


here's what was inside the package

DSCF0207.jpg


DSCF0205.jpg


DSCF0213.jpg


DSCF0216.jpg


DSCF0223.jpg
 
UPDATE - 21/12/2010

Finally i was able to cut the side panel.

it took me about 5 hours to cut it & file it.

i used a 1/8" drill bit & drilled some holes out then i used a saw blade to cut it & after filing it here's the result.

DSCF0229.jpg


DSCF0228.jpg


DSCF0230.jpg


DSCF0231.jpg


DSCF0233.jpg


DSCF0232.jpg


i think it's almost perfect.

what do you guyz think??
 
UPDATE - 26/12/2010

Got some free time to work & completed the top panel.
smile.gif


i used a 1/8" drill bit to drill a series of holes inside the line,filed it & then sanded it to make it look professional.

here's how it looks like -

DSCF0235.jpg


DSCF0237.jpg


DSCF0239.jpg


DSCF0242.jpg


DSCF0240.jpg


so,what do you guyz think??

will start preparing the outer panels for the case for paint from now on
smile.gif
 
UPDATE - 30/12/2010

I Searched for a Professional Painter in my city & came across one.

the outer panels are now sanded & primed using Self Etching Primer

here are some pics (two to be precise
tongue.gif
)

photo.jpg


photo1.jpg


apologies for bad pic quality
sad.gif
 
UPDATE - 04/01/2011

After sanding the filler a bit he applied Surface Primer to all the panels.

here's how it looks after the job
wink.gif


img0.png


img1.png


img2.png


img3.png


img4.png


img5.png


img6.png


img7.png


img8.png


img9.png


img10.png


img11.png
 
UPDATE - 09/01/2011

THE CASE HAS BEEN PAINTED WHITE,HERE ARE SOME TEASER PICS

I'M A HUGE FAN OF PINSTRIPING ART BUT SINCE THIS BEING MY CITY WHICH IS MORE OF A VILLAGE I HAD NO OPTION INSTEAD OF PLOTTER
wink.gif


DSCF0263.jpg


The black part is Stencil on which i'll be painting up tomorrow.
tongue.gif


BEHOLD THE MIGHTY LION

biggrin.gif


DSCF0268.jpg


DSCF0270.jpg
 
UPDATE - 13/01/2011

Got the Front & Top Panel Completely painted & Cleared today.

this is how it looks like -

DSCF0286.jpg


DSCF0284.jpg


DSCF0282.jpg


i think it looks amazing
smile.gif
 
THANKS ALL
smile.gif


UPDATE - 15/01/2011

Got the other two panels from the painter today here's how they look..

DSCF0294.jpg


DSCF0290.jpg


DSCF0292.jpg


all the panels together

DSCF0288.jpg


unfortunately today was kinda windy day which screwed the panels,loads of dust was accumulated on the panels

here are few pics

DSCF0296.jpg


DSCF0298.jpg


DSCF0300.jpg


i'm not satisfied with the way it looks so i'm going to sand it & get it cleared again.

Hope this time god will be with me & they'll be good
smile.gif
 
UPDATE - 14/04/2011

sorry for keeping the thread dead for 2 months,will try to finish the mod this time.

since my TX650 was going strong enough & still had more than 3 years of warranty on it,i didn't want to void it's warranty by sleeving the PSU.

instead bought some extension cables + a LED light kit.

here are the pics.

DSCF0347.jpg


Took Some time as well to finish off the front panel assembly.

here's how it looks

DSCF0361.jpg


DSCF0365.jpg


DSCF0367.jpg


DSCF0363.jpg


then i Modded something that i didn't planned.

i'll let the pics talk & see if you can find out.

IMAG0031.jpg


IMAG0030.jpg


DSCF0357.jpg


DSCF0359.jpg


for those who can't notice the difference in the pics above,it's the HDD bay orientation.

just opposite of Stock.

then moved on to some actual cutting on the chassis itself.

IMAG0028.jpg


IMAG0029.jpg


tested the location by placing the custom frame that i made earlier.

DSCF0349.jpg


DSCF0351.jpg


the back now looks more like antec 1200, isn't it?

it's raining here every afternoon from the past 3-4 days,so it's very hard to get the paint work done on the chassis
sad.gif


meanwhile got the primer done on the other components.

IMAG0035.jpg


IMAG0034.jpg


all primed.

IMAG0036.jpg


the aluminum is so light that it was making it very hard for the painter to paint on,even by using little amount of air,the aluminum clips were flying here and there as you can see in the last pic.
tongue.gif


Finished Sanding Using Wet 1500 Grit Paper by mixing shampoo in water for less friction between sand paper & the color.

here's the result.

DSCF0302.jpg


DSCF0304.jpg


DSCF0306.jpg


DSCF0308.jpg


all the dust that was settled after the clear coat was completely removed,now it's ready for one more clear coat.

Finally got the other two panels from the painter today,both the panels are Recleared.

Sanding Efforts Worth it
smile.gif


Just have a Look at the Reflection
biggrin.gif


DSCF0377.jpg


DSCF0373.jpg


DSCF0371.jpg


Comments & Suggestions are Welcomed
smile.gif
 
UPDATE - 16/04/2011

Made a Custom Aluminum Panel Yesterday for two Purposes -

1) Better Cable Management

2) Vertical Mounting of 2.5" SSD Drive

here's the pic

DSCF0353.jpg


DSCF0355.jpg


marked it for SSD mounting holes & hole for cables to pass through

IMAG0037.jpg


test fit after cutting & bit of sanding as i wasn't able to get the file in there

IMAG0040.jpg


finished product

IMAG0039.jpg


then it was painters turn for the primer

he primed it today by 11:30AM IST

some pics

IMAG0042.jpg


IMAG0041.jpg


IMAG0046.jpg


IMAG0047.jpg


the front 140mm to 120mm conversion panel

IMAG0043.jpg


the rear panel for housing 2x120mm fans

IMAG0044.jpg


till now it's seems to be going great but then Disaster.

it rained like hell today & there was snowfall,the weather was very windy as well.

IMAG0048.jpg


IMAG0038.jpg


so the bench on which all the parts were placed was blown away & all the parts including chassis were eating mud
sad.gif


have a look

IMAG0054.jpg


IMAG0053.jpg


i took the HDD Cage washed it with water & then i was shocked

IMAG0052.jpg


IMAG0051.jpg


IMAG0050.jpg


IMAG0049.jpg


Fortunately all the other parts were good & needed washing,but now i have one more thing to do,repair the HDD Cage.
 
here comes the new update -

UPDATE - 21/04/2011

EXHIBITION UP AHEAD
biggrin.gif


IMAG0055.jpg


i did reminded the painter to use NC filler a bit on the panels that have minor dents in them but he forgot so i asked him to put the filler & reprime it

so above is the pic of the panels with NC filler applied.

other panels have been primed as well
smile.gif


IMAG0056.jpg


IMAG0058.jpg


IMAG0059.jpg


& then the painters leaved for vacation for a 2-3 days
tongue.gif
else the build would have been done sooner.

anyways will wait for two days & get them painted
 
UPDATE - 27/05/2011

sorry for not updating you all in a long time but i have been working on the build,the only thing that i didn't do was update the worklog.

so here goes the update
smile.gif


everything has been painted up here goes some pics during the work

IMAG0060.jpg


IMAG0061.jpg


i decided to paint different color on fan grills,motherboard tray & PCI Slot covers for some extra highlights
tongue.gif


IMAG0068.jpg


IMAG0065.jpg


IMAG0067.jpg


IMAG0070.jpg


the painter working his magic on the parts
biggrin.gif


IMAG0078.jpg


IMAG0077.jpg


IMAG0076.jpg


i know he doesn't look professional but he indeed is
wink.gif


i also tried searching a lot for xigmatek 140mm orange blade white led fans but wasn't able to source them.so,i thought of something & finally ended up on more modding i.e.

changing led of 140mm blue led fans to white,visited a local store & got hold on some white leds

so i started the work here is one pic to be precise

IMAG0110.jpg


changed one led & tested it unfortunately all the leds were of different shade in white & they were not as bright as blue.

so,i've ordered some high brightness white led off ebay,will wait till they arrive.

some teaser pics of the update that will follow soon
wink.gif


DSCF0398.jpg
 
Hi all,I feel really very sorry for leaving this build in the middle of nowhere but i was preparing for the competitive exam which are done now & i expect to complete the rest of the build in next 3-4 days,since only PSU Sleeving & System assembly is remaining. Here goes today's Update ....

UPDATE - 23/12/2011

as all the modding & painting work was done earlier,all that remains now is sleeving & assembling.

Sleeving first -

Xigmatek Fan Sleeved

DSCF0445.jpg


DSCF0444.jpg


Same fan with Painted Grill on it

DSCF0446.jpg


Power Led & HDD Led

DSCF0449.jpg


Power Switch & Reset Switch

DSCF0450.jpg


Front Panel Connectors - as this was my first time with sleeving it was real PITA to sleeve these connectors,time & patience got me through here.

DSCF0447.jpg


other end

DSCF0452.jpg


Now,time to finish up the top panel - it was hard getting power buttons & reset buttons on the top panel,so a little bit of sanding the holes with sand paper & the buttons are in & working.

next is the 140mm fans (already sleeved),i've swapped all Blue Led's with White Ones,i'm sorry as i forgot to take pictures of the fan while sleeving & changing the leds.

Fans are secured using 35mm long black M4 Button head screws,M4 Nyloc Nuts & to dampen the vibrations of the fan i've used the rubber grommets that came in with the case for HDD's.

DSCF0428.jpg


DSCF0430.jpg


DSCF0424.jpg


DSCF0425.jpg


this is how i placed rubber grommet to dampen the vibration of the fan

DSCF0426.jpg


DSCF0427.jpg


DSCF0423.jpg


both fans in the place

Inside View

DSCF0434.jpg


Top View

DSCF0436.jpg


DSCF0438.jpg


The Center of 140mm Lian Li Fan doesn't have any sticker,the copper winding in the center was not looking good.

Time for a Quick Fix

DSCF0440.jpg


got all these plotted in no time,my mind was not working on what to plot so i went with the Project Title,if any of you have any image(s) that can be plotted on a 4x4 sq cm area without any distortion then it would be great.

DSCF0441.jpg


Oh & here's how the fan looks before & after the sticker

applied on one fan,

DSCF0442.jpg


and on both

DSCF0443.jpg


that's all for today..

next to come is PSU Sleeving & Reassembly.
 
UPDATE - 25/12/2011

MERRY CHRISTMAS TO ALL


From the beginning of this project my Parents noticed the hard work that i've put into this project & they also heard me saying 100% Modular PSU blah blah all the time,so my Parents Sponsored me one & here it goes
biggrin.gif


DSCF0453.jpg


DSCF0455.jpg


DSCF0454.jpg


DSCF0456.jpg


Look Mom no Cables

DSCF0457.jpg


DSCF0458.jpg


DSCF0459.jpg


DSCF0460.jpg


so,where are the cables?

ohh, here they are
laugh.gif


DSCF0461.jpg


DSCF0462.jpg


PSU is not the only thing that my Parents Sponsored,there's more.....

Time to Sleeve MDPC Style

DSCF0464.jpg


it took me near about 2 hours to get the first cable out as i was using about 10% of the pulling force required to pull the cable
tongue.gif


but as soon as the first one got out the others didn't took long

The 8 Pin Cable after Sleeving (My First Ever PSU Cable Sleeved)

DSCF0465.jpg


DSCF0466.jpg


DSCF0467.jpg


DSCF0468.jpg


DSCF0469.jpg


This is my Best Christmas Ever & I'm Lovin it..

PS - Thank You Everyone for your Support without which this would not have been possible,you all drive me to do all these things :thumb:
 
UPDATE - 26/12/2011

Well,it's a small update to be honest
tongue.gif


started sleeving the GPU Cables & i'm done with it,those cables had capacitors in them,so took me a while to study what are those for and ended up removing them
smile.gif


here is the pic of GPU Cable before sleeving

DSCF0472.jpg


& here are a few after sleeving

DSCF0487.jpg


DSCF0477.jpg


DSCF0478.jpg


DSCF0479.jpg


DSCF0480.jpg


DSCF0485.jpg


DSCF0481.jpg


DSCF0483.jpg


i've also started sleeving 24pin connector & it will be done by next update.
 
Back
Top