Project "luv i have another one" and hide.

mayhem

New member
well dunno if this belongs here but since this is my haunt its another project or the large kind.

Not really a PC but more of my passion for tinkering.

Ive been given the chance to take this monster off some one who to say the least didn't really do a good job and well destroyed it big time. And on bringing it home well my lasses face dropped and came out with not a bloody another one. I just stood there with a big smile on my face.

So i present you with ARCADE NO 3 ..... work log

Now this is a older generic cab that to say the least has had a hard life. It would have started off as a racing cab and some nugget has decided to mame it up with some very dangerous and dodgy wiring and some really bad hack and slash wood work.

So first some pics.

Side view - notice the red ..

26118_368894208143_579898143_3789550_6640166_n.jpg


Now a front view that has been hacked to peace's. the wiring is really dangerous in side with live wires all over the places and badly tapped together PC power supply running it all. And what was more disappointing was the fact that the pc power supply was some cheap ass £1.99 rubbish. What is worse it just had wire poked in the end to keep it running .....

26118_368894213143_579898143_3789551_1794522_n.jpg


Now looking down the front you can see were the pedals were and some one decided to basic rip them out and bung the hole with a peace of wood (runs away crying)

26118_368894218143_579898143_3789552_7173236_n.jpg


Last shot before we start work on it. this is well was were the previous person has built a cp and well painted it red ...0_o ... it realy was a mess before i pulled it al apart.

26118_368894243143_579898143_3789553_881274_n.jpg


Now the first thing ive done is remove all the dangerous wiring and strip out all the bad parts of the arcade cab. All so i have cleaned up a little bit.

26118_368903228143_579898143_3789565_5598366_n.jpg


Here all though not a good pic you can see me checking real arcade boards to see if they will fit properly and checking out how im going to wire the system up.

album.php


26118_368903243143_579898143_3789566_2215246_n.jpg


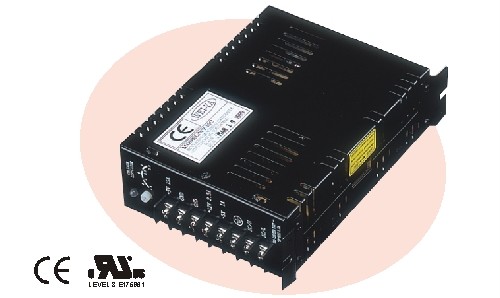
Now i just order a new set of cables and wiring loom and various other wiring goodes. All so ive ordered a proper Arcade power-supply and ill carry on once there all back.

{update as soon as parts arrive}
 
now ive looked at the front door and its trashed so im going to build a new front door.

The power supply came today which is this

286779405_o.jpg


Spec's

Power Supply +5V +12V -5VDC - 130W

Its has a 75% efficiency Rating which is excellent and will run the Arcade jamma boards im going to be fitting and the button lights.

I've allso started on working on the control panel but no photos just yet.

I wont be adding a coin mech into the system as i think it will make a nice home system as its not to big.

Im going to sand the whole system down once it gets a little warner and then remove all the t-moulding and replace it with chrome.

The new wiring is on order :) ..
 
Oky spent all Night Re wiring this baby . The wiring loop came but as soon as i started moving it around the soldering snapped which shows how cheap some stuff is made now a days. So i made my own up that was much stronger and safer.

Re wired the Arcade monitor and Fixed the line that was across the screen. The door is being made from a new peace of compressed wood.

Just a couple of pics of it working how ever im still a long way off finishing it.

003.jpg
001.jpg
002.jpg


There is 5 games in total for this system im going to fit and its showing Bomber man playing on the screen in the system.

I need to order some T-Moulding and ive just received my Strong sticky back plastic so ill need to sand down the whole frame work and rip off the old T-Moulding to. There is no point painting the system as from all the past efforts ive seen of spaying its looks oky at first but over a period of time these get kicked and bumped so a much better option is a good strong sticky back plastic that can take a beating.

So far the cost of the build has come to £35. The games haven't cost any thing as the money was made off some games i bought and sold on ebay for a much grater profit.

Small update. This is one side done. Ill do the other tomorrow after i got some more wood filler.

024.jpg


excuse the finger prints
 
quite a few updates as such but only 1 pic.

005.jpg


I removed the internal speakers as they just sounded awful with any thing that had base in it. So i ripped apart a decent set of PC hi end speakers and cut a 3 1/2" holes on each side of the cab. After some filling and then re working i applied some vinal. U can see in the pic above if you compare it to one of the first pics the amount of work done.

Allso I fully re wired the cab with a new jamma harness but the pins broke of the connector while fitting. So i de soldered all the wires and put a nice new Jamma finger board on with the edge connector solder directly to that to give it more stability.

I found the monitor to be in a real bad state. Lots of bleeding, fuzziness and just unbelievably dark. So after lots of searching on the internet and reading up. I pulled apart the monitor and corrected all the bleeding and brightness and sorted out all the colours. I used 4 different jamma games to get it the best colour mix i could and corrected every thing. Its now bright and vibrant with no colour bleeding the H-Sink and V-Sink are now correct and not wobbly.

Ive all so removed the what was left of the coin system and removed the coin box out as i wont be using a coin system on this build as i don't think its necessary. I will how ever add two Insert coin buttons on the Cp to cover this small problem.

I need to get 2 new steal L shaped bars for the top and bottom of the monitor glass as it only has 1 holding it in place and this needs to be sorted.
 
Lookin' good! I really want to buy one of these old machines, I just love retro stuff. I really want a space invaders one or pacman :D
 
hehe The one up stairs has Mrs pacman on it and this one will be running Negeo 64 and Bomber man.

Any way my T-Moulding arrived this morning which was ordered a while back. And i just spent the last hour cleaning out all the crap from the grooves and the cutting T-Moulding to shape.

This is what T-Mouldig looks like and i have 400 feet of it (it comes in 20ft sections.

016ks.jpg


014vj.jpg


013qlm.jpg


Now to go around corners you need to slice a V shame into it so that it doesn't kink and is easy to put on.

One of the problems with older cabs is when you rip the t-Moulding off the hole is larger so the new stuff isn't as tight. So to combat this i just used Hot glue and slowly worked my way around the cab placing T-Moulding in as i went along this took all in all about 1/2 hour to do but the effect as you can see you self is very good. There is still a plastic coating on the t-Moulding that need taking off but for now ill leave that on so it doesn't damage it.

026ux.jpg


022is.jpg


021yi.jpg


020td.jpg


019fpg.jpg


Now i have to finish off the other side lol.
 
lol yeh i like my free bee's hehe. I was told to burn it by a pro. but i said nah i think i can do some thing with it. So far the cost has been real low (which im glad as im skint). This though will be sold once its finished to finance other projects how ever im staring to like it (which is a bad thing lol).
 
a quick question before i forget. Any one know were to get 3 1/2" car speaker grills from (would like silver ones) Ive seen some on the net but cannot find them now.
 
Made the metal plates to hold the glass in place and got some speakers. Im not happy with the speakers so ill be changing them to black ones eventually.

005.jpg
006.jpg
008.jpg
016.jpg
 
man thats a really impressive job youve done there i know where to go if i ever get the itch for an old arcade machine in my house lol
 
still got a load of work to do yet . the control panel needs finishing off and the door needs finishing off yet lol.
 
Been spending some time doing the cp as in getting the angle and hight just right. now this may look a bit wird but since it was a driving cab i think it feels correct as in the hight and the angle for playability Any way it still needs sanding and still needs to finish it all off and wire it all up.

004.jpg
005.jpg
006.jpg
007.jpg


All so as you can see i made a brand new door for the system .. Just need 4 locks now wich i cannot afford so they will have to wait lol.
 
Well this is the job so far and a few more bits and bobs done

I don't know were to Put the 1/2 Player and coin buttons as of yet and i don't know if i should add a coin door as that will bump up the price quite alot and tbh im skint lol ..

Ive still got to get some plastic for the CP but our local B&Q are rip off artists and the smallest peace is £16 which is a micky take i think.

001.jpg
007.jpg
009.jpg


there is still alot more work to do but i think its getting there.
 
Back
Top