Project Exile MKI
Ok Peeps it has been a busy month or so and hopefully should be able to get this updated.
I did Not get on with the dual monitors and prefered the 144hz refresh on the Asus to the 2440x1600 resolution of the Dell so I sold it. I will look maybe at getting two 27" Asus monitors soon to go either side so I dont have a black line in the Middle but they will probably be normal ones.
The H100i Died and got RMA back to the Thermaltake but that stayed in the box as I posted above my Wife n Kids had been listening to me and looking around and got me Most of the water cooling stuff for Xmas.
I had already Purchased the two rads I wanted as I wanted to visualize the layout and plan the tubing as best I could for my first go. In the end I decided to try the Gigabyte Z77x- UD5H WiFi and have to say so far I am pretty impressed. As I had to remove the Drive cage for the new rads/fans I had to relocate the HDD and SSD's somewere. The HDD I add to the back Via two 5.25 drive bay hdd brackets and I used the SSD plates for mounting shelves (Still Undecided if I am happy with it)
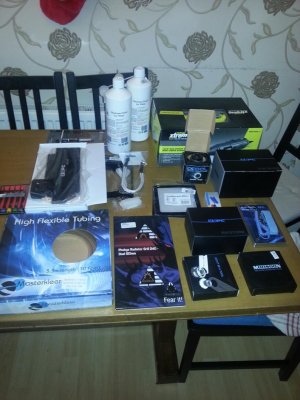
I swear I was like a Fat kid in a sweet shop, I didn't know what to open first.
I dug into the Monsoon fittings as the Mrs had said she didnt know what colour I wanted or how many so she got me 6 Blue and 6 White. I was a bit worried I would have to wait until I decided and ordered what ever amount I needed but Settled on a mix and match theme.
With the white barbs I thought they would be less visible in the main parts of my rig in the tubing as I was having white Fluid, With the Blue compressions and on the out of sight heads wouldn't really matter.
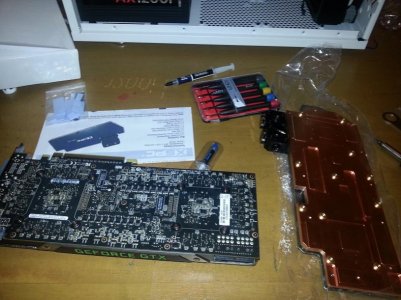
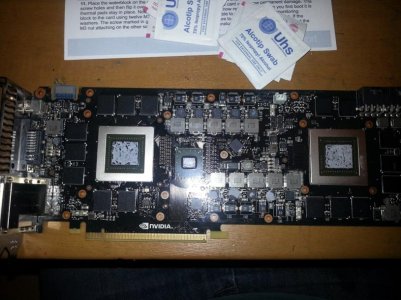
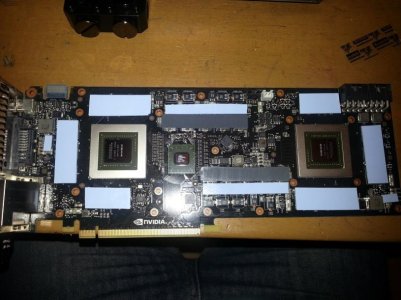
I have had plenty of experience with CPU heatsinks and fans but none on GPU I had always purchased them preinstalled so less chance of me messing up. This thing is heavy !
Still Really sketchy about building the loop I decided to build a small one outside of the system and "check for leaks" in the blocks and res (also check the pump is ok)
Let it run for a while and no problems and played with the speed on the pump and was all good. Was glad at least I could put a loop together and no leaks so my confidence went up abit.
So take apart and drain etc whill I fitted the Rads and fans in.
I was not sure about the front rad yet so just wanged them on any way. That is when I had my first hurdle I remeber watching one or two of Toms videos and knew I possibly needed to cut out some of the optical drive bay lower part to get the rad in but didnt know until I got one in there.
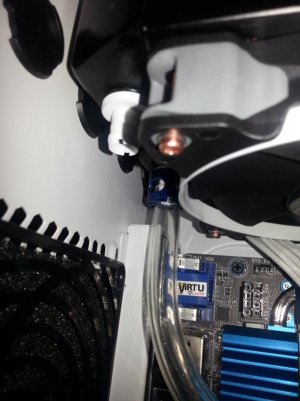
The Barbs just clipped 20mm up or down would of been sweet but no luck. I ended up dropping it a little and fixing it of line with the current holes.
SO far was not really happy with the Brass Screws/Bolts as the looked a little slim and just didnt look right. A quick google and had some more ordered that I hoped would match.
Now the CPU block had to add this but SHINEY STUFF !
Really impressed as I have never seen a Lapped Block before and the ones on the Retail Closed loops solutions are never that good.
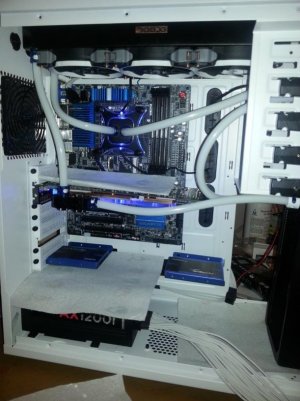
So on with the fittings of stuffs Bayres in and blocks are go ! I also Painted some of the orange/red Paper washers a blue so they add a little trim to the mobo fixings. I picked the best and binned the rest.
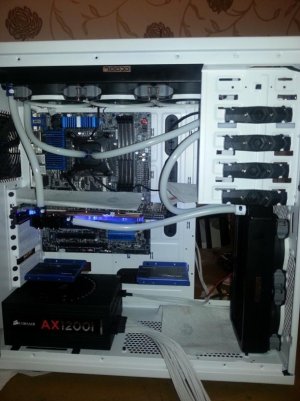
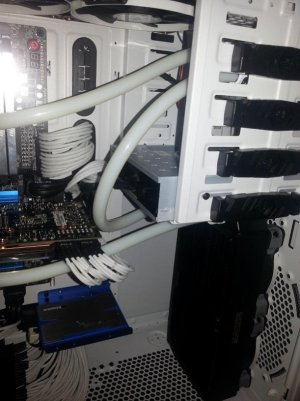
You can see on the front Rad where it is dropped to the next set of holes and yes the fans are still on the wrong way around.
--------------------------------------------------------------
Now the bit that I am dreading. GPU block instal :-(
I had heard some bad stories about bricking GPU's and as I said before was my first time.
The instructions was/are a snap and had no problems at all and was very relieved ( to the point I thought it could not be that easy and must of made a mistake or fubar my GPU) But sure enough in it went and system is coming together nicely
Now for tubing and let me say this little SOB was a pain to get in !
Now thinking about it I should of added that bit before putting the rads in.
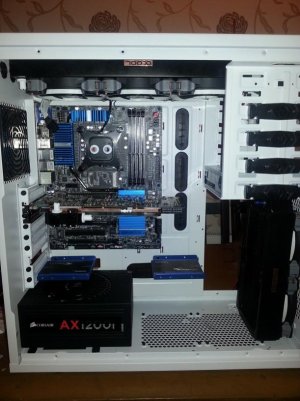
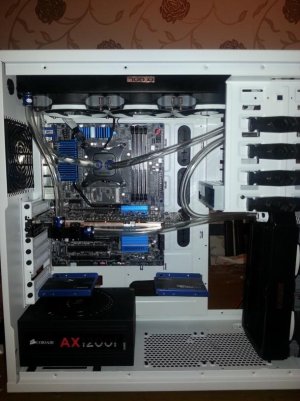
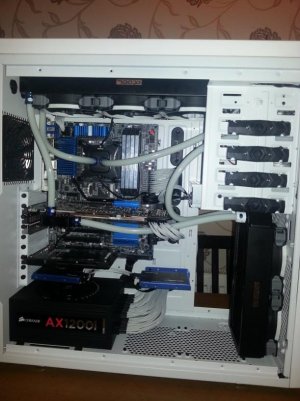
In my Opinion the Loop is looking nice and starting to consider clear fluid... that didnt last long as trusty words from the wife and had the white already. Also at this point I noticed the front fans and swapped them around. So here goes the Leak test...
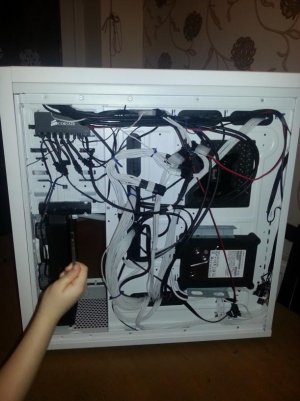
I decided to leak test for 8 hours with the occasional shake rattle and roll and a top up here and there as well as pump speed adjust up and down and some on and off's. Everything checked out no leaks noise levels of the pump are well within tolerance even on max speed. This also gave me a chance to play around with the cables and "Try" to neaten them up with the "Help" of my son.
I also had some longer black screws that fit lying around and used them in the front row as they was the most visible.
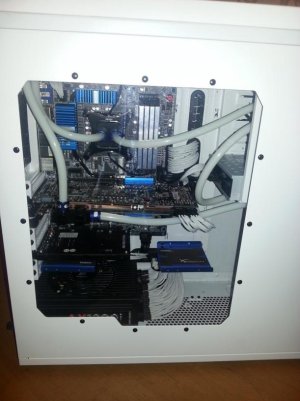
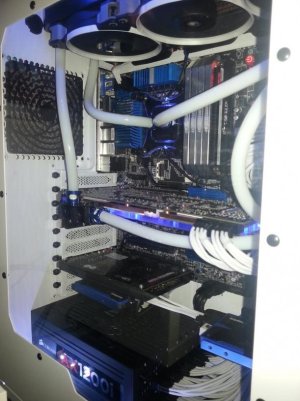
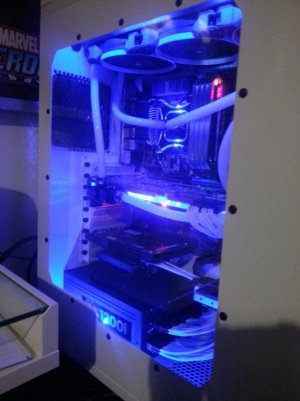
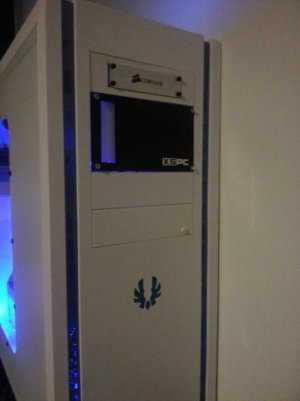
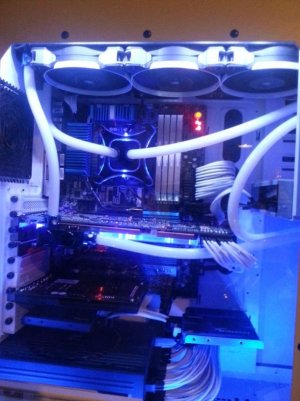
So here is some Shots of Exile MKI:
Updates and Tweaking and benchmarks to follow.
Please also remember guys this is my first real water cooling loop
")