---'Parvum SHEEDY'---

imersa

New member
3yU-l1HjJ6vSAhygmHJ9qqxMUxbcrF-czkJ9XcaYZx7e=w700


Hi everyone! Once again we are here to bring you another cheeky Parvum project before Insomnia, don't worry though all the others are still progressing nicely. This build is for one of our friends Sheedy. A lightly modified VEER1.0 will be used to house this powerful yet compact LAN rig with overkill water cooling kit. The colour scheme will be a neutral white and frosted finish with grey and black accents.

Case | Custom Parvum VEER1.0
CPU | Intel i7-4770k
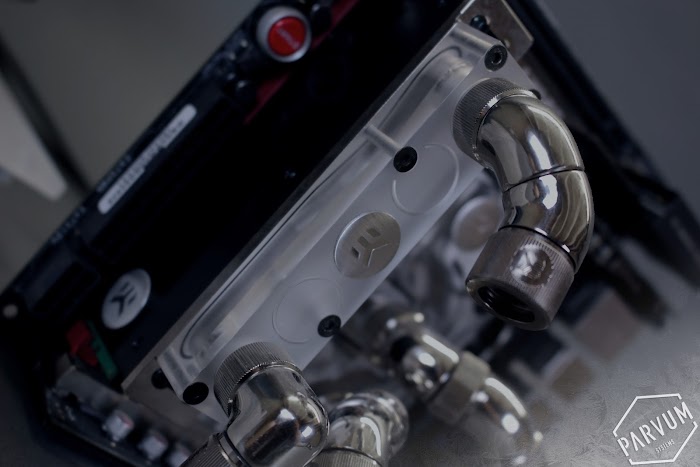
Motherboard | ASUS Maximus VII Impact
RAM | Corsair Vengeance 1600C9 2x4GB
GPU | ASUS GTX780
SSD | Kingston 240GB M.2
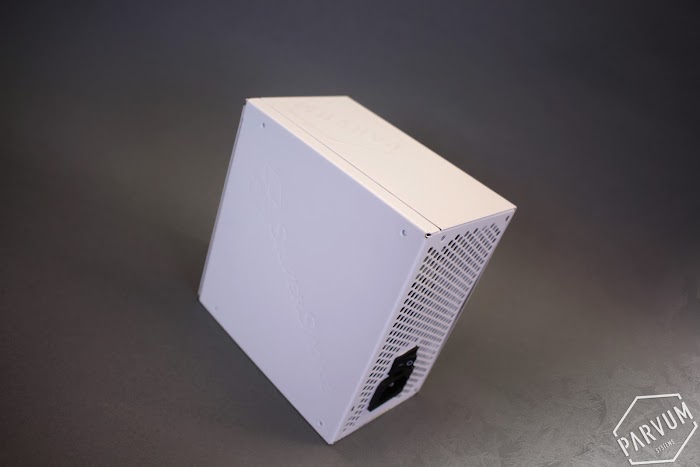
PSU | Silverstone Strider Gold ST65F-G

Fans | Parvum F1.0
Radiators | XSPC AX
Blocks | EKWB Nickel/Plexi
Fittings | EKWB 10/12 HDC Nickel
Rotaries | EKWB CSQ Nickel
Pumps | EKWB DDC + EKWB Heatsink

Thanks to our sponsors ASUS, EKWB and Silverstone, as well as fellow modders B_NEGATIVE and JR23 who have been helping out to keep everything moving along.

1QWJvdaz9WC5s1RX8arvJmg-9N0tCzKk-hMJVcyyPDRR=w700


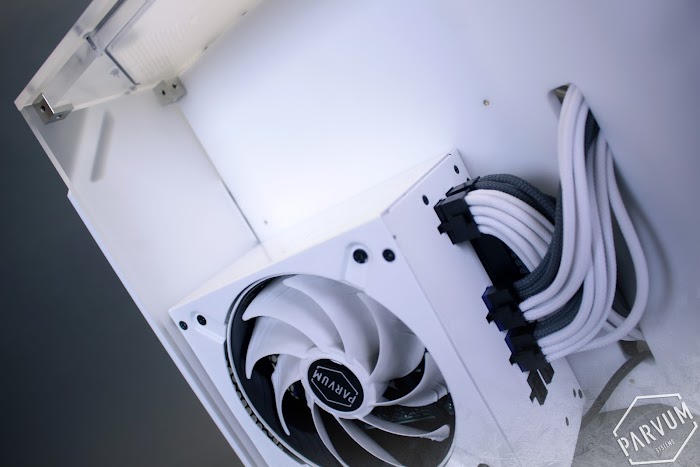
Straight in with some custom work from B_NEGATIVE on the Silverstone PSU, painting and branding the PSU to fit the theme and of course adding a Parvum F1.0 on reassembly. As both sides of the build will be on show it was important that the PSU remained aesthetically in-keeping, thanks to B_NEG it certainly is.

OQF2M2ovDzkFXulAVVP-llN9k1F6YbT-lulp2fymIzxp=w700


RUCwRRiARtt1G46XRIo00Vb7EIivrEfzg8bHWVXxoHZx=w700


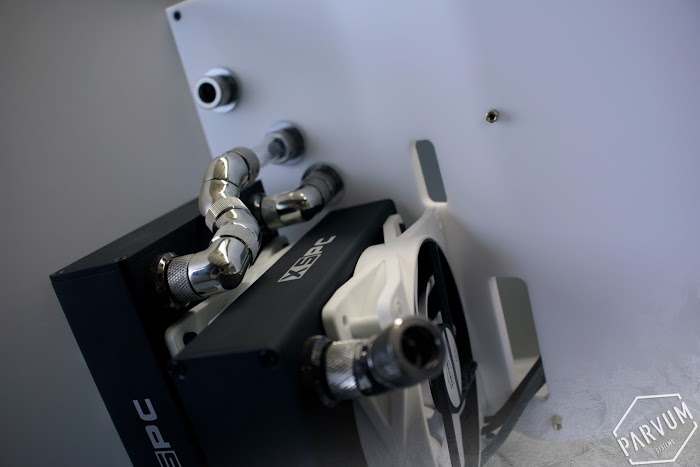
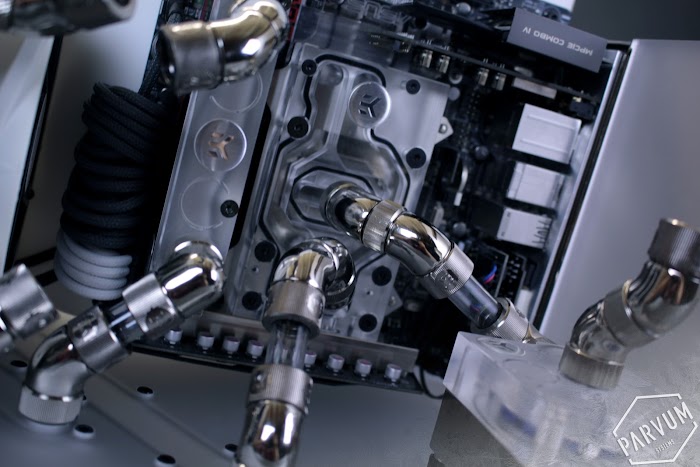
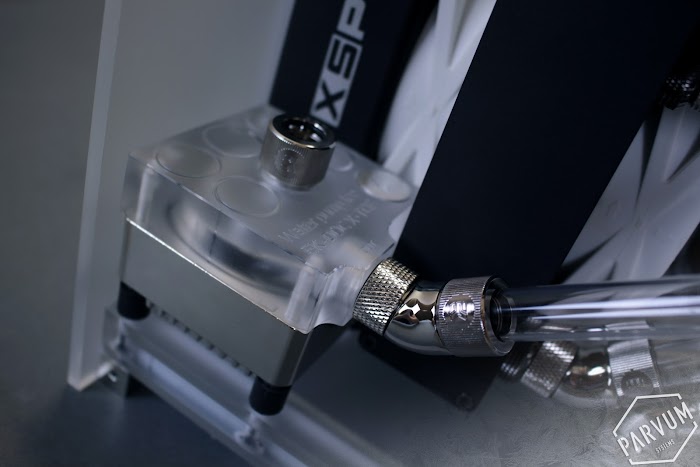
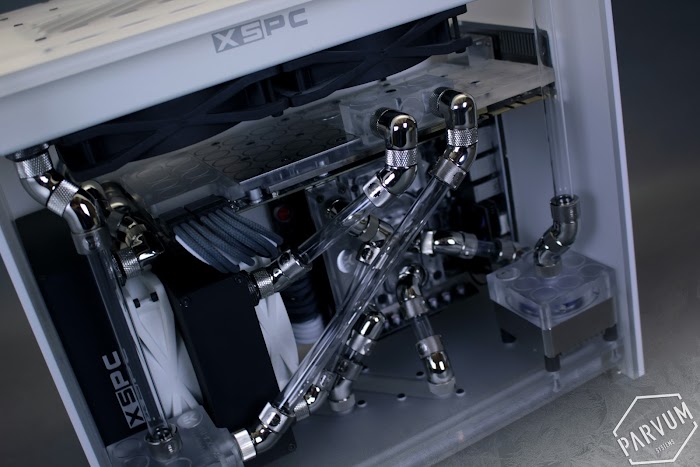
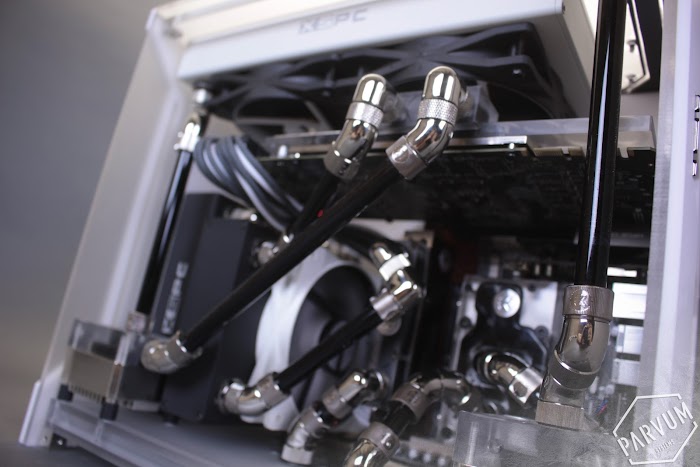
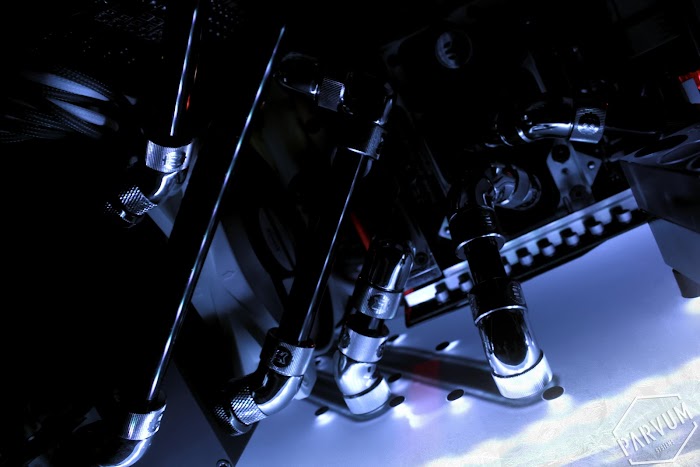
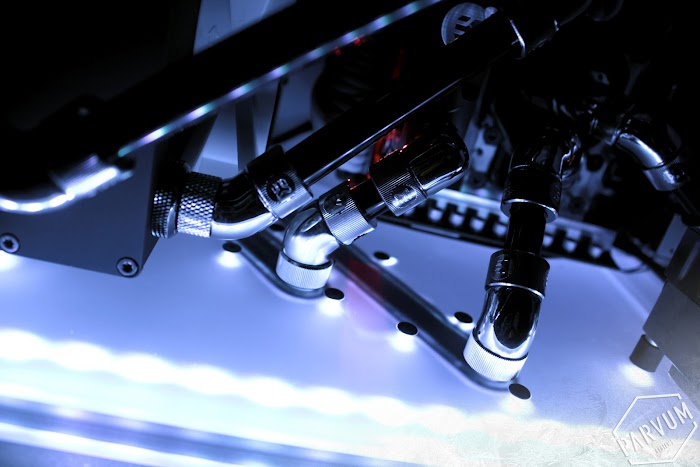
Just a few of the many fittings and radiators we managed to squeeze into the VEER1.0.

Jtkx26qrKL3Qpmny7H-jdfU1XgVtJEHQ1p45UbLKAU7Z=w700


TL6ElFh5-avNZbXK8RSdRfdeiTzn5bE7eHs_MXbMb1Gn=w700


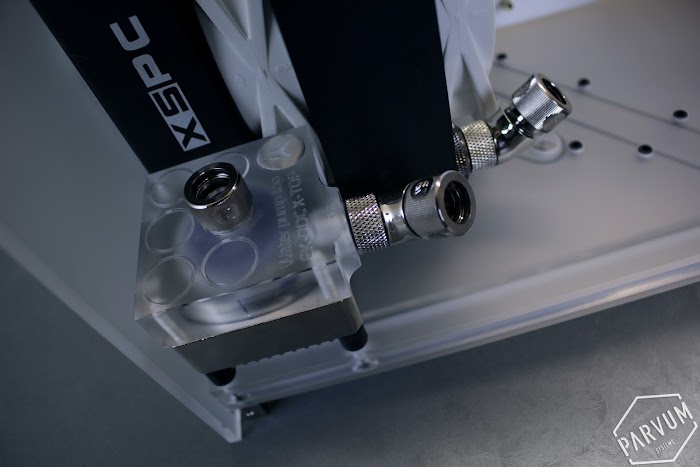
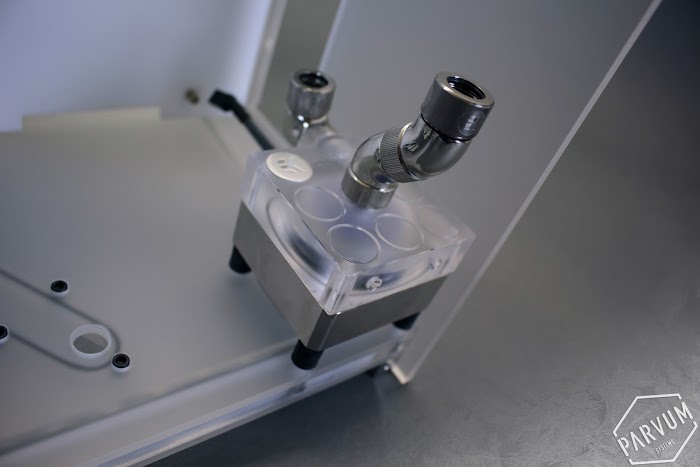
All the directions were roughly planned out by placing the components in a standard case. The finished article will now be built up around them so all the ports and components are placed exactly where they need to be.

KDbY1JydK0Dr3DlIKbrodIJn7eIU96Nq9vBTnX_Jcnuj=w700


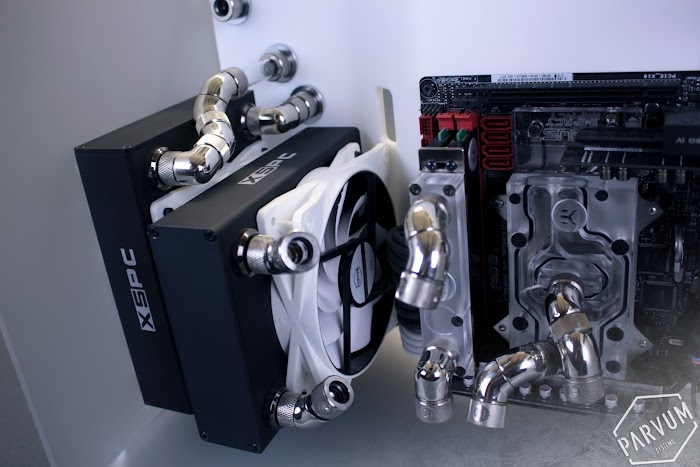
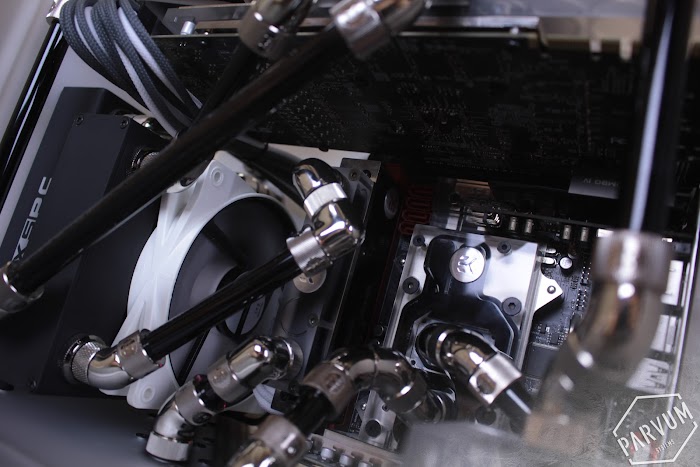
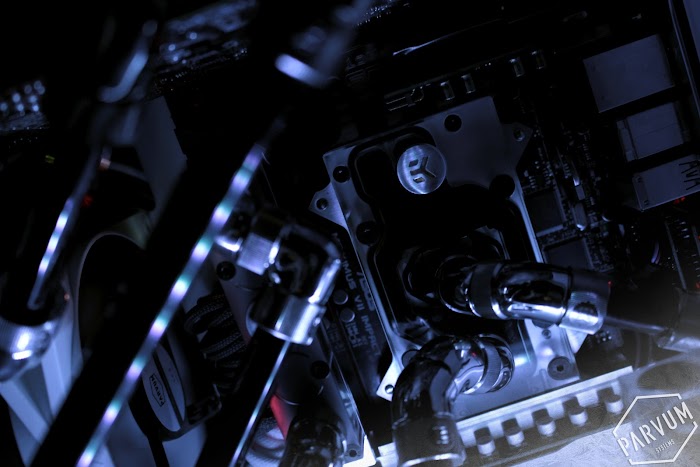
What else but the mighty Impact kitted out with an M.2 SSD and much EKWB goodness.

aZnqXI7MXlvhim1IbwhYNweSJN-QhXWGuVGITG_7bPzI=w700


8G3IQDDcMq8jv3lNPwM3u_OIaT4Ie_dIOwpUsttnUK_u=w700


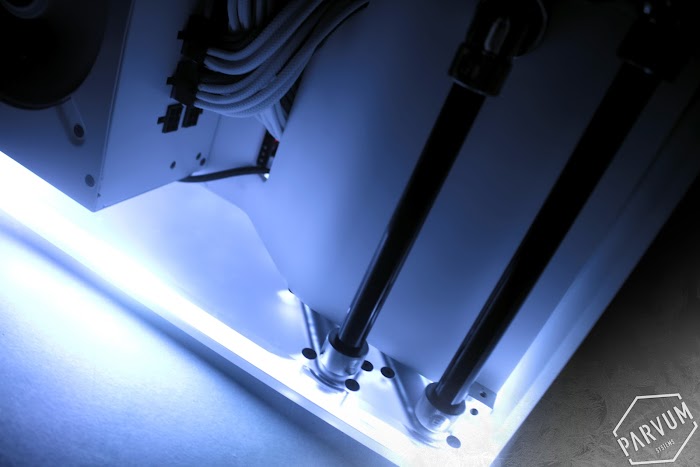
Much more to come on this one, including some custom Parvum watercooling parts and many many fittings to make up for the sparse use of them so far. ;)

 
I was going to see if you might want my Bitspower waterblock that covers the mobo and CPU, but it looks like you already have it taken care of. That and EKWB is sponsoring the build.
 
1QWJvdaz9WC5s1RX8arvJmg-9N0tCzKk-hMJVcyyPDRR=w700


Things are moving along nicely with Parvum Sheedy after a few difficulties with acrylic and o-ring tolerances, it's now looking promising for the custom reservoir and pass through plates. Especially as we now have some 2mm o-ring cord that is actually bigger than 1.7mm :D

MhO_eufHhG5unGju25ux48zmlTF00wTtaBfQ_KDXOocm=w700


PzG_NFF9L9efdZ0azQWMV6Xfpgm4tbqkqnoe9g1HsV6t=w700


ciqMKgi9m4zwjN6Z-w3M14lACByEACU_AeeBbIwnsQoR=w700


This plate will form the floor of the case linking the front and back parts of the loop, lighting the build and mounting the two DDC's.

SNPFWz-0YxiUJ5bGcuqOLQL9ccIPYg0u1GY4caHqEo_x=w700


7W_zG0F6jSP1WIKBn2-CiOn8wiN3VXyeUOmLFA8rhVzO=w700


j-sUm2rad3TosfED7qc60VFS78-r5Z03FCOg9WgTp_4y=w700


YQE98YFwjUke9HFDwwRactxVw_GBvmsc2TPjKG5JK8Mh=w700


In addition to the floor pass-through we have also fabricated a custom reservoir roof panel for the VEER flanking the top radiator with coolant.

ZdT4KS41ebeCWLt-2iu8w0FcCnIThyLD1whtYkboHAMe=w700


9dFM4VYYl6SPq6WGaHSrtWnlPHq1hL_EEcHtrb5s01SW=w700


IqK5NH0itxKv4daekXEcFlEIsxg9HDsTJbJxIrmGMcyy=w700


4esgfhQtnGghOxhPLREzme6r6Qnl5Y4rSb3r3MH2NQ6U=w700


Much more testing and fitting to come over the next week or two. Sorry this update was a little short on words, things are getting seriously busy as most of the projects are drawing toward an end. Feel free to ask questions about the build and i'll do my best to get back to you all.​
 
Last edited:
After a 12 hour day of pure progress on this I think there should be an update along very soon, definitely one for the white freaks among you to look out for. It's looking epic ;)

JR
 
1QWJvdaz9WC5s1RX8arvJmg-9N0tCzKk-hMJVcyyPDRR=w700


Today we will be taking a look at the progress on PARVUM SHEEDY, lots has been done on the assembly and loop front, plus all of the custom cables i've been working on. There have been a few set backs along the way with O-ring tolerances but after some testing of the custom parts in isolation they are now looking solid.

GNh4camYNC22UbDU7RlJp9qK3TZDC2uY-55zXotgEZBI=w700


Straight in with a cheeky radiator stack perfectly flanking an EK DDC.

q_NZ5CmCAuYR9y8_2FdW9A4vM2QuQo1yqTvQg-xRGF0_=w700


...and another EK DDC for good measure.

XJA8Ktzd4U_SPcafhan6g2x7oaU7uYr2kZXF6WRz8Owd=w700


Everything in this case is a mm perfect fit. The elaborate snake of rotaries are used to get the tubing around the end of the GPU and keep it perpendicular to the midwall.

MEYTse0289JXTynXpKvpTK_O-MV-Gc46yARTpCj2GFaE=w700


VHT7s1_zbREAcMxTsRcBIi4OydlZQYAI1B75wZX1lX-c=w700


With the pumps, radiator and motherboard mounted we cut the shorter hard to access pieces of tubing first.

nK2vO0uFh1Xnkz6VeNDFYJMtU-PZiQzRkPU89MJSwTsh=w700


And 100% remembered to plug in the right pump before adding fittings. :D

1BfHg6KF2WofFXFFTC1wke-S9-Rtm0c77KkYaOUb-9lf=w700


Next up the GPU, an EK blocked ASUS 780 DCUII and some of the longer tubing runs

pIpTOWSNkFjJ9urnqpVDJBJJtQIAE30jblfF9MkkFHCI=w700


9zv2vH-DtOyHhoiLQ_2zyuEoxh3zGuRrcLkkIuA30YC3=w700


pe491_vt1ZsOd21wRxk4RywkSRoGqB-oWDj7S6iFI3L0=w700


Perfect!

r0HATu_gpXjX-JpyKfwIT1fSJJTk4GSqhLOOl6WYMrx3=w700


Mj3-LsE-cBMjLoIgxEYda2dILxQUGDuWqkqjyKDa0jrP=w700


attaaHeFLSyuxDg7X-CUlXtbfshZhAXnmrUBf1lpPhZr=w700


Y6OFXIwhroGRAj0mE7jkGN5PjLI1m8P1LHvsA8ykYAOD=w700


X37mnTWGnfd61zk28nUl8FjT7u9JURXomwX1c0Qq9k6c=w700


With most of the front taken care of it was time to address the tubing in the rear. This connects the inner front radiator and completes the loop by returning the top radiator back to the reservoir.

g_qYKAJ6U-XPsaad1ULns3Fu-BqX-W647KW_kgIvZ81j=w700


While the loop was coming together all of the cables were simultaneously fitted and positioned.

1el9MU7GxHccrC6YN-faKpv__NCHLTkQPdgiXvk5_YTK=w700


E_5IAR0coCTA5UvVZixGcRgKabgsrFDSqBtOvCWNX8T8=w700


All that left was the top radiator and the reservoir which came in as one sub assembly united to the loop by 2 vertical tubes to each pump.

cleduvKf6i6GuBi4xyTn5JJIRU9j2iefhYOxumghTzwx=w700


wG2Sw3TXXi1SdQa58soTiDDubXwh7HdRKr61kcL1sQ0k=w700


With everything fitted, cabled and tubed together that concludes our progress so far. All that remains is to connect the embedded LED strip to a peripheral connector of the PSU, fit the M.2 SSD and fill the loop!

UyQ5n2yr4gwqLlEUal3hBHeiVpELSgVMLG39pAShQWj1=w700


But not just yet ;)
 
1QWJvdaz9WC5s1RX8arvJmg-9N0tCzKk-hMJVcyyPDRR=w700


SHEEDY is showing some signs of life!

Ro0MdhsQ0aYS1yB3u4SddVrDyIJ38-STcmEYW_hoDhJI=w700


Picking up directly from the last update the Mayhems oil black coolant is going in.

sTsQ1UfBTYOxDJNimA27OjIdL_LL0kuX2ifaTuwNdSTK=w700


After a lot of weird turns and furious shaking the loop was very close to full, all of the fittings made a great seal so it was powered up for the first time and left to pump for several hours.

97jyDhft_srpmnOJlXJdd2ET0oWci0NTzhmu_8ou3TQW=w700


Initially there were some very pretty patterns in the condensation on the top of the reservoir, hopefully they will re-appear as the effect under the frosted was outstanding in person.

V_nLRALmNLf-dofm8WwGn9GfCg6dahTpxyxTJOclU_TJ=w700


Xei9OMjofJX0zRXszPMxdEZ-OWMu-1eu4iV38qze_qXZ=w700


The choice to go with oil black coolant was immediately justified as soon as we turned the studio lights off, from here on in all of the pictures were taken with just the LED strip in the base of the rig powered on.

fCNowP_jaYPyuOff_t9YrsWXU24I6illuS-I5ktBcVI2=w700


x_BZl069gLaR8peagzdvR2Pv7cvdGe7FP8ot75QRCE67=w700


y8sbd4NuMNNlSzGIQMClP54e0KcBQ8AbgUfjMS7yZu0d=w700


5P0nxFHukJKsgYLbe51JIHWQi4fl9D7rhxx8poRISFhY=w700


Then entire rig is illuminated evenly by the refractions through the 10mm clear pass-through block which in turn highlights the frosted accents.

I1ND1O7BCZbKgcWYUFiq873b3p0Vo3KaKlTWPDQqQADz=w700


Soo84XhbEmoDWP6iLSEI-9g5qqyXTM5uEc8O5-7QEvGm=w700


mmAJWld9BcNBoTR5HNmxOarq5FOIUwZQQpyTEENBw9ih=w700


mDljC8j_Vp4gFIVS_z9D8_Sn6DLXu27KQeG6FtyfaJy4=w700


_p32kuek7xFKk69GCPjCcvvmzUxQBlL-lFtER_de6IKs=w700


fyMR4MQK5P6vI4N9GOETsRD82GNUWyqgla59t18sSaGW=w700


SHEEDY is ready for i55, even if the rest of us aren't!

Thanks for all of your comments and subs so far, final photos aren't far away now.
 
1 word: Gorgeous!
Subtle lighting but it suites the rig very well. One day I'd love to build a custom loop in a Parvum case as well, but I doubt I'll reach this level of epicness ^_^
 
Awesome looking.

nK2vO0uFh1Xnkz6VeNDFYJMtU-PZiQzRkPU89MJSwTsh=w700


The planning and preparation that must have gone in to this, really paying off.

Never seen that type of coolant before, very nice. If only it stayed separated :).

fyMR4MQK5P6vI4N9GOETsRD82GNUWyqgla59t18sSaGW=w700


Definitely looking forward to the final pictures.
 
I'm gonna go unpopular opinion puffin and say I'm not keen on the tubing layout and fittings layout in this.

While granted it's obviously taken a lot of planning to do (and that shows) it still feels... I dunno.. haphazard from some angles? Like.. what's it trying to achieve? There's chuffin' loads of fittings in there (And I know you only like to do straight runs of hardline tubing) but I do think in this particular build, it's suffering from over complication a bit.

From a technical standpoint, it's fantastic but aesthetically, to me at least, this looks messy, just too many fittings and too much going on. Complicated for complicated's sake.

It feels to me like one of those, "just because you can, doesn't mean you should" type of deals.

Again, totally personal opinion and personal taste, but, I had to say it because I enjoy most of the Parvum builds, but this one's just not doing it for me, sorry guys.
 
Back
Top