Feronix
New member
Heya guys,
Seeing as a few people seemed to like my custom GPU backplate in my build log, I figured I'd do a little guide for those who are also interested in a cheap custom backplate for their GPU for around £10, if not less.
Note:
These backplates are a bit thicker than an aluminium one you'll get from say EVGA, or on your Asus/MSI cards, so if your PCI-E 16x slot is way at the top of your motherboard or you're running an ITX board, you might have to make some cutouts for it to fit around the motherboard rear I/O and/or your RAM slot clips.
Also, you won't be able to run them sandwiched in SLI.
What you'll need:
- A piece of MDF
- Double-sided tape
- Ruler
- Pencil
- Saw
- Sanding paper
- Paint
Recommended:
- A square
- Masking tape
- Different grids sanding paper
You can also use plywood, but I recommend MDF as it's basically compressed bits of sanding/shaving dust and so does no longer have a grain, which will prevent it from warping under temperature differences.
Measuring and drawing
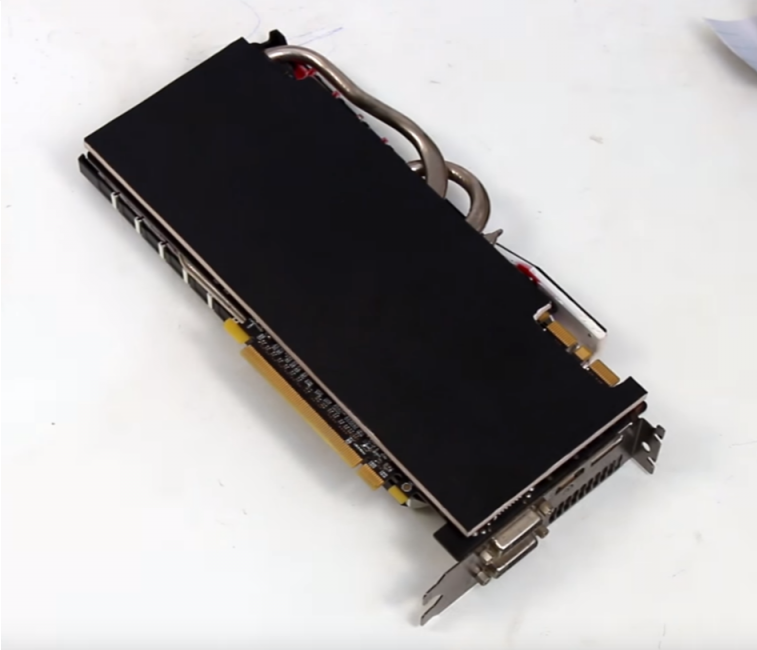
First of all, you need to measure your GPU along the top and the side that sticks into the case. As you can see from the blue line in the picture, if you measure the PCB on the side of the PCI brackets, the backplate might start blocking your slot and the GPU might not go in.

You then take those measurements and draw them onto the MDF. A square definitely comes in handy for this to make sure all your lines are perfectly straight.

Sawing and sanding
Next up, you're going to use a saw to cut the backplate out of the MDF. I recommend sawing on the outside of the drawn lines, MDF is really easy to sand if your lines aren't straight or the backplate is slightly too big, but if it's too small you'll have to start over.
You can use any preferred saw for this. I myself used a jigsaw, but you're fine to use a scroll saw, a table saw for super straight lines or even a handsaw if that's what you prefer.

After you've cut it out, you're best off using a low-grid sanding block to make sure all the lines are completely straight, and line up with your pencil lines. It's basically your moment to make any corrections to tiny mistakes that may have happened during sawing.

It is then time to test fit it on your GPU to see if the size is correct. If it's too big, you do more sanding (or a bit of filing). If it's too small, you start over.

You can then use your rough sanding block to make some nice rounded corners if this suits the style of your build. Obviously you can leave them straight if you so desire.

Optional: Cut-outs
It is good to put your GPU into your system for a bit and lay the backplate onto it to see if you need to make any cut-outs before you paint it (which is a mistake I made, as you can see here).
You can then immediately measure and draw on the backplate where the cutouts need to be placed.

A cutout in the corner is easy enough to make.

But just in case you struggle to make a nice rectangular cutout in the middle, follow this quick GIF guide to do your sawing.

Now you should have something looking like this (depending on which cutouts you needed):

Finishing touches
Again, you'll want to use some rough sanding paper to make your cutouts slightly better.
After that, you're going to want to get a pretty high grid sanding paper to make everything smooth and prepare the backplate for paint.
Paint and design
Now it's time for the fun part; Making the backplate look exactly how you want it to.
It is recommended to use a primer before you paint the backplate, however it is not strictly necessary. I recommend spray paint for nice, thin and even layers. You're going to have to spray it on pretty thick on the sides where you've made the cuts, but 2-3 layers should be sufficient. Just don't forget to let it dry properly and sand it back ever so slightly between layers.
Mine looks like this, with a thicker black stripe, and a thinner green stripe:

Mounting
There are different ways to mount a backplate to a card, probably the most commonly used is screws. But, since the MDF is fairly thick you'd need to search long and hard for the appropriate screws, nevermind standoffs, etc.
So for mine I went with double sided tape. This is fine to stick on the PCB of a card. You might have to do double layers of tape (so PCB, tape, tape, backplate) as some things on the back of the GPU stick out a bit (screws, solder points, etc) and the backplate might not reach all the way down to the tape.
It is fine to have the backplate touch solder points or screws, seeing as wood is clearly not conductive.
Depending on the tape that you use, this amount will be enough for cards in standard configurations. However, if you're running a 90 degree rotated motherboard tray, an ITX case where you card stands up, or an inverted-ATX case, you might want to use... a lot more :lol:

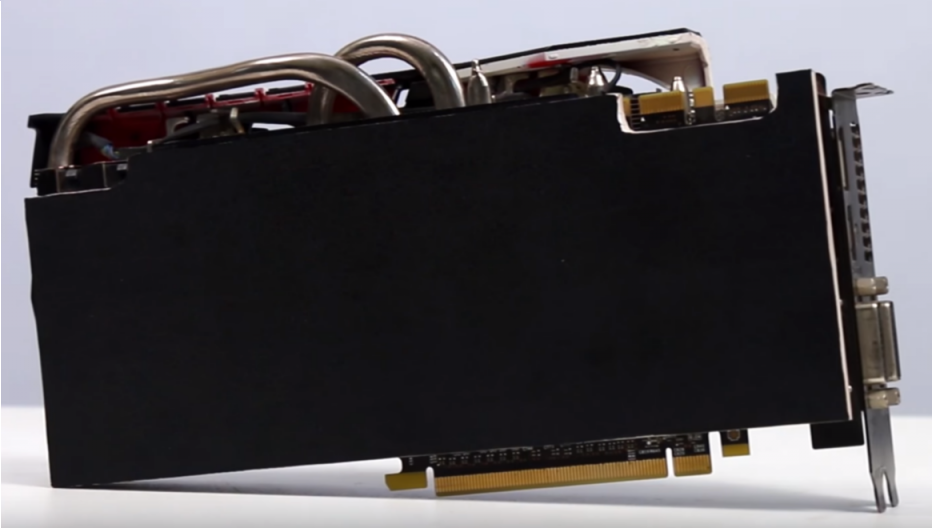
Finished
And there you go, you have your own custom designed backplate on the back of your card looking super clean and pretty. Enjoy")

Seeing as a few people seemed to like my custom GPU backplate in my build log, I figured I'd do a little guide for those who are also interested in a cheap custom backplate for their GPU for around £10, if not less.
Note:
These backplates are a bit thicker than an aluminium one you'll get from say EVGA, or on your Asus/MSI cards, so if your PCI-E 16x slot is way at the top of your motherboard or you're running an ITX board, you might have to make some cutouts for it to fit around the motherboard rear I/O and/or your RAM slot clips.
Also, you won't be able to run them sandwiched in SLI.
What you'll need:
- A piece of MDF
- Double-sided tape
- Ruler
- Pencil
- Saw
- Sanding paper
- Paint
Recommended:
- A square
- Masking tape
- Different grids sanding paper
You can also use plywood, but I recommend MDF as it's basically compressed bits of sanding/shaving dust and so does no longer have a grain, which will prevent it from warping under temperature differences.
Measuring and drawing
First of all, you need to measure your GPU along the top and the side that sticks into the case. As you can see from the blue line in the picture, if you measure the PCB on the side of the PCI brackets, the backplate might start blocking your slot and the GPU might not go in.
You then take those measurements and draw them onto the MDF. A square definitely comes in handy for this to make sure all your lines are perfectly straight.
Sawing and sanding
Next up, you're going to use a saw to cut the backplate out of the MDF. I recommend sawing on the outside of the drawn lines, MDF is really easy to sand if your lines aren't straight or the backplate is slightly too big, but if it's too small you'll have to start over.
You can use any preferred saw for this. I myself used a jigsaw, but you're fine to use a scroll saw, a table saw for super straight lines or even a handsaw if that's what you prefer.
After you've cut it out, you're best off using a low-grid sanding block to make sure all the lines are completely straight, and line up with your pencil lines. It's basically your moment to make any corrections to tiny mistakes that may have happened during sawing.
It is then time to test fit it on your GPU to see if the size is correct. If it's too big, you do more sanding (or a bit of filing). If it's too small, you start over.
You can then use your rough sanding block to make some nice rounded corners if this suits the style of your build. Obviously you can leave them straight if you so desire.
Optional: Cut-outs
It is good to put your GPU into your system for a bit and lay the backplate onto it to see if you need to make any cut-outs before you paint it (which is a mistake I made, as you can see here).
You can then immediately measure and draw on the backplate where the cutouts need to be placed.
A cutout in the corner is easy enough to make.
But just in case you struggle to make a nice rectangular cutout in the middle, follow this quick GIF guide to do your sawing.
Now you should have something looking like this (depending on which cutouts you needed):
Finishing touches
Again, you'll want to use some rough sanding paper to make your cutouts slightly better.
After that, you're going to want to get a pretty high grid sanding paper to make everything smooth and prepare the backplate for paint.
Paint and design
Now it's time for the fun part; Making the backplate look exactly how you want it to.
It is recommended to use a primer before you paint the backplate, however it is not strictly necessary. I recommend spray paint for nice, thin and even layers. You're going to have to spray it on pretty thick on the sides where you've made the cuts, but 2-3 layers should be sufficient. Just don't forget to let it dry properly and sand it back ever so slightly between layers.
Mine looks like this, with a thicker black stripe, and a thinner green stripe:
Mounting
There are different ways to mount a backplate to a card, probably the most commonly used is screws. But, since the MDF is fairly thick you'd need to search long and hard for the appropriate screws, nevermind standoffs, etc.
So for mine I went with double sided tape. This is fine to stick on the PCB of a card. You might have to do double layers of tape (so PCB, tape, tape, backplate) as some things on the back of the GPU stick out a bit (screws, solder points, etc) and the backplate might not reach all the way down to the tape.
It is fine to have the backplate touch solder points or screws, seeing as wood is clearly not conductive.
Depending on the tape that you use, this amount will be enough for cards in standard configurations. However, if you're running a 90 degree rotated motherboard tray, an ITX case where you card stands up, or an inverted-ATX case, you might want to use... a lot more :lol:
Finished
And there you go, you have your own custom designed backplate on the back of your card looking super clean and pretty. Enjoy