D-WAVE X2 Quantum computer - scratch build

HCP

New member
You who seen me before know that i´m soft for supercomputers and have begun to do alot of scratchbuilds.

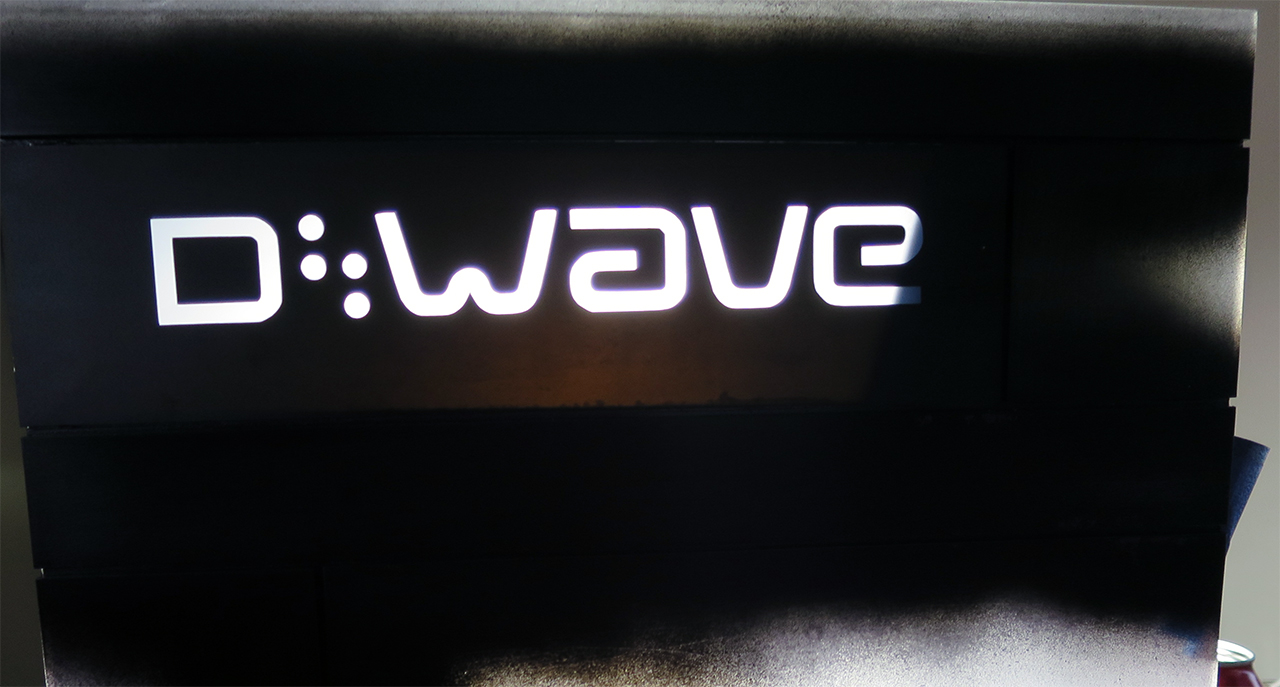
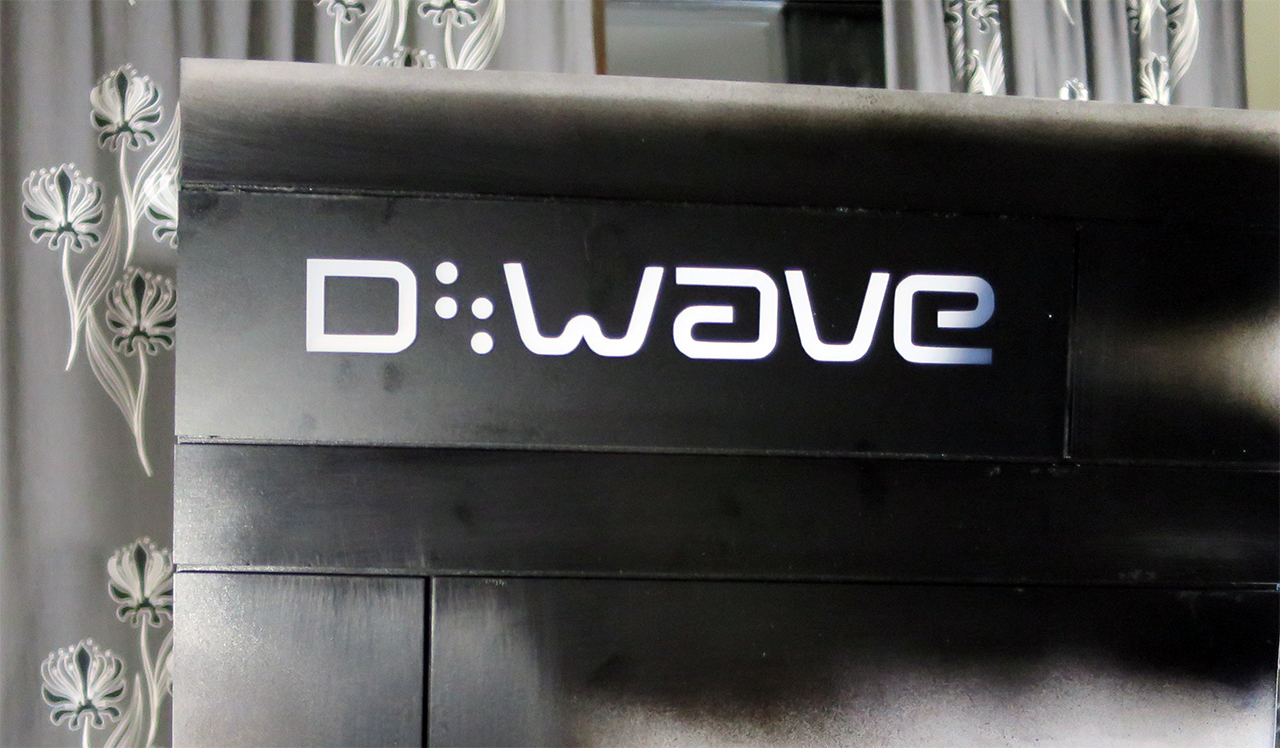
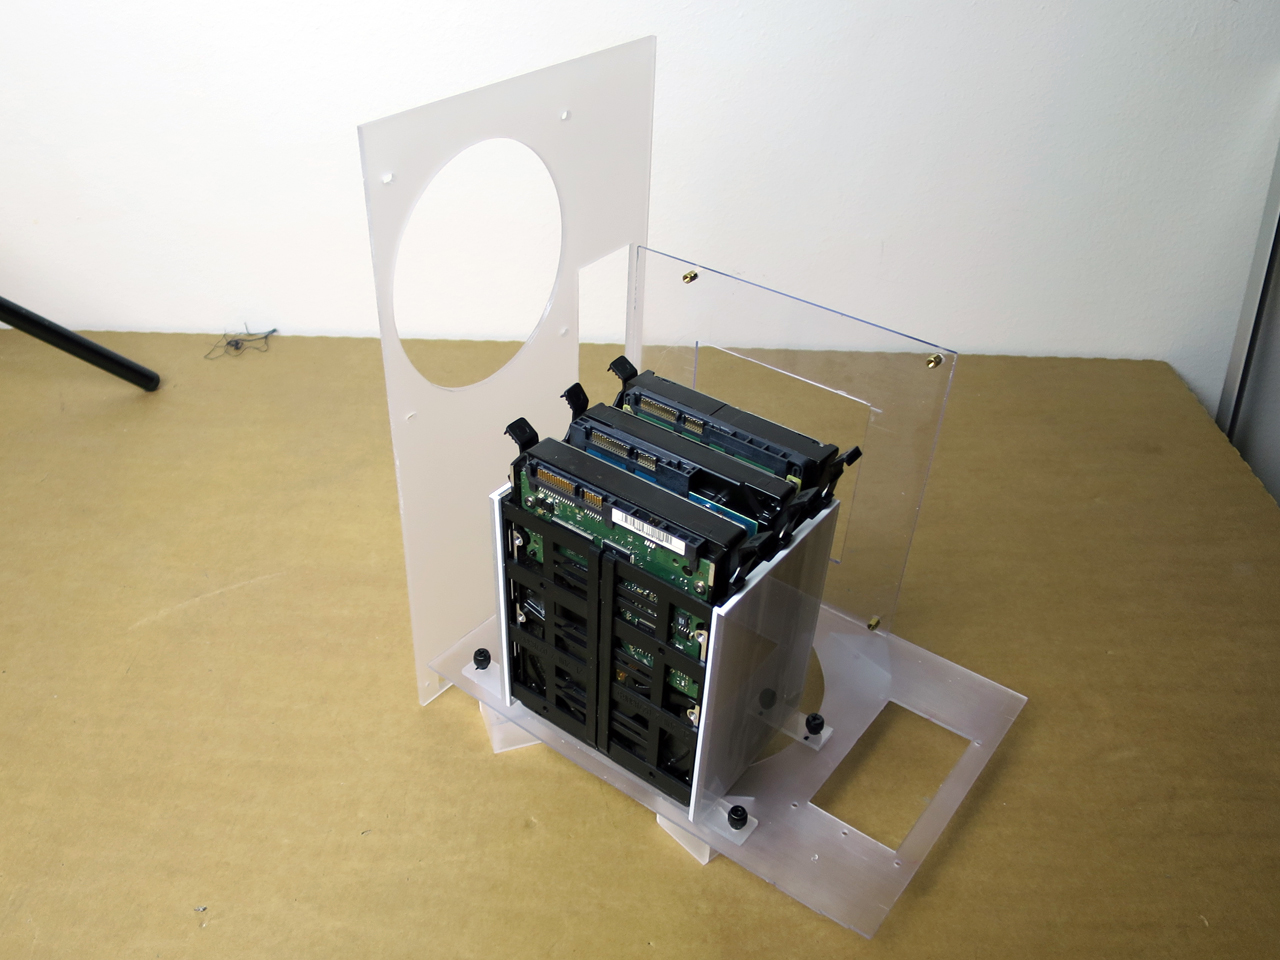
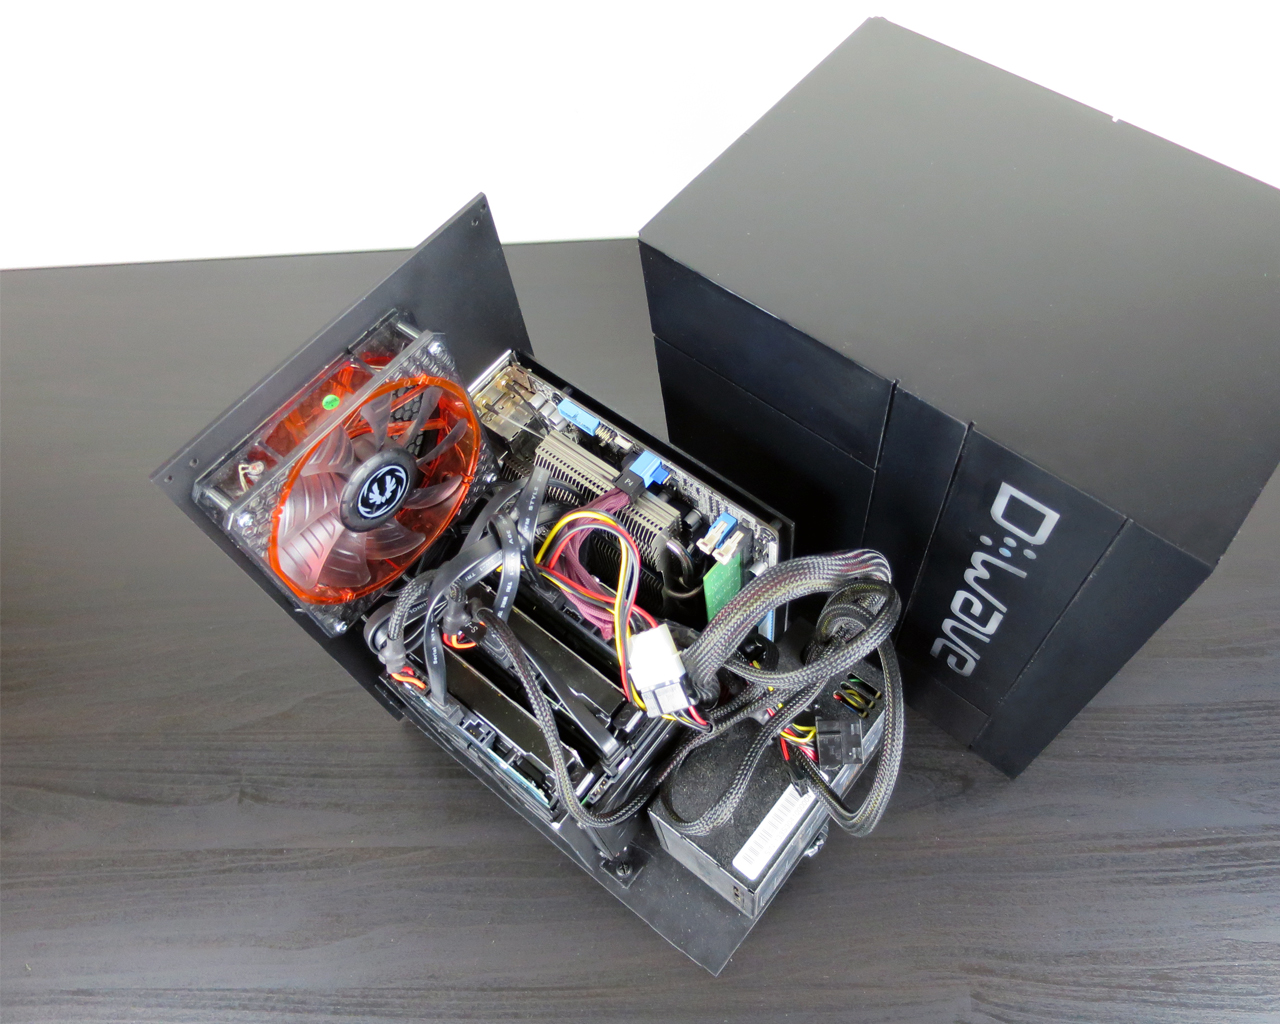
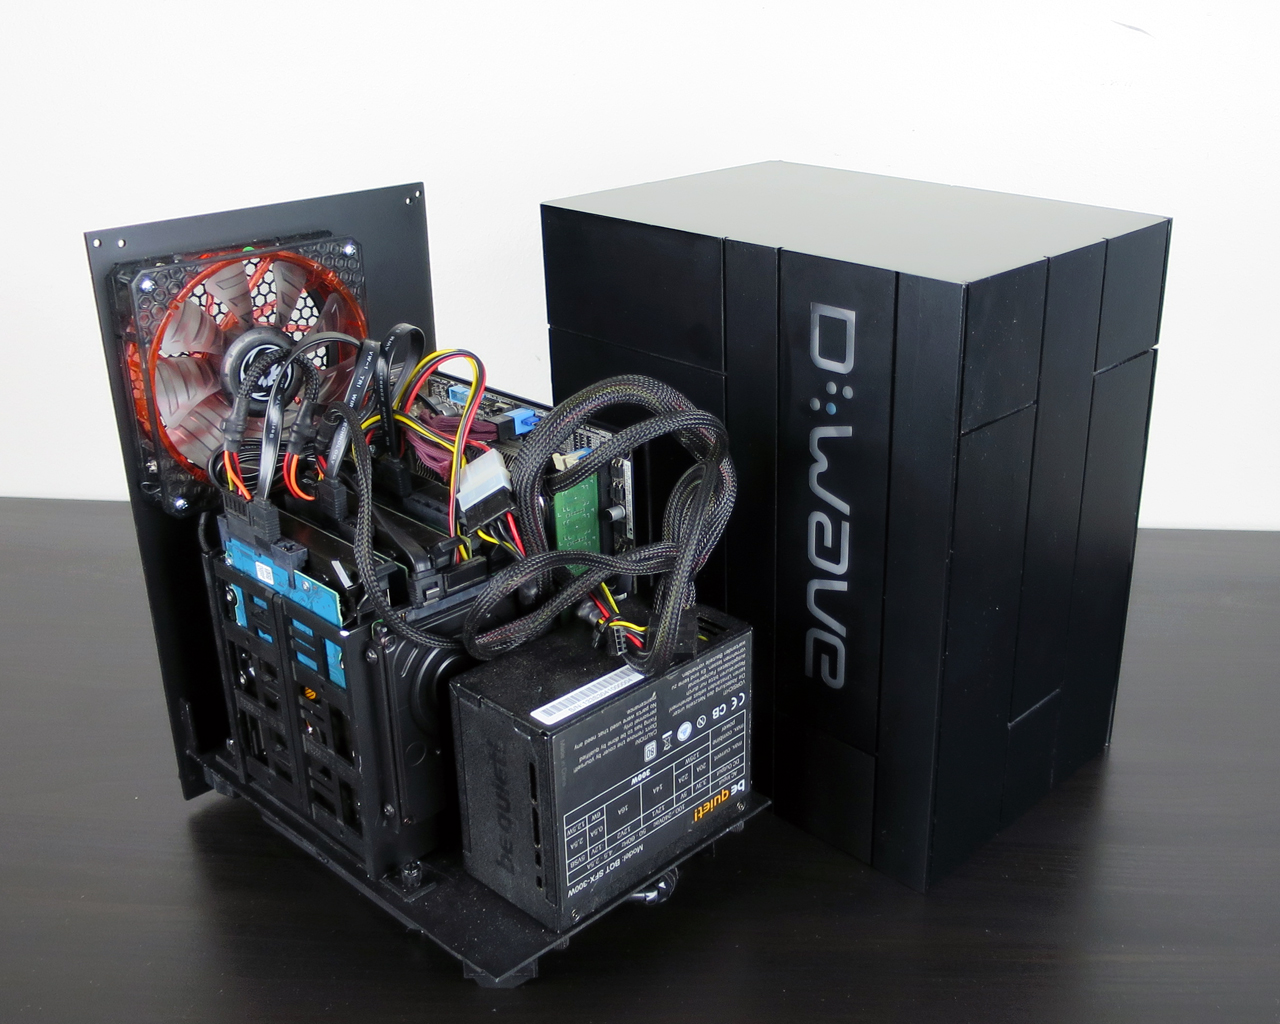
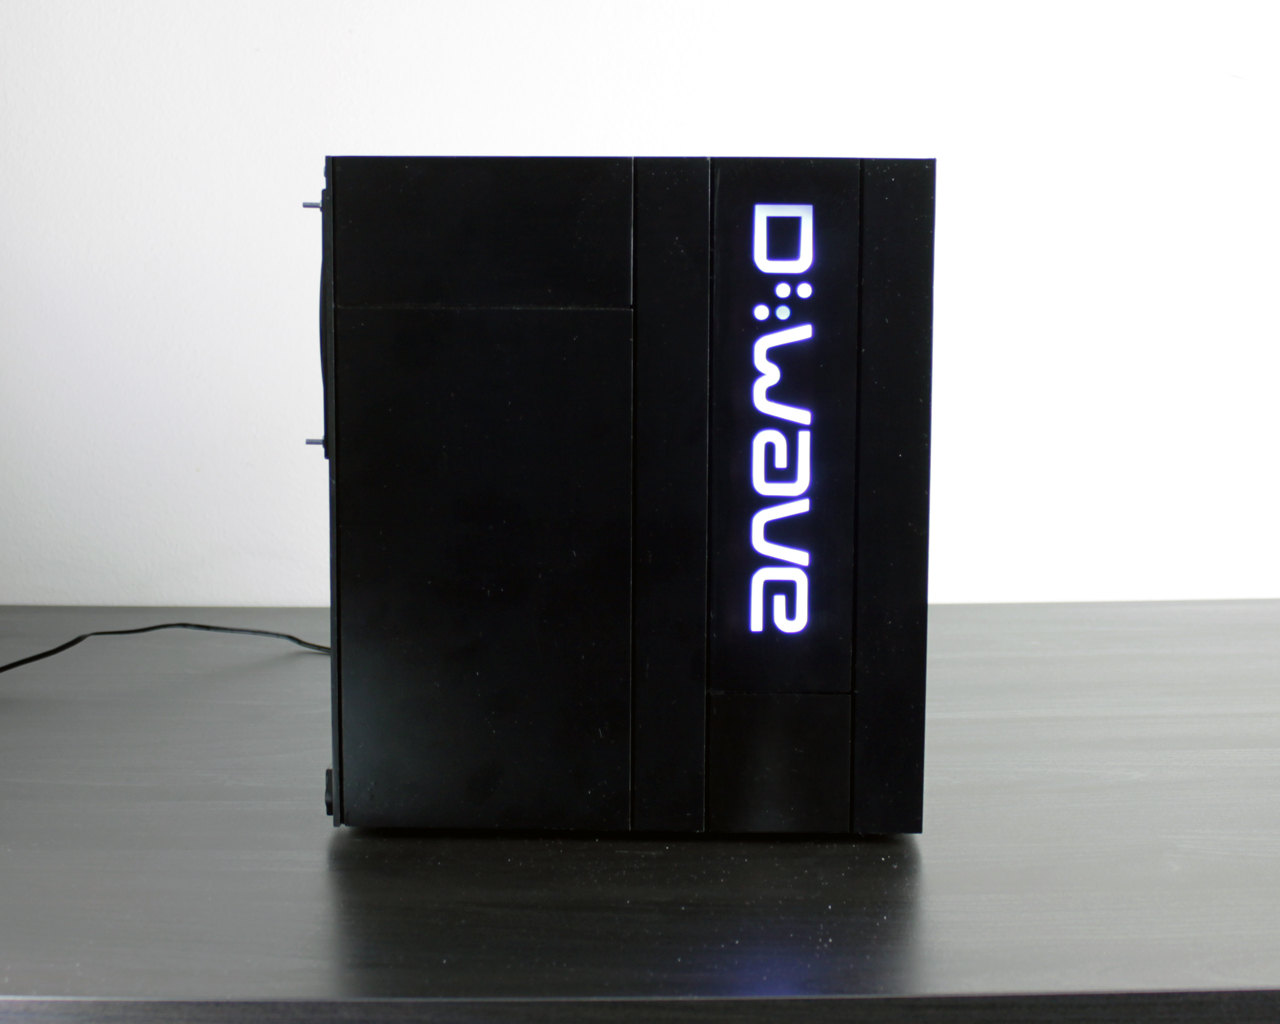
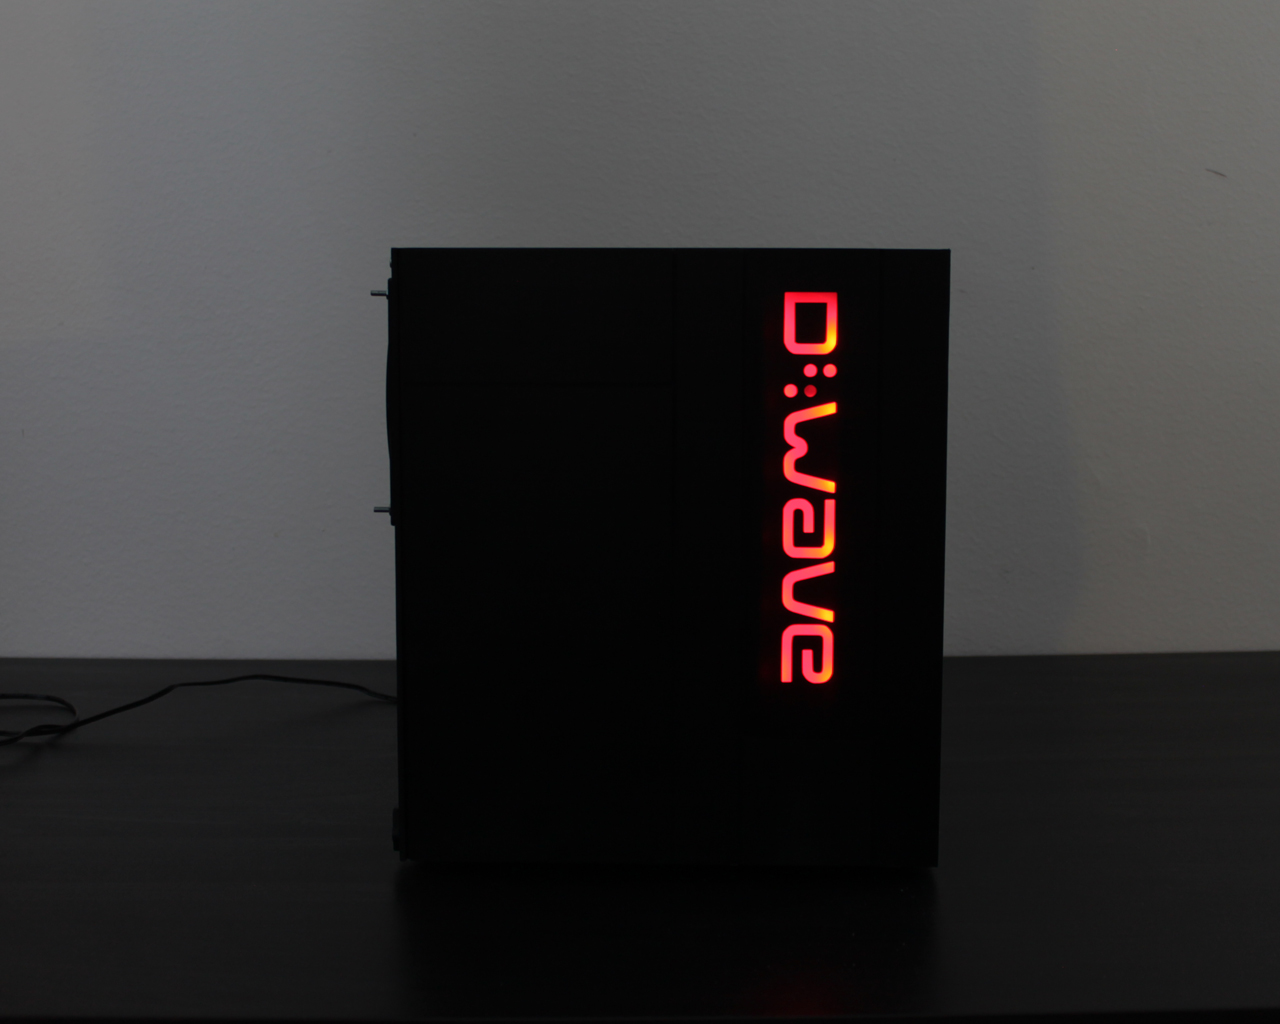
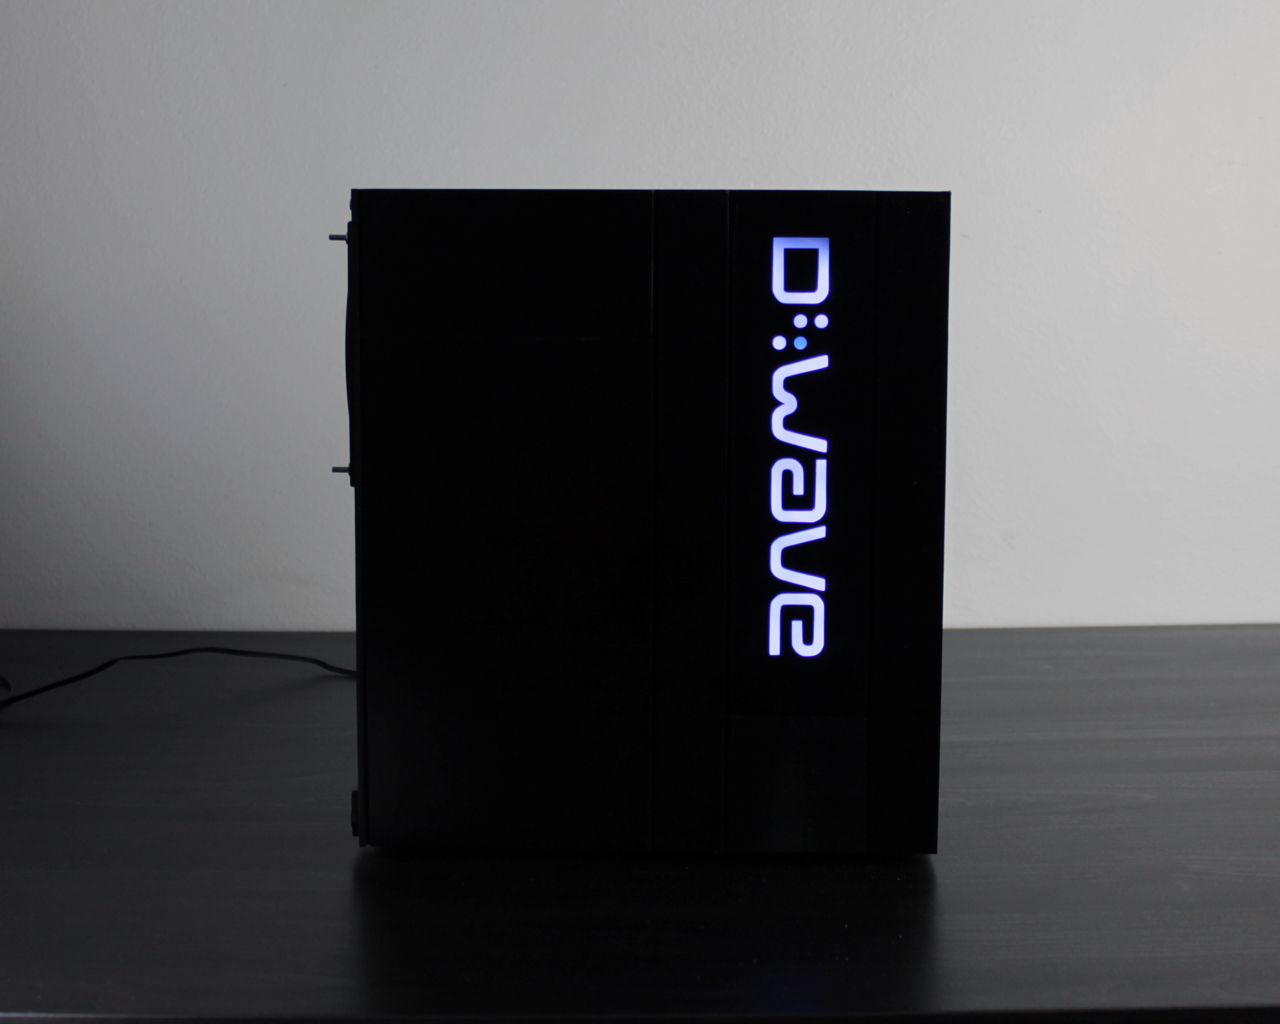
When i saw a article about D-Wave X2 i fell in love, how cool is this.

Instantly i started to gather information about the X2 and planning it out in Sketchup to get a grasp of what size is needed for my replica.

d-wave-x2.jpg


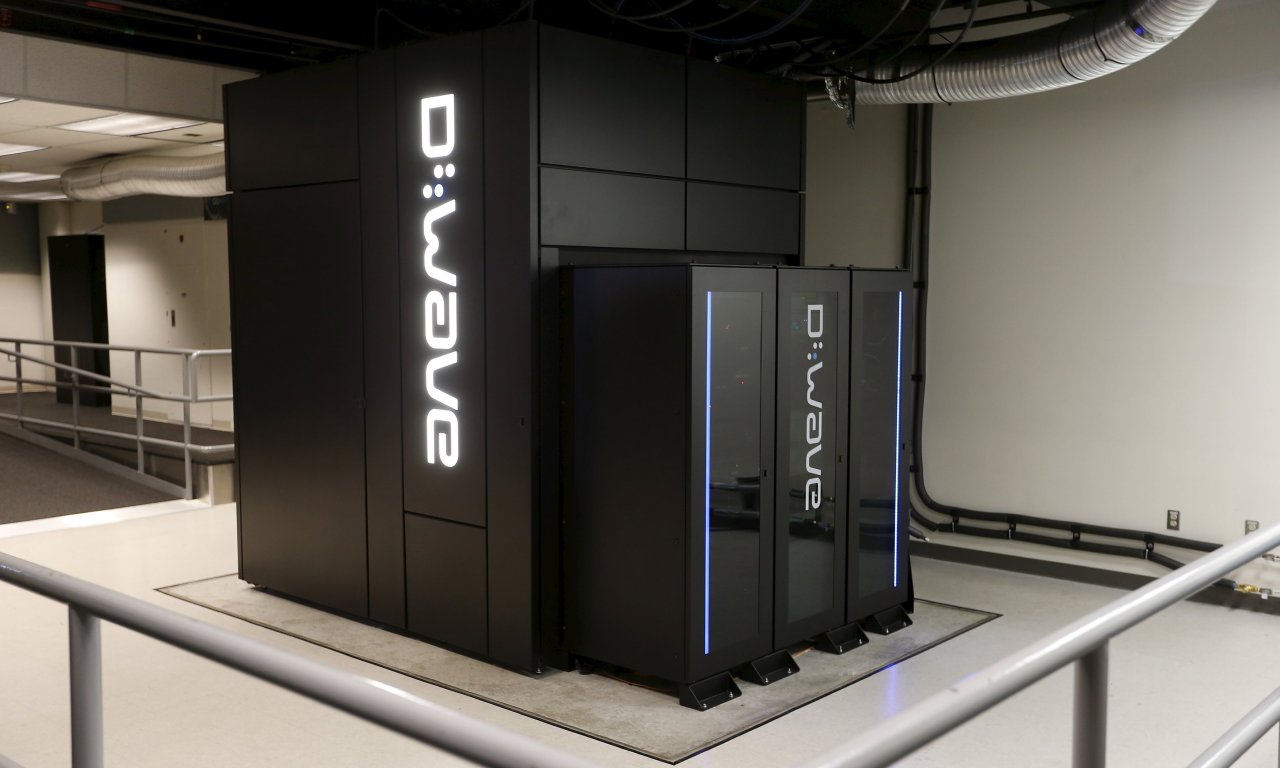
To be aesthetically appealing, i have made some changes.
- Racks in front of the chamber not in my replica
- Rear panels are moved to the front side, where the racks were.

Hardware
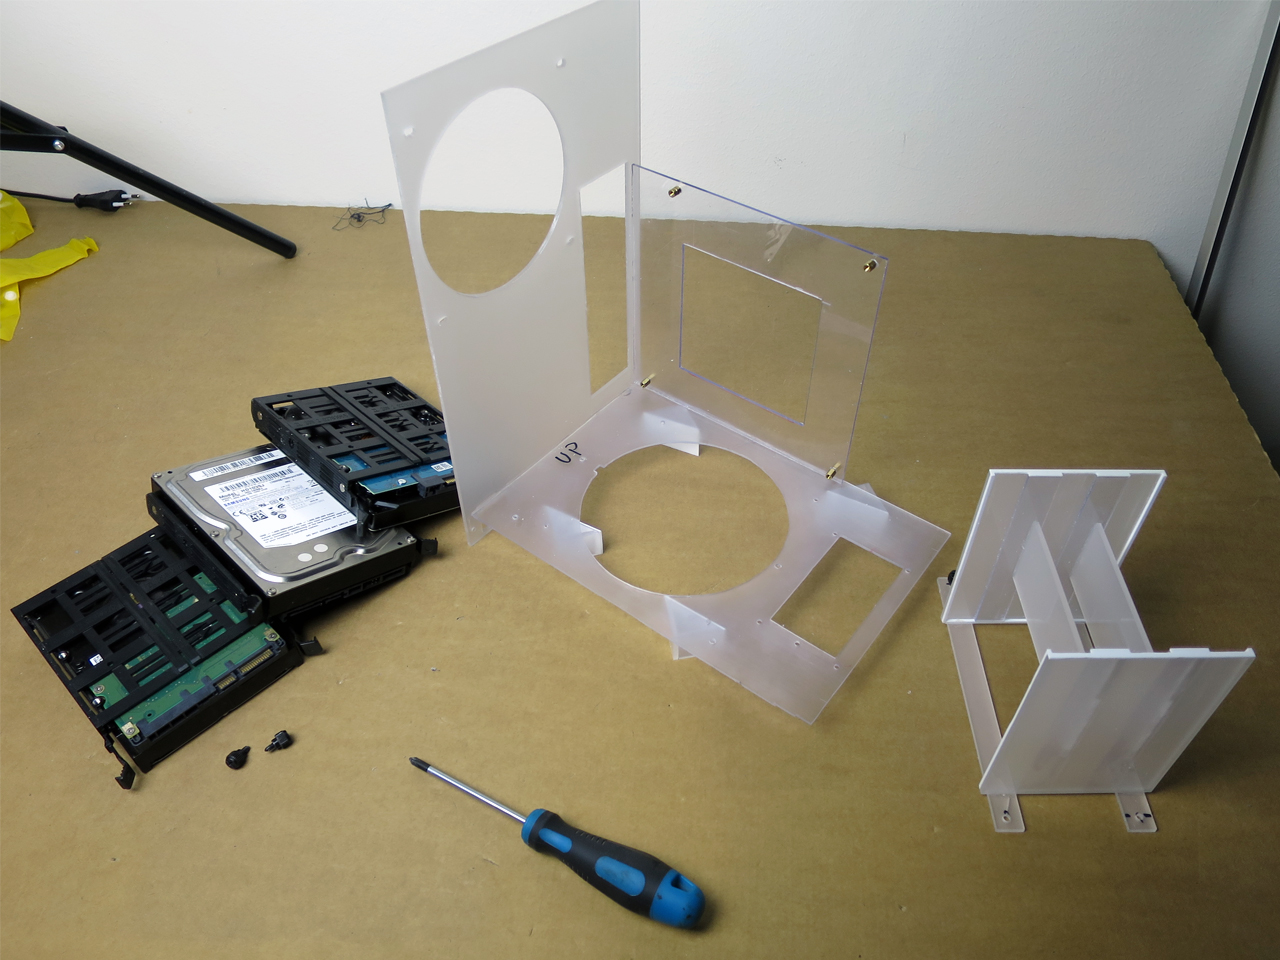
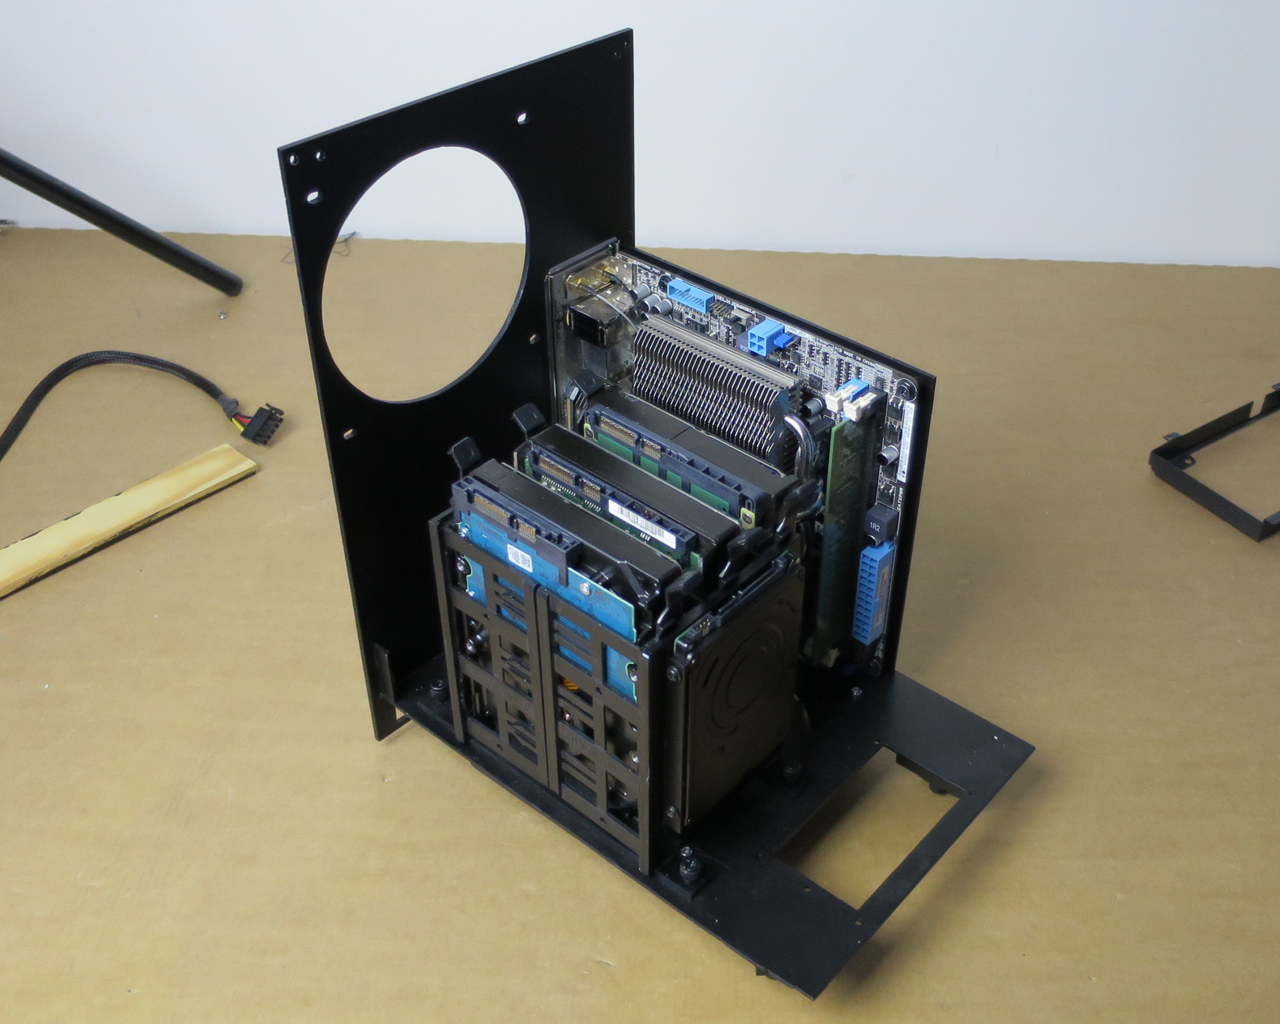
Gigabyte GA-Z97N ITX motherboard
Intel G3258 CPU
2x4gb Corsair Vengeance memory
Cooler Master 120V cooler
Samsung 840 120GB EVO OS-drive
3x4TB drives

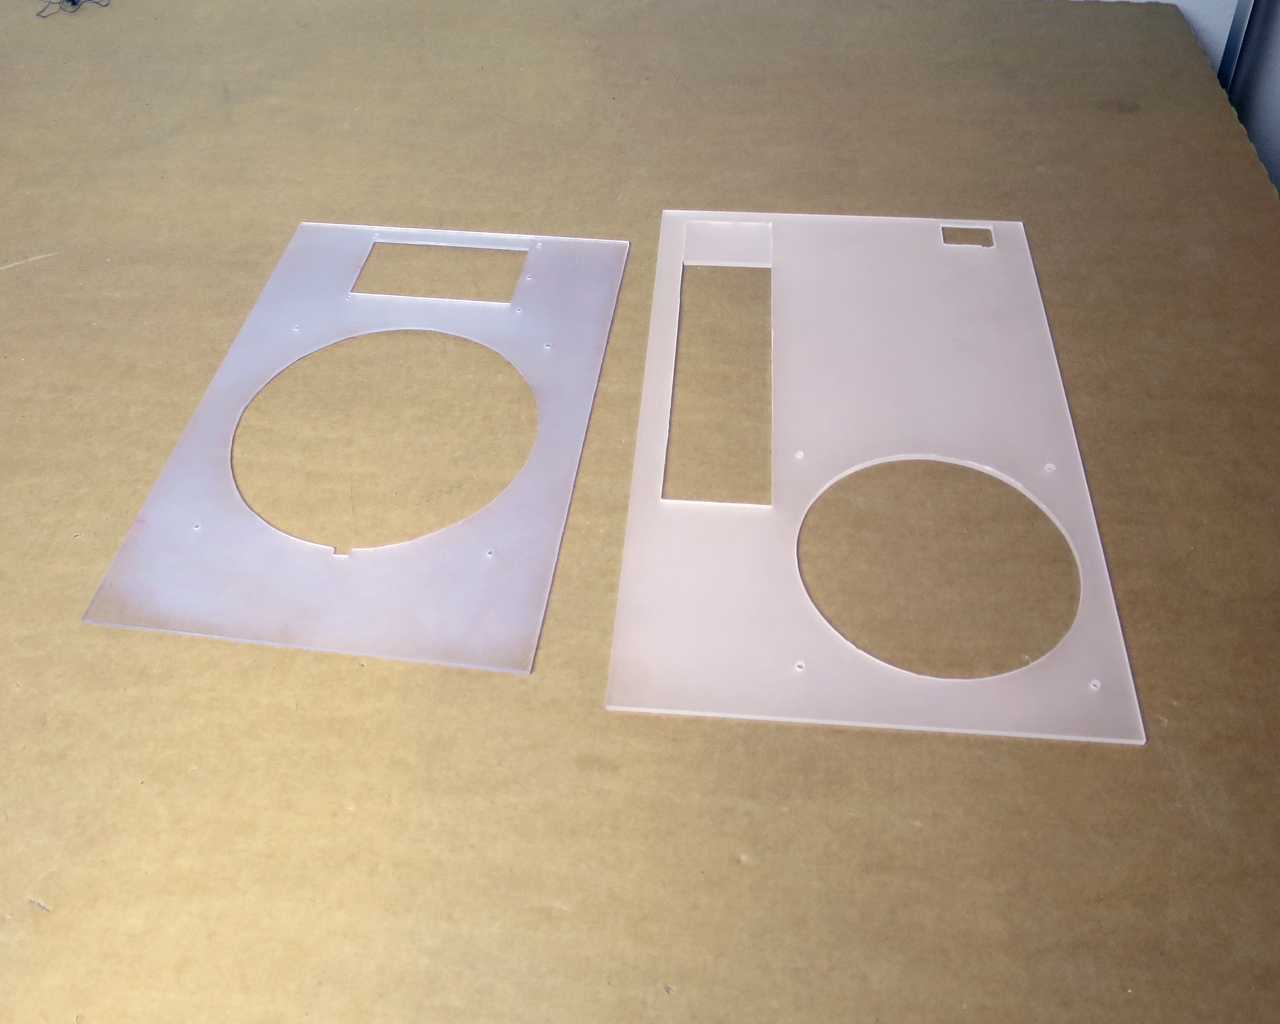
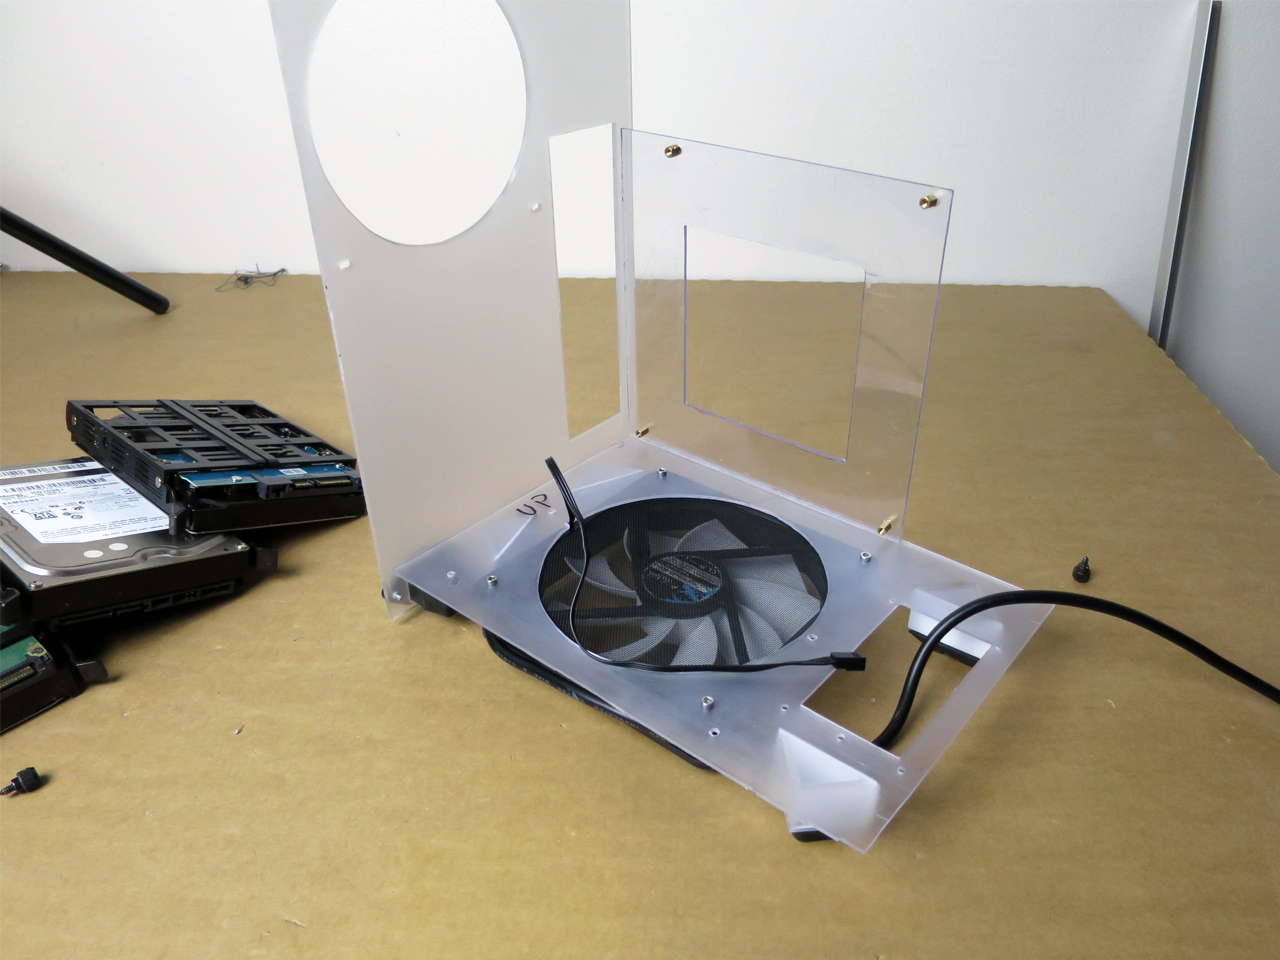
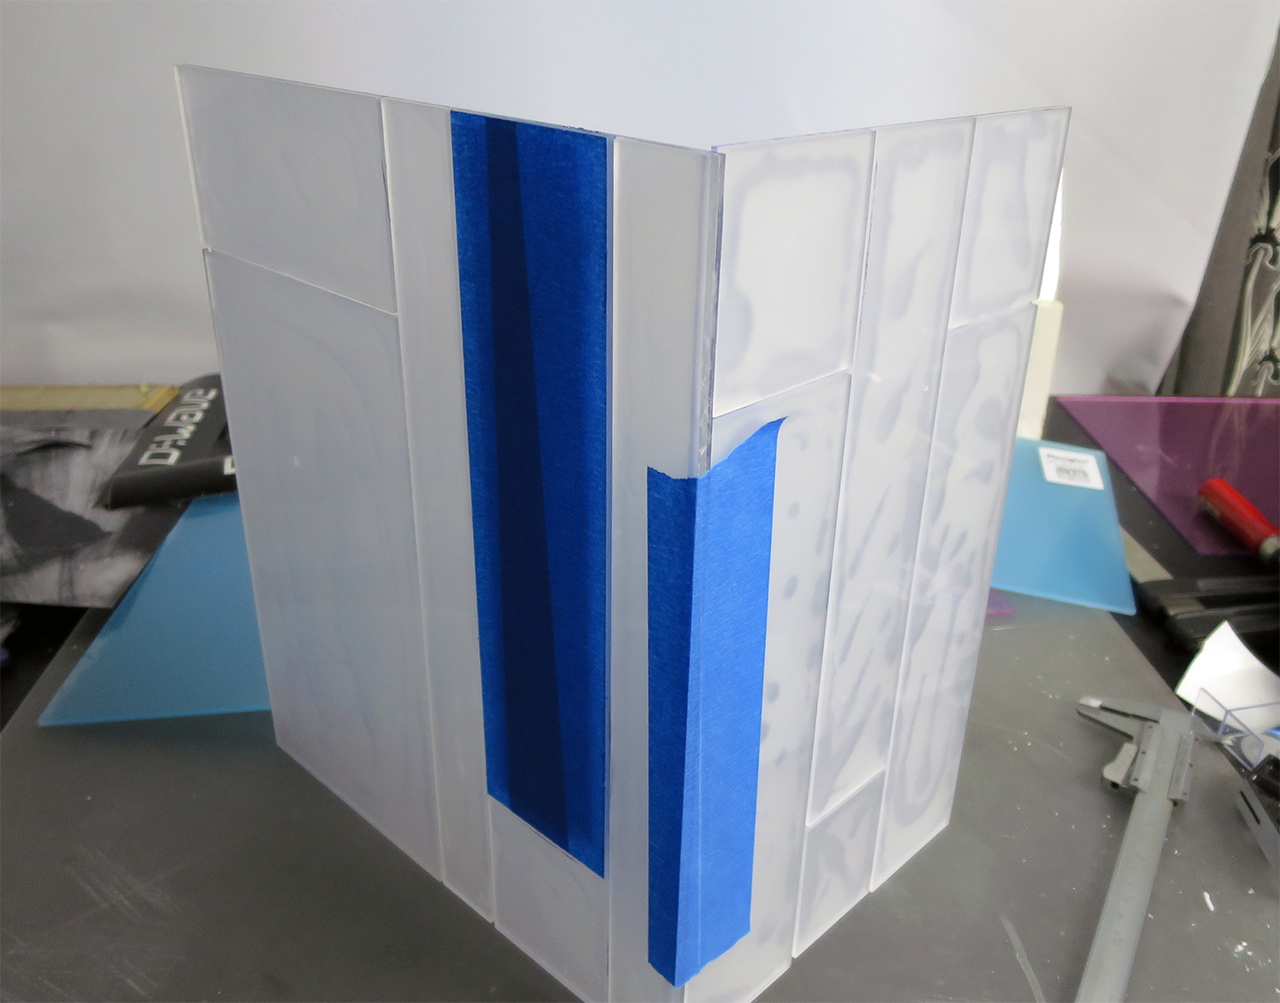
All panels cut, gluing them to a 2mm acrylic piece to make up the walls.
Wanted to keep the glue from oozing out in the spacing between all small pieces, worked good. Looks awful - right now :)

d-wave-x2-3.jpg


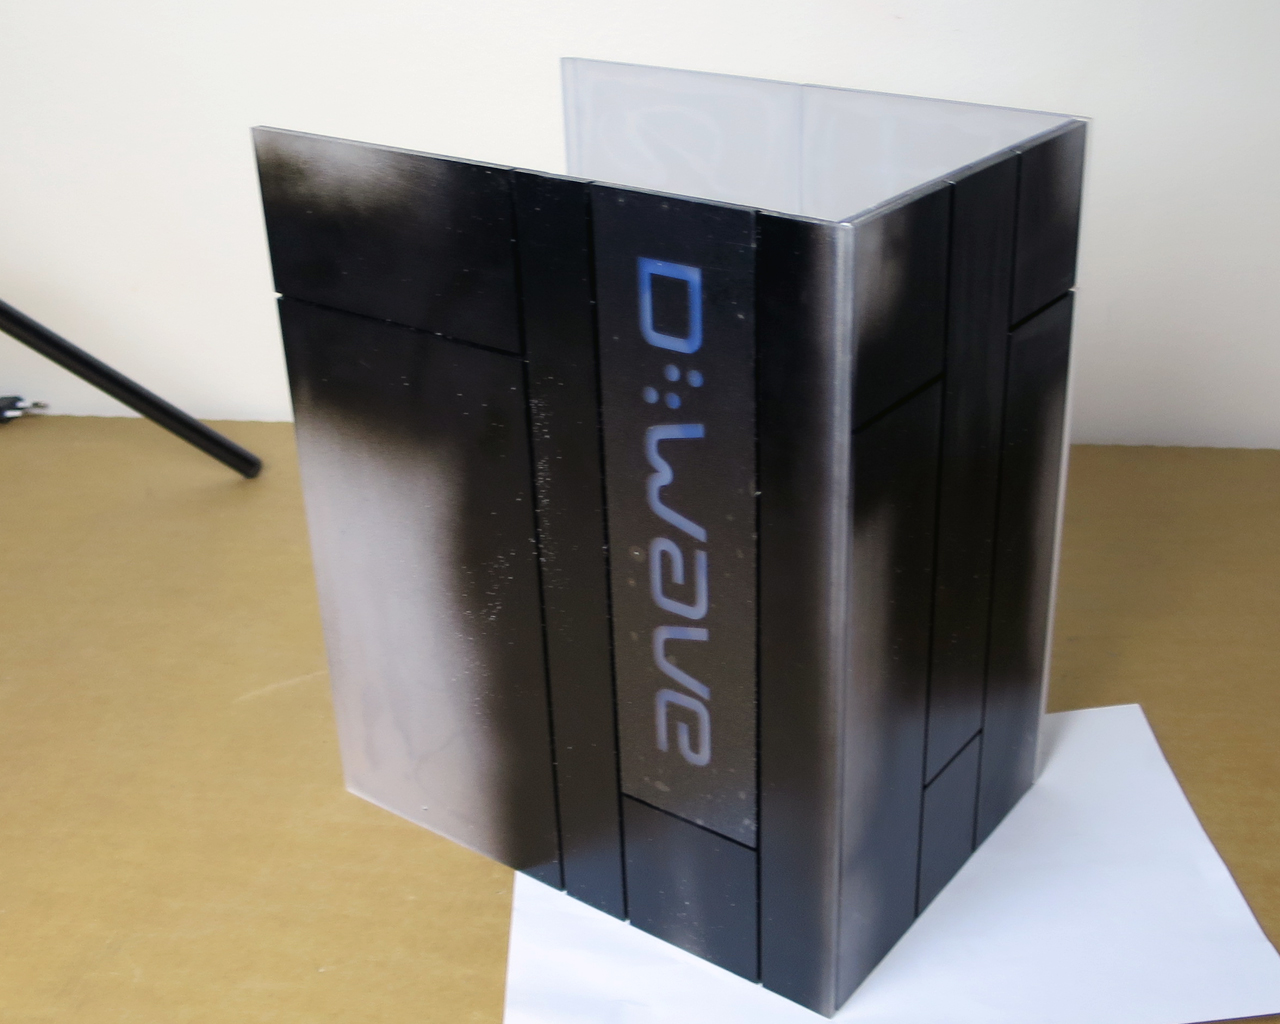
Side and front panel cut and glued

d-wave-x2-2.jpg


See ya in the next update!
 
Nice idea fella look forward to seeing it come together, what happened to WOPR?? we never saw it finished.
 
Nice idea fella look forward to seeing it come together, what happened to WOPR?? we never saw it finished.

WOPR still alive on the bench :)
Got stuck in programming all lights, it´s actually next up after this and my new workstation to be completed :)
 
First mistake...
I cut out the D-Wave logo in a piece of flat black vinyl, and had a idea of mounting a LED behind the panel to light it up.

But.. got it on off-centre in both directions...
Back to the cutting machine again :)

The black paint is only for the spacing between all small panels, the panels themselves will be wrapped in vinyl to get a easy surface without painting and sanding.

Here is how it looks in front of my desk light.
Some light coming trough, will isolate the logo on the back some more.

d-wave-x2-6.jpg


And without a light behind it.

d-wave-x2-7.jpg


Not much of progress to show today, i have mostly put time into the bottom and designing all parts holding the motherboard and drives inside the case and thinking of a way to open the case to change parts and whatnot.

To be continued :)
 
A smaller update today

Made the floor (left) and the back (right) and put a 140mm fan in the floor and a 120 in the back.
Probably do 2x120 in the roof too, not sure yet, or a single 140 there too.

Made a mistake with the IO-cutout, internal floor will be 30mm up from the bottom, forgot to add that to the back. Not visible later when painted and wrapped.

d-wave-x2-8.jpg


Front and side pieces glued.

d-wave-x2-9.jpg
 
Call me as thick as the offspring of a tennis ball and a TV weathergirl but why didn't you make the visible sides from black acrylic?
 
Call me as thick as the offspring of a tennis ball and a TV weathergirl but why didn't you make the visible sides from black acrylic?

Already have alot of materials, and only had glossy black acrylic i didnt like the effect of that surface, it reflected everything.
Easier on the money to go with the acrylic i already had than ordering new flat black acrylic :)
 
More updates

Made a simple drive bay to hold the three hdd´s.
Could be made better but didnt see why, it´s the outside of this puppy thats cool :)

d-wave-x2-10.jpg


And it is removable, for easy access to other parts.

d-wave-x2-11.jpg


Bottom fan and case feets mounted

d-wave-x2-13.jpg


Close up of the case feets


d-wave-x2-12.jpg


Now its time for some sanding and paint/wrap of the bottom part.
 
Mounted and painted.
Found another motherboard, AMD E35M1 with passive cooling, worked good. Been running it under load for a day in the case just to be sure the cooling is enough.

d-wave-x2-14.jpg


Bought a SSD-DOM unit, 16GB is enough for my Linux system.

d-wave-x2-20.jpg


And a collection of some pictures on the desk.


d-wave-x2-15.jpg

d-wave-x2-16.jpg

d-wave-x2-17.jpg

d-wave-x2-18.jpg

d-wave-x2-19.jpg
 
Back
Top