Andre's Z77 Personal Rig

looking now!

when you go to edit your signature it's the name layout as a new post on here, you select the text you want to make a link for then click the "insert link" icon at the top of the editor and paste your link there.

Thanks man, i do thing it work now :D
 
Fitting Noctua NF-P12 Fans, part 3: Drilling Additional Mesh

Last night I didn't bother to put the front panel back on the case


That is because I had something more in mind for the front panel fan area.


I was pleased with how the noctua's were mounted, but I was not happy with the bottom fan being half blocked, so I set out to drill some more holes and extend the mesh area downward.

I needed a mesh template to drill through to get teh spacing consistent, but also the keep the bot from jumping around.

Luckily I had just the thing hanging around here, an old HAF 932, which has mesh at the front that is the same sort of pattern as the stuff in the 650D. I drilled out the rivets in the front panel and salvaged the front panel to use as a drilling template.


The mesh area from the 932 wasn't big enough the cover the entire area, so I had to move it a few times to get the coverage I wanted.


I marked on the 650D the rough area that I wanted to drill, I want a little wider than the fan.


To secure it as I was drilling I used some clamps


First section of holes:


Middle section:


And the final section


To straighten out the drilled area a bit I used the clamps again with a metal file.


I also used the file a lot on the inside to get rid of all the burs


Then I used a black marker on the insides of the holes just to cover up the bare metal a bit.


You can see that on the 650D the dust filter is a rectangle, so it actually covers the sides of a 200mm fan a bit, but its just the right size for 2X 120mm fans


And when the dust filter on you don't see any of it:

 
Some nice work you have done whit your Father, i most say it look cool :D


thanks! he did the power button fix and i did the rest of it. the hand drilled mesh i did isn't the prettiest thing in the world, but it did improve the airflow for the bottom fan, plus you don't see that behind the dust filter and front panel anyway. I think of that frame of the case behind the front panel as the sort of "utility area" of the case that you can play around with and modify and you don't see it behind the actual finish of the case.
 
Nicely done, I like your solution for the holes.

good idea with the holes... looks really nice

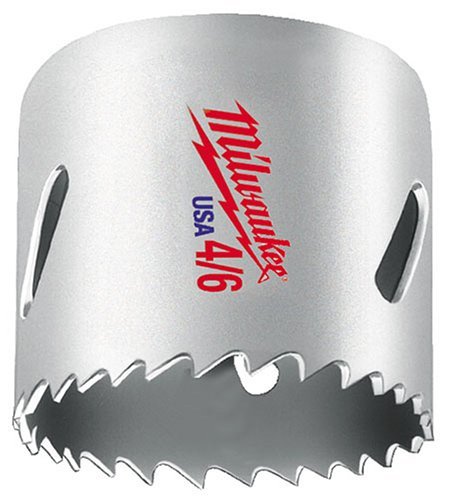
Thanks guys! The other solution that I've seen is maybe you guys remember MNPCTECH used to offer a service back in the day more with older cases where they would cut out the entire section of restrictive mesh with a drill sttachment that is actually the size of the 120mm fan blades or whatever size fan it was.

It was something like this but they used a 120mm version. I didn't have one on hand. though and I figured it might get a bit hairy drilling that into an area that is already mesh, so I decided that holes would be less risky and went with that instead.

drill-bits-hole-saw.jpg
 
USB3.0 Adapters

Today my HDE 2 port usb3 female to 20 pin adapter cable came. I ordered this one because the Silverstone SST-CP09 model that I have was too short and bulky for my liking and it just didn't work well.

Here are some links where you can pick up either of these for yourself:

HDE ® 2 Port Usb 3.0 A Female To 20 Pin Y Cable

Silverstone SST-CP09 120mm External to Internal 19 pin USB3.0 Adapter Cable


Here's a few pictures I took to compare the two. You can see the silverstone one has a longer section of rubber on the 20 pin header, making it more awkward to route it neatly, and the female usb ports on it are much bulkier as well. It's also much shorter which makes it more awkward to work with.


the new one looks much cleaner with the longer cables

I completely agree! I wouldn't recommend the short one at all it's a nightmare to get it routed behind the motherboard tray without bending the header a lot.

I haven't put the longer on in yet but I can only imagine it will be much easier to get in.
 
I am planning to do a look at the software side of the z77 mpower board, the bios and the MSI software.

Included in that is the CPU phase power LEDs which you can turn off in the software, but they keep coming back on if you restart or wake from sleep.

A side effect of that is light shining through the mesh in the roof onto the ceiling. Here is a look at what that looks like.

8270629251_e39aaf9fd3_h.jpg


8271693838_31303a2618_h.jpg
 
hell guys,

this is just a really quite update, there will be a detailed update coming tomorrow.


currently my case is stripped down pretty much bare. i've been working on cutting out all the front mesh, which is not finished.


i will have lots of detailed pictures of that tomorrow and a detailed update with all of the things i have done tonight and some videos.

i am taking a break now to have some tea, then i will get started on taking a few pictures of the hardware while it's out, then rebuilding my system :)

hope everyone is doing well! here is a couple of "teaser pictures"

8273316283_6bf27e0199_h.jpg


8274384832_e13d8b5ab3_h.jpg
 
everything is looking sweet. man its gonna be a bugger replacing the ram with such a huge heatsink. It just towers over everything! O_O lol Keeping an eye on this one!

I've had 4 or 5 sets on ram in and out of this now and it's actually not bad, all you have to do is take the fan off. One thing that helps with this bard is that it has clips on both sides of the memory instead of clips at the top and a slot at the bottom, that way you can position it at more of an angle then straighten it and press it into the slot vs the slots at the bottom where you have to straighten it out before putting it in.
 
Removing Front Mesh

Okay hey everyone!

Last night I had a long night working on some things, so here is an update for you now.

Originally I had drilled some holes for extra air flow for the bottom fan, but right away I knew I was not going to be happy with it.

I didn't like the look of either on the front or the back. The front was uneven and messy and the back was much much worse.


Here is what the inside of the front looked like after the holes.


In addition to that, there was still some being created by the mesh area, so it was clean that it had to go.


I marked up some rough lines were i wanted to cut. the idea was to get all the material drilled from the holes out, so i marked around that, then i marked a similar area for the top fan. I planned on leaving a section of mesh in the middle of the to fans for screw the two fans to. Since the section in the middle is made of mesh, it's not going to be restriction airflow at all.


I started getting all the hardware out of the case, and I took this opportunity to take some close up images of the hardware.


I removed the power supply and everything else except the roof fans, but I left the power supply cables in place along the motherboard tray, so that way I could just connect everything back up when I put the hardware back in.


When I got it downstairs I used plastic bags to cover up as much of the case as possible, to keep as much debris out as possible.


I covered the front optical bay area


I covered the roof fans


I used an old piece of laminate flooring to block of the area at the front where the fans are from the rest of the case


Made a few cuts around the inside of the mesh to get a feel for how the dremel cuts


It was very easy cutting along the mesh area. The cut along the bottom was a little longer to do, but it was not hard either.


at first I cut along the middle of the mesh, then after I went over again and smoothed it out


For the top section I didn't like how the vertical cuts looked where I had it marked, so I decided after to follow the circle pattern of the orignal fan just to make it a bit cleaner looking


Went over it the edges with a file & sandpaper


After I finished with the cutting I vacuumed it up, and finished by going over it a couple times with the air compressor.


I'm pleased with the end result. It looks much better and cleaner on the inside, and as predicted the noise from the mesh is not completely gone.


While I had all the hardware out of the case, there were a few things I wanted to take care of.

First was that the tiny num on the dust filter that clicks into the main part of the case for the quick release, press release thing broke off (partly due to me putting it on carelessly) so I glued that back on

Non-broken side:


Glued side:


The next thing was to have a look and see about the USB 3.0 pins on the motherborad header. When I had a closer look I noticed that the 19th pin was actually bent over sideways, not broken off like I had thought. So I let my dad have a look at it and he was able to bend it back in place.

The new, longer USB3 adapter is much easier to deal with, once I got it onto the motherboard I just left it on and hooked it up once the motherboard was back in the case.


Here are some pictures of the AX850.


Some pictures of the motherboard up close with the new memory.


Next I wanted to tidy up the cables around the front optical bay area a bit when I had the case out. I turned it upside down so I could get a better view of what I was doing up there.


I have a total of 4 cable mounting points up on the roof of the case near the front now. one is for the fan cables from the roof, and the rest are for the bundles of unused cables at the front.


I untangled some thing and ran some things in more direct routes, etc cleaned up some of the bundles, ran the usb3 cable and wound up the unused length and clipped it up in the roof. I redid it a few times and this is what I ended up with.


Still not the nearest thing, but it's not too bad and more importantly they are all zipped up and secured with the cable mounting points I put up on the roof, so none of these are ever going to hang down and become visible or anything like that.


I got some longer screws for the mesh area mounting since the grommete I used there is larger than at the top and bottom. These are actually the fan screws that came with my Sunbeam acrylic case. I had them stored in my spare screws bin for years.


No more noise from the front mesh. Even at the full speed you can barely hear the 4 Noctua fans at all.


I am very pleased how this turned out and I am glad to have noctuas at the front with no mesh. It was late by the time I was finished, but it was a lot of fun as usual. I always enjoy a good late night, long build and that satisfaction you get when you finish.


Here are videos:

http://www.youtube.com/watch?v=Tktx9DHGaug


http://www.youtube.com/watch?v=YQs7lsaxAcw


http://www.youtube.com/watch?v=9z6pFRArPbo


http://www.youtube.com/watch?v=XERSxIJhBlc
 
Back
Top