The Aqua Computer Aqualis Copper Edition
Well, obviously this had to be done, I couldn't just have those naked steel parts
in my build. Pretty though they are, copper they are not...
 The Central Pipe
For those unfamiliar with the Aqualis: It's basically a borosilicate glass tube (5 mm
thick, rather heavy, extremely good quality) with two Acetal caps on either end.
The difference when it comes to assembling the reservoir between this and a normal
plexi res is that it's not really possible to cut threads into the glass as you can do
with plexi, hence the central pipe. The pipe screws into the bottom and the top
cap and holds the entire assembly together.
Three possibilities came to my mind for copper-ifying this pipe:
- make a new pipe from copper
- paint the existing pipe
- keep the existing pipe and make a mantle pipe from copper around it
The drawbacks of making a new pipe are that the stock pipe is a very sturdy piece
of steel (presumably). Not only would it be extremely difficult to find a copper pipe
thick enough to cut the required threads into it, but I would also need to go buy
another thread cutter. All of this deterred me from that variant.
Painting the pipe would probably have been the easiest approach, but considering
that copper paint doesn't really ever look like real copper (it can come close, but
when put up against an actual piece of copper you can spot the difference quite
easily) I didn't really like this idea all that much.
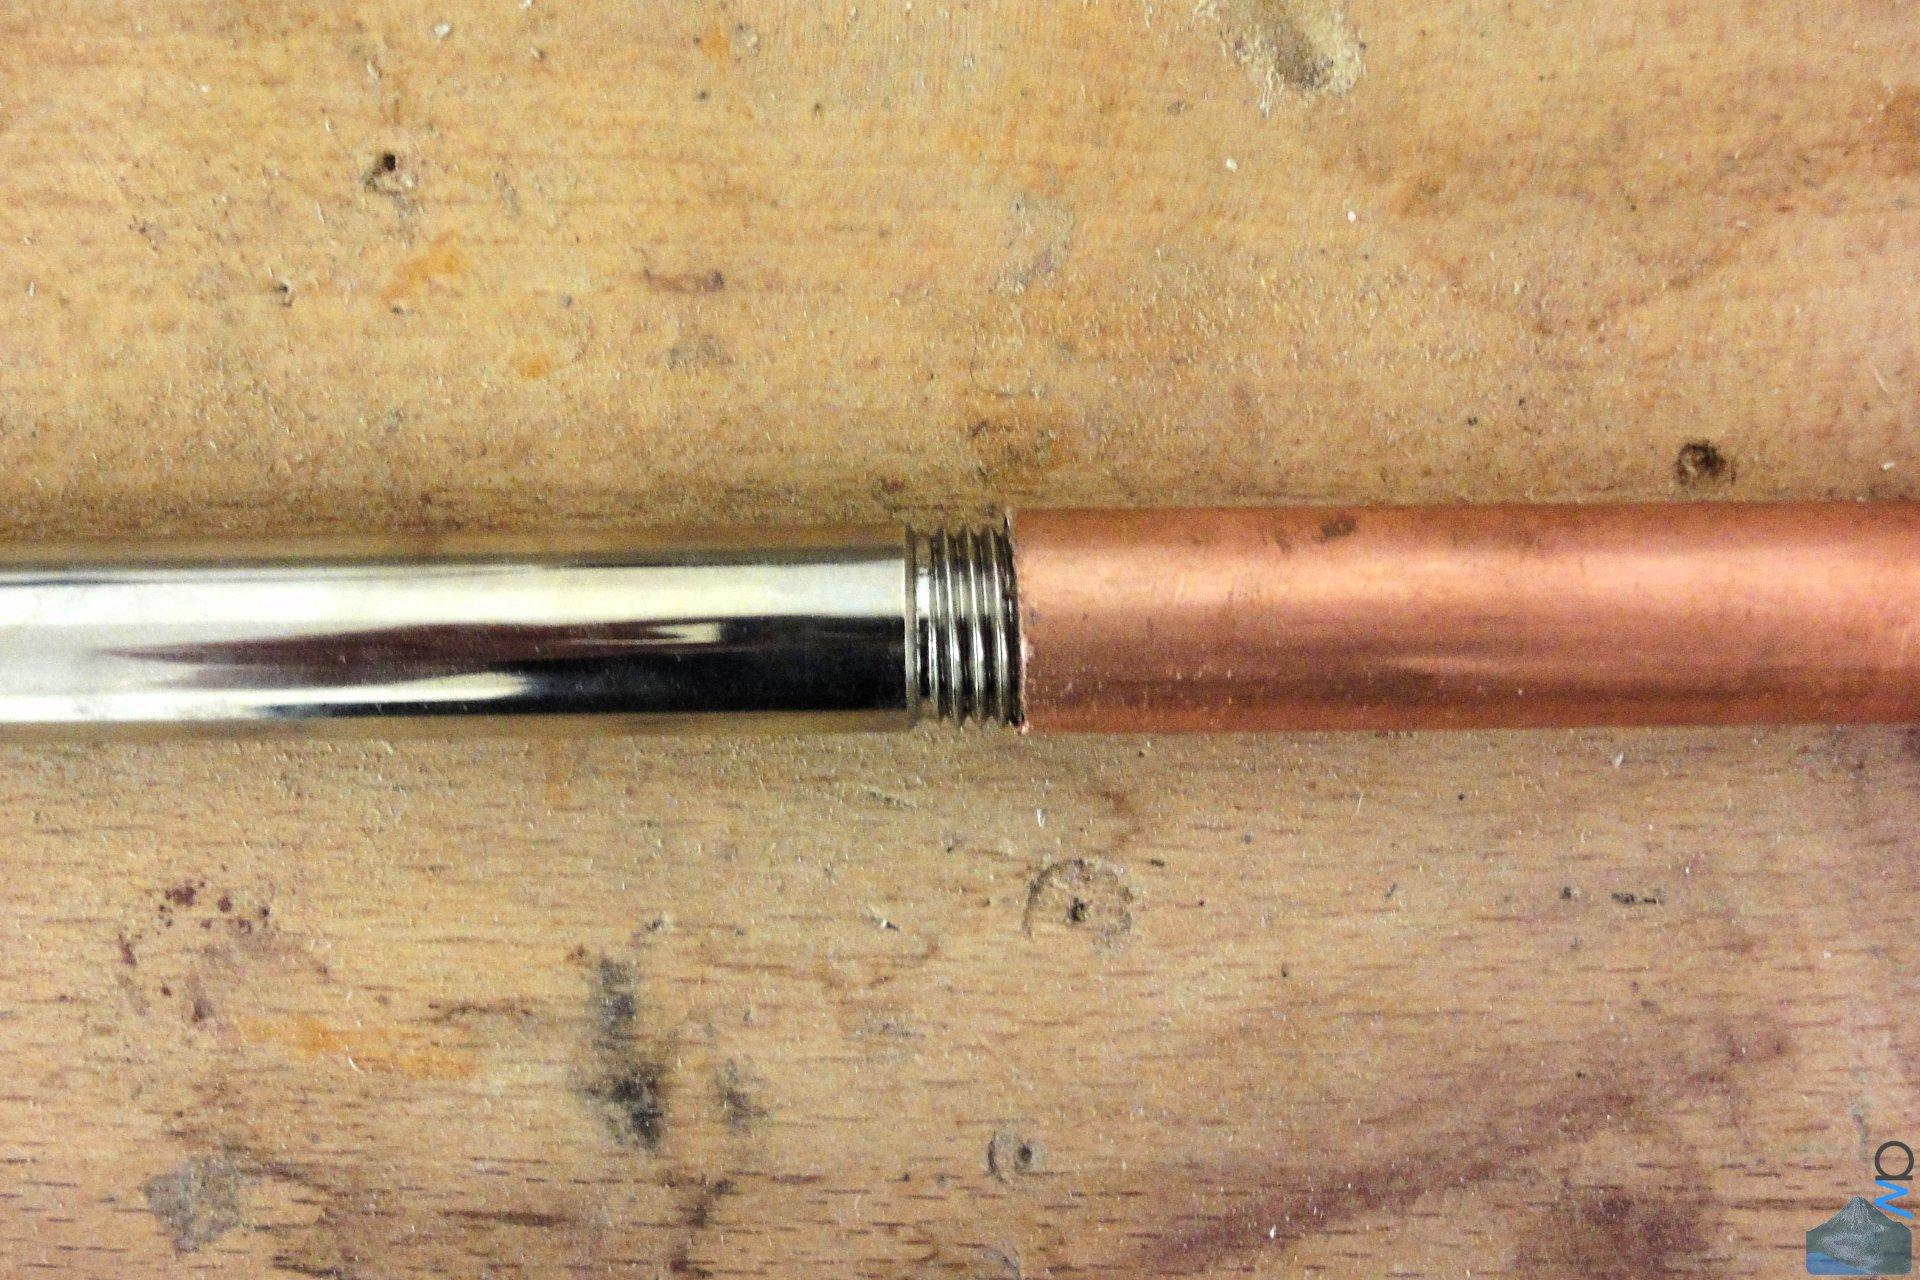
So it came down to the third variant. The problem with that was that I didn't really
have a copper pipe with the correct ID for fitting right over the steel pipe, and I don't
think I would have ever found one. Easily visible in this picture:
(click image for full res)
 Working Around the Diameter Problem
Considering that there is a rather considerable dead angle when it comes to the
visible part of the central pipe I arrived at what you see here. I simply made a length-
wise cut into the copper pipe and sleeved it over the steel pipe. Works like a charm,
the difference is impossible to tell in the final build unless you have x-ray vision.
(click image for full res)
 (click image for full res)
 Sleeved...
The mantle pipe sleeved onto the stock pipe:
(click image for full res)
 ... and Polished
Since there were considerable scratches in the copper pipe this took quite a while
longer than the copper face plate for the FC5V2.
(click image for full res)
 (click image for full res)
 The Anti-Vortex Plate - Stock
This is the stock plate on top of the sketch for what was to become its replacement.
(click image for full res)
 New Plate - Raw Cut
The raw cut for the new plate:
(click image for full res)
 New Plate - Bent and Polished
(click image for full res)
New Plate - Bent and Polished
(click image for full res)
 (click image for full res)
 Copper Mounting Bracket
Unfortunately I forgot to take pictures of this during manufacturing. Here it is bolted
to the reservoir. You can see that I still need to debur the mounting holes. Also my
apologies about the finger print, didn't catch that until it was too late.
(click image for full res)
 Bottom Cap Assembly - Back Side
This is the back side which won't be visible when it's mounted in the case. You can
also see that I've replaced the stock screws with shiny copper screws from Alphacool.
The steel screw can't be seen when it's mounted, so I left it as is since I didn't have a
suitable replacement anyway.
(click image for full res)
 Aqualis - Copper Edition
And this is the current status. There are still a few imperfections I need to file/sand
out, but for the most part it's finished.
(click image for full res)

So long, and thanks for visiting...
")

")

 .
.
 fingers crossed