Raystorm Mounting Studs

BlacknTan

New member
My Raystorm kit, EX 240 & D5 pump came yesterday, and I've been fooling around with it since.

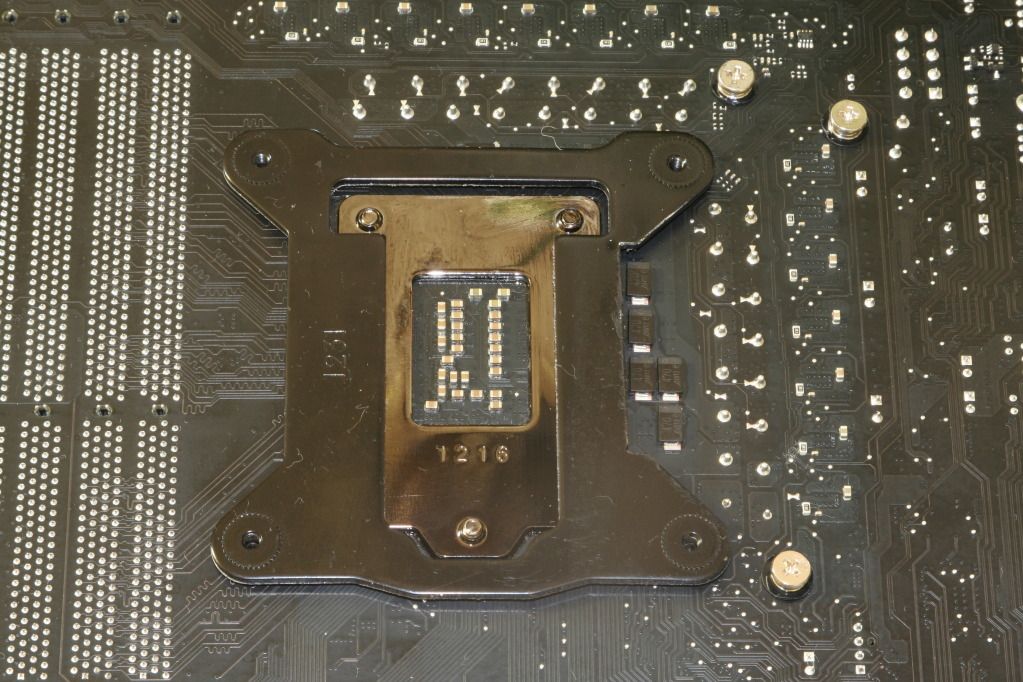
I had to relieve that 1155/1156 backplate in one area to provide clearance for some components on the MSi Z77 MPower board. The entire kit is very nice, EXCEPT the mounting screws for the water block are too short. The block has to tipped to even get the screws started. To my way of thinking, the screws should bottom out on the backplate easily, allowing the block to sit flat on the processor, and then the secondary nuts screwed down to apply the desired spring pressure. As it is now, it's a bit of a pain to mount.

Did anyone else notice this issue?

BTW, I am using the aluminum mounting flange because I have seen so many photos of plexi flanges that are bent from the heavy pressure.

Any thoughts?

IMG_6160.jpg


IMG_6163.jpg
 
Last edited:
Have you got the additional pressure nuts on the bolts all the way back? - Because if not that might give you a little more thread.
 
Yes, the secondary nuts (bottom) are screwed as high as they can go.

Am I the only one that has experienced this?

The spring seat in the secondary nut is angled from the point of the drill. A flat bottom drill will gain me a little bit. Losing one washer could gain me a little bit more. The springs are .500" long uncompressed, I can try to squeeze to .400" to relieve a little more.

Beyond that, I don't see where I can steal any more clearance.
 
Last edited:
I did notice this installing the raystorm, but I was doing this inside my case so that was probably my issue.
 
Oh yes. It was horrific for me lol. I also managed to miss the sticky pads on the backplate somehow, so you can imagine the faffing I did to fit it.
 
Well, I've got a fix worked out to make things a bit easier.

I compressed each spring in a vice completely. This reduced the length from .500" to .400". Proving that this is actually a poorly heat treated spring, or made of low quality spring steel.. Or both!
The secondary nuts will be drilled with a flat bottom drill, removing the angle from the drill point. The bottom face will have .050" removed to restore spring free travel.
Lastly, the plastic washers will not be used.
All this will give me the equivalent of adding .200", or 5mm to the length, or the distance the studs will protrude below the clamping flange.

It should make the final mount much easier, and allow the clamping nuts and springs to actually do their job properly.

So, I'm happy again, and other than this small glitch, quite impressed with the quality of the XSPC kit. It was packed well enough to survive a trip to the moon, and everything was there with no pieces missing. An accomplishment in itself, noting how many bits and pieces are actually included.
 
i usually use an EK (i hate saying that) LGA115x TRUE Backplate. replaces the
OE SB/IB backing plate and includes the cooler pattern. through-bolt design
so no monkey business on springs or what-not. plus it keeps the "arching" to
a minimum as to not bow-over the OE backing plate.

airdeano
 
Thanks Deano, that looks like a good system, plus it's got clearance for all motherboard components without hacking up the backplate to provide it.
I've got the Raystorm system temporarily mounted right now without the springs altogether. I put neoprene washers beneath the secondary tension nuts, and it actually works quite nicely. I can feel how much pressure is being applied quite well. So well that I just may do the final mount this way. But, I'll have the modified parts on hand just in case, but, at the moment, I'm leaning toward just using the neoprene washers and "feeling" the pressure applied.

Thanks again for pointing me to that backplate.. It's an option for me.
 
i still wanna build a homebrew CNC 24"x 36" table. just cant stop buying
'puter parts to save for the CNC. just $2500... and tools..

airdeano
 
Back
Top