Lian Li 350 rebuild

Paulie

New member
Hi all,

Just wanted to share with you my rebuild project for one of my all time favourite cases the Lian Li 350.

It was about October that I decided to start planning this as the previous DFI rig I had installed, well lets just say it developed issues that DFI in their current state took a long time to not really fix very well:'(

Which is why its taken so long to get to this stage of beginning the rebuild, still not to worry. I wanted to share this on here as Tom's largely to blame for my new choices in hardware from watching his youtube reviews alot of the reviews on the site here over the past year, so cheers Tom, keep up the great work this year to
smile.gif


Okay my direction for the build was to rebuild the PC into a htpc that was still capable of playing all the latest games at respectable settings at 1920x1080.

My outline for the pc was simple
  • It has to be quiet first and foremost.
  • It has to be modular so it can be upgraded or repaired easily.
  • It should be as neat as possible in terms of cable management.
  • It should run as cool as possible so the system will be fully water cooled.

The previous setup included a dfi 790gx motherboard, AMD 6000+ and a ATi 4850, this was water cooled with a Black Ice GT240 Stealth mounted on the fan bracket of the case and 2 Yate loons pulling air from the front of the case through the stock ventilation and blowing it across the motherboard.

Everything except the case, the 1Tb samsung storage drive, the Pump (laing DDC 18w)and the fittings a mixture of tfc comps and Bitspower rotaries have been upgraded.

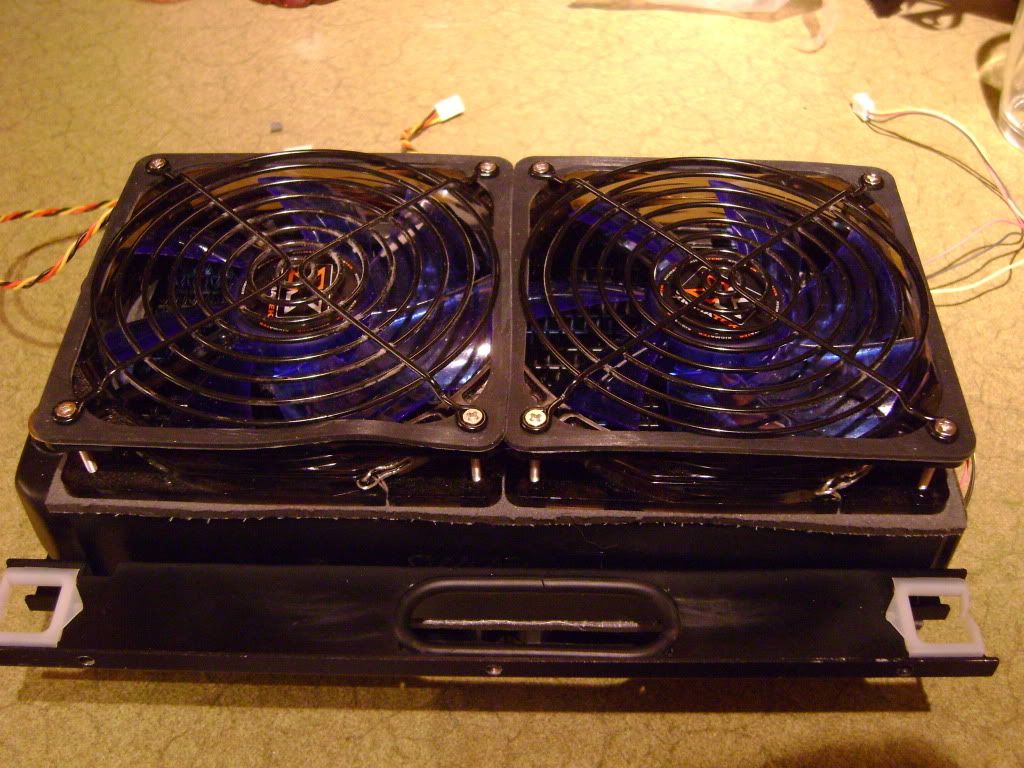
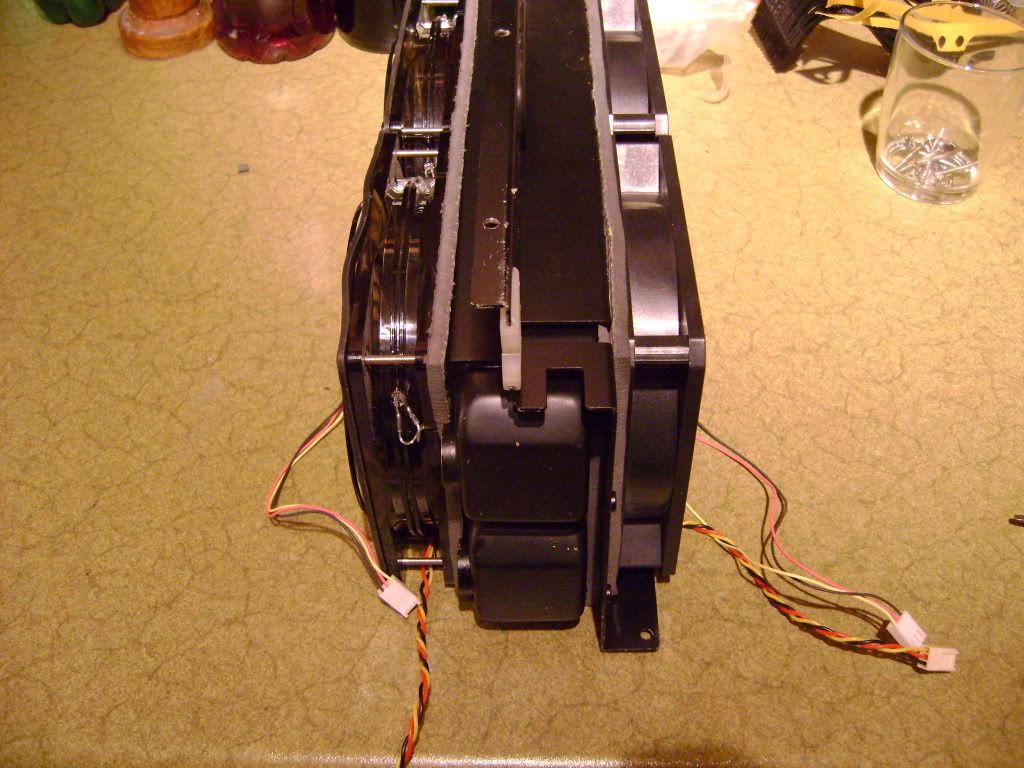
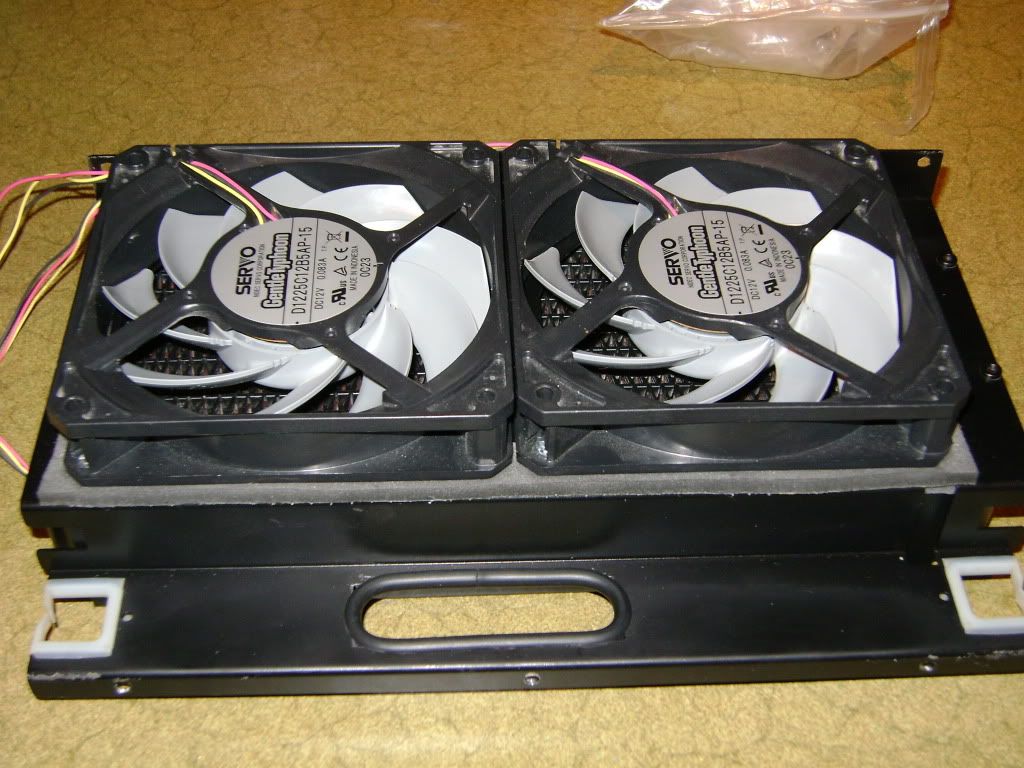
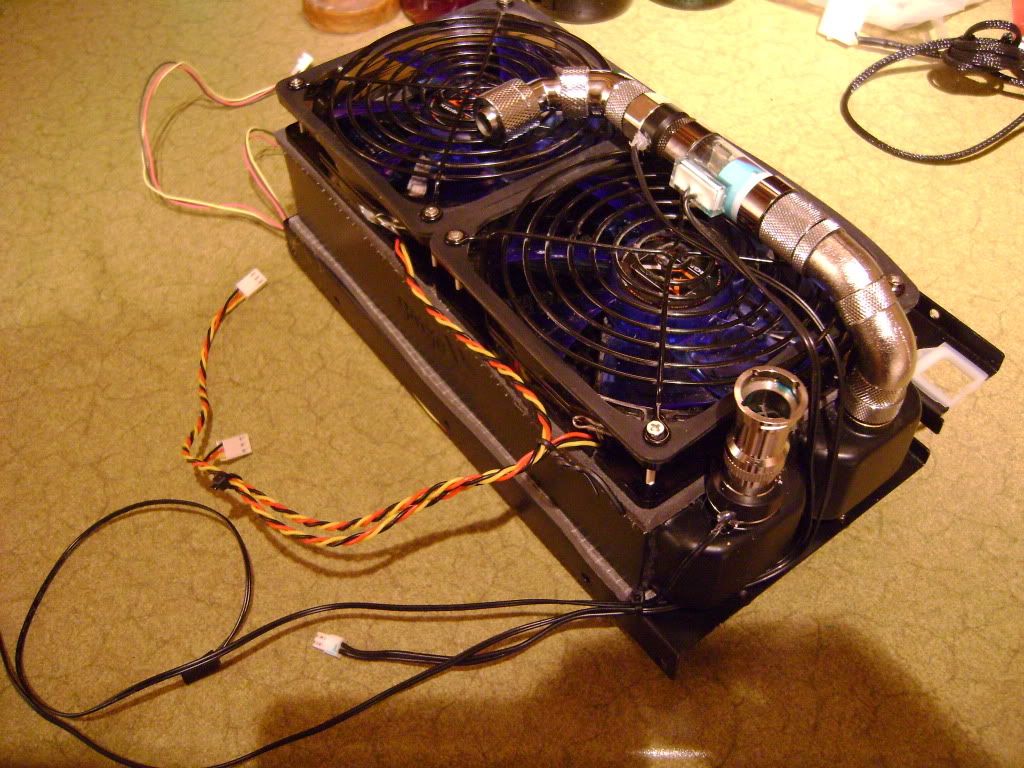
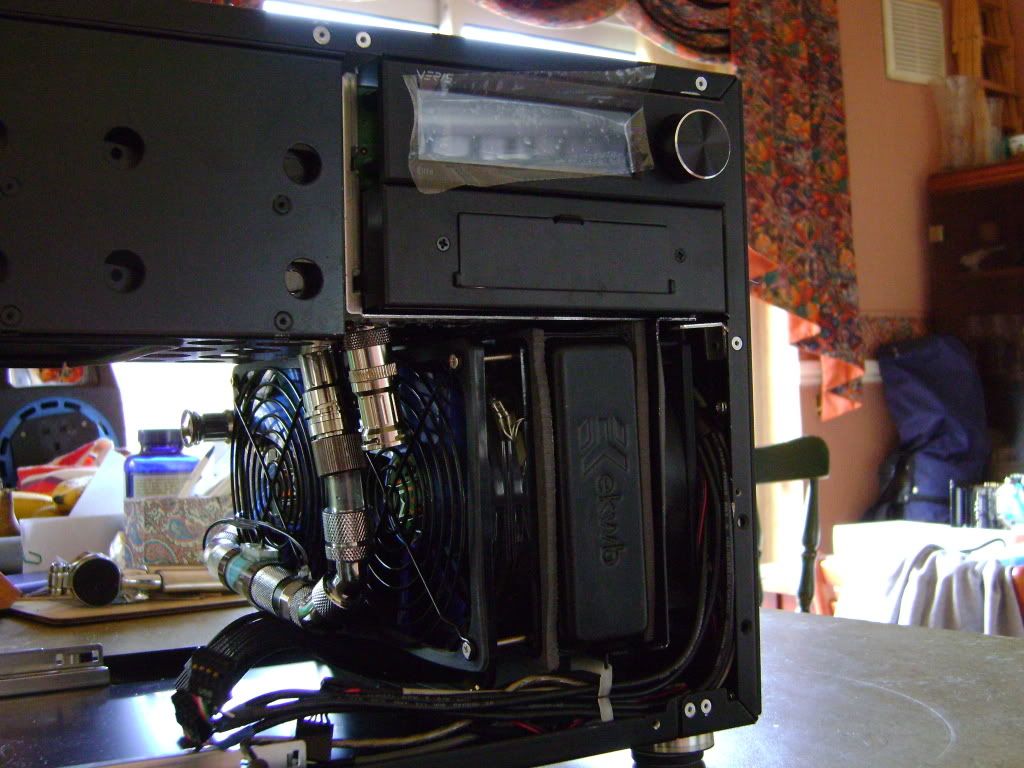
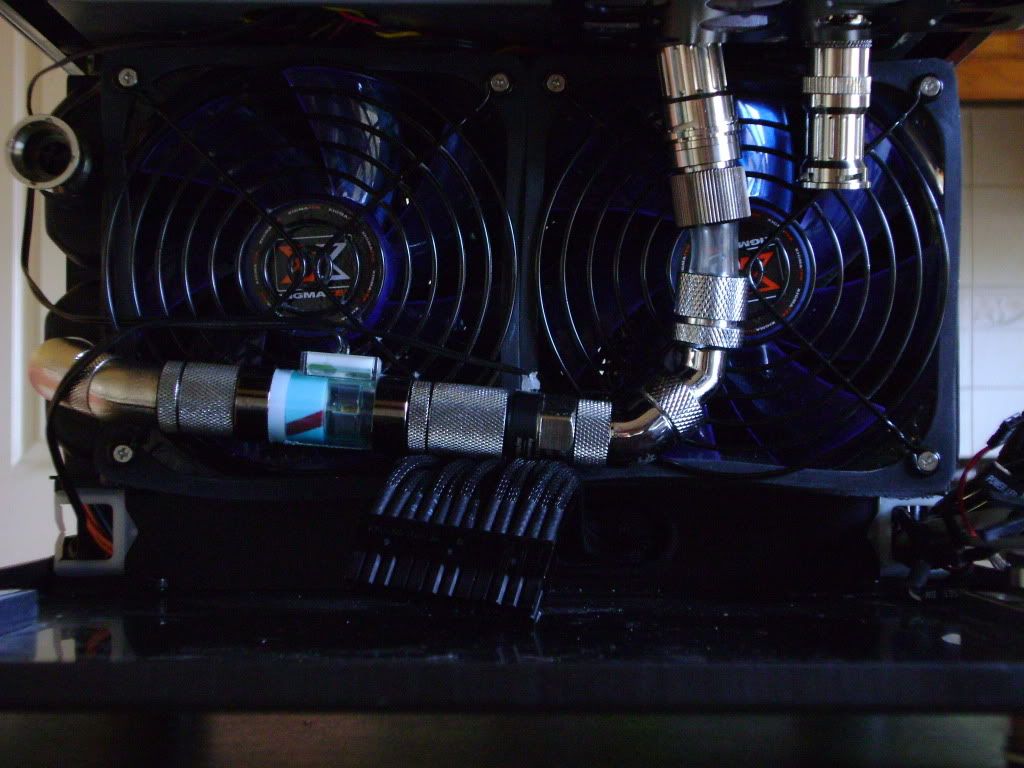
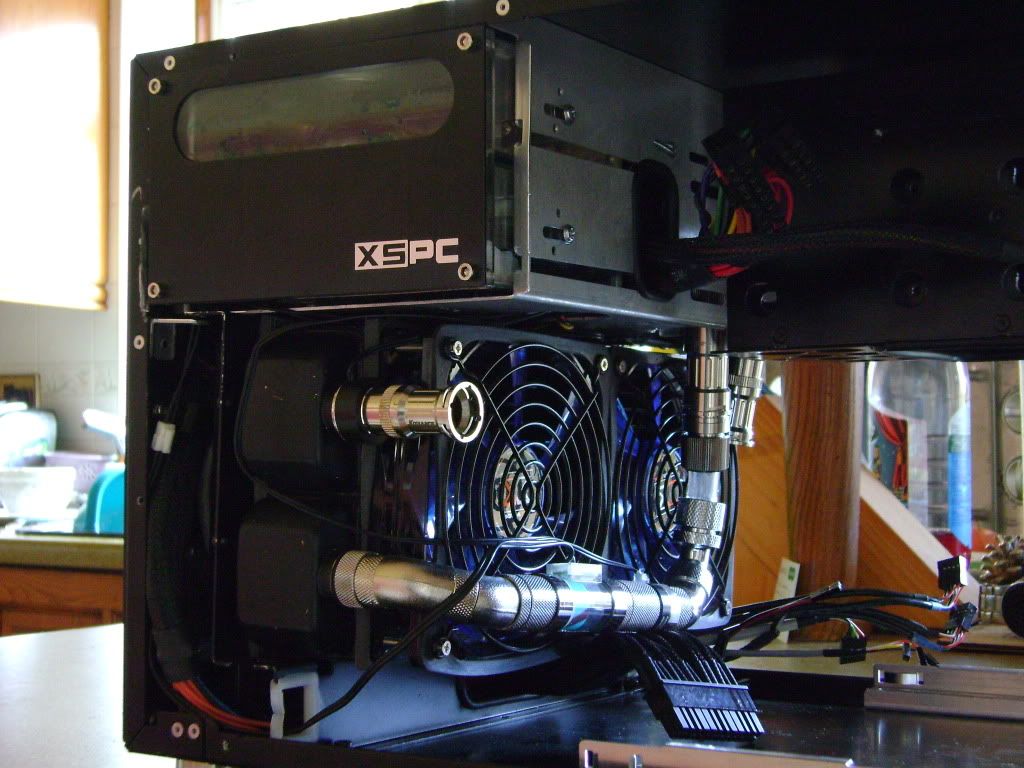
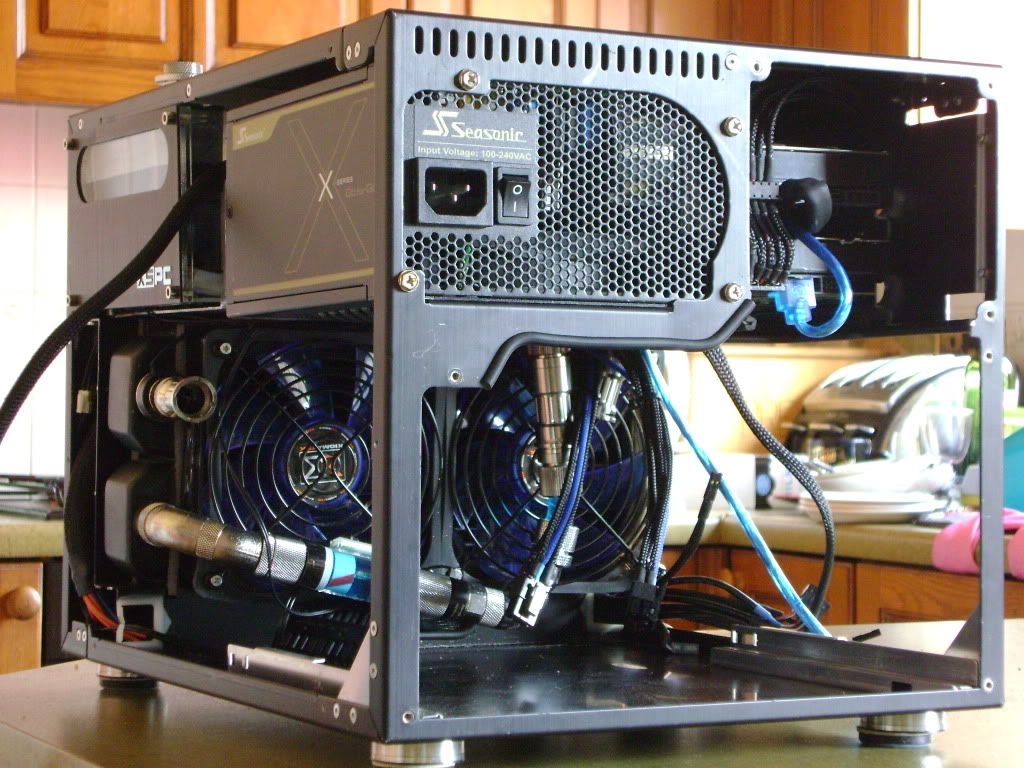
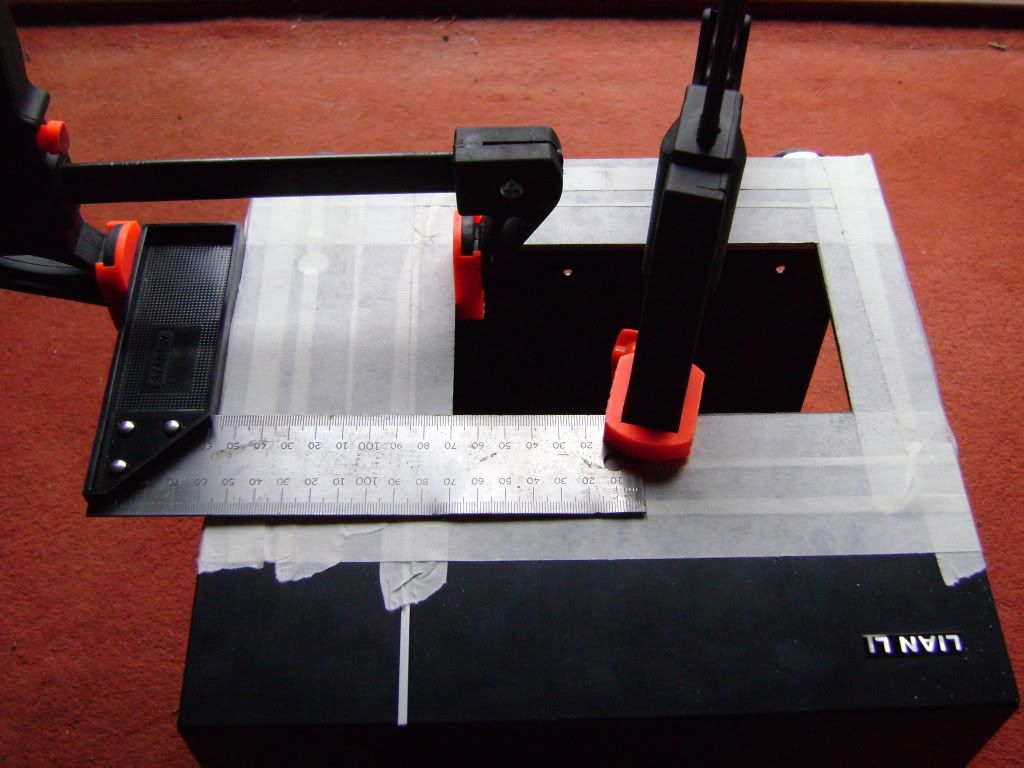
First change is I'm going for push/pull on the rad so new ventilation is needed.

495.jpg

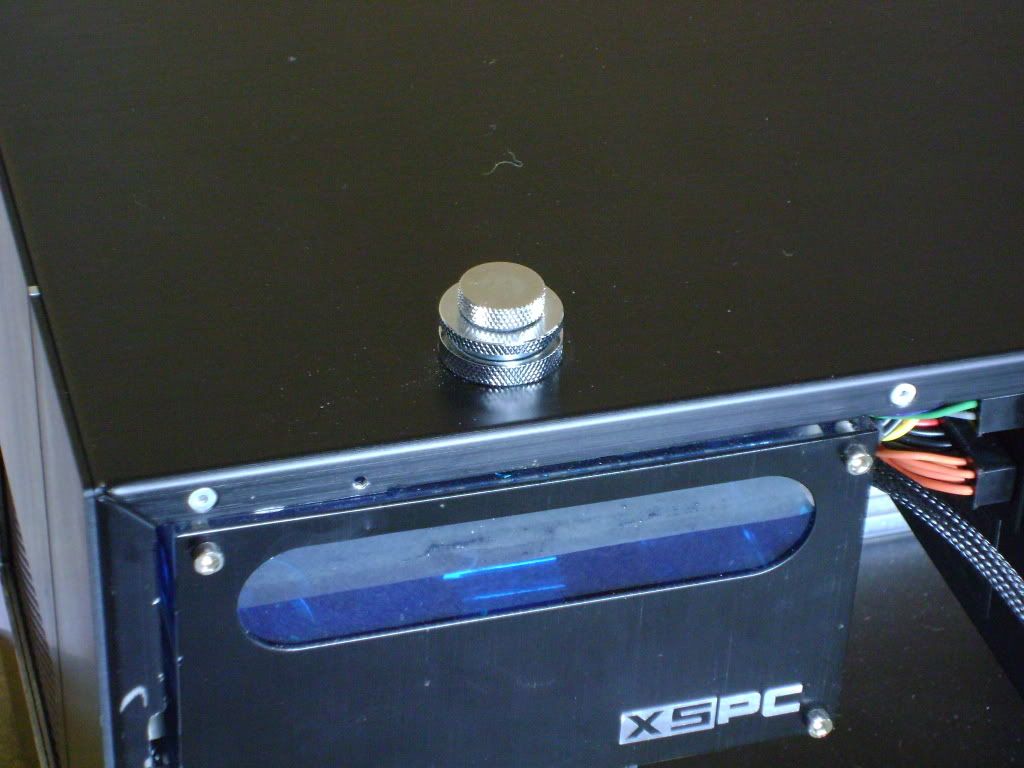
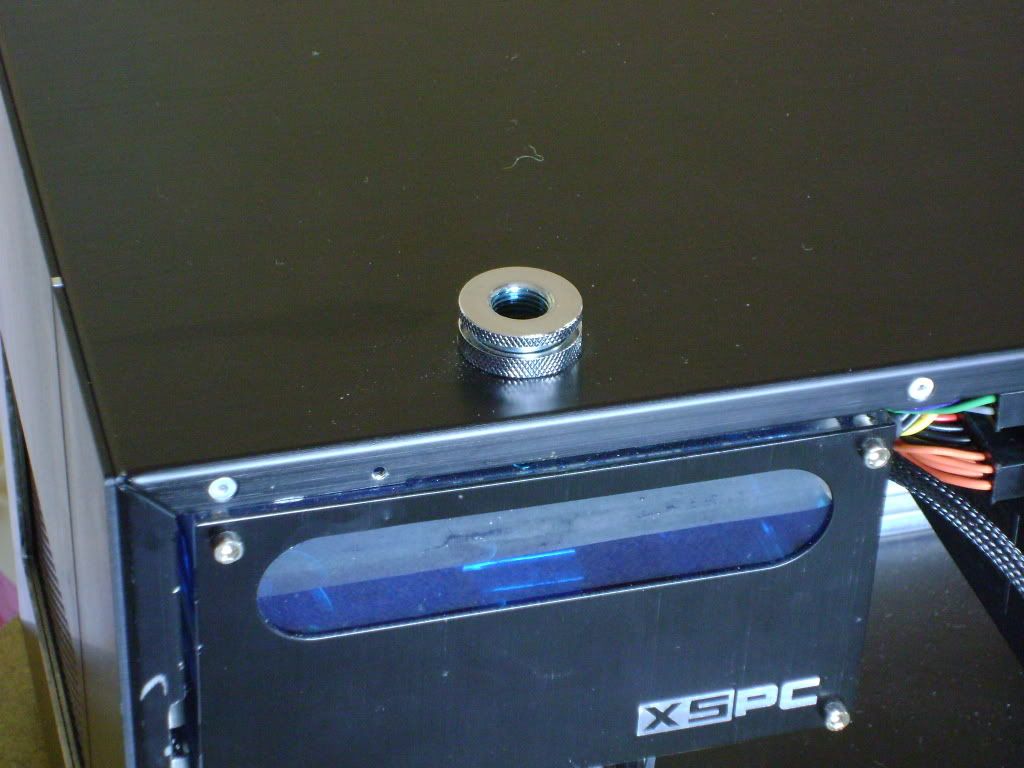
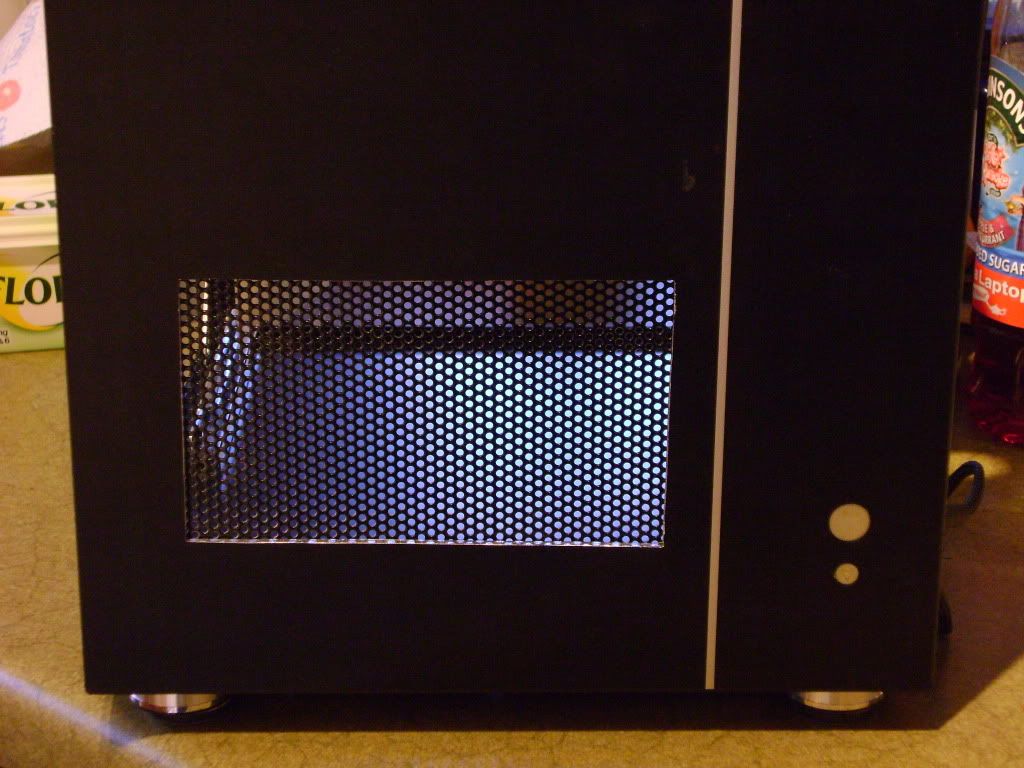
I'll paint round the edge when it warms up a little more

499.jpg

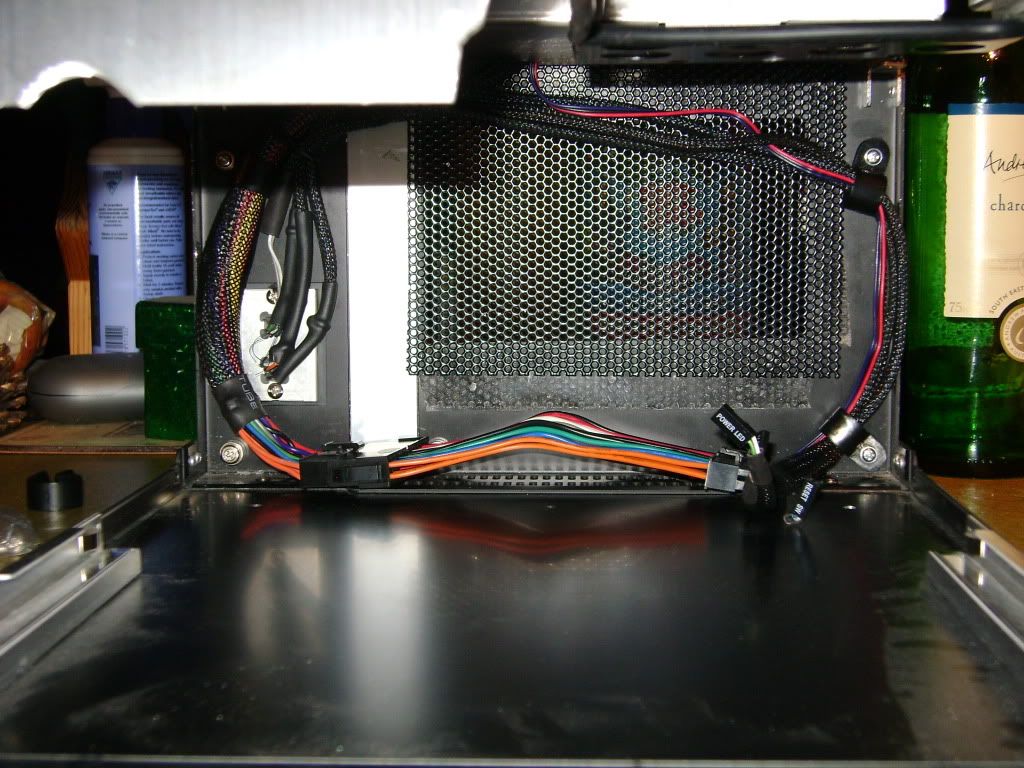
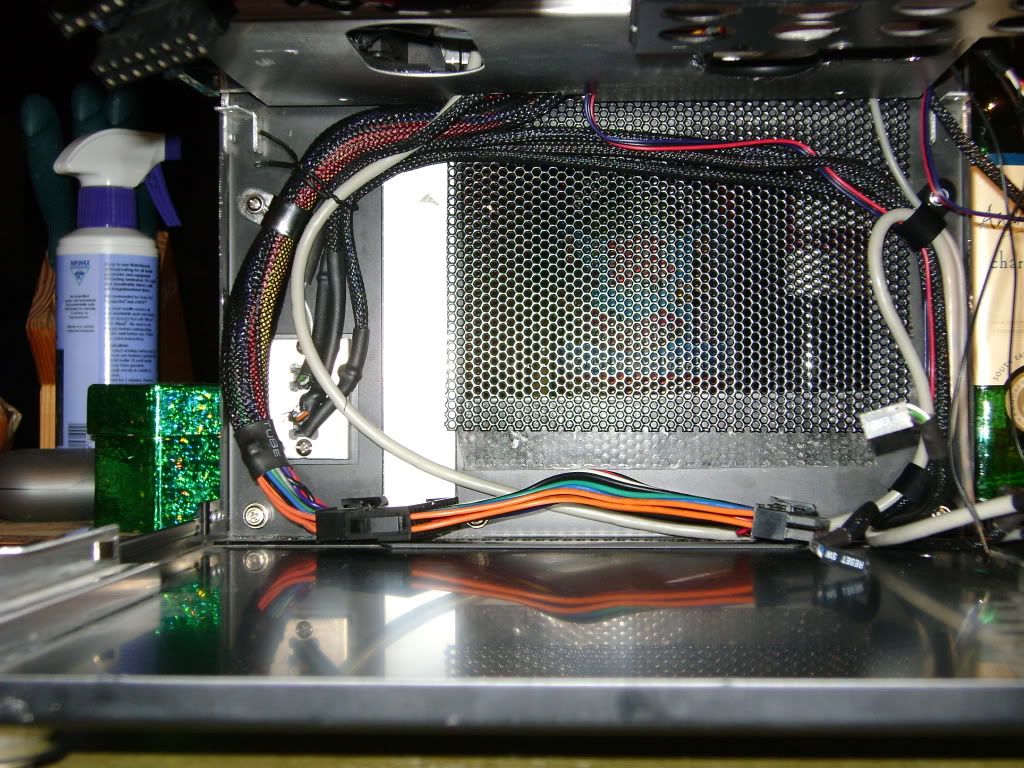
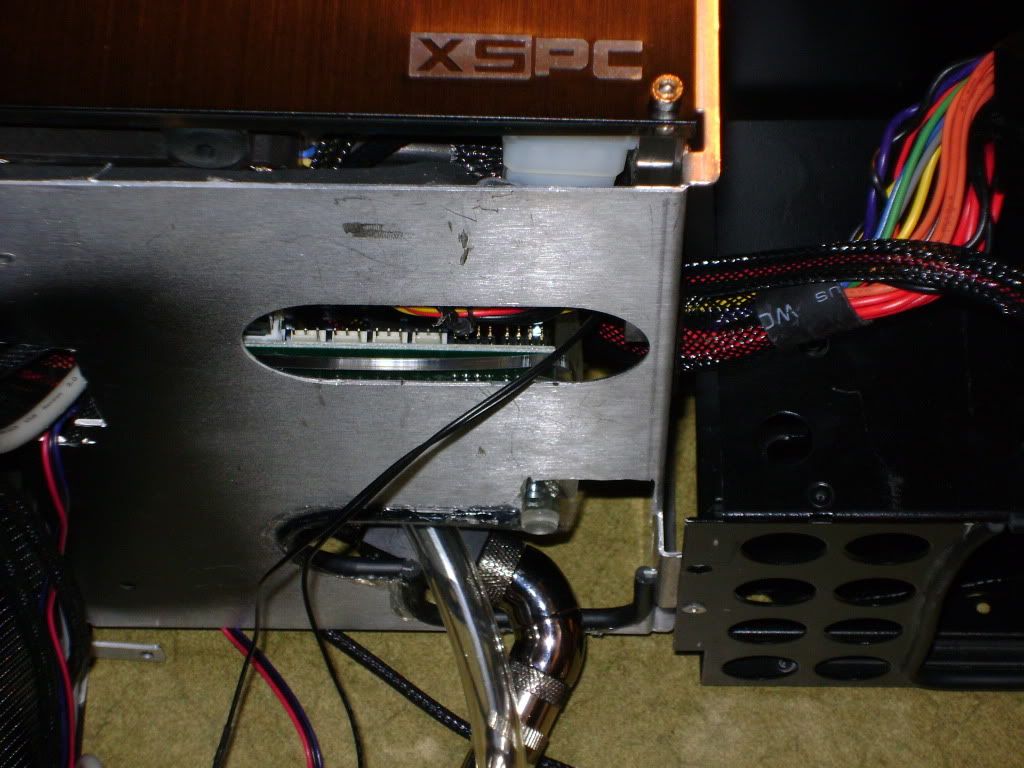
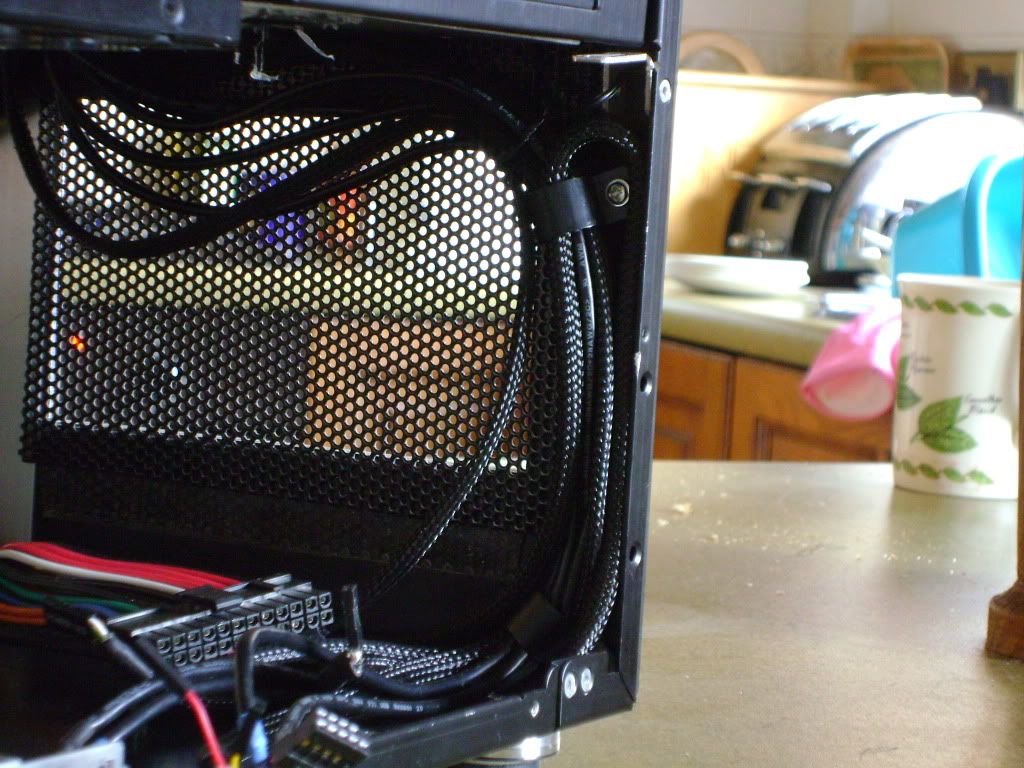
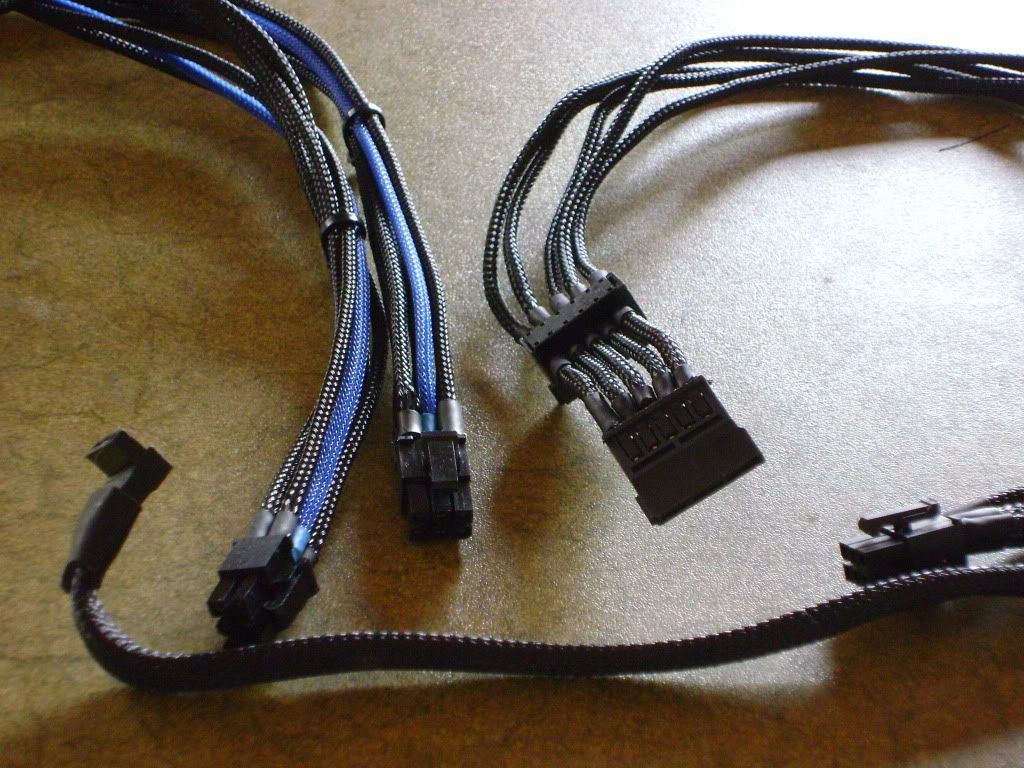
beginning the plann for cable management

502.jpg

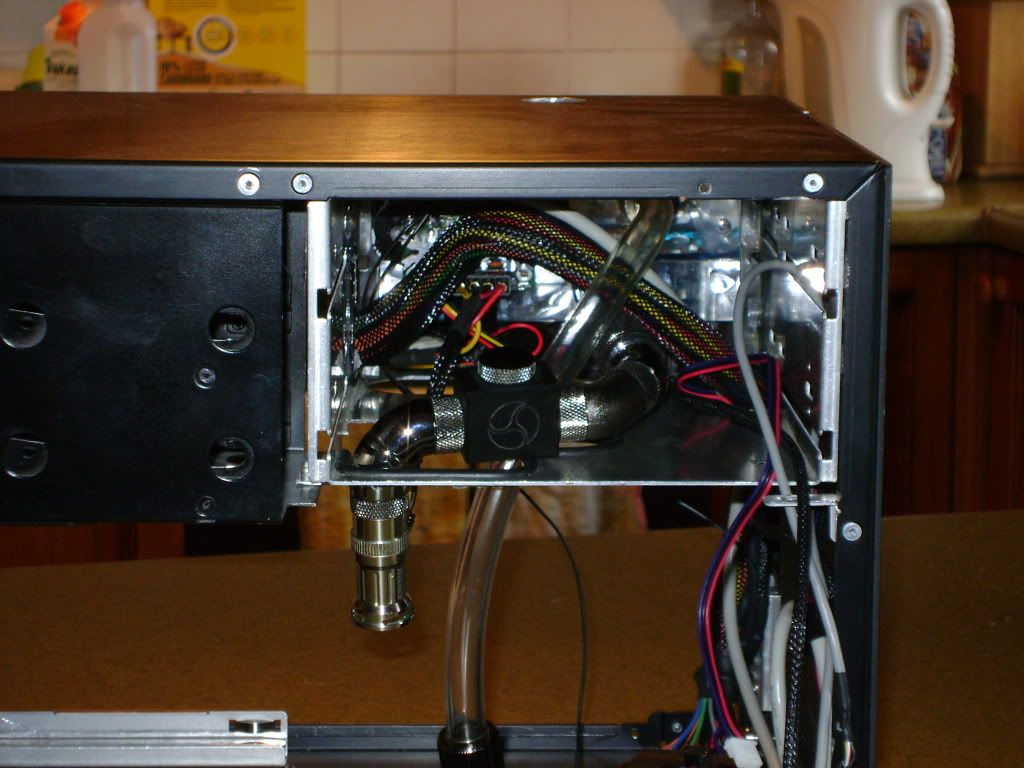
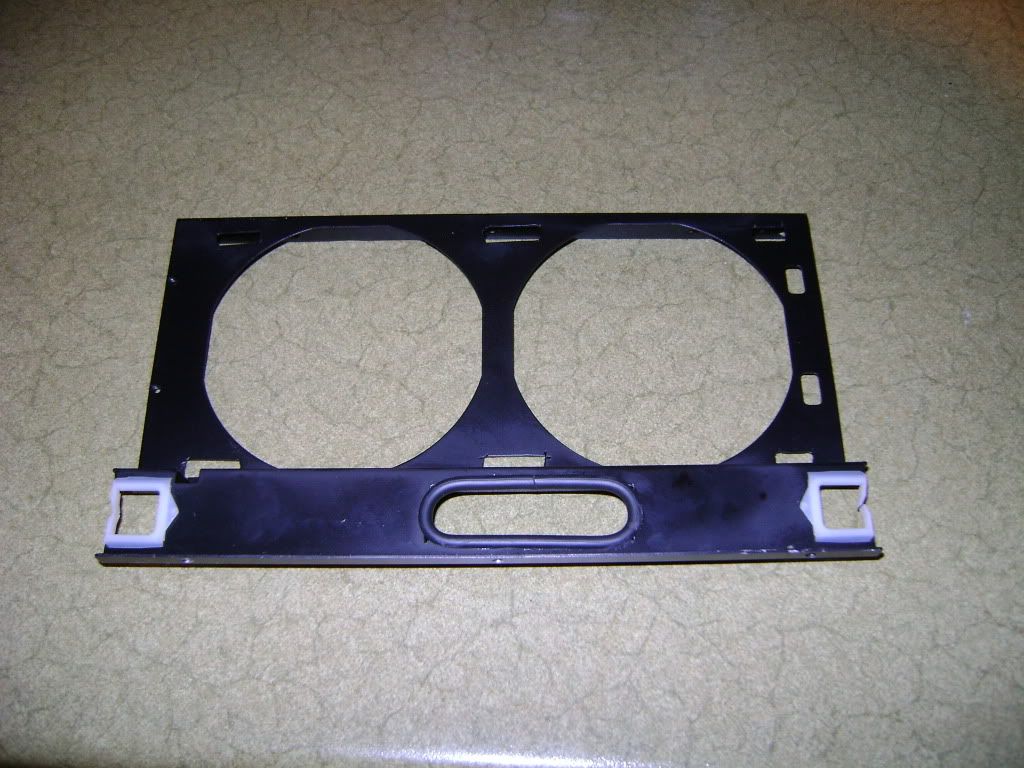
The fan bracket, painted and modded to accomodate the radiator and 24 pin atx cable

505.jpg

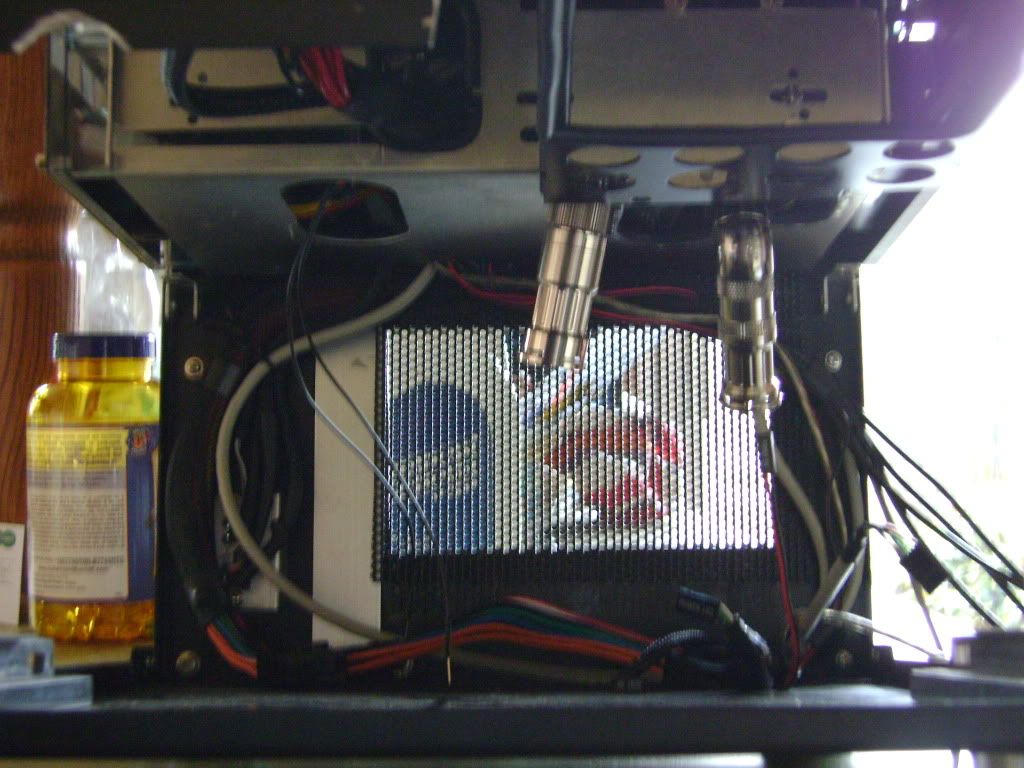
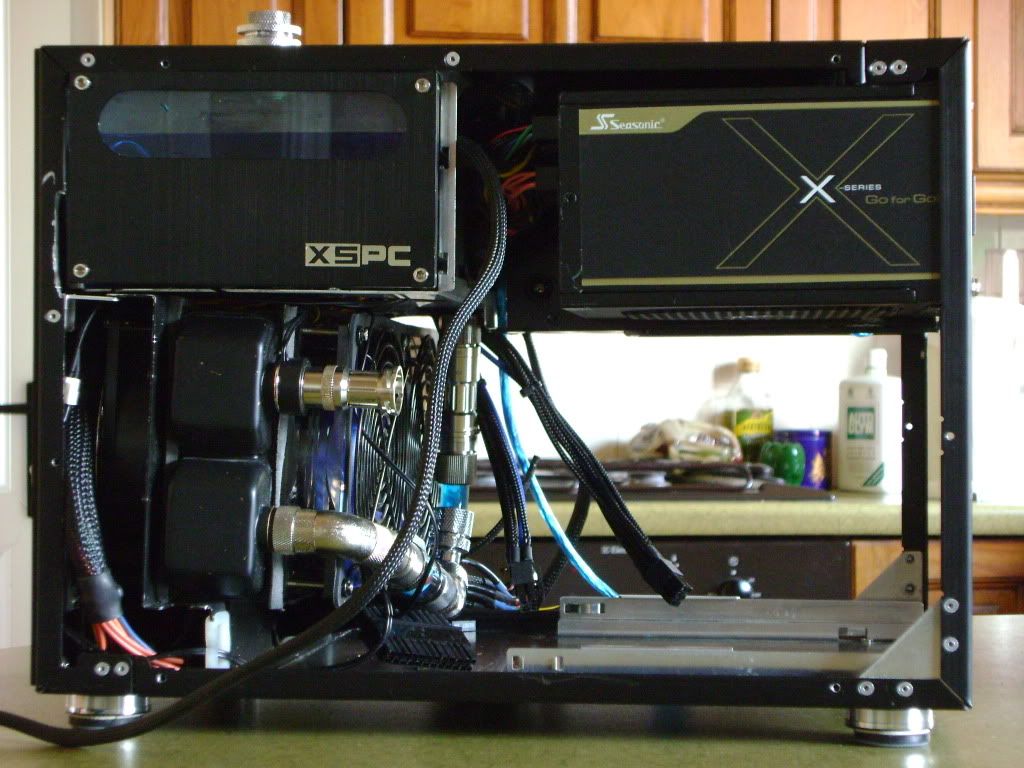
& here's a quick glimspe at everything I'm trying to cram into the case
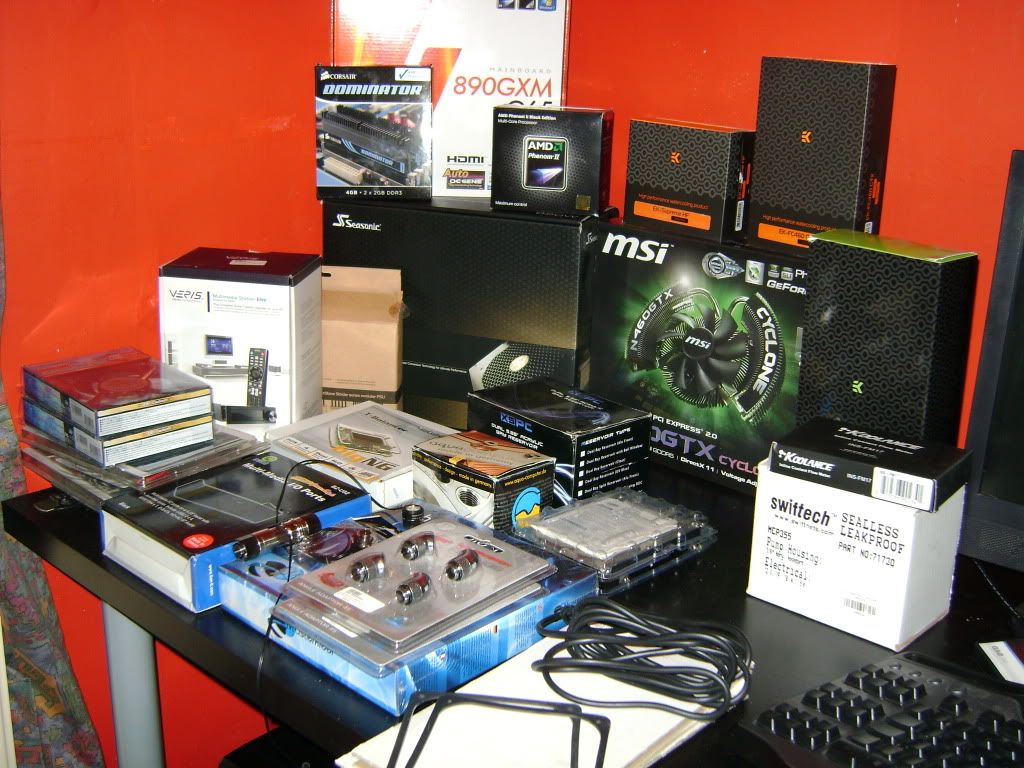
507.jpg

PC:

AMD PII 965

MSI 890GXM G65

Corsair Dominator 4gb ddr3 1600mhx cl8

MSI GTX 460 cyclone 768mb

Seasonic X-series 650 modular psu

1tb Samsung F1 spinpoint

1Tb WD Black sata 6gb
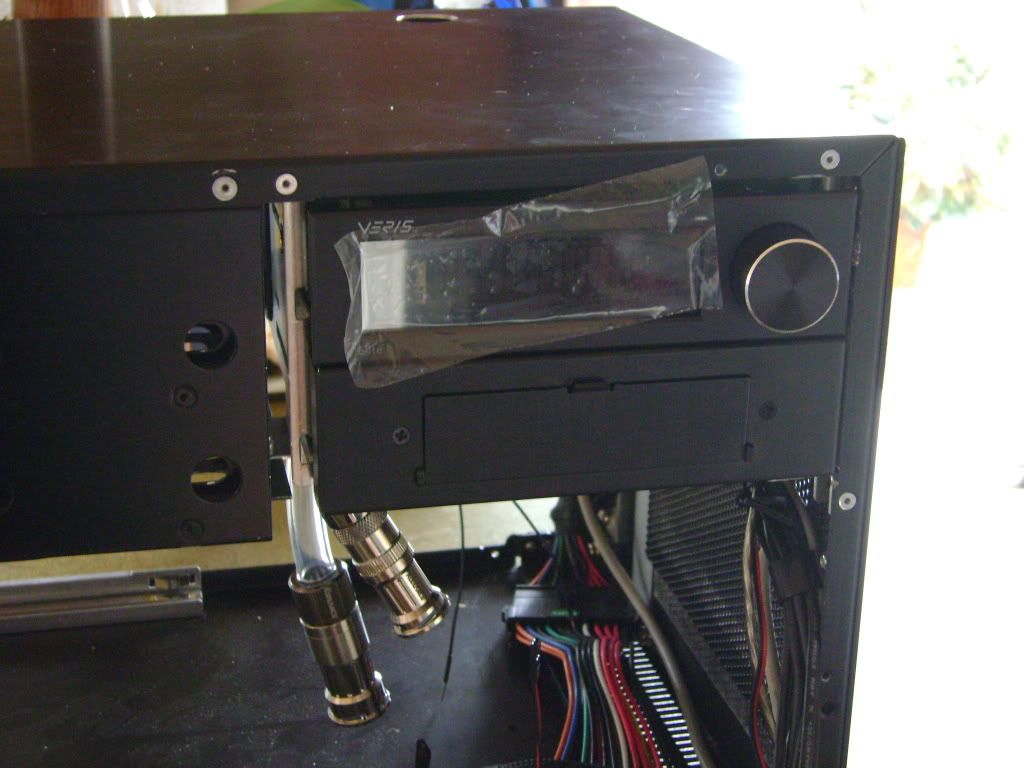
Antec Veris Elite

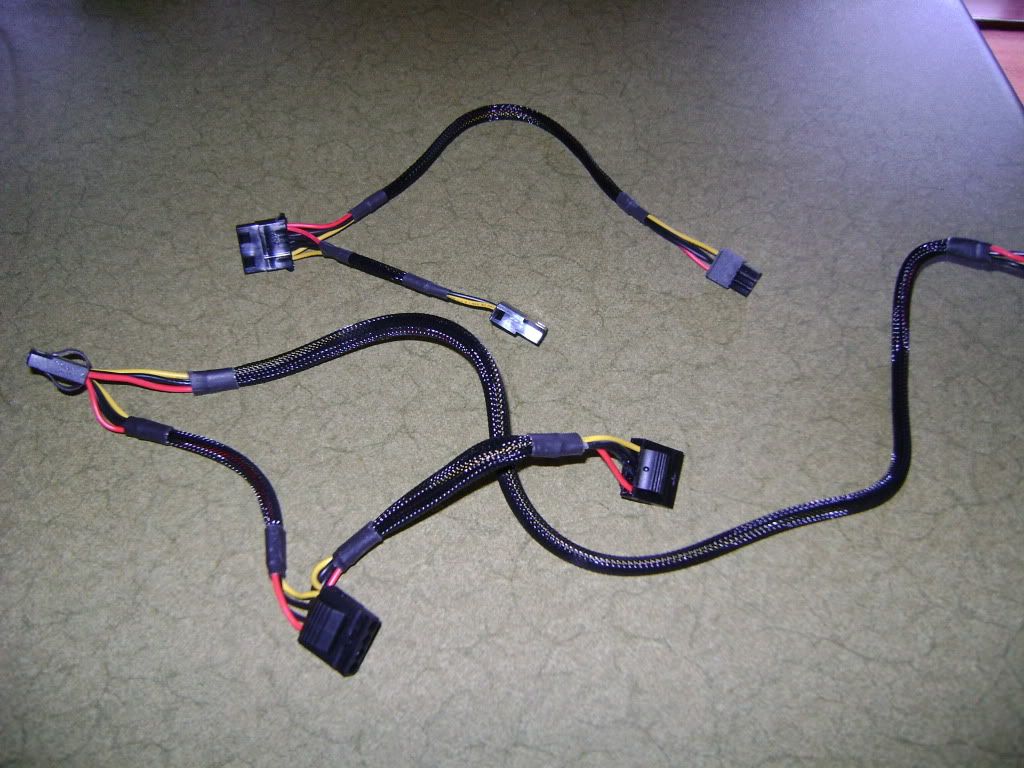
Silverstone PP05 short cable set

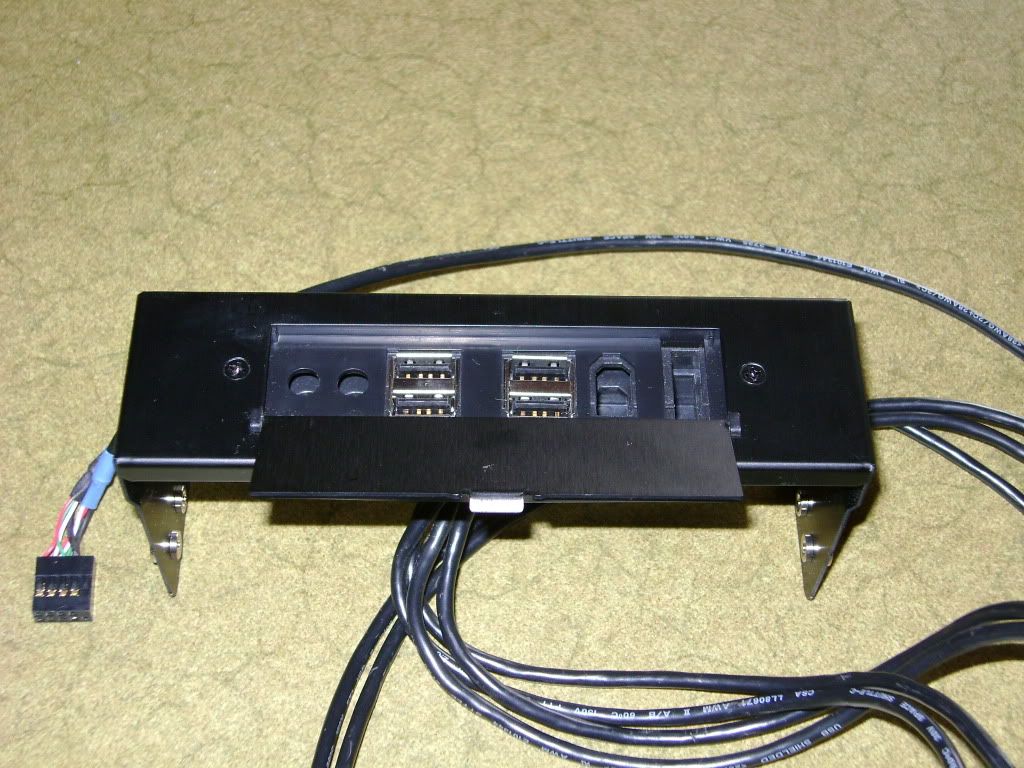
Lian li multimedia I/O ports

Cooling:

EK Supreme HF Nickel

EK 460 nickel + nickel backplate

EK 240 Coolstream Rad

Mips Nickel Ram cooler

Swifttech/laing ddc 18w
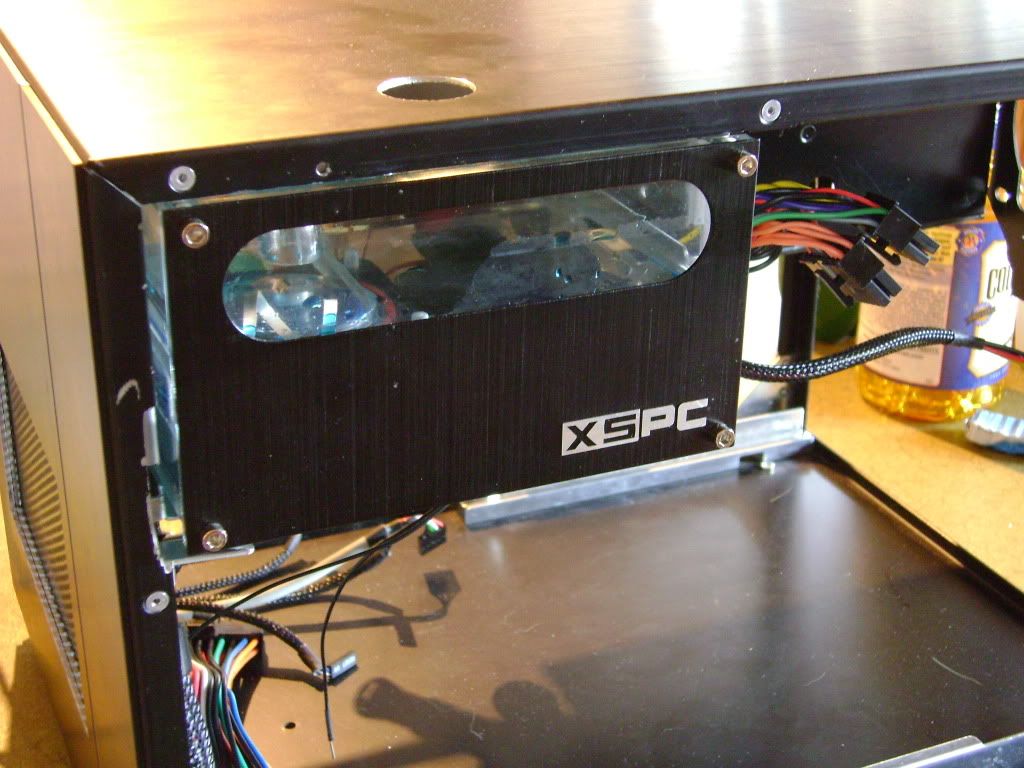
XSPC dual bay res

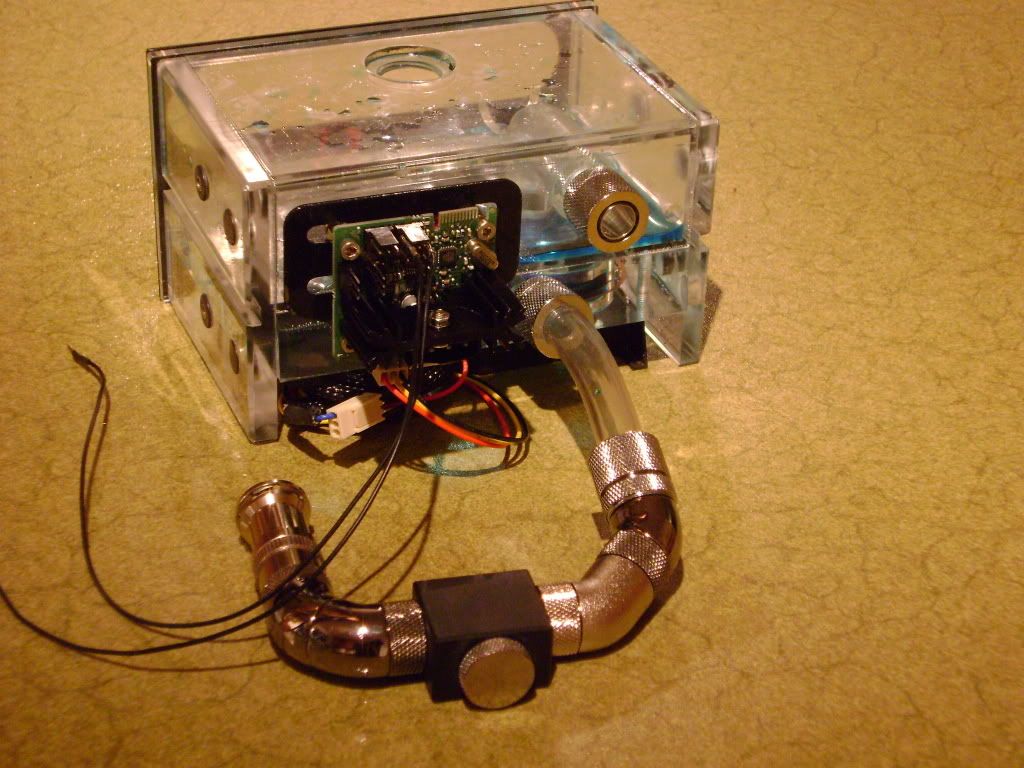
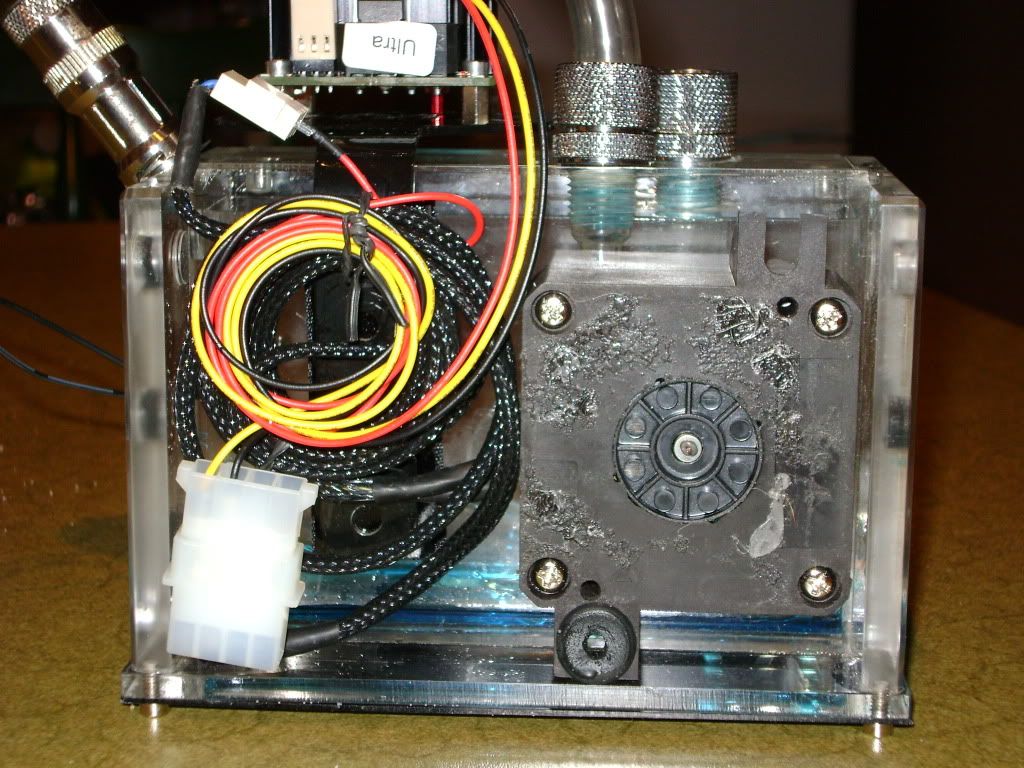
Aqua computer Poweradjust 2 ultra

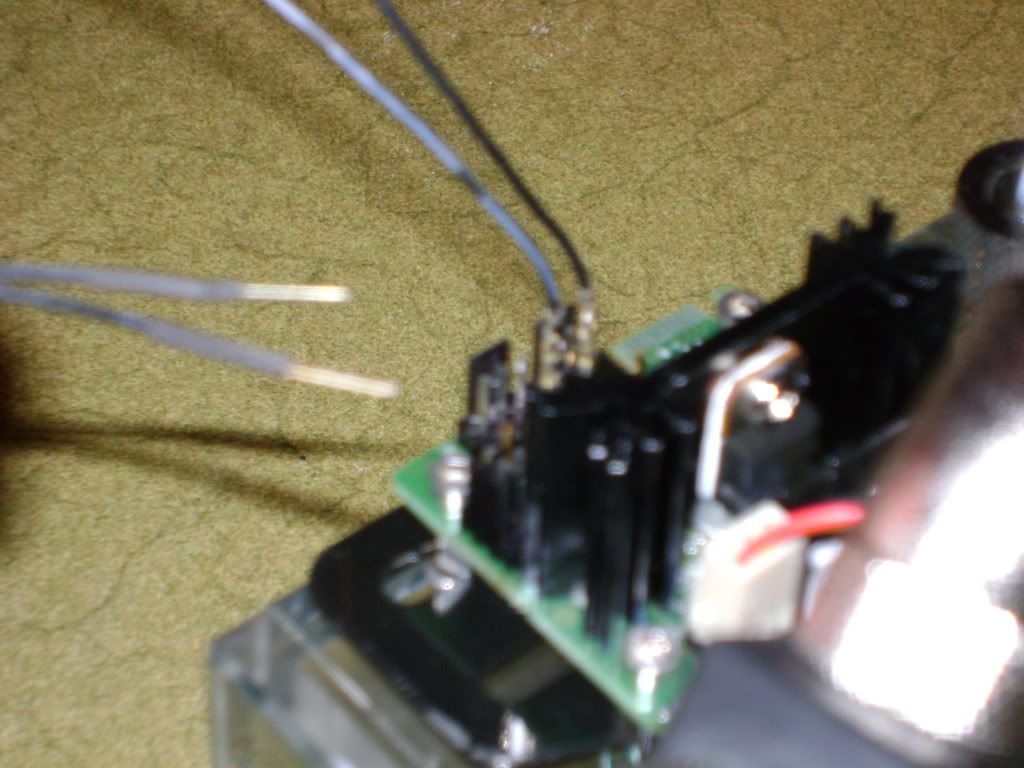
HFX/mcubed T-balancer BigNG

2 x Scythe Gentle Typhoon 1850rpm

2 x Xigmatek XLF-F1256 1500rpm

Aqua computer thermal probe

Phobya thermal probe

Koolance INS-FM17 flowmeter

Koolance QDC's

3/8" clear tubing

lots of fittings

hopefully have this complete by the end of the week, thanks for looking
 
quick update.

cable management is progressing nicely, the main atx will have two extenstions, the first is a short extension the antec veris uses to allow on/off & standby from the remote control. The second etension will be a short individual braided cable.

It doesnt look too pretty atm but it will all be hidden when by the rad without restricting air flow.

517.jpg


Added the usb cables for the bigng & poweradjust

521.jpg


And I've been working on my pump/res/poweradjust combo and I think I'm settled with this config

002.jpg


007.jpg


I attached a UN pump bracket to the underside of the res and mounted the poweradjust to it

003.jpg


006.jpg


The two stray cables are simply a 2 pin 30cm extension, I removed the small plastic connector at the female end so I can connect them to the gnd and rpm sensor (pin 1 & 3) of the male 3 pin header for the flow meter on the poweradjust and I'll connect the male pins directly into the 2 pin cable from the koolance flow meter. This way I dont have to use the little signal boost unit koolance provides with it to allow motherboards/fan controllers to read the rpm signal.

To calibrate the flow sensor in aqua computers aquero software. The Koolance unit boosts the rpm signal by a factor of 10 and that gives you a flow reading in mL/minute. I converted that to Litres/hour then again to gpm and a little bit math gave me a calibration factor of 197.

I dont have the additional flow sensor for the bigng so cant comment on whether that same calibration setting will read correctly on the bigNG navigator software.

I've got the rad assembled now, although some cable tidying still needs to be done

511.jpg


512.jpg


508.jpg


514.jpg


It goes GT typhoon>neoprene gasket>rad stand>neoprene gasket>rad>neoprene gasket>xigmatek fan>rubber gasket>fan guard.

Well thats all for now, have a few more updates soon
smile.gif


Thanks for looking.
 
Nice tiny build but why go water cooling

cheers, the water cooling is simply for silence, and performance in games (when its nearly silent)

the GT's spin upto 900rpm as water temp approaches 35'C on the outlet of the rad and the push xigmateks only turn on over 35, which it will only get to after about 30 mins gaming, never when just watching a movie.

when I tested it the loudest componets were the HDD's and the pump, which is why I've got the poweradjust and I'm also going to use 3mm neoprene pad under the pump to try and soften any vibration.

Like Benj3 says it ready for the next upgrade which will possibly happen if they release a maximus 4 gene, fingers crossed!

Oh and when you start water cooling, trust me its never tedious, half the pleasure in upgrading is just so you can redo your wc setup
smile.gif


Cable braiding- now thats tedious
wink.gif
 
ok I've finally settled on a layout for all the components to go in the drive bay, took a little longer and few more attempts to get it right than I expected, the bigng is bigger than i first realised, but I'm happy with it now.

first I cut and glued in a neoprene 3mm gasket to try help reduce vibration into the drive cage from the pump.

003-1.jpg


mounted the res/pump/poweradjust combo

004.jpg


it was at this point things started getting difficult with routing the tube around all the components. I originally planned to mount the bigng to the roof of the drive cage but there simply wasnt the room. I settled with it on the floor just behind and under pump outlet QDC config

006-1.jpg


this worked out pretty well for all the fan and temp sensor connections.

008.jpg


I used the twin molex cable from the silverstone shortcable set to power the bigng and the poweradjust2. The second cable is the original that comes with the psu that was replaced.

001.jpg


I modded the lian li external connections hub by removing the front panel audio, the firewire and esata connections to just leave the usb ports. To many unneeded cables
wink.gif


009.jpg


Then mounted the antec veris in the drive bay above

011.jpg


here's the final shot of how the cables look all tied down. I'd like to come back to this when I'm finished everything else and sleave all the cables black just to unify it all and make it look more tidy.

012.jpg


next came mounting the rad back in its original position, it was a bit of a squeeze and i had to attach fan guards to the front of the GT's but I got it in without too much trauma. The only difficulty was the 6" 24 atx extension that the veris uses to power on/off the pc.

015.jpg


013.jpg


014.jpg


Well now thats all done I've begun filling the res again to leak test by using the qdc's to link the pump outlet straight into the rad. Once I'm happy everything was tightend up properly and there no leaks its onto the fun part, mounting my waterblocks and building up the computer
smile.gif


so hopefully post some sexy waterblock pics this weekend
biggrin.gif


thanks for looking
 
Crikey, once upon a time I was thinking how cool it would be to water cool a V351, but after seeing how mad it all is I'm glad I've gone full-tower.

That said, that's an awesome job you're doing there dude. Simply awesome.
 
Cheers for supporting comments guys, it is fantastic case to watercool and work with and although mine is nearly two years old now (and showing a few signs of wear) I still love more now than when I first bought it
smile.gif


Its been a little longer than i wanted for my last update which is partly my fault, forgot I ran out of thermal paste before xmas so had to order some more and half way through braiding I ran out of 2.5mm braid and had to wait a week for the shops to restock. so a few minor oversights by me I'm placing the blame for the delay firmly on EK Eddy's shoulders - he just had to release a nickle clear plexi top block for dominator ram, so I had to have one
biggrin.gif
God dam you Eddy and your irresistable shiny blocks.

Well the EK block is in the post so should be here tomorrow I hope. The time off from mounting blocks and figuring out hose routing has let me complete the rest of the build.

all the internal cables are sleeved minus the 24 pin extension for the veris.

003-2.jpg


sleeved the pcie cables and sata cable from the short cable set

004-1.jpg


got the rad assembly, PSU and Hdd all mounted now

005-1.jpg


the short cable set meant the psu mounted with alm ost no fight at all (which was a relief)

007-2.jpg


mounted my fill port with a 1" whole in the roof

011-1.jpg


012-1.jpg


And a few pics of just around the case to finish todays update

006-2.jpg


013-1.jpg


006-2.jpg


I've decided to put my rig on the test bench this week as I plan to test just how effective the water blocks are on ddr3 ram, hopefully find a few hours spare this weeekend to have some fun with that which will work nicely for me to begin building the pc as the motherboard tray has been re-sprayed black and still needs about another week for the lacquer to harden.

cheers for looking
smile.gif
 
That psu looks a bit tilted? It looks awesome uptil now are u gonna do a window or something in the case?

Yeh its because of the 24 pin cable has to do a 90' degree turn then go over all the other cables before connecting to the psu, so it pushes down a little on the psu. The rear of the case isnt warped in anyway (I've just been and had a look to double check), it looks worse in that picture than it does in person. I'm going to have a look if i can re-arrange the cables to help reduce it.

I've got a small window on the cpu side of the case covered by mesh that was cut to help vent the hot air from the rad in my old setup. I'm undecided whether to make it atm but I do intend to replace the mesh with black tinted arcylic.

But I've discovered that the 30 degree fitting followed by the 60 degree fitting actual have a small leak when any lateral movement is applied to them so my first priority is to get them both swapped for a pair of 45's and a small extension to help them reach round the rad fans.
 
Back
Top