paulstung
New member
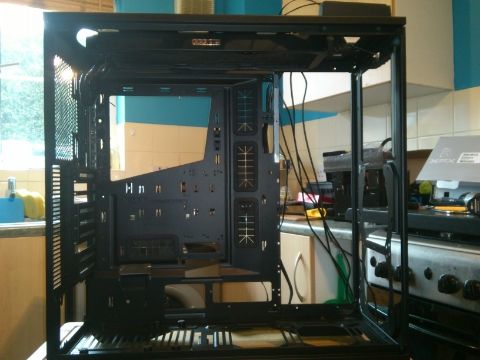
Seeing as though I need to change my pump/res combo, and my gpu is being rma'd, I thought this would be the perfect time to do all the mods I had planned for the future, all in one go possibly over a couple of weeks.
My plans are, to add a mid plate, for a place to hide cables, and possibly for the pump, I'm still undecided on what pump/res combo to go for. the plate needs to be placed in first so I can get a better idea of space. Also I have drilled out the rivets of the drive bays, and added it to the scrap pile, in it's place I'm going to mount the 240 Monsta up higher, above the mid plate.
As well as the mid plate, I need to add a panel to the front, where the drive bay, and fan mounts were. Once everything was removed, and the rad mounted it just looked awful, so it will be to cover up fan mounts, and the big hole where the drive bays used to live. It will also make mounting the rad, a lot more stable.
That's it for now, I'm off to source some acrylic sheet, that is bigger than 500 x 500, I need a sheets that is 502, any recommendations ? Also NZXT in their infinate wisdom, didn't powder coat, the pieces one at a time they done it whilst it was built. Has any body got any tips / tricks on how to paint the bare metal ?
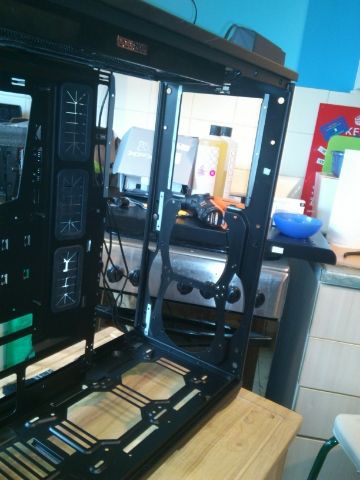
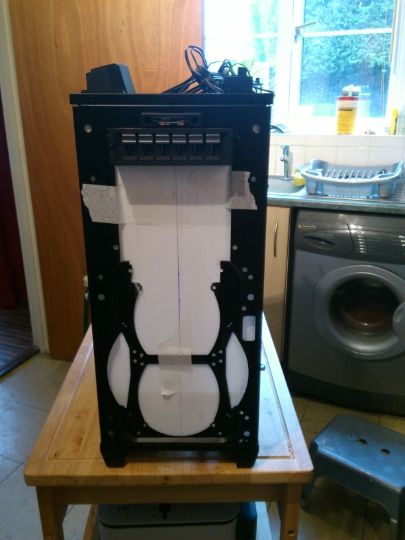
A quick mock up of my initial idea.

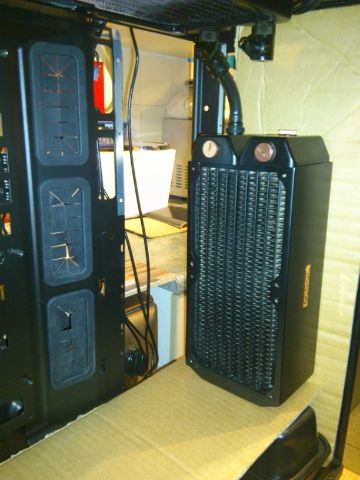
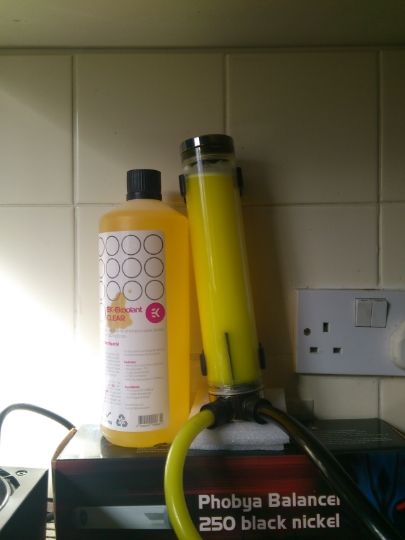
A little update. I got up nice and early, and put an order in for all, my nice lovely new parts. Pump, res, and some black/yellow acrylic. The only thing missing is the coolant, as I ran out of pennies, so that will be next week.
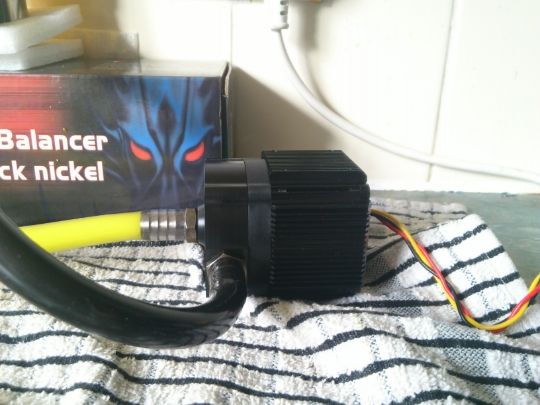
So far I have removed the drive bay cage, and trimmed it down, just to just one bay. I need a bay for a fan controller, the Phantom has a three stage one built in, but I find that it is only really a two stage and off, plus the pump I'm getting the Koolance PMP 500, is not variable, but can be run through a controller. The rest of my day was put to use in, mocking up, how the mid and front plate will be added.
It is now mocked up, and just waiting on my supplies to come. I can get on with tidying up the cuts, and figure out how to mount the front rad, to the new panel. The bottom fan will make contact with the chassis, but not the top one. So I need to get a piece of mild and make some sort of bracket, to make sure it is nice and strong, most of all, no rattles.
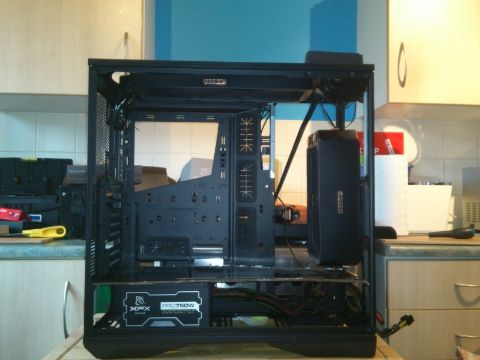
I'm still undecided on where to mount the pump,my first thought was under the mid plate, but the PMP 500, is such a sexy looking pump, it would be a shame to hide it away. Also it will be a shame to brake up the sleekness of the plate, with some holes and grommets. It just looks so clean.


The fan controller will eventually will be boxed in, as stage two will involve, adding a shroud, around the front rad, with just the front fans visable. I might even, give removing the fans shroud to just leave the blades. As seen on another thread. I think it will look sick . performance won't suffer as it is in push pull any way. ( can any one remember, the thread, with the shroud less fans ? )
My plans are, to add a mid plate, for a place to hide cables, and possibly for the pump, I'm still undecided on what pump/res combo to go for. the plate needs to be placed in first so I can get a better idea of space. Also I have drilled out the rivets of the drive bays, and added it to the scrap pile, in it's place I'm going to mount the 240 Monsta up higher, above the mid plate.
As well as the mid plate, I need to add a panel to the front, where the drive bay, and fan mounts were. Once everything was removed, and the rad mounted it just looked awful, so it will be to cover up fan mounts, and the big hole where the drive bays used to live. It will also make mounting the rad, a lot more stable.
That's it for now, I'm off to source some acrylic sheet, that is bigger than 500 x 500, I need a sheets that is 502, any recommendations ? Also NZXT in their infinate wisdom, didn't powder coat, the pieces one at a time they done it whilst it was built. Has any body got any tips / tricks on how to paint the bare metal ?
A quick mock up of my initial idea.
A little update. I got up nice and early, and put an order in for all, my nice lovely new parts. Pump, res, and some black/yellow acrylic. The only thing missing is the coolant, as I ran out of pennies, so that will be next week.
So far I have removed the drive bay cage, and trimmed it down, just to just one bay. I need a bay for a fan controller, the Phantom has a three stage one built in, but I find that it is only really a two stage and off, plus the pump I'm getting the Koolance PMP 500, is not variable, but can be run through a controller. The rest of my day was put to use in, mocking up, how the mid and front plate will be added.
It is now mocked up, and just waiting on my supplies to come. I can get on with tidying up the cuts, and figure out how to mount the front rad, to the new panel. The bottom fan will make contact with the chassis, but not the top one. So I need to get a piece of mild and make some sort of bracket, to make sure it is nice and strong, most of all, no rattles.
I'm still undecided on where to mount the pump,my first thought was under the mid plate, but the PMP 500, is such a sexy looking pump, it would be a shame to hide it away. Also it will be a shame to brake up the sleekness of the plate, with some holes and grommets. It just looks so clean.
The fan controller will eventually will be boxed in, as stage two will involve, adding a shroud, around the front rad, with just the front fans visable. I might even, give removing the fans shroud to just leave the blades. As seen on another thread. I think it will look sick . performance won't suffer as it is in push pull any way. ( can any one remember, the thread, with the shroud less fans ? )
Last edited:
") that'll make it look nice and clean hopefully ;-)
that'll make it look nice and clean hopefully ;-)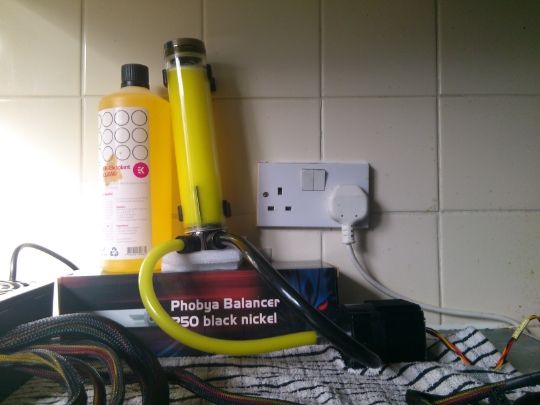
 .
.

") ).
).
