**Black Ice** - The rescue/build log

w3bbo

New member
Some of you may have seen Jim's unfinished Black Ice build which was the result of alot of hard work and failed attempts/attempts that didn't quite work out the way he planned/wanted. Think of the numerous Ripley clones that were formed in Alien:Resurection and you have the idea.

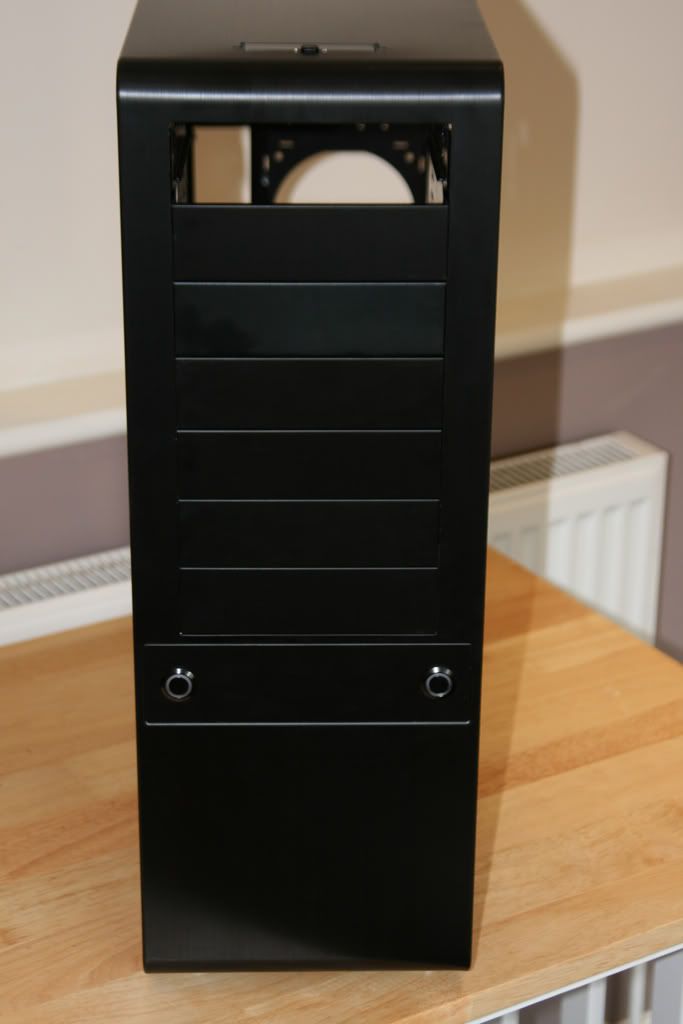
This abused A+ Black Pearl WC edition was one such attempt. A damn fine case in its prime (see review here) was sadly left to rot in Jims back garden. After a year out in the cold, bruised and battered by British weather, Jim sent me the case below :
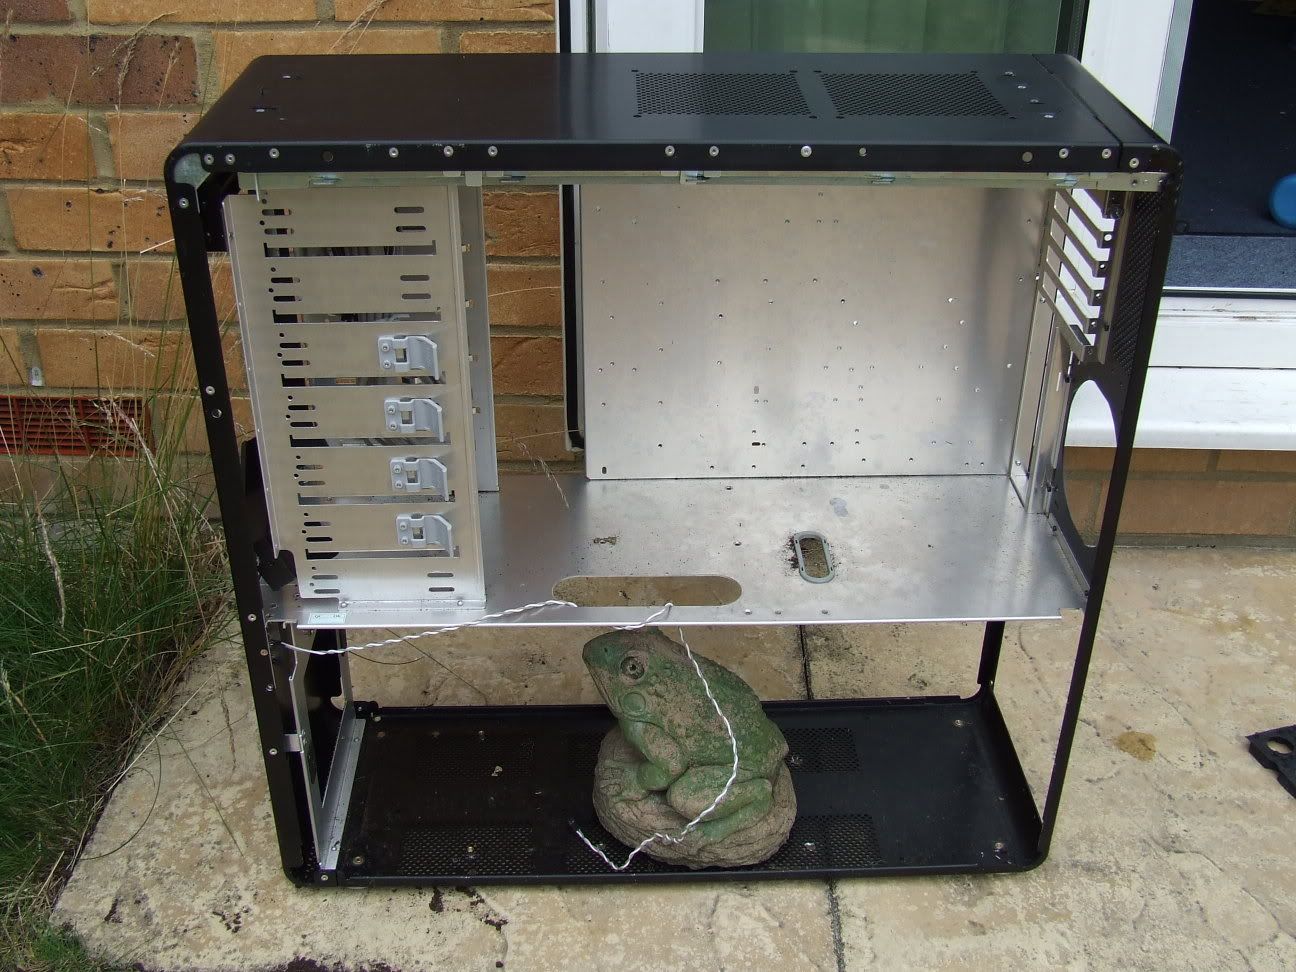
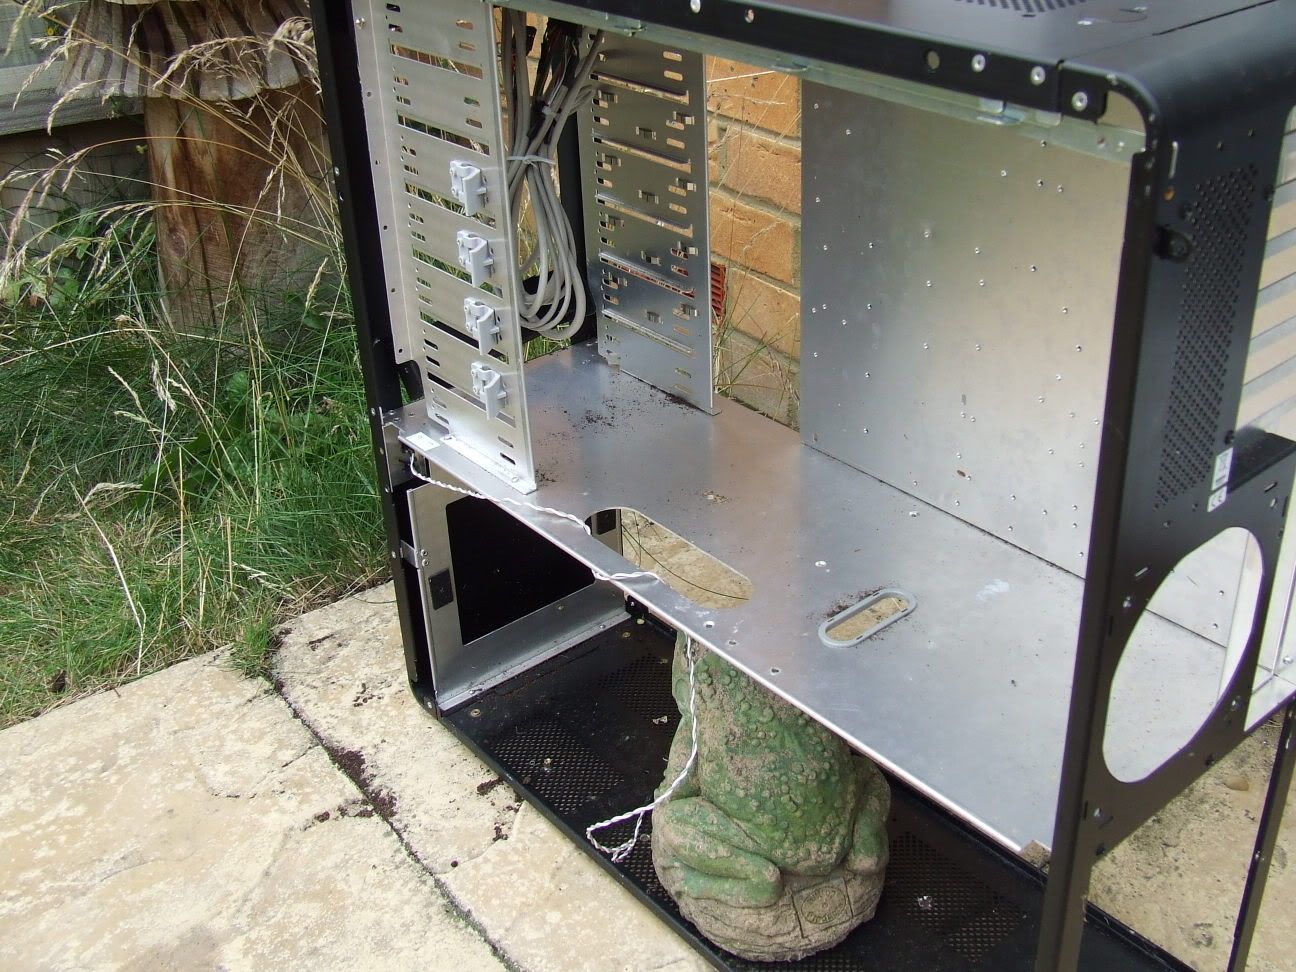
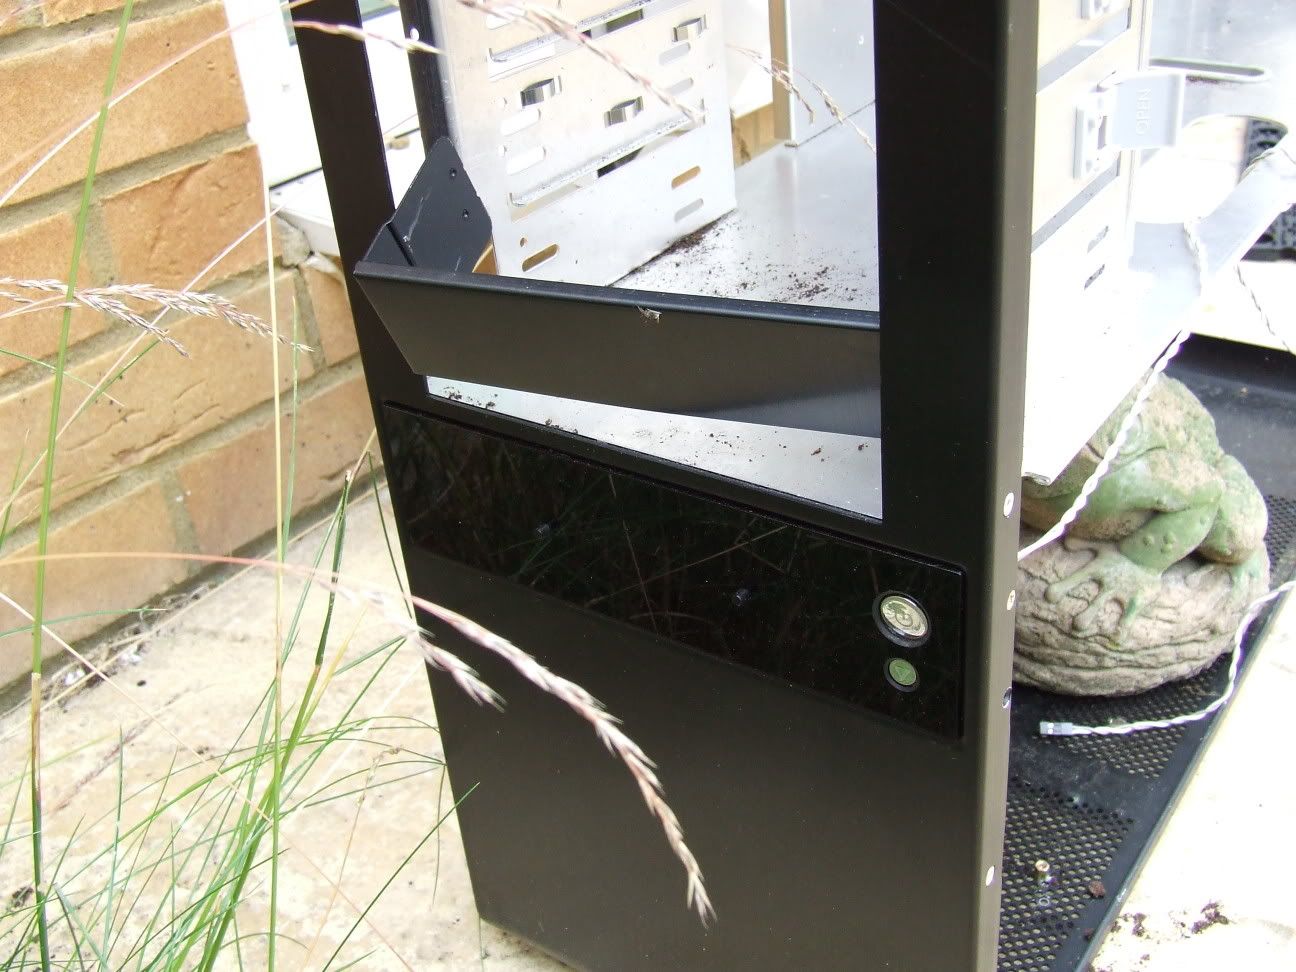
DSCF8385.jpg


DSCF8390.jpg


DSCF8387.jpg


My heart bled tbh:(. No screws, missing drivebay panels, scratches galore, rusted joints and to top it all off he wouldn't throw in the frog!

I hate seeing good hardware go to waste so Jim agreed to ship it to me for the cost of postage. Now time for the rescue attempt and build log.
 
Powdercoat internals

So the case finally came back from from the powder coaters and I was very impressed with the outcome. The case is starting to look a little more like a PC case than a garden ornament graveyard.

After a quick wax and polish here's how she stands at the moment:

IMG_1968.jpg


IMG_1971.jpg


IMG_1973.jpg
 
Modded front panel

I also got Tom to sort out a new front panel as the old A+ looked tacky and not in keeping with the look I'm aiming for. The material used was from left over LianLI modded window panels so was an exact match of the colour and texture and looks like it's 'meant' to be like that. Vandal switches(both white atm) were also added.

IMG_1975.jpg


IMG_1974.jpg


IMG_1969.jpg
 
Braiding the loons

I'm a big fan of Yate loons and the D12-SL12 are the perfect balance between CFM and noise imo. Obviously they are black but I hate to see bare wires so these, like those in my previous builds were braided.

IMG_1899.jpg


IMG_1912.jpg


IMG_1913.jpg


I might swap out the connectors, or maybe just paint them black too but I'll come to that bridge when I cross it :).
 
I could tell you but it wouldn't be fair to our sponsors as they are a direct competitor.

Rad Mounts

I plan on having a PA120.3 in the bottom but it wouldn't fit without modding the case so the PSU would fit vertically instead of horizontal. So once again Tom came to the rescue and made a custom backplate for the PSU so I could do just that. However, I forgot to ask him to whizz up some brackets to hold the PA on its side aswell as lifting the PA up enough to be vented by the side panels. Not having the time (or inclanation) to go out and buy some pre-made brackets I thought I'd have a go at making my own. Heres a few pics of how I got on with the bits and pieces I had lying around in my tool box.

Bracket plates bent to size:

IMG_1977.jpg


I then attached the bent plates to some L-shaped brackets and sprayed them. Even though the Yates are quiet fans I wanted to ensure there would be no rattling of the case after fitting the rad+fans so I cut a little motherboard packing out to place under the brackets:

IMG_1983.jpg


Here they are fitted to the case which needed to be drilled - hopefully I measured this right!:

IMG_1984.jpg
 
Filters

Fan filters are a God send for those of us who don't like heavy maintenance and so I stuck some on the rad fans along with a neoprene gasket to give a good seal.

IMG_1979.jpg


If anyone is wondering, I set the fans up in Push configuration. Numerous 'experiments' have been conducted by others and tbh I have tried both myself without noticing ANY difference whatsoever - just my observation as I'm sure there is some law in physics that should dictate which way fans are supposed to go for best performance but in my own 'tests' I couldn't find that one way was better than the other.

IMG_1980.jpg


Lets see if my measurements were right;).
 
Radiator Fitment

Looks like I got it just about right - You don't thik I would have posted pics if I got it wrong do you lol?).

Front

IMG_1985.jpg


Rear

IMG_1990.jpg


PSU fitted

As stated previously the PSU now sits on its side thanks to the custom bracket. I also gave the PSU the once over with a spraycan as it was starting to look a little battaered after numerous builds in the past.

IMG_1991.jpg
 
Its so clean, colour coded and organised. Love the black, black and more black scheme. I'd attempt something like this but its too much of a project for someone like myself. Keep up the good work. :D
 
Jesus, I remember seeing that when we went down for the NIA day. Fatastic job mate. Nice to see it went to a good home after all :).
 
Well it's certainly making itself feel at home - its inards to be are spread across the dining room as I speak lol.
 
Excellent work so far mate, be sure to keep us posted with plenty of pics. One thing though, where/how are you going to incorporate the garden frog into the build :D
 
name='Hassan' said:
Where is Jim?

No idea m8, maybe he's in hiding outta shame.

name='!TIMMY!' said:
Cant wait to see how this turns out. Looking great atm webbo!

Cheers!

name='PV5150' said:
Excellent work so far mate, be sure to keep us posted with plenty of pics. One thing though, where/how are you going to incorporate the garden frog into the build :D

Will do m8. I did have some cunning plan for the frog but Jim refused to post it sadly.
 
Back
Top