Build Log Bringing Sexy Back

sinnedone

New member
Hello OC3D, I wanted to share with you all a project I have been working on for almost 2 years now. :p

It's not the newest hardware being that when I started Haswell had just come out and unfortunately (or fortunately depending how you look at it) simple life things have lengthened this project.

This should be a fairly quick log as all the work is almost done and I'm at the point where all that's needed is some slight detail work and final pictures. Which I hope to complete in a week or so. Not to mention last time I posted a build here it was only rig pictures instead of a log and I'd like to tell the whole story this time. :D


This is also the first time I have watercooled a PC and on top of that I decided to jump straight to acrylic tubing. Up until acrylic started becoming mainstream I was seriously turned off of watercooling simply because of aesthetics. When I saw builds using copper (BNEG) and then acrylic I knew a hardline system was something I would definitely be down for. lol :p

I'm going to start off with system specs/details and pictures. PLease forgive the first couple of pictures as they will get better. :(


Case...........................................Zalman GS1000
Motherboard...............................Gigabyte GA-Z77X-UP7
CPU............................................Intel I7-3770k
RAM............................................Corsair Dominator Platinum 2133mhz 16GB (4x4gb)
SSD's..........................................OCZ Vertex 4 128GB x2 in RAID 0 (OS+few games)
HDD............................................2TB Seagate 7200rpm (storage)
Power Supply..............................Cooler Master V1000 modular 1000watt
Graphics......................................Saphire R9 290 x2 (reference)
Sound..........................................Creative Sound Blaster Z


Now for the watercooling side of things I have chosen the componets that looks wise fit the look I was looking for. I am not really a brand loyalist and simply use what looks best to me. :thumb:


For radiators I chose to go with the Alphacool brand. I chose to go with these beacuse I plan on using lower rpm fans and wanted unitformity with the rads. I will be trying to stuff the lollowing rads into my chosen case:

1- Alphacool Monsta 280mm
1- Alphacool ST30 280mm
1- Alphacool XT45 140mm
1- Alphacool ST30 120mm


For waterblocks I tried to stay uniform and used a combination of EKWB and XSPC blocks:

1- EKWB Supremacy in acrylic/nickel for the 1155 CPU
2- EKWB Acrylic/nickel blocks of the R9 290 rev 2 variety
1- XSPC Black Acetal/Copper Block for the z77x-up7


As far as connecting all this equipment together I went with a wide array of different manufacturer fittings. I will be using 1/2" OD acrylic tubing with this particular build and some of the fittings will be as follows:

-Bitspower rotaries
-EKWB rotaries
-Monsoon rotaries
-Monsoon 1/2"OD fittings
-Bitspower Drain valve
-Plugs from both EK and Bitspower
-Extensions from Bitspower and Koolance


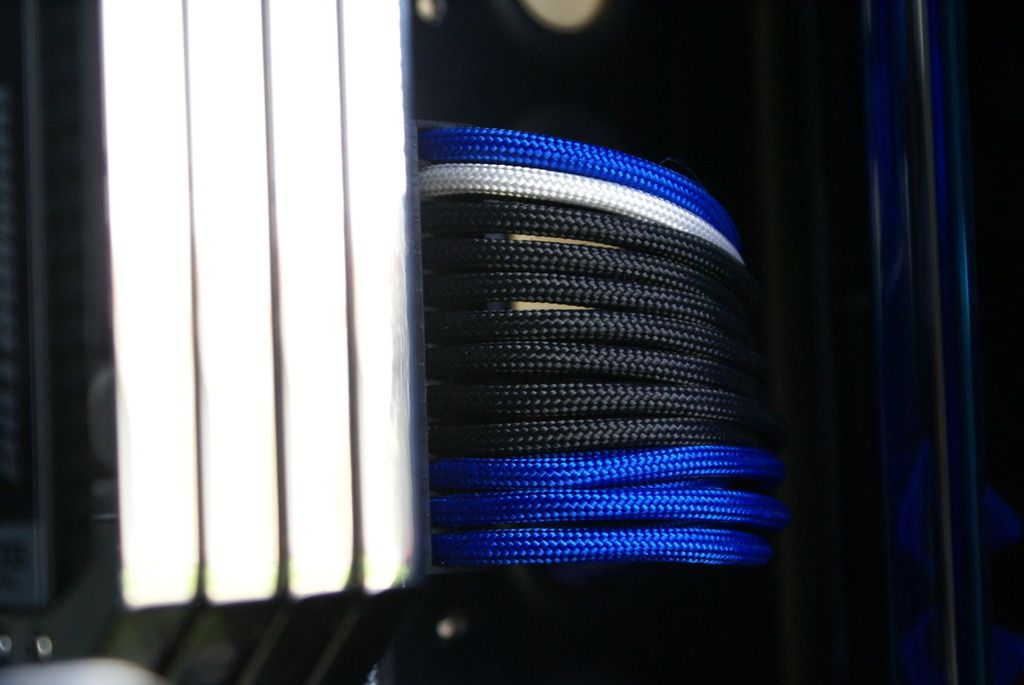
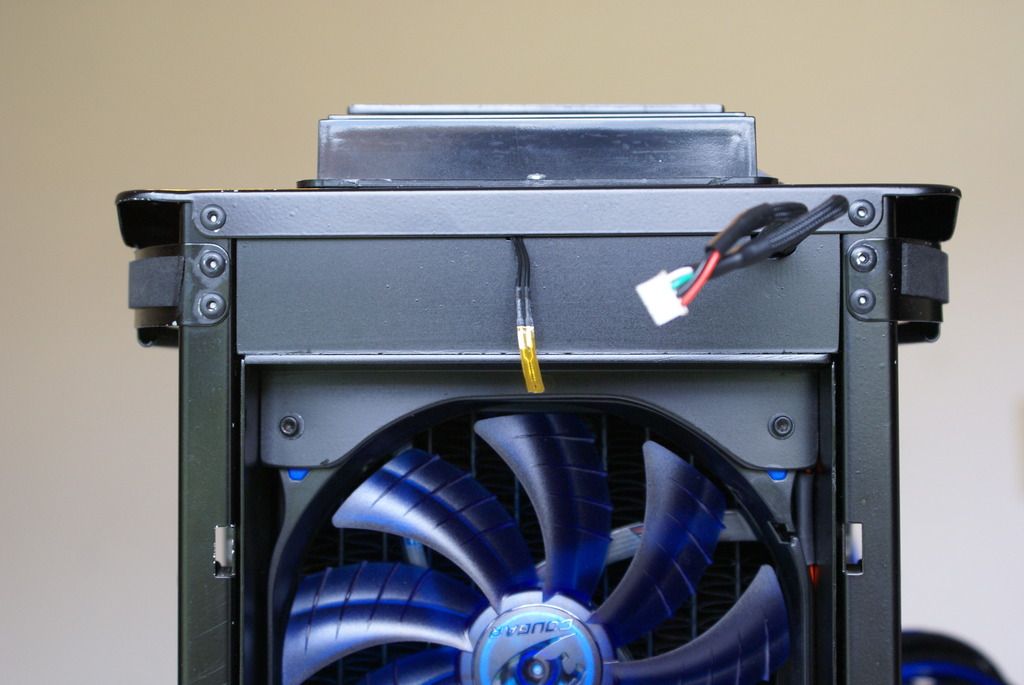
Pushing the air through the rads will be Cougar Blue LED 140mm/120mm fans. There will also be a Prolimatech 140mm slim and a 120mm slim fan for odd placement duties. :D

Pushing the fluid will be a Swiftech mpc35x pwm pump with an EK heatsink housing and Bitspower acrylic pump top with add on reservoir. So here is the obligatory too much stuff stacked on top of each other pic; :D

20140921_174509_HDR_zps38cd3478.jpg


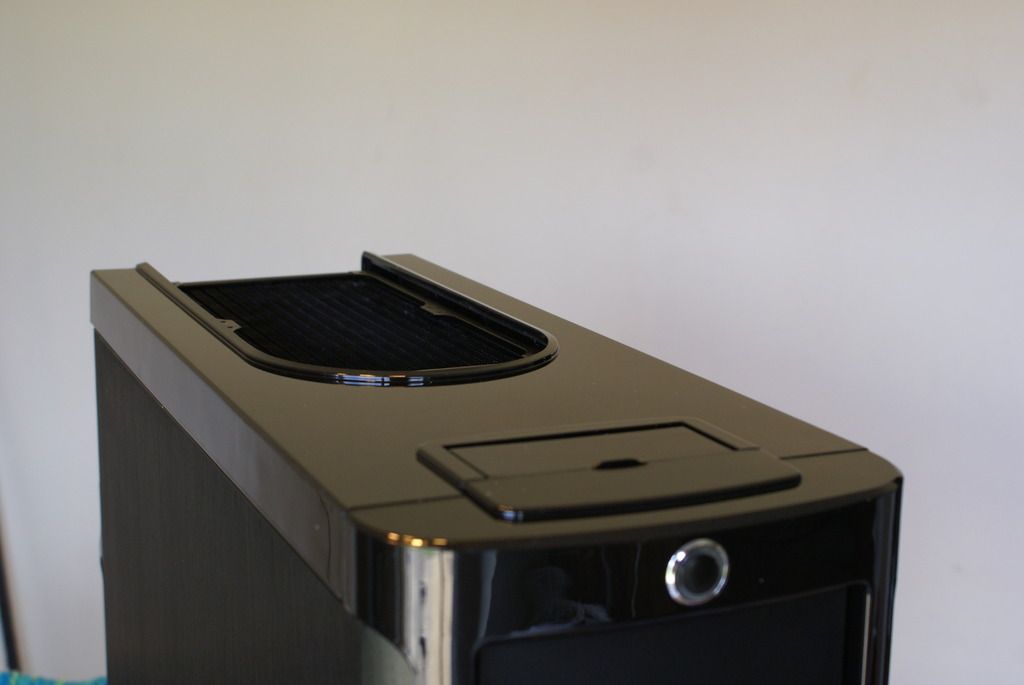
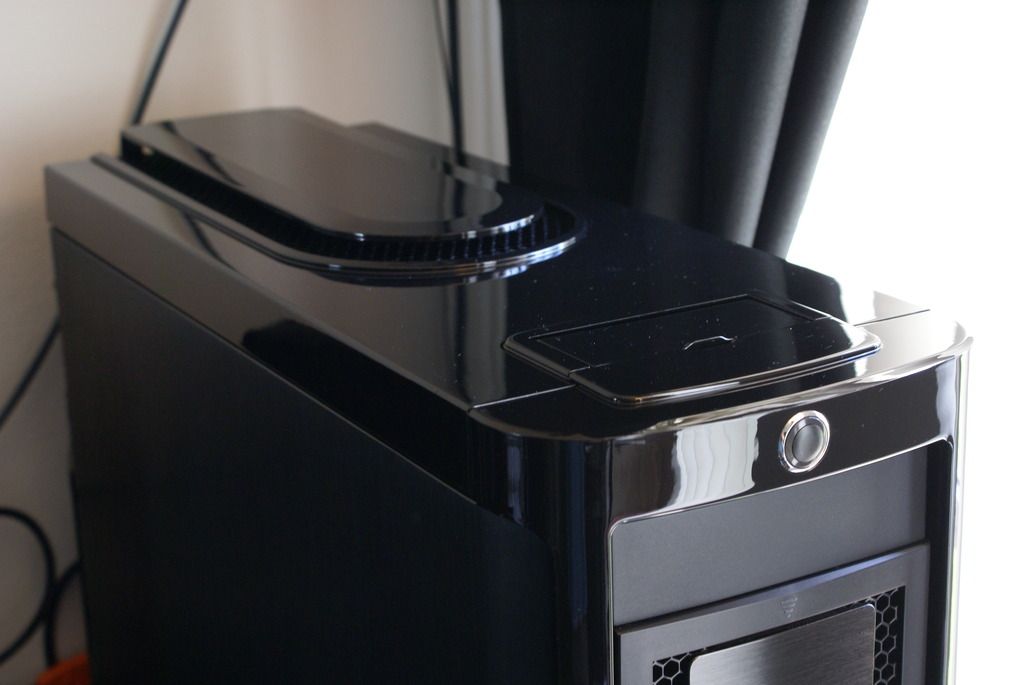
Here is a picture of the case I will be using:

20140921_175652_HDR_zpsf1ae73c3.jpg


Now I know that it's not the newest case around or full of watercooling options but ever since I first saw this case, I simply loved the looks of it. To me it reminded me of high end home Stereo equipment and just looks classy to boot. It might not look like much now, but by the time I'm trough it will have all the watercooling options I need plus I think it will look a little better than what it came stock. :D


Here are some pictures of the hardware I'll be working with. First up is the EK clean acrylic/nickel Supremacy CPU block. (non EVO as I've been collecting parts for a long time, lol)

20140922_141340_HDR2_zps8e281e9a.jpg


20140922_141440_HDR2_zpsb6c584fa.jpg


20140922_141504_HDR2_zpsff7e5bd5.jpg


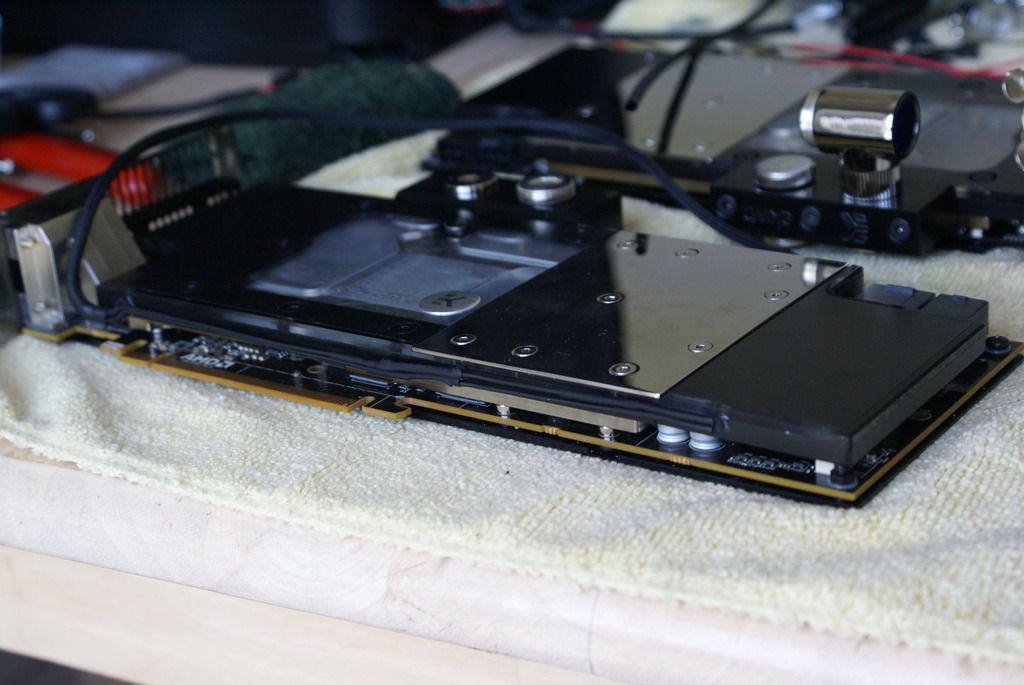
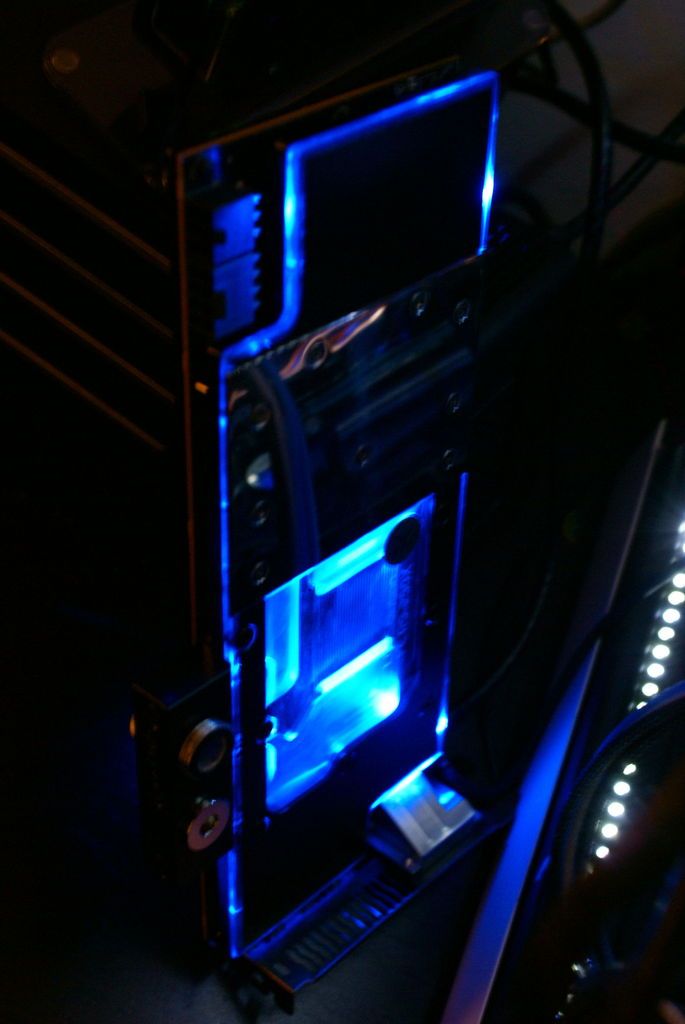
Next up is one of the EK R9 290 Blocks with backplate. There are 2 pairs of these but one is currently being used in my rig.

20140922_142454_HDR2_zpsfed5afe2.jpg


20140922_142410_HDR2_zps553c2442.jpg


20140922_142556_HDR2_zps79dcd46a.jpg


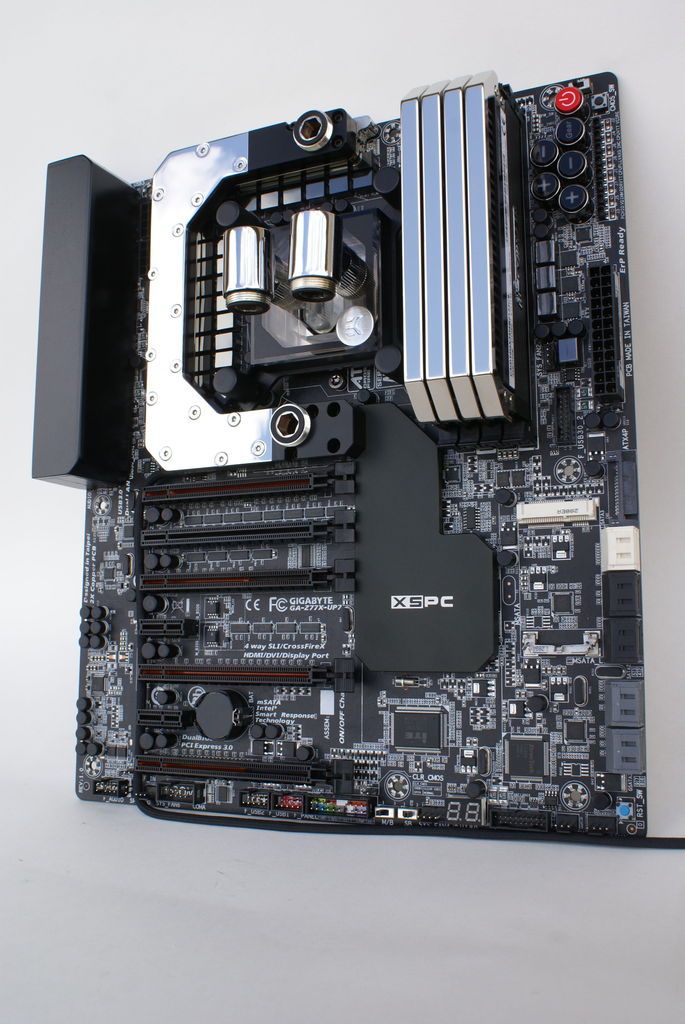
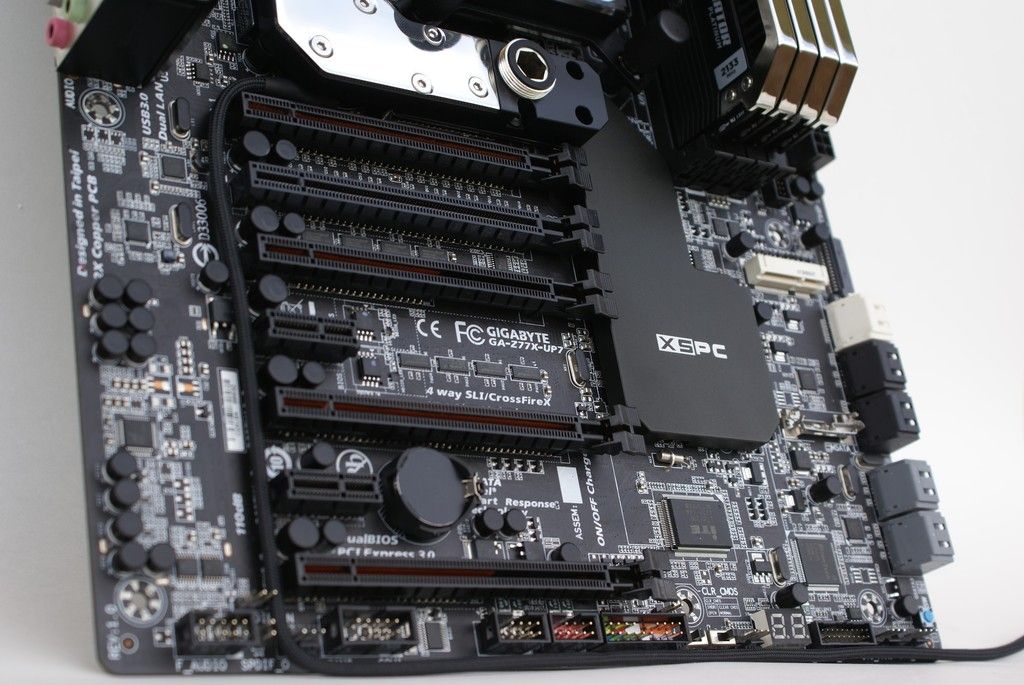
Next up is the motherboard with xspc block and some monsoon fittings, Unfortunately the orange will go in a future update, but this is one sexy board. :D

20140922_143024_HDR_zpsdd2e79bd.jpg


20140922_142941_HDR2_zps5f460d2b.jpg


20140922_142926_HDR2_zps32151ffc.jpg


20140922_143047_HDR2_zps5b848ec2.jpg


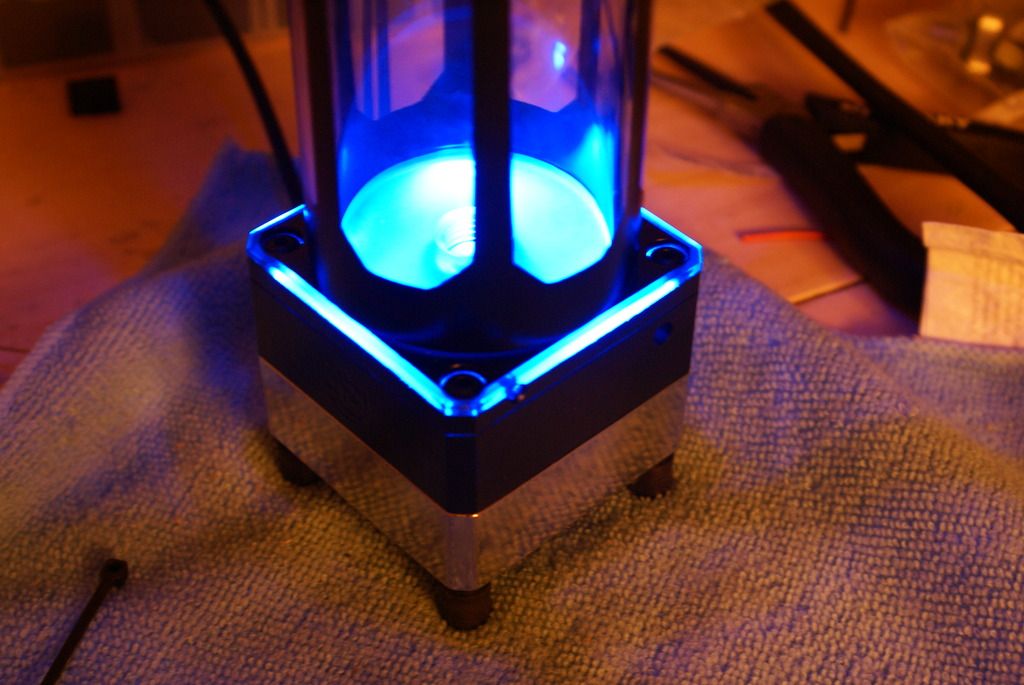
Here we have a couple of different parts put together. We start off with a Swiftech MCP35x pump, add an EK nickel DDC heatsink, and a Bitspower acrylic top. Then we go for the Bitspower 250 reservoir top upgrade kit and on top of that an upgrade 3 hole top for the res. Bitspower..... the best at nickel and dimin'. :p

20140922_143551_HDR2_zps5ba9af73.jpg


20140922_143621_HDR2_zps5c8da53f.jpg


20140922_143806_HDR2_zps40a9990a.jpg


20140922_143639_HDR2_zps8849e5d1.jpg


Like I mentioned before I'll be using of different manufacturer fittings but damn these Monsoon ones are rather sexy!

20140922_144219_HDR2_zps80c74e33.jpg


20140922_144500_HDR_zpsba6e2277.jpg


20140922_144529_HDR2_zpsf26e968f.jpg


20140922_144751_HDR2_zps3af86f4a.jpg


20140922_144737_HDR2_zpsa34508e3.jpg
 
Last edited:
Look forward to seeing how the build progresses dude. Not generally a fan of rounded cases, however Zalman have done well with that, i agree with what you were saying about the "high end home Stereo equipment" look. As for the water cooling options, half the fun is making it all fit.

Keep the updates coming.

Thank you. :D
Honestly I do believe most of my personal fun is making things fit. lol If I am not making something fit or modifying it makes it feel like something is missing.

I quite like that case :) always wanted one :)

Thanks, I'm going to spice it up just a bit. ;)


First thing up to be improved on visually is the motherboard waterblock. I personally did not like the button head screws so decided to try and make it be a little more visually appealing. :D

Disassembled the motherboard water block to get at the stainless steel plate which originally looked like this:
20140926_152107_HDR2_zps3c1f10a5.jpg


Went ahead and countersunk the holes for the screws for preparation of new hardware:
20140926_152201_HDR2_zpse81190a6.jpg

20140926_1522182_zps222fe223.jpg


After that went ahead and sourced some flush head allen screws cut to length and assembled the block:
20140926_153551_HDR2_zpsb268547c.jpg

20140926_153600_HDR2_zpsd480cd6e.jpg


Definitely feel that better. :D It's not done yet in those pictures as it will be made to look a lot prettier.


Next up is the case. It's a Zalman GS1000. Now this is a rather old case (5 years or so) and airflow is not it's strong suit but we'll see if we can make some changes.*


Here are some pictures of the case as it started:


20140928_134507_HDR_zps3f9844de.jpg


20140928_134618_HDR_zps1847f8f3.jpg


20140928_134629_HDR_zpsd894ab99.jpg


20140928_134747_HDR_zpsc9394ec1.jpg


20140928_134834_HDR_zps69e872f7.jpg


Now one feature I want to use on this particular case is the hot swap bays in the lower three spots at the front of the case. The case was built with a mounting location for a 120mm fan at the very bottom of the hard drive area to help keep the hard drives cool but installing one would make you have to use the 3 upper drive bays losing the 3 bottom ones. I can't have that now.... I need that area for the front Monsta rad. Well with the help of a slim (12mm) scythe 120mm fan and some modifications we're gonna make this happen. *:D


Here are some pictures of what I mean:


IMAG3250_zps717716f1.jpg


Now first thing were gonna gave to do is flatten out these mounting recesses in the bottom of the case.*


Before:

IMAG3243_zps978833fd.jpg


After:

IMAG3245_zpsff3e11d1.jpg


Still not enough room for that 12mm thick fan.*

IMAG3249_zps9117488f.jpg


Well lets modify the plastic mounting brackets for the hard drive cages a bit then.*


IMAG3251_zpsf283b4cc.jpg


IMAG3252_zps05932d27.jpg


After those 2 slight modifications we finally have enough room for a slim fan to keep those 3 drives nice and cool :D


IMAG3256_zps6bbdd5ed.jpg


IMAG3255_zps525b3bea.jpg


20140928_140528_HDR_zps194d36e6.jpg


20140928_140538_HDR_zps705b6ba6.jpg


I'm at the point right now where I need to modify things a bit to try and fit as much rad space as possible in this case. I will be installing 4 rads in total. The first will be an Alphacool 280mm Monsta in push/pull as intake in the front of the case. The second will be a single 140mm Alphacool XT45 in push/pull intake at the bottom of the case. The third will be 280mm Alphacool ST30 in push exhaust at the top of the case. The last will be a single 120mm Alphacool ST30 as an exhaust in push at the rear in the case. Here a simple paint diagram of what the plans are:

20140928_134834_HDR-1_zps396005ab.jpg


Im going to be tackling the bottom mounted 140mm XT45 first. Now there isnt much room down there and with the power supply in place the rad doesnt really fit very well:

20140928_135919_HDR_zps7e18ed04.jpg


Yeah crammed up against the power supply and hot swap board isn't going to work very well. :p

20140928_135927_HDR_zpsada71bd6.jpg


To get a little bit of space at the bottom and have room for the 140mm radiator I decided to go with a Lian Li power supply bracket (can be seen HERE ) to pull the power supply back a couple of inches. This particular bracket is not a direct bolt on for my case, and the zalman uses its own power supply bracket to load the power supply from the rear:

IMAG3257_zpsc260e388.jpg

IMAG3260_zps3830e437.jpg

IMAG3259_zps7d3554e9.jpg

IMAG3261_zpsc0690b61.jpg


To try and mount the Lian Li bracket directly to my case would have required a little bit of sheetmetal work on my part to be able to get a good mount and decided to try for a combination of the original zalman power supply bracket and the Lian Li extension. First thing up was to cut the original power supply bracket so that the power supply go slide through it.

IMAG3263_zps20fe46fb.jpg

IMAG3262_zpsae4854b1.jpg


Then I placed the Lian Li bracket onto the power supply to make measurements of where the two pieces would need to be joined.
IMAG3265_zpsf03be779.jpg

IMAG3266_zps6c1c3b5e.jpg


Now if these were like materials then a simple weld and grind would suffice to join them together, but unfortunately they are not like metals. The zalman case bracket is a sort of aluminized steel and the Lianli bracket are plain old aluminum. So I tried out some epoxy after prepping the surfaces and hoping it would do the job.(pictured) UNfortunately as I knew was going to be the case it didn't work. What I would up doing is what I should have done in the first place and simply riveted the 2 pieces together. Unfortunately I do not have pictures of that.
IMAG3272_zps097f545d.jpg

IMAG3273_zpse504490b.jpg

IMAG3275_zps1910c9d5.jpg


In the end the bracket accomplished its job and gained the extra space I needed for the radiator.
IMAG3268_zps9e4d8a4d.jpg

20140928_140145_HDR_zps816d7849.jpg

20140928_140206_HDR_zpsaeff1a19.jpg


Next up is the power supply mount bracket. Since the power supply is sitting a little further back via power supply extension bracket, the bottom support bracket was a little too long and in the way of an intake fan, this needed to be remedied:

Started with:
IMAG3355_zps8lvyo0uy.jpg


After cut:
IMAG3356_zpsyxwumavy.jpg


This freed up some room for the 140mm slim fan that goes mounted in the bottom of the case:
IMAG3357_zpsxyamqorj.jpg


IMAG3358_zpsustxjhzy.jpg


IMAG3360_zps4h5niakk.jpg


IMAG3363_zpscqqxl4je.jpg


Now comes time to shoehorn these rads into this case. :D I started with the top rad by cutting out enough space for a top mount:
IMAG3367_zps2ui0p7gr.jpg


Then I made some brackets into which mount those top rad/fans to:
IMAG3376_zpspadohtnp.jpg


IMAG3377_zpstj468izq.jpg


Went ahead and mounted the brackets to the case with some rivets to continue the fitment process:
IMAG3378_zps8it5uzlv.jpg


IMAG3381_zpsbbjw4kjp.jpg


IMAG3384_zpscxx4h33o.jpg


IMAG3385_zpsqshayfn7.jpg


Slightly offset to try and give myself more room in the main chamber:
IMAG3389_zpsceqfp0uq.jpg


Still not very much room though :o
IMAG3388_zpso8xmvyp8.jpg


Next up is the front rad. A 280mm monsta being mounted in what use to be the front drive bays. First thing is to try and make some brackets to mount this thing.
IMAG3392_zps4i0wvdut.jpg


Follow that with some assembly with the fans in push/pull
IMAG3393_zps9lgi2tmw.jpg

IMAG3394_zpsmnqttrqf.jpg

IMAG3397_zpsveki4ytm.jpg


Now its time to mount them up :thumb:
IMAG3399_zpsbmmiymyl.jpg

IMAG3400_zpsqvcjwshk.jpg

IMAG3401_zpsowove2dj.jpg


Next up is the bottom 140mm rad. There's some dimpled 120mm mouting holes, but I wont be using them and they'll actually get in the way. They had to be flattened down to make a good mount for the 140mm
Before:
IMAG3369_zpszeviefx9.jpg

After:
IMAG3371_zpsa6uvfulc.jpg


Another small bit is that there are not enough ventilation holes to account for the 140mm fans coming up in size from 120mm on the bottom, so some more ventilation holes had to be made:
pilot holes:
IMAG3372_zps2kvmogbr.jpg


slightly larger unfinished holes:
IMAG3373_zps1epfcyyf.jpg


mounted:
IMAG3405_zps9mg97gis.jpg

IMAG3406_zpskjna0oz9.jpg

IMAG3407_zpsbjw9y1rj.jpg


Now for the final rad :D This one is going to be a 120mm mounted at the rear of the case on the outside. Only real modification here was making some holes to allow the fittings to pass through:
IMAG3382_zpspwuwbbrc.jpg


AAANNNNDDD Finally :D All rads mounted in the case:
IMAG3411_zpscy1gdncp.jpg

IMAG3410_zpscdjb9yr1.jpg

IMAG3408_zpstkspf7fh.jpg


One of the things needing modification was somewhere to mount the pump/res combo being it sat slightly too tall when sat on the midplate being that's where I wanted to mount it.. Now I know I could have simply gone with the 150ml bitspower res, but the 250ml just looks so sexy reaching to the top I had to try and figure out a way to make it happen. :)

What I wound up doing is simply cutting a hole through the midplate so the pump could sit lower. Then making an aluminum bracket to sit the pump/res combo onto. I used the stock rivet holes but made the bracket threaded to hold both together. It turned out pretty well.


IMAG3477_zpsl3wq9iks.jpg

IMAG3475_zps0pdpr0vb.jpg

IMAG3476_zpstygtyk20.jpg

IMAG3478_zpslxs2t7mh.jpg

IMAG3479_zpsxcqwamhi.jpg

IMAG3481_zpsxs2xcf0l.jpg


Still a little tight at the top, but everything fits.
IMAG3482_zpsbbyxiuqj.jpg

IMAG3483_zpswvfcga0s.jpg


Thats pretty much it for everything that needed to be modified on the case. Next off is dissassembly and gettting powdercoated.
IMAG3493_zpscv4j46bb.jpg

IMAG3573_zpsr1jp6taj.jpg

IMAG3574_zpswmrw4avb.jpg
 
Last edited:
A Zalman case, been doubting about those once too. Good to see one creating a build with it. Looking good so far! :)
 
By George that looks awesome !

As I was scrolling down through the pics I was thinking "Man that needs painting black badly" and you didn't disappoint !

Great work so far !
 
A Zalman case, been doubting about those once too. Good to see one creating a build with it. Looking good so far! :)

Thank you. :D


By George that looks awesome !

As I was scrolling down through the pics I was thinking "Man that needs painting black badly" and you didn't disappoint !

Great work so far !

lol Yeah the non painted interior of the older cases do kill the look a bit.

Quality work there dude and great execution, moar! moar! :lol:

Thank you.

Some more incoming. :D


Now the countersinking of the screws on the stainless plate was only the first step for what the final goal would be. Now my other blocks are nickel plated so the motherboard block was a little out of place being copper. So after some vigorous stainless polishing and getting the copper bits dipped in nickel we have the z77x-up7 motherboard block XSPC should have built. Came out rather sexy I think. :p

IMAG3500_zpshogz3mew.jpg

IMAG3501_zpsd06aorvc.jpg

IMAG3503_zpslj15pptv.jpg

IMAG3502_zpsgrhws2l1.jpg

IMAG3499_zpsny0ziw5d.jpg


Now while I was happy getting things polished/plated I decided to give the ram a little bit of love as well. While Corsairs" Dominator platinum series ram is rather sexy to say the least, it needed a little something in my particular build. I decided to have the top sections plated as well. They are normally an anodized silver finish but I think this looks much better.

IMAG3494_zpspujqkse6.jpg

IMAG3498_zpscxambexg.jpg

IMAG3512_zpskz1xnwci.jpg


Coming together on the motherboard

IMAG3511_1_zpscffynggg.jpg

IMAG3517_zpsvgnej6mb.jpg

IMAG3515_zps58uzdx81.jpg

IMAG3509_1_zps1nrl5jkm.jpg

IMAG3507_zpszcxoecgr.jpg


Those of you with a keen eye might have noticed a little differnet color scheme on the motherboard. While this is a particular sexy motherboard and orange is an awesome color it simply doesn't do on this build. Painting a motherboard is the biggest pain in the a$$ there ever was lol. I got er done though.

IMAG3445_zpsay4uerr4.jpg
 
Last edited:
The motherboard is almost sitting the way I want but there's still some small bits to be done. (more on that later)

It was time to turn my attention to the waterblocks. First up is the graphics cards blocks. One thing I didn't like about the acrylic EK block for the R9 290's is the fact the acrylic did not run the full length of the card. I decided to take car of that on a budget, lol

IMAG3628_zpsxpj2njjy.jpg


I also replaced the black screws with some stainless screws that hold on the stainless plate and polished both the plate and screws.
IMAG3644_zpskjecfykt.jpg

IMAG3645_zps4r6fzeur.jpg

IMAG3646_zpsmwry2udy.jpg

IMAG3652_zpsfxy7n27z.jpg


Basically what I did there was buy some acrylic the same thickness and then made some extensions to the original acrylic by hand to lengthen the acrylic. THe recesses for the capacitors look a little rough on those parts because acrylic doesn't like being heated up and a cnc job wasn't in the budget. It doesn't really affect the looks of the card because those cutouts won't be seen.

That brings us to the next modification to the gpu blocks. :D

DSC001992_zps26295f90.jpg

DSC002002_zps39fb5be1.jpg

DSC00204_zpse70798e2.jpg

DSC00206_zpsdf7af31e.jpg

DSC00208_zpscf5dd223.jpg


That's a little better. :)

At that point the acrylic was painted with a satin black minus the small "window" in the center section and a small border around the edge of the acrylic.

Why did you paint the acrylic like this you ask.... well there will be blue leds installed in all the blocks/pump/res and I don't like how harsh leds look in plain acrylic blocks. THe way I painted the blocks will help keep the light where I want it and not floods everything. Basically I want the components to have a sort of "glow" to them.(more on that later)

THe cpu block was next up on the paint treatment.
20141101_165136_zpsbcf77d4a.jpg

20141101_165154_zpsa98844e2.jpg

20141101_165217_zps25b931de.jpg


The last bit to get the custom paint treatment was the pump/res combo. For this I was inspired by the harbingers reservoir covers as I always like that look. I think it came out rather nice. ;)
20141218_103927_zps0fea91e9.jpg

20141219_164014_zpsea2a281d.jpg

20141219_185603_zps2e1d33da.jpg

20141219_185621_zpsd77fe274.jpg
 
Last edited:
Next step was to get these puppies lit. I installed three 3mm blue leds in the gpu blockas and wired them up.
95dd9530_DSC00603_zpsoa31zlrh.jpeg

fd664f69_DSC00611_zpsrpgye3ua.jpeg

fa762473_DSC00620_zps157na3fe.jpeg

0f0ae56e_DSC00624_zps1xckqbf4.jpeg


After those were installed I moved onto the cpu block whic received two 3mm blue leds.
1daf1c0e_DSC00630_zpssudkwity.jpeg

72b93b71_DSC00632_zpsf1cho8eh.jpeg


After that it was time for the pump/res combo. The pump block itself has a 5mm led and the res section has a 3mm blue led.
http://img.photobucket.com/albums/v... zalman v1/b7ae2684_DSC00786_zpsqofrluns.jpeg
64676216_DSC00808_zpswviq43t1.jpeg


The following pictures are not that great and better ones will get posted at a later date, but they show the look I was going for with the lighting on these acrylic pieces.
969e29f3_DSC00613_zpskdjcuffi.jpeg

3b7d782b_DSC00619_zpswh0blhom.jpeg

2184db70_DSC00640_zpsvbyal5rp.jpeg

73d111e1_DSC00653_zpseikthmdq.jpeg

6ea782d1_DSC00776_zpslrxyfprb.jpeg

edadc58b_DSC00777_zpsvjjwzrdy.jpeg


So far I think the lighting works really well and is exactly what I wanted the blue leds to do. Which is basically light up the components without flooding the entire area around them with blue light and washing the rest of the build. :)


Now we're back to give the motherboard some love. :)
Ever since motherboards starting coming out with IO covers I really liked how most gave the board a cleaner look once installed. So I decided to give that a go for the ole UP7.

Started off with some acrylic pieces which I measured and cut individually along with shaping and adding angles by hand. Using some acrylic weld the 5 little pieces of hand cut acrylic became this:
download_zpsaomi81ho.jpg

72516c3f_DSC00690_zpshexlexkp.jpeg

2420288b_DSC00693_zpsp9y6ladt.jpeg


Went with a subtle satin black like the rest of the pieces on this IO cover and simply attached with double sided 3m tape. I rather like the results though. Here is how it came out on the motherboard:
7013fa39_DSC00748_zpsrm0efy0q.jpeg

109a21c0_DSC00751_zpsbroz5nc8.jpeg

faf1ea39_DSC00759_zpshzbx5sns.jpeg


OOh much better :D
Still not done with the motherboard love though. At this point the capacitors were sticking out like a sore thumb so with some time consuming hand painting skills those too were blacked out as well. The cpu block hand nuts/battery were given the black treatment as well. The results were gratifying to say the least. :)
1bafa76d_DSC00879_zpspimtxsu3.jpeg

656a3909_DSC00890_zps75htsdah.jpeg

b989ce46_DSC00906_zps94p4uvhd.jpeg

fbb458e9_DSC00907_zpsiz0sdwld.jpeg


So after all this, all the hardware has received some love minus one last part, the Creative Sound Blaster Z. If anyone doesn't know this particular sound card comes with a bright red metal shield. It actually looks pretty good but it's not for this build. I then removed the shield and painted it a satin black to make it a little more understated along with disconnecting the bright red leds it comes with. It also has a small plastic window that's tinted red which i made a clear replacement.
IMAG2076_zps3698e42a.jpg

IMAG2095_zpsd296b334.jpg

IMAG2099_zps4617bcf4.jpg


At this point the sound card needed a little extra flair. It needed a backplate, and not just any backplate. It needed an EKWB Sound Blaster Z backplate. What's this you say... EK doesnt make backplates for sound cards? Well... we'll just have to fix that.
20150311_162208_zps5ucxbgse.jpg

20150311_162217_zpsxzxoksaa.jpg


Ahhh, much better. :)
So since all the hardware is finally done the next thing up is to install and get some acrylic tubing bent up.

Stay tuned. ;)
 
Hi sinnedone, I'll be honest, when I first started reading your project log I wasn't that interested because that case is quite fugly imo :p.

However, your ideas and execution are simply excellent, I'd never of though of polishing the stainless of the motherboard block or getting the RAM covers plated, very nice indeed. Talking of plating, I've contacted a few companies in the UK to get stuff plated and or anodised but due to the small volume they either don't answer my email or fob me off. Nice business practice! I've resorted to painting instead, but I digress...

Anyway, please continue your awesome modding, really looking forward to the end result!
 
This is looking amazing.

Thank you much. :D


One hell of a build. Nice one. Thanks for sharing.

Thank you for following along. ;)


This is simply the sex !

Ooh yeah. :p lol Thanks


Nice going dude. Looking forward to seeing those PCIE covers painted and fitted !

Stay tuned there's much more incoming. :cool:


Hi sinnedone, I'll be honest, when I first started reading your project log I wasn't that interested because that case is quite fugly imo :p.

However, your ideas and execution are simply excellent, I'd never of though of polishing the stainless of the motherboard block or getting the RAM covers plated, very nice indeed. Talking of plating, I've contacted a few companies in the UK to get stuff plated and or anodised but due to the small volume they either don't answer my email or fob me off. Nice business practice! I've resorted to painting instead, but I digress...

Anyway, please continue your awesome modding, really looking forward to the end result!

lol yeah :)

This case you either hate it or love it there's really no in between. :D

Thank you, I've tried to bring a little of my car tricks over to the PC field.

As far as being brushed off by the bigger companies I know how you feel. Look around and ask at your local custom car shops/machinists etc. Once you find some good small business they'll share their resources with you and point you in the right directions. It's usually the small business that will help you out so make sure you treat them well and advertise for them by word of mouth. :rock:


So we are up to the acrylic tubing runs. Believe it or not, I am not a fan of tubes running all over the place. It wasn't until things like copper and acrylic tubing started taking off that I decided I wanted to water cool my components. NOw dont get me wrong there are some BEAUTIFUL soft tubing builds out there but they are so far and few in between I simply was not interested.

With all that being said I tried to keep my tubing runs as short and discrete as possible. THe pictures are going to take a small step backward as the motherboard io cover and capacitors were not finished for the tubing mock up.

I decided to use 1/2" (13mm) tubing as I felt larger diameter tubing in such a small space would look slightly out of place. I used a monsoons bending mandrel kit (which I must say is a nice kit) along with plastic scrapers, scraps of metals, sockets and whatever I had laying around in the garage to set the tubing outside of the case. I really did not want to free hand it inside the case because OCD will kick in and if they weren't at perfect 90 degree bends and level I would have probably stopped with the build entirely. lol

20150116_100456_zpscu9iwfrf.jpg

DSC00423_zps0b46ab5d.jpg

DSC00425_zps988d0c38.jpg

DSC00427_zpscc7ba9ef.jpg


This particular area from the pump to front rad and top rad got a little cramped. :p
DSC00443_zpsltojhcsv.jpg

DSC00451_zpsq3o2ejt7.jpg

DSC00465_zpsqiwd7ozo.jpg

DSC00482_zpssmtuv66j.jpg

DSC00489_zpsuf2yygsr.jpg

DSC00499_zpsq2vs0exf.jpg

DSC00509_zpsq79xookl.jpg

DSC00518_zpscrutoqp7.jpg

DSC00520_zps4pnn0isy.jpg

DSC00522_zpsy1f2yafn.jpg


That is pretty much it for the tubing and routing. :cool:
For the rear IO I decided to tone them down a bit instead of completely blacking them out. SInce the graphics cards were already a black chrome sort of color I added the same look to the rear io shield, the pcie covers, and the waterblock mount.
DSC00523_zpsbf2e17um.jpg
DSC00526_zpsjcd81s3r.jpg

DSC00527_zps541fr9nz.jpg

DSC00456_zpsmppi5fr5.jpg


So for now that is it. The next update should have all the wiring shenanigans. :p
 
Next up is mounting what's left of the hardware. Namely the Aquaero 5LT fan controler and MPS 400 flow meter. Now there isn't much room in this case already so shoving these in there proved to be a bit of a challenge.

First up is the 5LT. This was mounted in the bottom of the case in front of the lower rad. Tight squeeze. :)
204b577d_DSC00767_zpsaxy2plyj.jpeg

8c7f279a_DSC00768_zpsfolhjhfs.jpeg

3f7ce5a5_DSC00769_zpsm52fcwq5.jpeg


The flow meter was mounted in the tubing run above the bottom rad as I wanted to keep it out of sight in the basement.
cb204a72_DSC00829_zpswow3svd6.jpeg

06c772da_DSC00830_zpsc335cm6k.jpeg

23178940_DSC00836_zpsjvhk0mma.jpeg


So after getting those installed it was about time to get started on the custom wiring and harnesses. Oh the wiring how I love it so. (that's sarcasm if you couldn't tell lol :p ) The first part of the wiring was actually modifying the fans. You see I wanted to be able to control the blue LED's in the fans individually instead of having them tied into the fan speed/voltage. I then had to desolder all leds from the circuit board and wire them out through a capacitor into another fan header plug. This was very time consuming, but in the end being able to control the lighting was worth it.
0486fe29_DSC00772_zpsrnk94hum.jpeg

d3812955_DSC00773_zpskr6ijl2i.jpeg


Since that was done it was time to make custom fan and fan led harness. These will tie into all fans and all leds including cpu/gpu/res. That way they will all be controlled at the same time.
a9d938ba_DSC00804_zpsbopghifu.jpeg

fb6139e8_DSC00807_zpso2bkof5s.jpeg


Everything in this build was sleeved with paracord as I like the nice matte finish of the black for the sections of wiring I really don't want attention being drawn to. Next up was the pump.
68ebe5bf_DSC00817_zpsbspqiktz.jpeg


There really want much accesory wiring/sleeving done as all I needed was one molex run for the pump/aquaero, another molex run for the hot swap plate in the front of the case, and finally an auxiliary sata power for the motherboard pcie.
cb0e31fc_DSC00844_zpsabeigcro.jpeg

106f6031_DSC00847_zps0nmvhqnn.jpeg

5614ea8d_DSC00850_zpsqcn9o5hh.jpeg

5c6b411d_DSC00859_zpsub23hgxr.jpeg


That is pretty much it for the wiring that will not be seen, or at least minimally seen. :) These are the colors I have chosen for the sleeving. (black/blue/hint of white)
23eec7dd_DSC00864_zpswzekmsxm.jpeg


This particular power supply (Cooler Master V100) has a fair amount of double wires and is something people should look out for.
bbf0009f_DSC00869_zpshdkksn3d.jpeg

2b18d2b1_DSC00872_zpsnfvgedst.jpeg

6d5b69ed_DSC00927_zpsjusbwnv4.jpeg

5fcc6992_DSC00930_zpst9ldi5lb.jpeg

7ca01bcc_DSC00935_zpsx6mxg1fv.jpeg
 
Next up is modifying the case a bit for better airflow.

First I started with the three front panels where the front 280mm rad will be pulling air through. THese are a bit restrictive as it comes stock so I had to cut out the plastic rear section and add some hexagon mesh.

Before:
DSC00564_zpsucn7l88x.jpg


After:
13332624_DSC00973_zpsziljo4jw.jpeg

5eba8c5c_DSC00977_zpsczisqzb1.jpeg


That was just enough to keep the front fans spinning at top rpm without being choked for air.

After that was done I needed to make some small plastic covers at both the top and bottom of the front rad to make sure it only pulled in air from outside the case and not recycled hot air.
d4ecca39_DSC00979_zpsudb1hir2.jpeg

03e296eb_DSC00992_zps8d4mcsc7.jpeg

02988c15_DSC00980_zpsfxk4ghrr.jpeg


After that was done I had some custom filters made up that I cut and made to fit in front of the rad but behind the front of the case. Meaning in order to clean I would need to disassemble the front of the case to remove. Sad, but I'll gladly take that over having a dusty interior.
524c7886_DSC01005_zpsfbllkesw.jpeg


Next up is trying to get better airflow out of the top. Started by cutting out the very restrictive center section and adding in some more hexagon mesh that I made some small brackets to attach to the top of the case.
b0b68457_20150818_133817_zpsdmauesf8.jpeg

f18220f8_20150818_145100_zpspimepiiu.jpeg

e8eec863_DSC01016_zpsbuf6lokf.jpeg

e525ca77_DSC01019_zpsjetru5tz.jpeg

991d08f4_DSC01028_zpsq5ntopfg.jpeg


Now one of the features I really like about this case is the top vent and its a shame I had to cut it off. That didn't last long as I simply reattached the very top cover to the mesh with some screws and standoffs. Hmmm much better. :)
c2d2fb52_DSC01034_zpseahbts7p.jpeg

62f94e5a_DSC01043_zpsalao2ipc.jpeg

b03ed827_DSC01042_zpss8brvqj6.jpeg


Keeping with the clean theme a bottom intake filter was added as well.
3643d4ed_DSC00950_zpssgmlkims.jpeg

77c48725_DSC00953_zpsih716sr2.jpeg


At this point almost everything is finished and just needed some finishing details. "But sinnedone" you say, "How are you going to see all the sexyness that lies inside using that case?"

Well I'm glad you asked. ;)

I had a local company waterjet some side panel holes for window duties. I then simply used some plexiglass and adhesive to attach.
280a23de_DSC01111_zpsg2uls8go.jpeg


I'm a stickler for symmetry and both panels received windows.
dee83918_DSC01109_zpsqunknydm.jpeg


With this new rear window I was left with a bit of a dilemma. I now had to make sure the rear of the case looked good enough to justify a window being there. Since I know had some spare black brushed aluminum pieces from the side panels I decided to incorporate some nice wiring covers.

I started by making a brushed black aluminum cover to hide most of the motherboard wiring going into the rear of the case. Included are the 24 pin, sata cables, pcie sata power.
09e680cf_DSC01078_zpsl0ddkrbd.jpeg


The screw holes were counter sunk a little larger than needed to give the screw heads a nice outline, and all the edges were sanded over a bit to give the whole piece a bit of an outline.
a74a16dc_DSC01080_zpsza2gxacu.jpeg


Now the cover needs to be held on somehow so decided to go to the hardware store and pick up some allen head screws. I also purchased some metal pins that I cut down to size to provide proper spacing.
09a96543_DSC01083_zpspcudp2sn.jpeg

f599f122_DSC01081_zpsbp5q2exe.jpeg


Need some cable management, but this is the basic idea.
f42592f4_DSC01104_zpsrulqpaoh.jpeg


I think the outlining on the two brushed aluminum pieces makes a nice contrast without drawing too much attention.
c2f8d16b_DSC01088_zpsbjfraxuo.jpeg

fea5c2e6_DSC01090_zpsnlsvja2z.jpeg

ecd858f8_DSC01096_zpsidqa9rtv.jpeg


Except for some small detail work, this should be the bulk of the log. The next set of pictures should be proper final pictures of the completed build. :D
 
Last edited:
Dat cable management tho!

The whole build though :o

I've seen a lot of builds now. Thousands upon thousands but I can't remember the last time I saw something as beautifully planned and executed as this thing.

This isn't a simple case of some one taking a Caselabs for example and then throwing in thousands of pound's worth of equipment. This is a quite reasonably priced case that offers pretty much nothing in terms of water cooling and so on.

So to take that and basically make it work is just astonishing. Even the rad bolted to the back looks like it belongs there and is supposed to be there.

Amazing. Just absolutely amazing, and makes a really nice change because tbh? I'm getting pretty sick of Caselabs/Parvum/Hexgear builds. They're all the bloody same but in different colours.
 
Back
Top