dieseldog49
New member
Hey guys, so I snagged a bunch of stuff at the Dangerden Fire Sale (Sad to see them go :sad-smile ) and I was jazzed with all of these parts headed my way and I was in the "modding" mood. However I am waiting on parts for my Bombproof Builders Desk and my Wall PC build. So knowing I needed a new benching station (traded away my Dimas) I got a crazy idea, build a bench from scratch and only give myself 8 hours to do it! Not only that but I decided I had to use free and found parts as much as possible and I had to make it up as I went along. No sketches, plans or CAD layouts. But wait theres more! I also decided I could not make any measurements, I would have to find templates or eyeball it, the only thing I could use was a strait edge, everything else would be improvised or found objects.
Now why would I put all of these totally unnecessary "limits" on myself? Well several reasons
1. If it isn't hard it's not worth doing. I live for challenge and its one of the main reason I build PC's.
2. To shake things up! I currently have my next 5 Desk/Case/Scratch builds planned out extensively (which by the way should end up being about 2 years worth of builds :thumb: ) But I can only take those on one at a time and between work, cashflow and life there can be stretches where I dont even get to work on them. By playing playing by an entirely different set of rules I force myself to think and create in entirely new ways and explore the dynamics of my creative proccess.
3. Success Teaches us nothing, We only learn from failure. I knew going into this build with these rules I was going to screw things up, but thats the beauty of this build is that every mistake I made i had to adjust to and improve upon. Even this far in I have already come up with a ton of better ways to work with my builds and perfected some of my techniques along the way.
DISCLAIMER: This is a build for the fun of it. It in no way reflects my standards for regular case modding or scratchbuilding I am just having a good time and taking the attitude of as long as it fits we're good.
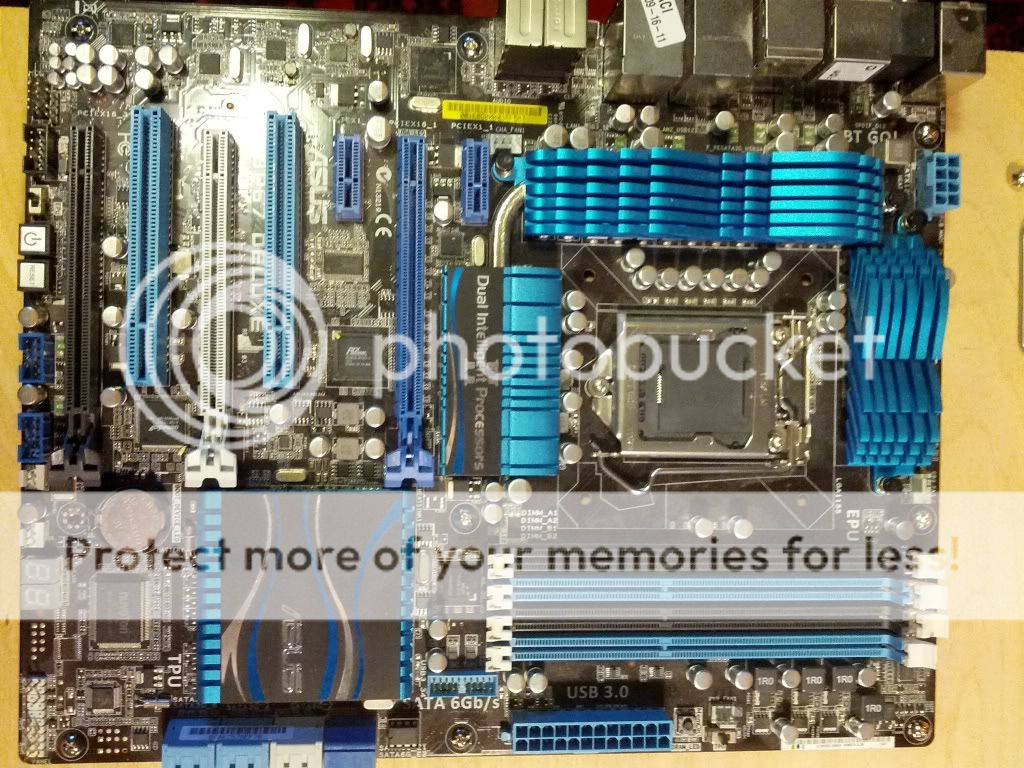
Ok so lets get into this build, the platform I am going to be using is a piece of scrap plywood from my desk build. I took a broken Asus Z68 Deluxe mobo and used it as my template for my standoffs. I then drilled the holes and threaded my standoffs in very very carefully :weirdsmil
First 4 in


Pretty happy with how it lined up

Then the Rest, not perfect but close enough (30 minutes in)

But dont think I have forgotten the mATX boards!

Bah one standoff short

Now we need to mark out some cable management holes

And its off to the Sawhorses!

First one was pretty rough

But with the second one I had gotten it pretty close to figured out

Third one was as close to perfect as I think I can get freestyling it

Now to the first leg, using 2x6 scraps from closing in my carport, didn't even cut them to fit this. (70 minutes in)

Pre-drilled then screwed in the leg

But then inspiration hits (I blame the Jawas, Utini!)


Beer decided to explode from vibration

Next up we have the 360mm rad cutout (thats right I am going for the gold here) (110 Minutes in)


Rough left side cut

Cleanin up

Side Cut for the right
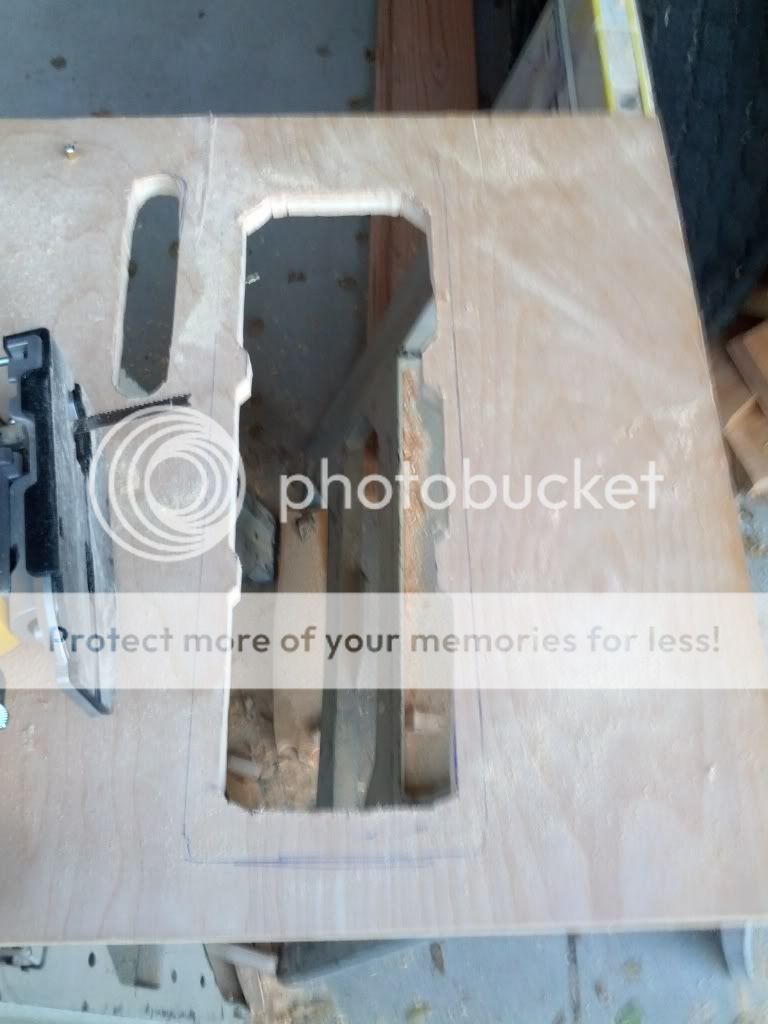
Cleaned up a bit

Figuring out where I need to drill my mounting holes

Test fitting

Where I am at 2 and a half hours of work


Next steps
PSU Mount
HDD mounts
PCIE Bracket
Router the Edges
fix some of the wood imperfections
Power and Reset Switches
USB ports
a Coat of High Gloss paint.
Now why would I put all of these totally unnecessary "limits" on myself? Well several reasons
1. If it isn't hard it's not worth doing. I live for challenge and its one of the main reason I build PC's.
2. To shake things up! I currently have my next 5 Desk/Case/Scratch builds planned out extensively (which by the way should end up being about 2 years worth of builds :thumb: ) But I can only take those on one at a time and between work, cashflow and life there can be stretches where I dont even get to work on them. By playing playing by an entirely different set of rules I force myself to think and create in entirely new ways and explore the dynamics of my creative proccess.
3. Success Teaches us nothing, We only learn from failure. I knew going into this build with these rules I was going to screw things up, but thats the beauty of this build is that every mistake I made i had to adjust to and improve upon. Even this far in I have already come up with a ton of better ways to work with my builds and perfected some of my techniques along the way.
DISCLAIMER: This is a build for the fun of it. It in no way reflects my standards for regular case modding or scratchbuilding I am just having a good time and taking the attitude of as long as it fits we're good.
Ok so lets get into this build, the platform I am going to be using is a piece of scrap plywood from my desk build. I took a broken Asus Z68 Deluxe mobo and used it as my template for my standoffs. I then drilled the holes and threaded my standoffs in very very carefully :weirdsmil
First 4 in
Pretty happy with how it lined up
Then the Rest, not perfect but close enough (30 minutes in)
But dont think I have forgotten the mATX boards!
Bah one standoff short
Now we need to mark out some cable management holes
And its off to the Sawhorses!
First one was pretty rough
But with the second one I had gotten it pretty close to figured out
Third one was as close to perfect as I think I can get freestyling it
Now to the first leg, using 2x6 scraps from closing in my carport, didn't even cut them to fit this. (70 minutes in)
Pre-drilled then screwed in the leg
But then inspiration hits (I blame the Jawas, Utini!)
Beer decided to explode from vibration
Next up we have the 360mm rad cutout (thats right I am going for the gold here) (110 Minutes in)
Rough left side cut
Cleanin up
Side Cut for the right
Cleaned up a bit
Figuring out where I need to drill my mounting holes
Test fitting
Where I am at 2 and a half hours of work
Next steps
PSU Mount
HDD mounts
PCIE Bracket
Router the Edges
fix some of the wood imperfections
Power and Reset Switches
USB ports
a Coat of High Gloss paint.
")


